文章目錄
- 點擊輸入框提示信息
- 防止別人盜取視頻
- 設置輸入邊框透明
- 按鈕跳轉
- a標簽如何具有bootstra按鈕樣式
- formData的使用
- boostrap上傳樣式
- jq獲取input標簽的值
- jq獲取最近一個td標簽的值
- css設置幾個div中的圖片保持在一條水平線
- 使div居中
- canvas 網頁背景 粒子+鼠標跟隨+磁力
- 登錄界面添加背景
- 獲取當前時間
- html空格符號代碼
- RGB顏色值與十六進制顏色碼轉換
- 在線考試防作弊js實現代碼完整版
- css全局定位內容圖片自動居中
- html中設置透明
- jQuery圖片上傳插件,支持批量上傳、預覽、刪除、放大、上傳數量和尺寸限制以及上傳前、上傳中和上傳后的回調
- 調色也是一種技術
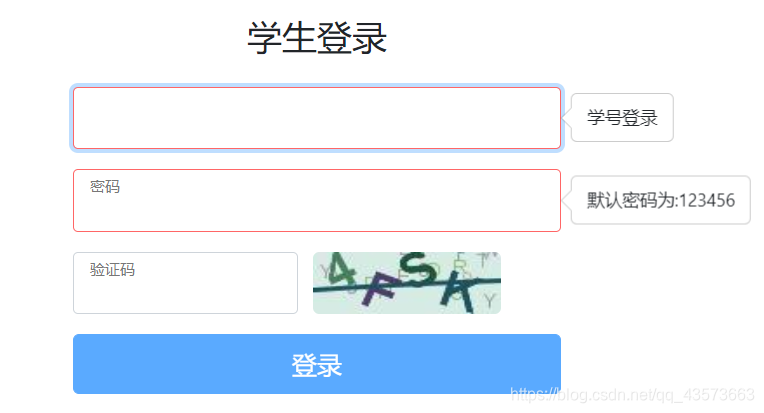
點擊輸入框提示信息
1. 添加CDN
<script src="https://cdn.staticfile.org/popper.js/1.15.0/umd/popper.min.js"></script>
<script src="https://cdn.staticfile.org/twitter-bootstrap/4.3.1/js/bootstrap.min.js"></script>
2.Html代碼
<div class="form-label-group"><input  @keyup="changevalue" data-toggle="popover" data-content="學號登錄" v-model="number" type="text" name="username" id="username" class="form-control" autocomplete="off" disableautocomplete><label for="username" id="number">學號</label>
</div>
<div class="form-label-group">
<!--		<input  @keyup="changevalue" v-model="password" type="password" name="password" id="password" class="form-control" autocomplete="off" disableautocomplete>--><input  @keyup="changevalue" data-toggle="popover" data-content="默認密碼為:123456" v-model="password" type="password" name="password" id="password" class="form-control" autocomplete="off" disableautocomplete><label for="password" id="pwd">密碼</label>
</div>
3.JS代碼
$(document).ready(function(){$('[data-toggle="popover"]').popover();});
4.效果圖
防止別人盜取視頻
<style type="text/css">video::-internal-media-controls-download-button{display:none;}video::-webkit-media-controls-enclosure{overflow:hidden;}video::-webkit-media-controls-panel{width: calc(100%+ 30px);}
</style>
設置輸入邊框透明
border: 1px solid rgb(0,0,0,0.1);
按鈕跳轉
單獨一個鏈接,實現跳轉:
<input type="button" value="我是一個按鈕"
οnclick="javascrtpt:window.location.href='http://baidu.com'">
觸發一個函數跳轉:
<script>
function jump(){window.location.href="http://baidu.com";
}
</script><input type="button" value="我是一個按鈕" οnclick=javascrtpt:jump()>
a標簽如何具有bootstra按鈕樣式
<a class="btn btn-primary" :href="`javascript: onPageTap('../news/news-detail.html?id=${item.id}&tablename=news')`" style="color: #FFFFFF"></a>
formData的使用
<div class="col-md-4"> <!--文件上傳--><button type="button" class="btn btn-warning" data-toggle="modal" data-target="#exampleModal3" >上傳文件</button><div class="modal fade" id="exampleModal3" tabindex="-1" role="dialog" aria-labelledby="exampleModalLabel" aria-hidden="true"><div class="modal-dialog" role="document"><div class="modal-content"><div class="modal-header"><h5 class="modal-title" id="exampleModalLabel3">上傳文件</h5><button type="button" class="close" data-dismiss="modal" aria-label="Close"><span aria-hidden="true">×</span></button></div><div class="modal-body"><!-- <input id="lefile" type="file" style="display:none" >--><div class="input-append"><!-- <label class="col-form-label">上傳文件</label>--><input class="input-large" type="file" name="lefile" id="lefile" style="height:30px;"></div></div><div class="modal-footer"><button type="button" class="btn btn-secondary" data-dismiss="modal" >取消</button><button type="button" class="btn btn-primary" onclick="uploadfile(this)">確定</button></div></div></div></div></div>
function uploadfile(d) {var username = '[[${username}]]';var filepath = "/"+username ;var files = $('#lefile').prop('files');// alert(username);// alert(filepath);var objectfile = new FormData();objectfile.append('lefile', files[0]);objectfile.append('username', username);objectfile.append('filepath', filepath);// alert(objectfile);$.ajax({async: false,cache: false,url:"/uploadfile",type:"post",data:objectfile,processData: false,contentType: false,dataType:"json",success:function (data) {if (data.result===1){window.location.href="/main/"+username;}else {alert("上傳失敗!");}}})};
@RequestMapping("/uploadfile")@ResponseBodypublic Map<String,Integer> uploadFile(@RequestParam("lefile") MultipartFile file, @RequestParam("username") String username, @RequestParam("filepath") String filepath) throws URISyntaxException, IOException, InterruptedException {FileSystem fs=FileSystem.get(new URI("hdfs://192.168.43.60:9000"),new Configuration(),"hadoop");String filename = file.getOriginalFilename();String FilePath = "src/main/resources/static/doc/"+username+"/";System.out.println(FilePath);File goalfile = new File(FilePath);if(!goalfile.exists()){goalfile.mkdirs();}Path clientPath = new Path(FilePath+filename);Path serverPath = new Path(filepath);FileOutputStream outfile = new FileOutputStream(FilePath+filename);outfile.write(file.getBytes());outfile.flush();outfile.close();fs.copyFromLocalFile(false,clientPath,serverPath);fs.close();Map<String,Integer> map=new HashMap<>();map.put("result",1);System.out.println(map);return map;}
boostrap上傳樣式
<input id="lefile" type="file" style="display:none">
<div class="input-append"><input id="photoCover" class="input-large" type="file" style="height:30px;"><button class="btn" οnclick="$('input[id=lefile]').click();">Browse</button>
</div>
<script type="text/javascript">
$('input[id=lefile]').change(function() {
$('#photoCover').val($(this).val());
});
</script>
jq獲取input標簽的值
$("#Id").val()
jq獲取最近一個td標簽的值
var path = $(thisObject).closest("tr").find(".filepath").text();var name = $(thisObject).closest("tr").find(".name").text();
css設置幾個div中的圖片保持在一條水平線
所有相關的div的樣式設置為:
{height:60px; line-height: 60px; } //這表示所有div行高一樣
把所有img的樣式設置為:
{vertical-align: middle ; } 這個表示所有img的基線設置在同一個水平線
使div居中
top:50%;
left:50%;
transform: translate(-50%,-50%);
canvas 網頁背景 粒子+鼠標跟隨+磁力
bg.js
var CanvasParticle = (function(){function getElementByTag(name){return document.getElementsByTagName(name);}function getELementById(id){return document.getElementById(id);}// 根據傳入的config初始化畫布function canvasInit(canvasConfig){canvasConfig = canvasConfig || {};var html = getElementByTag("html")[0];// 獲取body作為背景// var body = getElementByTag("body")[0];// 獲取特定div作為背景// mydiv是你想要將其作為背景的div的IDvar body = document.getElementById("mydiv");var canvasObj = document.createElement("canvas");var canvas = {element: canvasObj,points : [],// 默認配置config: {vx: canvasConfig.vx || 4,vy:  canvasConfig.vy || 4,height: canvasConfig.height || 2,width: canvasConfig.width || 2,count: canvasConfig.count || 100,color: canvasConfig.color || "121, 162, 185",stroke: canvasConfig.stroke || "130,255,255",dist: canvasConfig.dist || 6000,e_dist: canvasConfig.e_dist || 20000,max_conn: 10}};// 獲取contextif(canvas.element.getContext("2d")){canvas.context = canvas.element.getContext("2d");}else{return null;}body.style.padding = "0";body.style.margin = "0";// body.replaceChild(canvas.element, canvasDiv);body.appendChild(canvas.element);canvas.element.style = "position: fixed; top: 0; left: 0; z-index: -1;";canvasSize(canvas.element);window.onresize = function(){canvasSize(canvas.element);}body.onmousemove = function(e){var event = e || window.event;canvas.mouse = {x: event.clientX,y: event.clientY}}document.onmouseleave = function(){canvas.mouse = undefined;}setInterval(function(){drawPoint(canvas);}, 40);}// 設置canvas大小function canvasSize(canvas){// 獲取窗口的寬高// canvas.width = window.innerWeight || document.documentElement.clientWidth || document.body.clientWidth;// canvas.height = window.innerWeight || document.documentElement.clientHeight || document.body.clientHeight;// 獲取特定div的寬高var width = document.getElementById("mydiv").style.width;var height = document.getElementById("mydiv").style.height;width = parseInt(width);height = parseInt(height);canvas.width = width || window.innerWeight || document.documentElement.clientWidth || document.body.clientWidth;canvas.height = height || window.innerWeight || document.documentElement.clientHeight || document.body.clientHeight;}// 畫點function drawPoint(canvas){var context = canvas.context,point,dist;context.clearRect(0, 0, canvas.element.width, canvas.element.height);context.beginPath();context.fillStyle = "rgb("+ canvas.config.color +")";for(var i = 0, len = canvas.config.count; i < len; i++){if(canvas.points.length != canvas.config.count){// 初始化所有點point = {x: Math.floor(Math.random() * canvas.element.width),y: Math.floor(Math.random() * canvas.element.height),vx: canvas.config.vx / 2 - Math.random() * canvas.config.vx,vy: canvas.config.vy / 2 - Math.random() * canvas.config.vy}}else{// 處理球的速度和位置,并且做邊界處理point =	borderPoint(canvas.points[i], canvas);}context.fillRect(point.x - canvas.config.width / 2, point.y - canvas.config.height / 2, canvas.config.width, canvas.config.height);canvas.points[i] = point;}drawLine(context, canvas, canvas.mouse);context.closePath();}// 邊界處理function borderPoint(point, canvas){var p = point;if(point.x <= 0 || point.x >= canvas.element.width){p.vx = -p.vx;p.x += p.vx;}else if(point.y <= 0 || point.y >= canvas.element.height){p.vy = -p.vy;p.y += p.vy;}else{p = {x: p.x + p.vx,y: p.y + p.vy,vx: p.vx,vy: p.vy}}return p;}// 畫線function drawLine(context, canvas, mouse){context = context || canvas.context;for(var i = 0, len = canvas.config.count; i < len; i++){// 初始化最大連接數canvas.points[i].max_conn = 0;// point to pointfor(var j = 0; j < len; j++){if(i != j){dist = Math.round(canvas.points[i].x - canvas.points[j].x) * Math.round(canvas.points[i].x - canvas.points[j].x) +Math.round(canvas.points[i].y - canvas.points[j].y) * Math.round(canvas.points[i].y - canvas.points[j].y);// 兩點距離小于吸附距離,而且小于最大連接數,則畫線if(dist <= canvas.config.dist && canvas.points[i].max_conn <canvas.config.max_conn){canvas.points[i].max_conn++;// 距離越遠,線條越細,而且越透明context.lineWidth = 0.5 - dist / canvas.config.dist;context.strokeStyle = "rgba("+ canvas.config.stroke + ","+ (1 - dist / canvas.config.dist) +")"context.beginPath();context.moveTo(canvas.points[i].x, canvas.points[i].y);context.lineTo(canvas.points[j].x, canvas.points[j].y);context.stroke();}}}// 如果鼠標進入畫布// point to mouseif(mouse){dist = Math.round(canvas.points[i].x - mouse.x) * Math.round(canvas.points[i].x - mouse.x) +Math.round(canvas.points[i].y - mouse.y) * Math.round(canvas.points[i].y - mouse.y);// 遇到鼠標吸附距離時加速,直接改變point的x,y值達到加速效果if(dist > canvas.config.dist && dist <= canvas.config.e_dist){canvas.points[i].x = canvas.points[i].x + (mouse.x - canvas.points[i].x) / 20;canvas.points[i].y = canvas.points[i].y + (mouse.y - canvas.points[i].y) / 20;}if(dist <= canvas.config.e_dist){context.lineWidth = 1;context.strokeStyle = "rgba("+ canvas.config.stroke + ","+ (1 - dist / canvas.config.e_dist) +")";context.beginPath();context.moveTo(canvas.points[i].x, canvas.points[i].y);context.lineTo(mouse.x, mouse.y);context.stroke();}}}}return canvasInit;
})();
<body class="login-layout" id="mydiv" >
<script type="text/javascript">window.onload = function() {//配置var config = {vx: 4,	//小球x軸速度,正為右,負為左vy: 4,	//小球y軸速度height: 3,	//小球高寬,其實為正方形,所以不宜太大width: 2,count: 100,		//點個數color: "30,144,255", 	//點顏色stroke: "130,255,255", 		//線條顏色dist: 6000, 	//點吸附距離e_dist: 20000, 	//鼠標吸附加速距離max_conn: 10 	//點到點最大連接數}//調用CanvasParticle(config);}
</script>
效果圖:

登錄界面添加背景
<body style=" background: url(http://global.bing.com/az/hprichbg/rb/RavenWolf_EN-US4433795745_1920x1080.jpg) no-repeat center center fixed; background-size: 100%;">
<div class="container" id="app" style="background: url(../loginbg.jpg);" >
獲取當前時間
<div  class="input-group mb-3 " style="width: 260px;left: 30px"><input type="text" class="form-control" placeholder="開始時間" id="begintime" name="begintime">
</div>
<div class="input-group mb-3" style="width: 260px;left: 30px"><input type="text" class="form-control" placeholder="結束時間" id="overtime" name="overtime">
</div>
if (flag==1){document.getElementById("begintime").value = new Date().Format("yyyy-MM-dd HH:mm:ss");flag++;}else {document.getElementById("overtime").value = new Date().Format("yyyy-MM-dd HH:mm:ss");}
Date.prototype.Format = function (fmt) { //author: meizzvar o = {"M+": this.getMonth() + 1, //月份"d+": this.getDate(), //日"H+": this.getHours(), //小時"m+": this.getMinutes(), //分"s+": this.getSeconds(), //秒"q+": Math.floor((this.getMonth() + 3) / 3), //季度"S": this.getMilliseconds() //毫秒};if (/(y+)/.test(fmt)) fmt = fmt.replace(RegExp.$1, (this.getFullYear() + "").substr(4 - RegExp.$1.length));for (var k in o)if (new RegExp("(" + k + ")").test(fmt)) fmt = fmt.replace(RegExp.$1, (RegExp.$1.length === 1) ? (o[k]) : (("00" + o[k]).substr(("" + o[k]).length)));return fmt;}

html空格符號代碼
:一個字符的半角的不斷行的空格,如果需要在網頁中插入多個空格,可以將“?”代碼寫多遍;
  :一個字符的半角的空格,也可以將“?”寫多遍來插入多個空格;
 :兩個字符的全角的空格,也可以將“?”寫多遍來插入更多的空格;
  :小于一個字符的空格;
說明:單詞后面的分號記得帶上,是不能省略的,它也是html代碼中的一部分。
RGB顏色值與十六進制顏色碼轉換
RGB顏色值與十六進制顏色碼轉換工具
在線考試防作弊js實現代碼完整版
<!--考試防作弊-->
<script type="text/javascript">
//屏蔽右擊
document.body.oncontextmenu=document.body.ondragstart= document.body.onselectstart=document.body.onbeforecopy=function() {return false;
};//窗口失焦、大小變化監聽
var blurNum=1;
$(window).on('blur resize',function() {if(blurNum>3) {alert("你已經違規3次考試結束!");$(window).off("beforeunload");CloseWebPage();} else {alert("考試中切換窗口違規"+blurNum+"次!");}blurNum++;
});$(window).on('beforeunload', function() {$(this).off('blur resize');return '離開此頁面將退出考試!';
});//關閉窗口方法
function CloseWebPage() {if (navigator.userAgent.indexOf("MSIE") > 0) {if (navigator.userAgent.indexOf("MSIE 6.0") > 0) {window.opener = null;window.close();} else {window.open('', '_top');window.top.close();}} else if (navigator.userAgent.indexOf("Firefox") > 0) {window.location.href = 'about:blank ';} else {window.opener = null;window.open('', '_self', '');window.close();}
}
</script>
防止刷新。 因為瀏覽器都自帶了刷新返回等按鈕,因此只想到了彈出窗口的形式。
/* * @param url 考試界面的鏈接  * @param name 新窗口的名稱,沒有可填空 * 屬性menubar=no 新窗口隱藏菜單欄,防刷新即基本實現 */
window.open( url, name, "menubar=no" )
接下來在防止切屏內一并處理。
防止切屏。主要思路是屏蔽鍵盤快捷鍵和鼠標切換。
屏蔽切換組合鍵如下:
function stopShortCutKey() {               //屏蔽鼠標右鍵、Ctrl+n、shift+F10、F5刷新、退格鍵  if ( (window.event.altKey) && ((window.event.keyCode == 37) ||   (window.event.keyCode == 39) ) ) { alert("不準你使用ALT+方向鍵前進或后退網頁!");return false;}if ((event.keyCode == 116) ||                                   //屏蔽   F5   刷新鍵  (event.keyCode == 112) ||                                   //屏蔽   F1   刷新鍵  (event.ctrlKey && event.keyCode == 82)) {                   //Ctrl   +   R  return false;}if ((event.ctrlKey) && (event.keyCode == 78)){return false;      //屏蔽   Ctrl+n  } if ((event.shiftKey) && (event.keyCode == 121)) {  //屏蔽   shift+F10  return false;}if (window.event.srcElement.tagName == "A" && window.event.shiftKey){return false;        //屏蔽   shift 加鼠標左鍵新開一網頁  }if ((window.event.altKey) && (window.event.keyCode == 115)) {   //屏蔽Alt+F4  window.showModelessDialog("about:blank", "", "dialogWidth:1px;dialogheight:1px");return false;}if ((window.event.altkey) && (window.event.keyCode == 27)) { alert("認真答題!"); }
}
"屏蔽"鼠標切屏
window系統上,win + tab 組合鍵屬于系統級別的快捷鍵,無法操作。我想到了監聽網頁失焦事件。
var allowNum = 3; // 允許三次切屏,超過則提交window.onblur = function() { if(allowNum < 1) { submitTest() } allowNum--; alert("您已切屏,超過三次自動提交試卷")}
禁止窗口大小改變
監聽窗口改變的事件如下,但由于它會默認觸發onblur事件( 因為點擊窗口按鈕,已經在頁面之外,無法監聽了,所以失焦函數會觸發),為防止兩次觸發切屏,故只用上面的函數進行監聽。
window.onresize()
css全局定位內容圖片自動居中
.content img {max-width:800px;_width:expression(this.width > 800 ? "800px" : this.width); //控制圖片整體大小clear: both; display: block; margin:auto; }
html中設置透明
background:rgba(0,0,0,.5);
節點里面的元素透明:
background:#000000;opacity:0.5;
5為透明度
jQuery圖片上傳插件,支持批量上傳、預覽、刪除、放大、上傳數量和尺寸限制以及上傳前、上傳中和上傳后的回調
jQuery圖片上傳插件
調色也是一種技術
pink mistyrose aliceblue lavender honeydew paleturquoise lightbluelightskyblue powderblue paleturquoise skyblue cadetblue cornflowerblue steelblue 


)
的作用)


)

的學習)
)

