上一篇:?http://www.cnblogs.com/cgzl/p/7755801.html
完成client.service.ts:
import { Injectable } from '@angular/core';
import { Http, Headers } from '@angular/http';
import { Observable } from 'rxjs/Observable';
import { ErrorHandler } from '@angular/core';
import 'rxjs/add/operator/map';
import 'rxjs/add/operator/catch';
import 'rxjs/add/observable/throw';import { Client } from '../models/Client';@Injectable()
export class ClientService {private url = 'http://localhost:5001/api/client';private headers = new Headers({ 'Content-Type': 'application/json' });constructor(private http: Http) { }getAll(): Observable<Client[]> {return this.http.get(this.url).map(response => response.json() as Client[]);}getOne(id: number): Observable<Client> {return this.http.get(`${this.url}/${id}`).map(response => response.json() as Client);}create(client: Client) {return this.http.post(this.url, JSON.stringify(client), { headers: this.headers }).map(response => response.json()).catch(this.handleError);}update(client: Client) {return this.http.patch(`${this.url}/${client.id}`, JSON.stringify(client), { headers: this.headers }).map(response => response.json()).catch(this.handleError);}delete(id: number) {return this.http.delete(`${this.url}/${id}`).map(response => response.json()).catch(this.handleError);}private handleError(error: Response) {if (error.status === 400) {return Observable.throw('Bad Request');}if (error.status === 404) {return Observable.throw('Not Found');}return Observable.throw('Error Occurred');}
}
我個人比較喜歡 observable的方式而不是promise.
然后再Client.Component里面, 注入ClientService, 在NgOnInit里面調用查詢方法:
import { Component, OnInit } from '@angular/core';
import { ClientService } from '../../services/client.service';
import { Client } from '../../models/Client';@Component({selector: 'app-clients',templateUrl: './clients.component.html',styleUrls: ['./clients.component.css']
})
export class ClientsComponent implements OnInit {public clients: Client[];constructor(private service: ClientService) { }ngOnInit() {this.service.getAll().subscribe(clients => {this.clients = clients;console.log(this.clients);});}
}
然后修改Client.Component.html:
<table class="table table-striped" *ngIf="clients?.length > 0; else noClients"><thead class="thead-dark"><tr><th>ID</th><th>Name</th><th>Email</th><th>Balance</th><th></th></tr></thead><tbody><tr *ngFor="let client of clients"><td>{{client.id}}</td><td>{{client.firstName + ' ' + client.lastName}}</td><td>{{client.email}}</td><td>{{client.balance}}</td><td><a href="" class="btn btn-secondary btn-sm">明細</a></td></tr></tbody>
</table>
<ng-template #noClients><hr><h5>系統中沒有客戶..</h5>
</ng-template>
然后把client.component放在dashboard中:
dashboard.component.html:
<app-clients></app-clients>
然后看看瀏覽器:
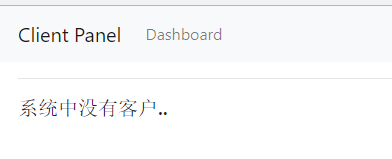
我這里還沒有數據, 如果有數據的話, 將會顯示一個table, header是黑色的.
使用font-awesome
npm install font-awesome --save
然后打開.angular-cli.json:
"styles": ["styles.css","../node_modules/bootstrap/dist/css/bootstrap.css","../node_modules/font-awesome/css/font-awesome.css"],"scripts": ["../node_modules/jquery/dist/jquery.js","../node_modules/tether/dist/js/tether.js","../node_modules/bootstrap/dist/js/bootstrap.bundle.js"]
重新運行ng serve
修改 client.component.html的明細按鈕:
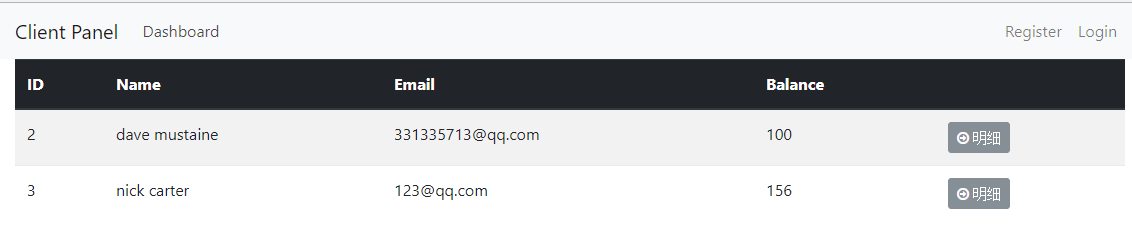
<td><a href="" class="btn btn-secondary btn-sm"><i class="fa fa-arrow-circle-o-right"></i> 明細</a></td>
然后還是使用swagger添加兩條數據吧: http://localhost:5001/swagger, 現在的效果:
添加一個總計:
import { Component, OnInit } from '@angular/core';
import { ClientService } from '../../services/client.service';
import { Client } from '../../models/Client';@Component({selector: 'app-clients',templateUrl: './clients.component.html',styleUrls: ['./clients.component.css']
})
export class ClientsComponent implements OnInit {public clients: Client[];public total: number;constructor(private service: ClientService) { }ngOnInit() {this.service.getAll().subscribe(clients => {this.clients = clients;this.getTotal();});}getTotal() {this.total = this.clients.reduce((previous, current) => previous + current.balance, 0);}
}
html:
<div class="row"><div class="col-md-6"><h2><i class="fa fa-users">客戶</i></h2></div><div class="col-md-6"><h5 class="pull-right text-muted">總計: {{total | currency:"USD":true}}</h5></div>
</div>
<table class="table table-striped" *ngIf="clients?.length > 0; else noClients"><thead class="thead-dark"><tr><th>ID</th><th>Name</th><th>Email</th><th>Balance</th><th></th></tr></thead><tbody><tr *ngFor="let client of clients"><td>{{client.id}}</td><td>{{client.firstName + ' ' + client.lastName}}</td><td>{{client.email}}</td><td>{{client.balance}}</td><td><a href="" class="btn btn-secondary btn-sm"><i class="fa fa-arrow-circle-o-right"></i> 明細</a></td></tr></tbody>
</table>
<ng-template #noClients><hr><h5>系統中沒有客戶..</h5>
</ng-template>
Sidebar 側邊欄
打開sidebar.component.html:
<a routerLink="/add-client" href="#" class="btn btn-success btn-block"><i class="fa fa-plus"></i>添加新客戶</a>
然后再dashboard中添加sidebar:
<div class="row"><div class="col-md-10"><app-clients></app-clients></div><div class="col-md-2"><app-sidebar></app-sidebar></div>
</div>
添加在了右邊. 效果如圖:

然后需要在app.module.ts里面添加路由:
const appRoutes: Routes = [{ path: '', component: DashboardComponent },{ path: 'register', component: RegisterComponent },{ path: 'login', component: LoginComponent },{ path: 'add-client', component: AddClientComponent }
];
Add-Client 添加客戶的表單:
打開add-client.component.html:
<div class="row"><div class="col-md-6"><a routerLink="/" href="#" class="btn btn-link"><i class="fa fa-arrow-circle-o-left"></i> 回到Dashboard </a></div><div class="col-md-6"></div>
</div><div class="card"><div class="card-header">Add Client</div><div class="card-body"><form #f="ngForm" (ngSubmit)="onSubmit(f)"><div class="form-group"><label for="firstName">名</label><input type="text" class="form-control" [(ngModel)]="client.firstName"name="firstName"#clientFirstName="ngModel"minlength="2"required><div *ngIf="clientFirstName.errors.required && clientFirstName.touched" class="alter alert-danger">名字是必填的</div><div *ngIf="clientFirstName.errors.minlength && clientFirstName.touched" class="alter alert-danger">名字最少是兩個字</div></div></form></div>
</div>
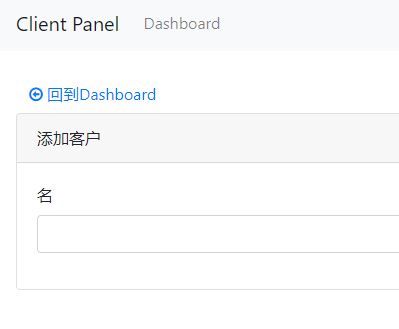
現在表單里面添加一個字段, 然后在app.module里面添加FormsModule:
import { FormsModule } from '@angular/forms';imports: [BrowserModule,RouterModule.forRoot(appRoutes),HttpModule,
    FormsModule],
現在應該是這個樣子:
然后把表單都完成 add-client.component.html:
<div class="row"><div class="col-md-6"><a routerLink="/" href="#" class="btn btn-link"><i class="fa fa-arrow-circle-o-left"></i> 回到Dashboard </a></div><div class="col-md-6"></div>
</div><div class="card"><div class="card-header">添加客戶</div><div class="card-body"><form #f="ngForm" (ngSubmit)="onSubmit(f)" novalidate><div class="form-group"><label for="firstName">名</label><input type="text" class="form-control" [(ngModel)]="client.firstName" name="firstName" #clientFirstName="ngModel" minlength="2"required><div *ngIf="clientFirstName.touched && clientFirstName.invalid"><div *ngIf="clientFirstName.errors.required" class="alert alert-danger">名字是必填的</div><div *ngIf="clientFirstName.errors.minlength" class="alert alert-danger">名字最少是兩個字</div></div></div><div class="form-group"><label for="lastName">姓</label><input type="text" class="form-control" [(ngModel)]="client.lastName" name="lastName" #clientLastName="ngModel" minlength="2"required><div *ngIf="clientLastName.touched && clientLastName.invalid"><div *ngIf="clientLastName.errors.required" class="alert alert-danger">姓是必填的</div><div *ngIf="clientLastName.errors.minlength" class="alert alert-danger">姓最少是兩個字</div></div></div><div class="form-group"><label for="email">Email</label><input type="email" class="form-control" [(ngModel)]="client.email" name="email" #clientEmail="ngModel" required><div *ngIf="clientEmail.touched && clientEmail.invalid"><div *ngIf="clientEmail.errors.required" class="alert alert-danger">Email是必填的</div></div></div><div class="form-group"><label for="phone">聯系電話</label><input type="text" class="form-control" [(ngModel)]="client.phone" name="phone" #clientPhone="ngModel" minlength="10"><div *ngIf="clientPhone.touched && clientPhone.invalid"><div *ngIf="clientPhone.errors.minlength" class="alert alert-danger">電話最少是10位</div></div></div><div class="form-group"><label for="balance">余額</label><input type="number" class="form-control" [(ngModel)]="client.balance" name="balance" #clientBalance="ngModel" [disabled]="disableBalanceOnAdd"></div><input type="submit" class="btn btn-primary btn-block" value="提交"></form></div>
</div>
現在看起來是這樣:

再安裝一個庫:?npm install --save angular2-flash-messages
這個庫可以略微靈活的顯示提示信息.
npm install --save angular2-flash-messages
在app.module里面:
import { FlashMessagesModule } from 'angular2-flash-messages';imports: [BrowserModule,RouterModule.forRoot(appRoutes),HttpModule,FormsModule,
    FlashMessagesModule],
add-client.component.ts:
import { Component, OnInit } from '@angular/core';
import { FlashMessagesService } from 'angular2-flash-messages';
import { Router } from '@angular/router';
import { Client } from '../../models/Client';@Component({selector: 'app-add-client',templateUrl: './add-client.component.html',styleUrls: ['./add-client.component.css']
})
export class AddClientComponent implements OnInit {public client: Client = {id: 0,firstName: '',lastName: '',email: '',phone: '',balance: 0};public disableBalanceOnAdd = true;constructor(public flashMessagesService: FlashMessagesService,public router: Router) { }ngOnInit() {}onSubmit({ value, valid }: { value: Client, valid: boolean }) {if (!valid) {this.flashMessagesService.show('請正確輸入表單', { cssClass: 'alert alert-danger', timeout: 4000 });this.router.navigate(['/add-client']);} else {console.log('valid');}}
}
然后需要在某個地方放置flash messages, 打開app.component.html:
<app-navbar></app-navbar>
<div class="container"><flash-messages></flash-messages><router-outlet></router-outlet>
</div>
然后運行一下:
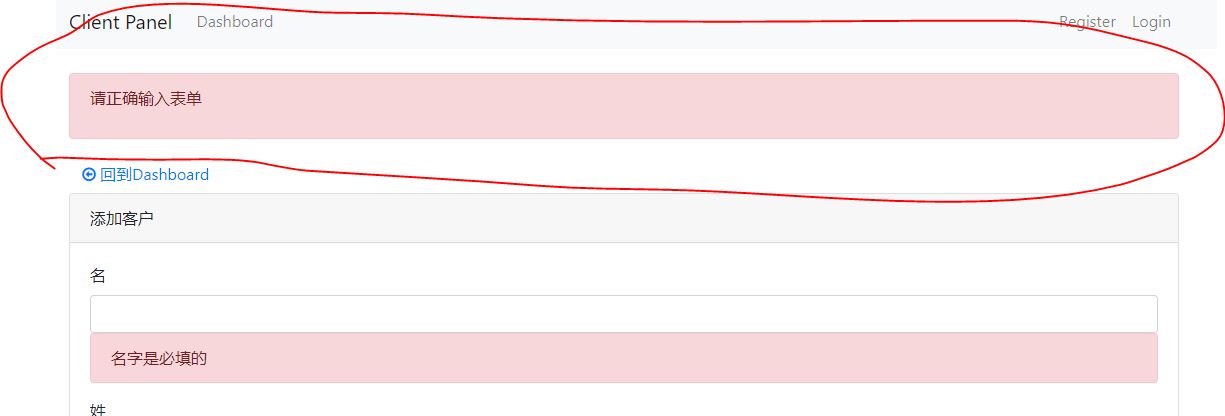
大約這個樣子.
然后修改提交, 注入clientService, 把數據新增到web api:
import { Component, OnInit } from '@angular/core';
import { FlashMessagesService } from 'angular2-flash-messages';
import { Router } from '@angular/router';
import { Client } from '../../models/Client';
import { ClientService } from '../../services/client.service';@Component({selector: 'app-add-client',templateUrl: './add-client.component.html',styleUrls: ['./add-client.component.css']
})
export class AddClientComponent implements OnInit {public client: Client = {id: 0,firstName: '',lastName: '',email: '',phone: '',balance: 0};public disableBalanceOnAdd = true;constructor(public flashMessagesService: FlashMessagesService,public router: Router,public clientService: ClientService) { }ngOnInit() {}onSubmit({ value, valid }: { value: Client, valid: boolean }) {if (this.disableBalanceOnAdd) {value.balance = 0;}if (!valid) {this.flashMessagesService.show('請正確輸入表單', { cssClass: 'alert alert-danger', timeout: 4000 });this.router.navigate(['/add-client']);} else {this.clientService.create(value).subscribe(client => {console.log(client);this.flashMessagesService.show('新客戶添加成功', { cssClass: 'alert alert-success', timeout: 4000 });this.router.navigate(['/']);});}}
}
可以運行試試. 應該是好用的.
Client Detail 客戶明細:
首先在app.module.ts里面添加路由:
const appRoutes: Routes = [{ path: '', component: DashboardComponent },{ path: 'register', component: RegisterComponent },{ path: 'login', component: LoginComponent },{ path: 'add-client', component: AddClientComponent },{ path: 'client/:id', component: ClientDetailsComponent }
];
然后在clients.componet.html修改:
<td><a href="" [routerLink]="['/client', client.id]" class="btn btn-secondary btn-sm"><i class="fa fa-arrow-circle-o-right"></i> 明細</a></td>
修改client-detail.component.ts:
import { Component, OnInit } from '@angular/core';
import { ClientService } from '../../services/client.service';
import { FlashMessagesService } from 'angular2-flash-messages';
import { Router, ActivatedRoute, Params } from '@angular/router';
import { Client } from '../../models/Client';@Component({selector: 'app-client-details',templateUrl: './client-details.component.html',styleUrls: ['./client-details.component.css']
})
export class ClientDetailsComponent implements OnInit {id: string;client: Client;hasBalance = false;showBalanceUpdateInput = false;constructor(public clientService: ClientService,public router: Router,public route: ActivatedRoute,public flashMessagesService: FlashMessagesService) { }ngOnInit() {// 獲取IDthis.id = this.route.snapshot.params['id'];// 獲取Clientthis.clientService.getOne(+this.id).subscribe(client => {if (client.balance > 0) {this.hasBalance = true;}this.client = client;});}}
然后修改html:
<div class="row"><div class="col-md-6"><a routerLink="/" class="btn btn-link"><i class="fa fa-arrow-circle-o-left"></i> 回到Dashboard</a></div><div class="col-md-6"><div class="btn-group pull-right"><a [routerLink]="['/edit-client', id]" class="btn btn-secondary">編輯</a><button type="button" class="btn btn-danger" (click)="onDeleteClick()">刪除</button></div></div>
</div>
<hr>
<div class="card" *ngIf="client"><div class="card-header"><h3> {{client.firstName + ' ' + client.lastName}}</h3></div><div class="card-body"><div class="row"><div class="col-md-8"><h4>客戶ID: {{id}}</h4></div><div class="col-md-4"><h4 class="pull-right">余額:<span [class.text-danger]="!hasBalance" [class.text-success]="hasBalance">{{client.balance | currency: 'USD': true}}</span><small><a (click)="showBalanceUpdateInput = !showBalanceUpdateInput"><i class="fa fa-pencil"></i></a></small></h4><div class="clearfix"><form *ngIf="showBalanceUpdateInput" (submit)="updateBalance(id)" class="form-inline pull-right"><div class="form-group"><input type="number" class="form-control" name="balance" [(ngModel)]="client.balance"></div><button type="submit" class="btn btn-primary">更新</button></form></div></div></div><hr><ul class="list-group"><li class="list-group-item">Email: {{client.email}}</li><li class="list-group-item">聯系電話: {{client.phone}}</li></ul></div>
</div>
然后要做一個修改余額的動作, 這是個部分更新, 應該對應http patch.
目前client.service里沒有patch, 所以需要添加一個patch方法, 不過首先建立一個PatchModel.ts:.
export interface PatchModel {op: string;path: string;value: any;
}
client.service.ts:
import { PatchModel } from '../models/PatchModel';patch(id: number, patchs: PatchModel[]) {return this.http.patch(`${this.url}/${id}`, JSON.stringify(patchs), { headers: this.headers }).map(response => response.json()).catch(this.handleError);} 然后修改 client-detail.component.ts:
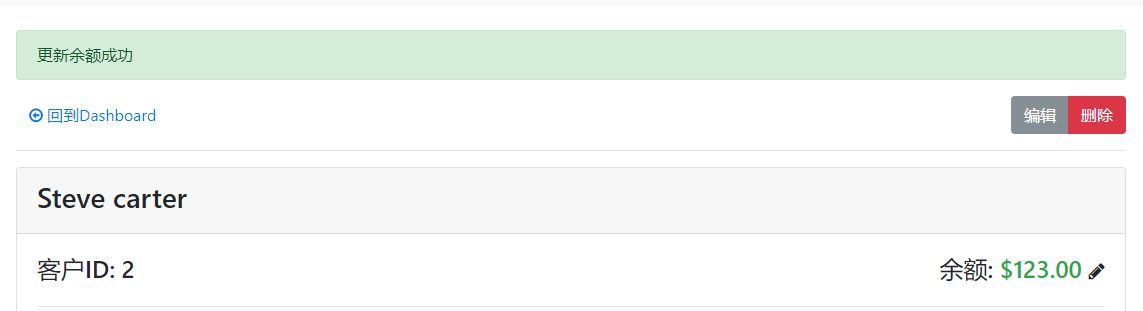
import { PatchModel } from '../../models/PatchModel';updateBalance(id: string) {// 更新客戶的余額this.clientService.patch(+id, [{ op: 'replace', path: '/balance', value: this.client.balance }]).subscribe(() => {this.showBalanceUpdateInput = false;this.flashMessagesService.show('更新余額成功', { cssClass: 'alert alert-success', timeout: 4000 });});} 運行一下, 應該好用:
刪除動作:
onDeleteClick() {if (confirm('確定要刪除?')) {this.clientService.delete(+this.id).subscribe(() => {this.flashMessagesService.show('客戶刪除成功', { cssClass: 'alert alert-success', timeout: 4000 });this.router.navigate(['/']);});}}
應該好用, 刪除后跳轉到dashboard.
編輯客戶 Edit-Client
?先添加路由 app.module.ts:
const appRoutes: Routes = [{ path: '', component: DashboardComponent },{ path: 'register', component: RegisterComponent },{ path: 'login', component: LoginComponent },{ path: 'add-client', component: AddClientComponent },{ path: 'client/:id', component: ClientDetailsComponent },
  { path: 'edit-client/:id', component: EditClientComponent }
];
然后修改edit-client.component.html:
<div class="row"><div class="col-md-6"><a [routerLink]="['/client', id]" href="#" class="btn btn-link"><i class="fa fa-arrow-circle-o-left"></i> 回到客戶明細 </a></div><div class="col-md-6"></div></div><div class="card"><div class="card-header">編輯客戶</div><div class="card-body"><form #f="ngForm" (ngSubmit)="onSubmit(f)" *ngIf="client" novalidate><div class="form-group"><label for="firstName">名</label><input type="text" class="form-control" [(ngModel)]="client.firstName" name="firstName" #clientFirstName="ngModel" minlength="2"required><div *ngIf="clientFirstName.touched && clientFirstName.invalid"><div *ngIf="clientFirstName.errors.required" class="alert alert-danger">名字是必填的</div><div *ngIf="clientFirstName.errors.minlength" class="alert alert-danger">名字最少是兩個字</div></div></div><div class="form-group"><label for="lastName">姓</label><input type="text" class="form-control" [(ngModel)]="client.lastName" name="lastName" #clientLastName="ngModel" minlength="2"required><div *ngIf="clientLastName.touched && clientLastName.invalid"><div *ngIf="clientLastName.errors.required" class="alert alert-danger">姓是必填的</div><div *ngIf="clientLastName.errors.minlength" class="alert alert-danger">姓最少是兩個字</div></div></div><div class="form-group"><label for="email">Email</label><input type="email" class="form-control" [(ngModel)]="client.email" name="email" #clientEmail="ngModel" required><div *ngIf="clientEmail.touched && clientEmail.invalid"><div *ngIf="clientEmail.errors.required" class="alert alert-danger">Email是必填的</div></div></div><div class="form-group"><label for="phone">聯系電話</label><input type="text" class="form-control" [(ngModel)]="client.phone" name="phone" #clientPhone="ngModel" minlength="10"><div *ngIf="clientPhone.touched && clientPhone.invalid"><div *ngIf="clientPhone.errors.minlength" class="alert alert-danger">電話最少是10位</div></div></div><div class="form-group"><label for="balance">余額</label><input type="number" class="form-control" [(ngModel)]="client.balance" name="balance" #clientBalance="ngModel" [disabled]="disableBalanceOnEdit"></div><input type="submit" class="btn btn-primary btn-block" value="提交"></form></div></div>
修改edit-client.component.ts:
import { Component, OnInit } from '@angular/core';
import { ClientService } from '../../services/client.service';
import { FlashMessagesService } from 'angular2-flash-messages';
import { Router, ActivatedRoute, Params } from '@angular/router';
import { Client } from '../../models/Client';@Component({selector: 'app-edit-client',templateUrl: './edit-client.component.html',styleUrls: ['./edit-client.component.css']
})
export class EditClientComponent implements OnInit {id: string;client: Client;disableBalanceOnEdit = true;constructor(public clientService: ClientService,public router: Router,public route: ActivatedRoute,public flashMessagesService: FlashMessagesService) { }ngOnInit() {// 獲取IDthis.id = this.route.snapshot.params['id'];// 獲取Clientthis.clientService.getOne(+this.id).subscribe(client => {this.client = client;});}onSubmit({ value, valid }: { value: Client, valid: boolean }) {if (!valid) {this.flashMessagesService.show('請正確輸入表單', { cssClass: 'alert alert-danger', timeout: 4000 });this.router.navigate(['/edit-client', this.id]);} else {this.clientService.update(+this.id, value).subscribe(client => {console.log(client);this.flashMessagesService.show('更新客戶成功', { cssClass: 'alert alert-success', timeout: 4000 });this.router.navigate(['/client', this.id]);});}}
}
client.service.ts需要修改一下, 之前的update方法寫的不正確也不符合規范:
update(id: number, client: Client) {return this.http.put(`${this.url}/${id}`, JSON.stringify(client), { headers: this.headers }).map(response => response.json()).catch(this.handleError);}
然后運行, 好用.
先寫到這, 估計還得寫一篇, 下一篇文章里面要使用identity server 4了, implicit grant flow.


:連續內存分配 內存碎片、動態分配、碎片整理、伙伴系統)


:非連續內存分配 段式、頁式、段頁式存儲管理)


:虛擬存儲、覆蓋、交換)

)

:置換算法)
)

:進程和線程)
