目錄
- 一、前言
- 二、Nacos集成
- 1、引入Nacos依賴
- 2、設置Nacos配置
- 3、加載Nacos配置中心配置項
- 4、Nacos集成驗證
- 5、Nacos配置中心配置項動態生效
Nacos安裝詳見:Spring Cloud 系列之 Nacos 配置中心
一、前言
上一篇已經講解了怎樣安裝安裝、啟動、配置 Nacos,這篇我們講解如何在項目中使用 Nacos 。
還不了解 Nacos 的詳見:Spring Cloud 系列之 Nacos 配置中心
在集成 Nacos 之前,首先我們要先創建一個 Spring Boot 項目:IDEA 創建 SpringBoot 項目
二、Nacos集成
1、引入Nacos依賴
<dependencies><!-- nacos --><dependency><groupId>com.alibaba.cloud</groupId><artifactId>spring-cloud-starter-alibaba-nacos-config</artifactId><version>2.2.1.RELEASE</version></dependency><dependency><groupId>com.alibaba.cloud</groupId><artifactId>spring-cloud-starter-alibaba-nacos-discovery</artifactId><version>2.2.1.RELEASE</version></dependency>
<dependencies>
注:Spring Boot版本要低于2.4,否則啟動應用會報錯。

2、設置Nacos配置
項目中默認配置文件是 application.properties ,Nacos 配置加在此配置文件中的話,應用啟動會報連接 Nacos 失敗,我們需要創建 bootstrap.properties 或 bootstrap.yml 配置文件(添加任意一個即可),下面我們以 bootstrap.properties 為例:
spring.application.name=apm-mobile-android
spring.cloud.nacos.username=nacos
spring.cloud.nacos.password=nacos
spring.cloud.nacos.server-addr=10.0.7.115:18117spring.cloud.nacos.discovery.namespace=PROD
spring.cloud.nacos.config.namespace=PROD
spring.cloud.nacos.config.timeout=3000
spring.cloud.nacos.config.refresh-enabled=truespring.cloud.nacos.config.group=apm
spring.cloud.nacos.config.prefix=${spring.application.name}
spring.cloud.nacos.config.file-extension=propertiesspring.cloud.nacos.config.shared-configs[0].group=apm
spring.cloud.nacos.config.shared-configs[0].data-id=apm-mobile-android.properties
spring.cloud.nacos.config.shared-configs[0].refresh=truespring.liquibase.enabled=false

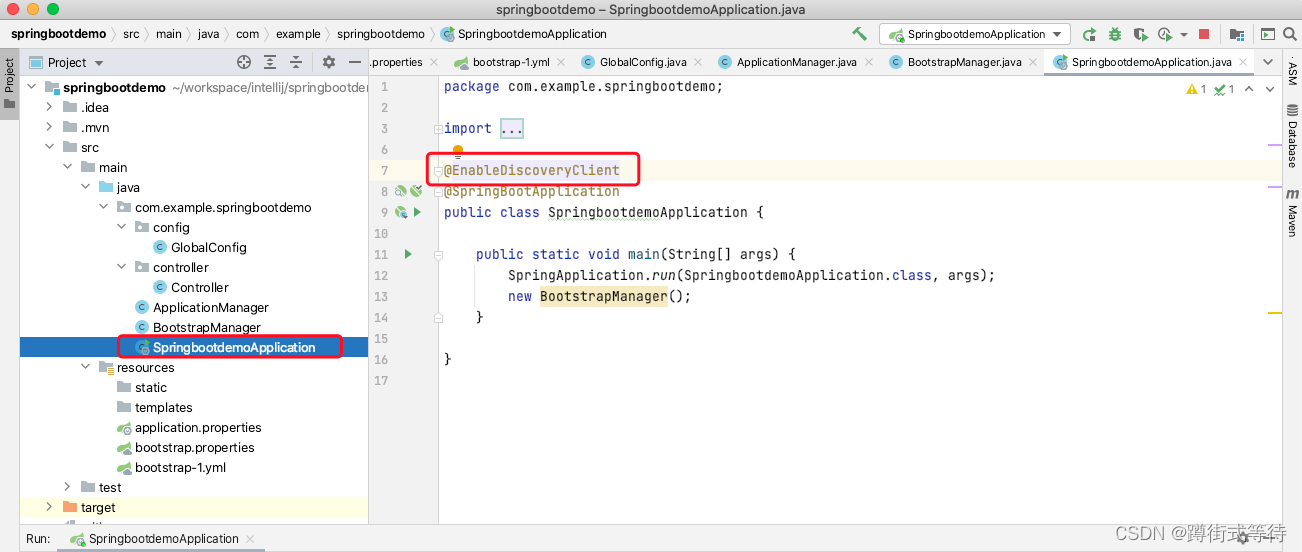
3、加載Nacos配置中心配置項
在初始化類中添加 @EnableDiscoveryClient 注解即可:
package com.example.springbootdemo;import org.springframework.boot.SpringApplication;
import org.springframework.boot.autoconfigure.SpringBootApplication;
import org.springframework.cloud.client.discovery.EnableDiscoveryClient;@EnableDiscoveryClient
@SpringBootApplication
public class SpringbootdemoApplication {public static void main(String[] args) {SpringApplication.run(SpringbootdemoApplication.class, args);new BootstrapManager();}}
4、Nacos集成驗證
Nacos配置如下:
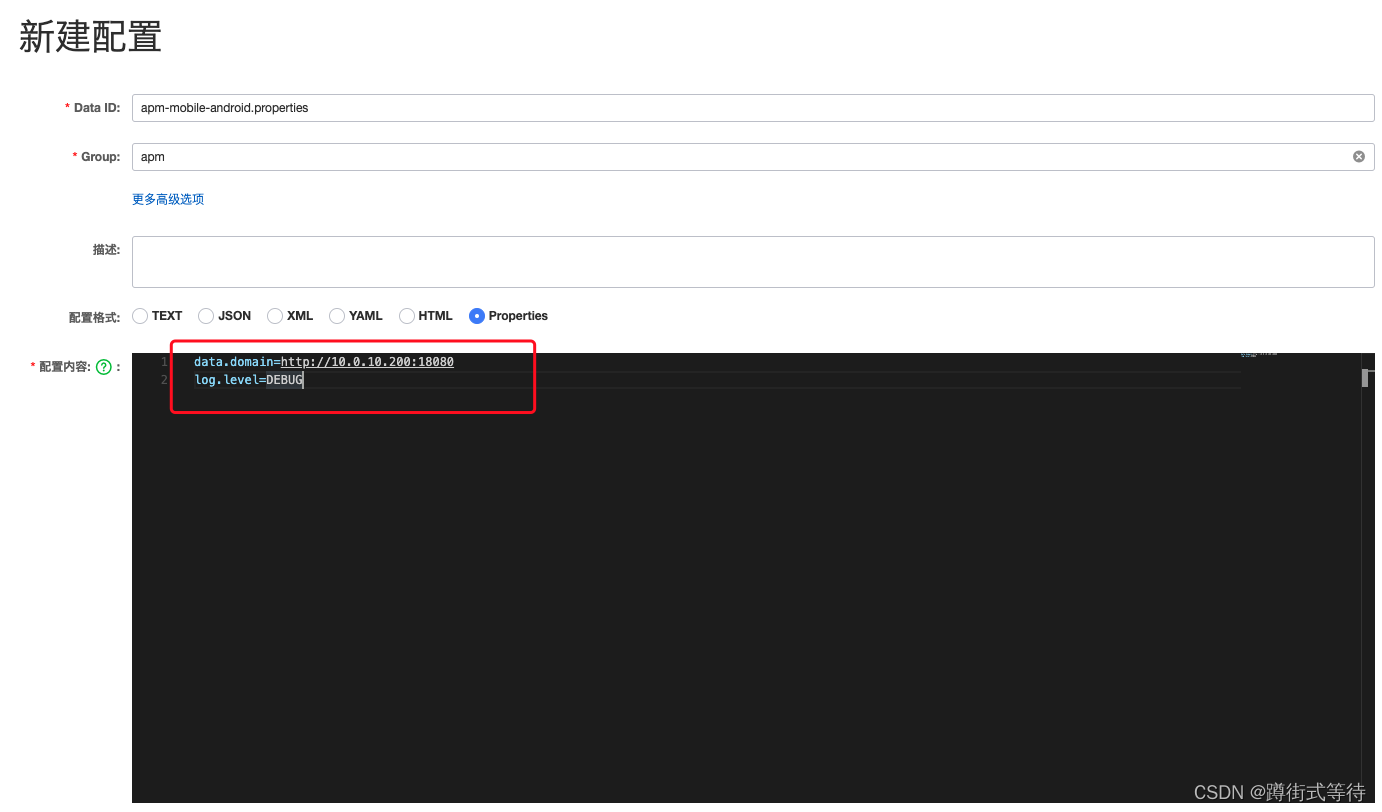
啟動應用,然后訪問:http://localhost:8085/hello
出現如下界面說明加載Nacos配置成功。

5、Nacos配置中心配置項動態生效
需要在配置對象中添加 @RefreshScope 注解,然后重啟應用。
package com.example.springbootdemo.config;import lombok.Data;
import org.springframework.beans.factory.annotation.Value;
import org.springframework.cloud.context.config.annotation.RefreshScope;
import org.springframework.context.annotation.Configuration;
import org.springframework.stereotype.Component;@Data
@Component
@Configuration
@RefreshScope
public class GlobalConfig {@Value("${data.domain:http://10.0.0.1:18080}")private String dataDomain;@Value("${log.level:DEBUG}")private String logLevel;
}

重啟后,訪問:http://localhost:8085/hello

將 Nacos 配置中的 log.level 修改為 DEBUG ,然后重新訪問:http://localhost:8085/hello,出現如下界面說明 Nacos 配置動態生成成功。


)


