rxjs 怎么使用
I loved DragonBall Z as a kid, and still love it as an adult.
我從小就愛DragonBall Z,但從小到大仍然喜歡它。
Among the ludicrous number of transformations, the original Super Saiyan remains my favorite.
在可笑的轉換數量中,原始的超級賽亞人仍然是我的最愛。

Nothing quite like the original
沒有什么比原來的
I’m also loving RxJS the more I level up with it, so why not combine these two for the ultimate showdown?
我越喜歡RxJS,就越喜歡RxJS,那么為什么不將兩者結合起來進行最終的對決呢?
我們去超級賽亞人 (Let’s Go Super Saiyan)
With four sprite sheets and a bit of HTML, CSS, and RxJS, we can recreate this legendary transformation!
通過四個Sprite工作表以及一些HTML,CSS和RxJS,我們可以重新創建這個傳奇的轉換!
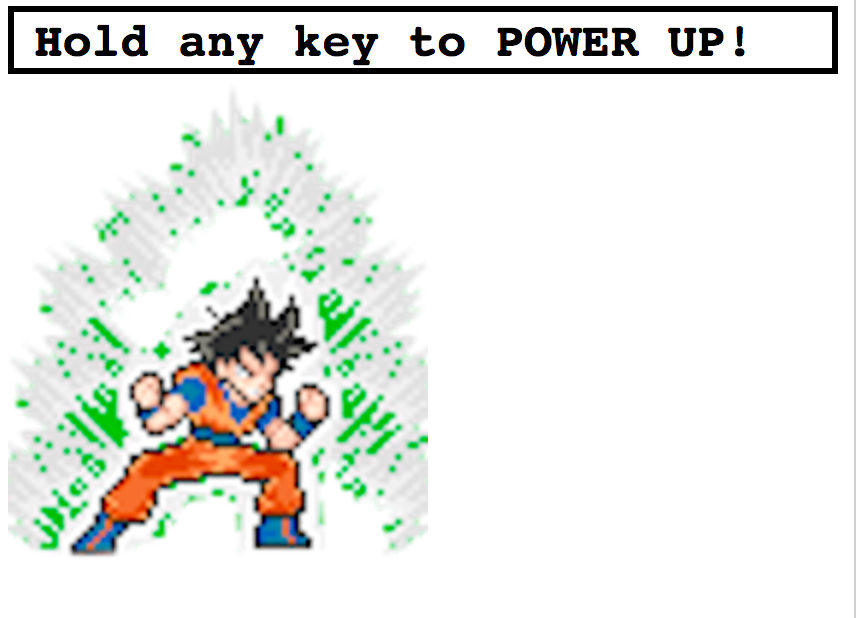
This is what we’ll be making. Exciting, right?! ?
這就是我們要做的。 令人興奮,對嗎? ?
建立 (Setup)
Everything’s on my GitHub.
一切都在我的GitHub上 。
cd ./wherever-you-want
git clone [https://github.com/yazeedb/dbz-rxjs](https://github.com/yazeedb/dbz-rxjs)
cd dbz-rxjs
Open index.html in your favorite browser, and the project in your favorite text editor, and you’re ready to go!
在您喜歡的瀏覽器中打開index.html ,然后在您喜歡的文本編輯器中打開該項目,就可以開始了!
No npm installs today ?
今天沒有npm install嗎?
And going forward, I’ll use the acronym “SSJ” instead of “Super Saiyan” for brevity.
為了簡便起見,我將使用縮寫詞“ SSJ”代替“ Super Saiyan”。
訓練的第一天 (First Day of Training)
You’ll notice that Goku’s already moving. Since we’re focusing on RxJS, we’ll just skim the project’s starting point.
您會注意到悟空已經在移動了。 由于我們專注于RxJS,因此我們將略過項目的起點。
Here’s the main HTML:
這是主要HTML:
<div id="root"><div id="meter-container"><span>Hold any key to POWER UP!</span><div id="meter"></div></div><div id="sprite" class="base"></div>
</div>
The bottom div has class="base", which corresponds to this CSS:
底部div具有class="base" ,它對應于以下CSS:
.base,
.ssj {width: 120px;height: 250px;animation: stand 0.8s steps(2) infinite;
}.base {background-image: url('img/goku-standing-sheet.png');
}
This sets Goku’s width, height, and standing animation.
設置悟空的寬度,高度和站立動畫。
If you look at his base/ssj sprite sheets, it’s two different positions and we’re switching between them every 0.8 seconds.
如果您查看他的base / ssj Sprite表,它是兩個不同的位置,我們每0.8秒切換一次。
The switching’s handled towards the bottom of style.css:
切換處理到style.css的底部:
@keyframes stand {from {background-position: 0px;}to {background-position: -255px;}
}
Same thing for power up:
上電相同:
@keyframes powerup {from {background-position: 0px;}to {background-position: -513px;}
}
We’ll cover the power up meter when we manipulate it.
在操作電表時,我們將對其進行介紹。
掌握DOM元素 (Mastering the DOM Elements)
index.html already includes RxJS@6.2.1 via CDN, so you’re covered.
index.html已經通過CDN包含RxJS@6.2.1 ,因此您已RxJS@6.2.1 。
In app.js, let’s capture the DOM elements we’re interested in:
在app.js ,讓我們捕獲我們感興趣的DOM元素:
const sprite = document.querySelector('#sprite');
const meterContainer = document.querySelector('#meter-container');
const meter = document.querySelector('#meter');
I prefer to alias document.querySelector so using it doesn’t cause me wrist pain.
我更喜歡給document.querySelector加上別名,因此使用它不會引起手腕疼痛。
const $ = document.querySelector.bind(document);**
const sprite = $('#sprite');
const meterContainer = $('#meter-container');
const meter = $('#meter');
Next, we’ll create a main function and immediately call it.
接下來,我們將創建一個main函數并立即調用它。
// ...const main = () => {// do something
};
main();
上電 (Powering Up)
Here is main’s first code snippet:
這是main的第一個代碼段:
const main = () => {const { fromEvent } = rxjs;const begin = fromEvent(document, 'keydown');const end = fromEvent(document, 'keyup');
};
Goku should power up when a key is held down, and stop when that key is let go. We can use the fromEvent operator to create two observables:
按下某個鍵時,悟空應該上電,放開該鍵時應該停止。 我們可以使用fromEvent運算符來創建兩個可觀察對象:
begin: Notifies when the user presses a key down.begin:通知當用戶按下一個鍵下來 。end: Notifies whenever the user lets go of a key.end:在用戶放開任何按鍵時通知。
Then we can subscribe to these emissions and act upon them. To get the power up animation, give sprite the powerup class name.
然后,我們可以訂閱這些排放并對其采取行動。 要獲得加電動畫,請給sprite加powerup類別名稱。
begin.subscribe(() => {sprite.classList.add('powerup');
});
It works, but pressing a key causes him to power up forever…
可以,但是按一個鍵會使他永遠通電……
We must also subscribe to the end observable, so we know when the key has been let go.
我們還必須訂閱可觀察的end ,以便我們知道何時釋放密鑰。
end.subscribe(() => {sprite.classList.remove('powerup');
});
Now he powers up and down at your command.
現在,他根據您的命令上下電。
建立童子軍 (Building a Scouter)
Any DBZ fan has seen a scouter, the little eyewear used to track power levels (until like episode 20…).
任何DBZ粉絲都曾經看到過一個窺探者,那是用來追蹤功率水平的小眼鏡(直到第20集…)。

Obligatory > 9000 joke
強制性> 9000笑話
As Saiyans power up, their power level grows. Inconceivable, right?
隨著賽亞人的力量上升,他們的力量水平也在增長。 不可思議吧?
We need a way to track Goku’s power level as he ascends, and trigger the SSJ transformation after say, 100 points.
我們需要一種方法來跟蹤悟空在他上升時的功率水平,并在說出100分之后觸發SSJ轉換。
We can start his power off at 1, and increase it while the user holds a key down.
我們可以從1開始關閉電源,然后在用戶按住鍵的同時增加電源。
RxJS運算符 (RxJS Operators)
Operators are where RxJS really shines. We can use pure functions to describe how data should transform through the stream.
操作員是RxJS真正發揮作用的地方。 我們可以使用純函數來描述數據應如何在流中進行轉換。
When the user holds a key down, let’s transform those emissions into a number that increases over time.
當用戶按下某個鍵時,讓我們將這些排放量轉換為隨時間增加的排放量。
掃瞄 (Scan)
The scan operator is perfect for this. It’s like Array.reduce, but it emits as it’s reducing.
掃描運算符非常適合此操作。 這就像Array.reduce ,但它發出的,因為它的減少 。
For example, if you have an array of numbers:
例如,如果您有一個數字數組:
nums = [1, 2, 3, 4, 5];And wish to add them up, reduce is a great choice.
并希望將它們加起來, reduce是一個不錯的選擇。
nums.reduce((a, b) => a + b, 0);
// 15
What if you want to see each addition as it happens?
如果您希望每次添加時都能看到該怎么辦?
Enter scan. You can run this in our app’s console.
輸入scan 。 您可以在我們的應用程序控制臺中運行它。
const { from } = rxjs;
const { scan } = rxjs.operators;from([1, 2, 3, 4, 5]).pipe(scan((a, b) => a + b, 0)).subscribe(console.log);// 1 (0 + 1)
// 3 (1 + 2)
// 6 (3 + 3)
// 10 (6 + 4)
// 15 (10 + 5)
See how the emissions increase over time? We can do that with Goku as he powers up!
看看排放量如何隨時間增加? 我們可以通過悟空加電來做到這一點!
const { fromEvent } = rxjs;
const { scan, tap } = rxjs.operators;const begin = fromEvent(document, 'keydown');
const end = fromEvent(document, 'keyup');begin.pipe(scan((level) => level + 1, 1),tap((level) => {console.log({ level });})).subscribe(() => {sprite.classList.add('powerup');});
We start his level at 1 and increase it by 1 every time the keydown event fires.
我們將他的級別從1開始,并在每次keydown事件觸發時將其級別提高1。
And the tap operator operator lets us quickly log the value without disturbing the pipeline.
輕敲運算符運算符使我們可以快速記錄該值,而不會打擾管道。
My power infinitely approaches MAXIMUM!
我的力量無限接近最大值!
超級賽亞人 (Going Super Saiyan)
We’ve trained hard, it’s time to transform.
我們經過艱苦的訓練,是時候轉型了。
The scan operator tracks Goku’s power level. Now we need to go SSJ when it emits 100.
scan操作員跟蹤悟空的功率水平。 現在我們需要在SSJ發出100信號時使用它。
I built a map of levels: transformations. You can put it right above main.
我建立了一個levels: transformations 。 您可以將其放在main上方。
const powerLevels = {100: {current: 'base',next: 'ssj'}
};const main = () => {// ...
};
It’s overkill, but should simplify adding future transformations.
這太過分了,但是應該簡化添加將來的轉換的過程。
When the power level reaches a number in that powerLevels map, we’ll remove its current class from sprite and add the next class.
當功率級別達到該powerLevels映射中的一個數字時,我們將從sprite刪除其current類并添加next類。
This lets us smoothly go from one transformation to the next.
這使我們能夠順利地從一種轉換過渡到另一種轉換。
Here’s the code.
這是代碼。
const { fromEvent } = rxjs;
const { filter, map, scan, tap } = rxjs.operators;const begin = fromEvent(document, 'keydown');
const end = fromEvent(document, 'keyup');begin.pipe(scan((level) => level + 1, 1),tap((level) => {console.log({ level });sprite.classList.add('powerup');}),map((level) => powerLevels[level]),filter((level) => level && level.next)).subscribe(({ current, next }) => {sprite.classList.remove(current);sprite.classList.add(next);});
地圖和過濾器 (Map and Filter)
Adding the powerup class now happens inside of tap, because it should always happen. The SSJ transformation however, shouldn’t always happen.
現在添加powerup類發生在tap ,因為它應該總是發生。 但是,SSJ轉換不應該總是發生。
Using map, the latest power level becomes an entry in the powerLevels map. We use filter to check if the entry exists and has a .next property.
使用map ,最新功率級別將成為powerLevels映射中的一個條目。 我們使用filter檢查條目是否存在并具有.next屬性。
If it does, that means Goku can go even further beyond! Our .subscribe will swap current and next as class names on sprite.
如果可以,那就意味著悟空可以走得更遠! 我們的.subscribe將在sprite上交換current名稱和next作為類名。
The end result?
最終結果?
功率計 (Power Meter)
You’re having as much fun as I am, right? Unfortunately, our user won’t.
你和我一樣開心,對吧? 不幸的是,我們的用戶不會。
They can’t see how high Goku’s power level is! They won’t know how to open the DevTools console. We must remedy this!
他們看不到悟空的功率等級有多高! 他們不知道如何打開DevTools控制臺。 我們必須對此進行補救!
Let’s improve our UX by filling the power meter. You can put this above main.
讓我們通過填充功率計來改善用戶體驗。 您可以將其放在main之上。
const fillMeter = (level) => {const limit = 100;if (level >= limit) {return;}const containerWidth = meterContainer.offsetWidth;const newWidth = (level / limit) * containerWidth;meter.style.width = `${newWidth}px`;
};
And call it inside tap.
并在tap調用它。
tap((level) => {console.log({ level });sprite.classList.add('powerup');fillMeter(level);
});
And here we go:
現在我們開始:
走得更遠 (Going Even Further Beyond)
Unlocking more transformations is just a matter of adding sprites, and updating our powerLevels map. If you’re interested, submit a PR on the repo and we’ll definitely talk.
解鎖更多轉換只是添加精靈,并更新我們的powerLevels映射。 如果您有興趣,請在倉庫中提交PR,我們一定會談。
Here’s the original sprite sheet. Enjoy!
這是原始的精靈表 。 請享用!
翻譯自: https://www.freecodecamp.org/news/go-super-saiyan-with-rxjs-observables-d4681ae51930/
rxjs 怎么使用


)


)


