一、輪廓發現原理
輪廓發現是在圖像邊緣提取的基礎上尋找對象輪廓的方法,故邊緣提取的閾值的選定會影響到最終輪廓發現的結果。
其本質是基于二值圖像的,邊緣提取常用Canny進行提取邊緣
輪廓發現也是基于拓撲結構,掃描連通圖,最后建立其樹形結構的拓撲圖
通常情況可以利用梯度來避免閾值的錯誤設定
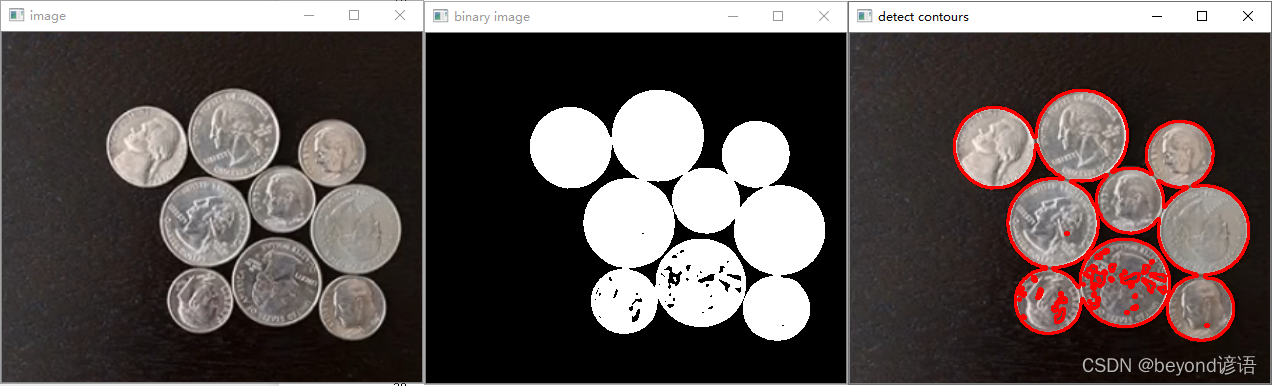
二、代碼實現
cloneImage,contours,heriachy = cv2.findContours(binary,cv2.RETR_TREE,cv2.CHAIN_APPROX_SIMPLE)
binary:二值圖像
cv2.RETR_TREE:二值圖像返回結果構建模型的方法,即構建輪廓的方法,返回樹形結構
cv2.CHAIN_APPROX_SIMPLE:一般為簡單的返回形式
cloneImage:克隆圖片信息,可忽略
contours:存放返回輪廓信息,最有用
heriachy :存放輪廓層次信息,可忽略
cv2.drawContours(image,contours,i,(0,0,255),2)
image:圖像信息
contours:存放輪廓信息,繪制哪個輪廓,會從contours中找
(0,0,255):繪制輪廓的顏色
2:繪制輪廓的線寬
import cv2
import numpy as np
from matplotlib import pyplot as pltdef contour(image):gray = cv2.cvtColor(image,cv2.COLOR_BGR2GRAY)#先轉換為灰度圖ret,binary = cv2.threshold(gray,0,255,cv2.THRESH_BINARY|cv2.THRESH_OTSU)#二值化cv2.imshow("binary image",binary)cloneImage,contours,heriachy = cv2.findContours(binary,cv2.RETR_TREE,cv2.CHAIN_APPROX_SIMPLE)for i,contour in enumerate(contours):cv2.drawContours(image,contours,i,(0,0,255),2)print(i)cv2.imshow("detect contours",image)src = cv2.imread(r"G:\Juptyer_workspace\study\opencv\opencv3\calc.jpg")
cv2.imshow("image",src)
cv2.namedWindow("image",cv2.WINDOW_AUTOSIZE)
contour(src)
cv2.waitKey(0)
cv2.destroyAllWindows()
效果圖如下:

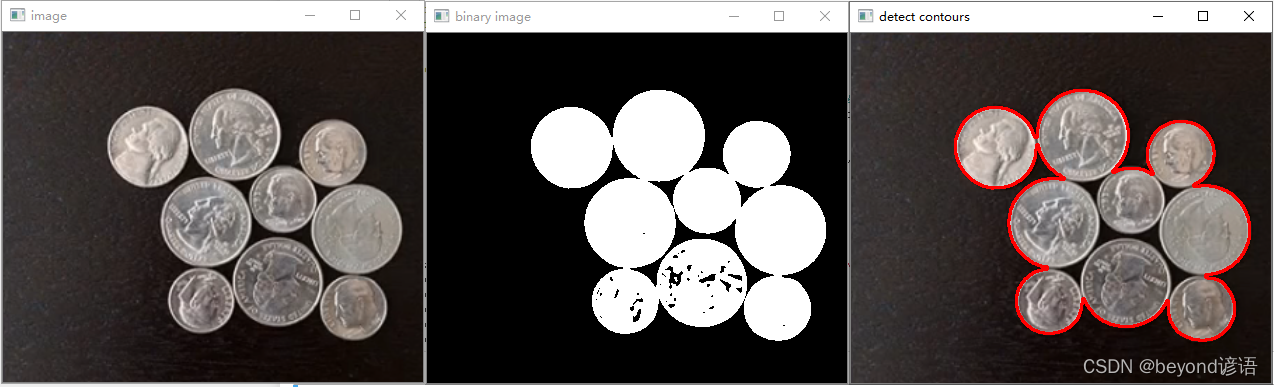
三、加上濾波代碼實現
cv2.GaussianBlur(image,(3,3),0)高斯濾波,卷積核大小為3*3
import cv2
import numpy as np
from matplotlib import pyplot as pltdef contour(image):dst = cv2.GaussianBlur(image,(3,3),0)gray = cv2.cvtColor(dst,cv2.COLOR_BGR2GRAY)#先轉換為灰度圖ret,binary = cv2.threshold(gray,0,255,cv2.THRESH_BINARY|cv2.THRESH_OTSU)#二值化cv2.imshow("binary image",binary)cloneImage,contours,heriachy = cv2.findContours(binary,cv2.RETR_TREE,cv2.CHAIN_APPROX_SIMPLE)for i,contour in enumerate(contours):cv2.drawContours(image,contours,i,(0,0,255),2)print(i)cv2.imshow("detect contours",image)src = cv2.imread(r"G:\Juptyer_workspace\study\opencv\opencv3\calc.jpg")
cv2.imshow("image",src)
cv2.namedWindow("image",cv2.WINDOW_AUTOSIZE)
contour(src)
cv2.waitKey(0)
cv2.destroyAllWindows()
效果圖如下:
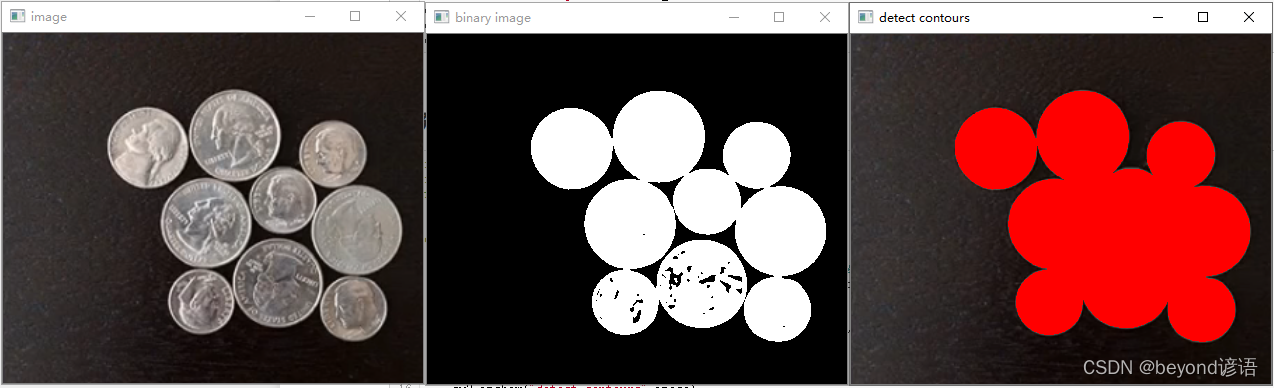
四、找大輪廓
cv2.findContours(binary,cv2.RETR_EXTERNAL,cv2.CHAIN_APPROX_SIMPLE)
cv2.RETR_EXTERNAL:返回最大輪廓結果
import cv2
import numpy as np
from matplotlib import pyplot as pltdef contour(image):dst = cv2.GaussianBlur(image,(3,3),0)gray = cv2.cvtColor(dst,cv2.COLOR_BGR2GRAY)#先轉換為灰度圖ret,binary = cv2.threshold(gray,0,255,cv2.THRESH_BINARY|cv2.THRESH_OTSU)#二值化cv2.imshow("binary image",binary)cloneImage,contours,heriachy = cv2.findContours(binary,cv2.RETR_EXTERNAL,cv2.CHAIN_APPROX_SIMPLE)for i,contour in enumerate(contours):cv2.drawContours(image,contours,i,(0,0,255),2)print(i)cv2.imshow("detect contours",image)src = cv2.imread(r"G:\Juptyer_workspace\study\opencv\opencv3\calc.jpg")
cv2.imshow("image",src)
cv2.namedWindow("image",cv2.WINDOW_AUTOSIZE)
contour(src)
cv2.waitKey(0)
cv2.destroyAllWindows()
效果圖如下:
五、填充輪廓
cv2.drawContours(image,contours,i,(0,0,255),-1)
最后一個參數為繪制輪廓線段的寬度,-1表示填充
import cv2
import numpy as np
from matplotlib import pyplot as pltdef contour(image):dst = cv2.GaussianBlur(image,(3,3),0)gray = cv2.cvtColor(dst,cv2.COLOR_BGR2GRAY)#先轉換為灰度圖ret,binary = cv2.threshold(gray,0,255,cv2.THRESH_BINARY|cv2.THRESH_OTSU)#二值化cv2.imshow("binary image",binary)cloneImage,contours,heriachy = cv2.findContours(binary,cv2.RETR_EXTERNAL,cv2.CHAIN_APPROX_SIMPLE)for i,contour in enumerate(contours):cv2.drawContours(image,contours,i,(0,0,255),-1)print(i)cv2.imshow("detect contours",image)src = cv2.imread(r"G:\Juptyer_workspace\study\opencv\opencv3\calc.jpg")
cv2.imshow("image",src)
cv2.namedWindow("image",cv2.WINDOW_AUTOSIZE)
contour(src)
cv2.waitKey(0)
cv2.destroyAllWindows()
效果圖如下:
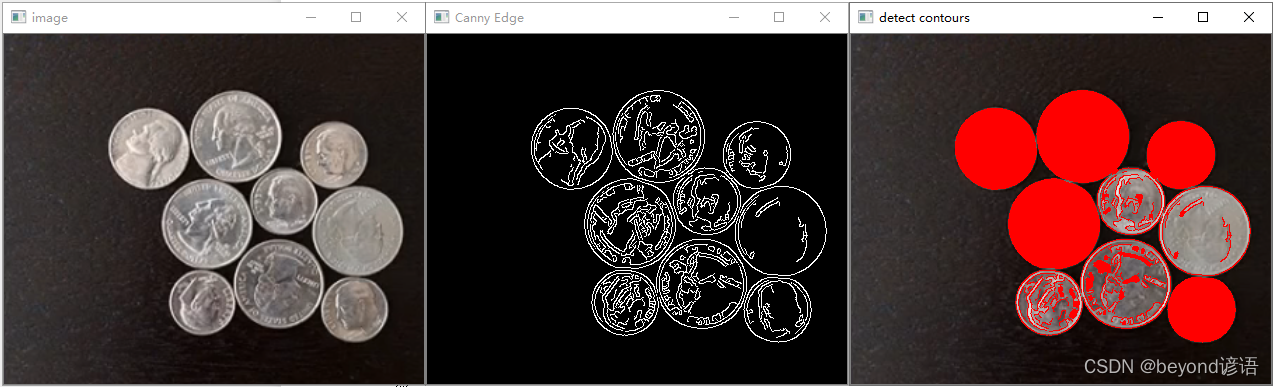
六、Canny提取輪廓
import cv2
import numpy as np
from matplotlib import pyplot as pltdef edge(image):blurred = cv2.GaussianBlur(image,(3,3),0)gray = cv2.cvtColor(blurred,cv2.COLOR_BGR2GRAY)xgrad = cv2.Sobel(gray,cv2.CV_16SC1,1,0)#x Gradientygrad = cv2.Sobel(gray,cv2.CV_16SC1,0,1)#y Gradientedge_output = cv2.Canny(gray,50,150)cv2.imshow("Canny Edge",edge_output)return edge_outputdef contour(image):binary = edge(image)cloneImage,contours,heriachy = cv2.findContours(binary,cv2.RETR_EXTERNAL,cv2.CHAIN_APPROX_SIMPLE)for i,contour in enumerate(contours):cv2.drawContours(image,contours,i,(0,0,255),-1)print(i)cv2.imshow("detect contours",image)src = cv2.imread(r"G:\Juptyer_workspace\study\opencv\opencv3\calc.jpg")
cv2.imshow("image",src)
cv2.namedWindow("image",cv2.WINDOW_AUTOSIZE)
contour(src)
cv2.waitKey(0)
cv2.destroyAllWindows()
效果圖如下:
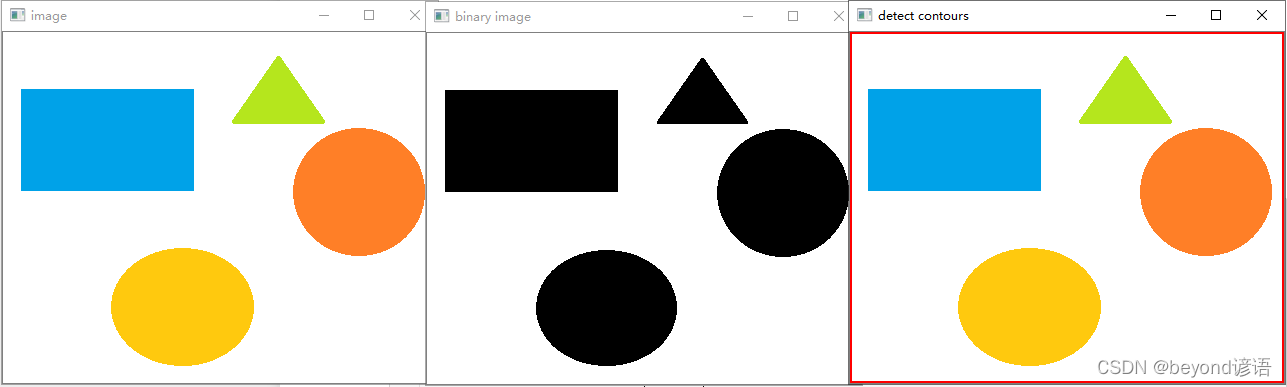
七、若尋找輪廓尋找到圖像最外邊緣,取反一下即可
import cv2
import numpy as np
from matplotlib import pyplot as pltdef contour(image):dst = cv2.GaussianBlur(image,(3,3),0)gray = cv2.cvtColor(dst,cv2.COLOR_BGR2GRAY)#先轉換為灰度圖ret,binary = cv2.threshold(gray,0,255,cv2.THRESH_BINARY|cv2.THRESH_OTSU)#二值化cv2.imshow("binary image",binary)cloneImage,contours,heriachy = cv2.findContours(binary,cv2.RETR_EXTERNAL,cv2.CHAIN_APPROX_SIMPLE)for i,contour in enumerate(contours):cv2.drawContours(image,contours,i,(0,0,255),2)print(i)cv2.imshow("detect contours",image)src = cv2.imread(r"G:\Juptyer_workspace\study\opencv\opencv3\by.jpg")
cv2.imshow("image",src)
cv2.namedWindow("image",cv2.WINDOW_AUTOSIZE)
contour(src)
cv2.waitKey(0)
cv2.destroyAllWindows()
效果圖如下:
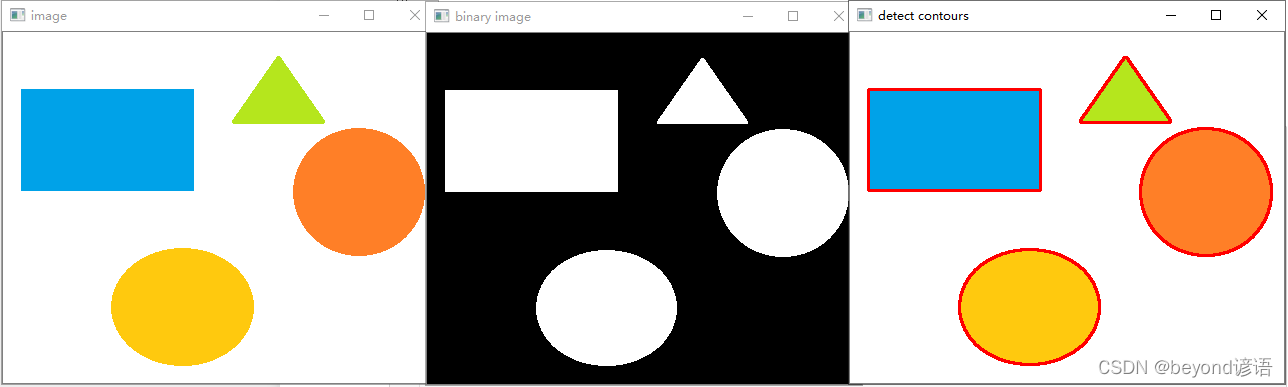
解決方法:cv2.THRESH_BINARY_INV
import cv2
import numpy as np
from matplotlib import pyplot as pltdef contour(image):dst = cv2.GaussianBlur(image,(3,3),0)gray = cv2.cvtColor(dst,cv2.COLOR_BGR2GRAY)#先轉換為灰度圖ret,binary = cv2.threshold(gray,0,255,cv2.THRESH_BINARY_INV|cv2.THRESH_OTSU)#二值化cv2.imshow("binary image",binary)cloneImage,contours,heriachy = cv2.findContours(binary,cv2.RETR_EXTERNAL,cv2.CHAIN_APPROX_SIMPLE)for i,contour in enumerate(contours):cv2.drawContours(image,contours,i,(0,0,255),2)print(i)cv2.imshow("detect contours",image)src = cv2.imread(r"G:\Juptyer_workspace\study\opencv\opencv3\by.jpg")
cv2.imshow("image",src)
cv2.namedWindow("image",cv2.WINDOW_AUTOSIZE)
contour(src)
cv2.waitKey(0)
cv2.destroyAllWindows()
效果圖如下:


方法)


函數)


![[mongodb翻譯]分片和故障轉移](http://pic.xiahunao.cn/[mongodb翻譯]分片和故障轉移)
)


)
