一、思路分析
首先,拿到一張文檔,我們需要對文檔進行預處理操作,再進行輪廓檢測,因為就算拿到文檔輪廓,但是這些輪廓也有可能是歪歪扭扭的,這時候需要通過一系列的透視變換操作,將文檔擺正。通過調用OCR函數庫實現文檔內容的識別。
二、導包及其相關函數
# 導入工具包
import numpy as np
import argparse
import cv2
# 設置參數
ap = argparse.ArgumentParser()
ap.add_argument("-i", "--image", required = True,help = "Path to the image to be scanned")
args = vars(ap.parse_args())
def order_points(pts):# 一共4個坐標點rect = np.zeros((4, 2), dtype = "float32")# 按順序找到對應坐標0123分別是 左上,右上,右下,左下# 計算左上,右下s = pts.sum(axis = 1)rect[0] = pts[np.argmin(s)]rect[2] = pts[np.argmax(s)]# 計算右上和左下diff = np.diff(pts, axis = 1)rect[1] = pts[np.argmin(diff)]rect[3] = pts[np.argmax(diff)]return rectdef four_point_transform(image, pts):# 獲取輸入坐標點rect = order_points(pts)(tl, tr, br, bl) = rect"""tl trbl br """# 計算輸入的w和h值widthA = np.sqrt(((br[0] - bl[0]) ** 2) + ((br[1] - bl[1]) ** 2))widthB = np.sqrt(((tr[0] - tl[0]) ** 2) + ((tr[1] - tl[1]) ** 2))maxWidth = max(int(widthA), int(widthB))#得到的輪廓不保障一點是個矩形,這里將兩條width都計算出來,以最大的width最為最終矩形的widthheightA = np.sqrt(((tr[0] - br[0]) ** 2) + ((tr[1] - br[1]) ** 2))heightB = np.sqrt(((tl[0] - bl[0]) ** 2) + ((tl[1] - bl[1]) ** 2))maxHeight = max(int(heightA), int(heightB))# 變換后對應坐標位置 這時候就需要將文檔擺正,通過識別出來原始文檔的width和height信息來重新擺正,放到(0,0)為左上角,形成一個矩形dst = np.array([[0, 0],[maxWidth - 1, 0],[maxWidth - 1, maxHeight - 1],[0, maxHeight - 1]], dtype = "float32")# 計算變換矩陣M = cv2.getPerspectiveTransform(rect, dst)#rect為輸入的原始圖像的四個點,dst為最后擺正的四個點坐標;透視變換需要將原始的2維平面文檔轉換為3維空間中,變換之后再轉回到2維平面中,調用該函數之后,此時M為3維矩陣warped = cv2.warpPerspective(image, M, (maxWidth, maxHeight))# 返回變換后結果return warpeddef resize(image, width=None, height=None, inter=cv2.INTER_AREA):#對圖像的大小進行變換dim = None(h, w) = image.shape[:2]if width is None and height is None:return imageif width is None:r = height / float(h)dim = (int(w * r), height)else:r = width / float(w)dim = (width, int(h * r))resized = cv2.resize(image, dim, interpolation=inter)return resized
三、提取出文檔的輪廓
# 讀取輸入
image = cv2.imread(args["image"])
#坐標也會相同變化
ratio = image.shape[0] / 500.0#后續需要對圖像進行變換,這里先保留一下變換比例  shape[0]是width寬度
orig = image.copy()
image = resize(orig, height = 500)
# 預處理
gray = cv2.cvtColor(image, cv2.COLOR_BGR2GRAY)#灰度圖
gray = cv2.GaussianBlur(gray, (5, 5), 0)#高斯濾波去除一些噪音點
edged = cv2.Canny(gray, 75, 200)#Canny邊緣檢測
# 展示預處理結果
print("STEP 1: Canny邊緣檢測")
cv2.imshow("Image", image)
cv2.imshow("Edged", edged)
cv2.waitKey(0)
cv2.destroyAllWindows()
# 輪廓檢測
cnts = cv2.findContours(edged.copy(), cv2.RETR_LIST, cv2.CHAIN_APPROX_SIMPLE)[1]#邊緣檢測之后再進行輪廓檢測,輪廓檢測這里使用的是邊緣檢測的結果
cnts = sorted(cnts, key = cv2.contourArea, reverse = True)[:5]#對不同的輪廓按照面積排序,這里按面積大小找前5個輪廓
# 遍歷輪廓
for c in cnts:#遍歷找到的前5個輪廓# 計算輪廓近似peri = cv2.arcLength(c, True)#計算下每個輪廓的長度# C表示輸入的點集# epsilon表示從原始輪廓到近似輪廓的最大距離,它是一個準確度參數# True表示封閉的approx = cv2.approxPolyDP(c, 0.02 * peri, True)# 4個點的時候就拿出來if len(approx) == 4:#輪廓近似之后看看輪廓有幾個點,若是4個點的輪廓,應該就是矩形了,是我們要找的文檔對象screenCnt = approxbreak
# 展示結果
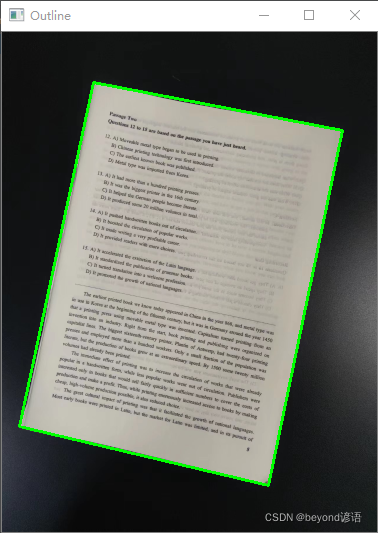
print("STEP 2: 獲取輪廓")
cv2.drawContours(image, [screenCnt], -1, (0, 255, 0), 2)
cv2.imshow("Outline", image)
cv2.waitKey(0)
cv2.destroyAllWindows()
三、通過透視變換將文檔圖像擺正
# 透視變換
warped = four_point_transform(orig, screenCnt.reshape(4, 2) * ratio)
# orig為原始圖像copy所得
# screenCnt.reshape(4, 2)拿到輪廓的四個坐標,但是這里是以及resize之后的四個點坐標,故需要乘以retio這個比例把四個點的坐標給還原回去
# 二值處理
warped = cv2.cvtColor(warped, cv2.COLOR_BGR2GRAY)#為了是得變化之后的圖像更加清晰,對圖像再次進行灰度化和二值化操作
ref = cv2.threshold(warped, 100, 255, cv2.THRESH_BINARY)[1]
cv2.imwrite('scan.jpg', ref)#保存一下識別出來的文檔圖像,為后續的識別內容做樣本
# 展示結果
print("STEP 3: 透視變換")
cv2.imshow("Original", resize(orig, height = 650))
cv2.imshow("Scanned", resize(ref, height = 650))
cv2.waitKey(0)


此時就會將掃描得到的文檔進行保存
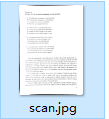
后續的OCR識別就是針對這個文檔進行的。
四、Pycharm參數設定
對于 文檔進行透視變換擺正 需要提供參數,指定圖像路徑

找到Edit Configurations
將image參數改成自己測試圖像路徑
--image yy.png,只需要重新指定后面的yy.png圖像路徑即可

五、OCR對文檔內容進行識別
Ⅰ,工具包下載安裝
tesseract工具包下載,windows就直接找個版本下載exe文件就行,直接下一步就行,需要注意一下按照的路徑。
Ⅱ,配置環境變量


cmd下進行測試看看安裝是否成功,tesseract -v
輸出版本信息即可

Ⅲ,測試一下
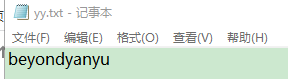
例如在D盤下有一張圖像
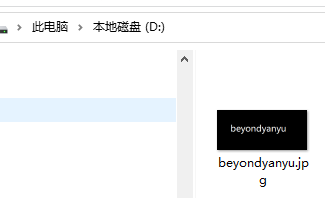
tesseract beyondyanyu.jpg yy beyondyanyu.jpg為測試圖像路徑,yy生成結果路徑及名稱
注意你存放測試圖像的路徑


報錯解決方法一:
若在此處報錯,需要重新新建一個系統變量

TESSDATA_PREFIX
C:\Program Files (x86)\Tesseract-OCR\tessdata

電腦關機重啟一下。
再進行上述測試,看看有沒有生成結果。
報錯解決方法二:
G:\Anaconda3\Lib\site-packages\pytesseract
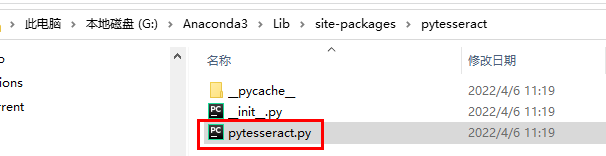

把此處的路徑更改成下載的位置的全局路徑即可。
Ⅳ,安裝pytesseract
我用的是Anaconda,在Anaconda prompt中輸入:pip install pytesseract
Ⅴ,測試
from PIL import Image
import pytesseract
import cv2
import ospreprocess = 'thresh' #thresh  濾波二值化操作可以試試image = cv2.imread('scan.jpg')#讀取得到的透視變換擺正之后的測試圖像
gray = cv2.cvtColor(image, cv2.COLOR_BGR2GRAY)#if preprocess == "thresh":gray = cv2.threshold(gray, 0, 255,cv2.THRESH_BINARY | cv2.THRESH_OTSU)[1]if preprocess == "blur":gray = cv2.medianBlur(gray, 3)filename = "{}.png".format(os.getpid())
cv2.imwrite(filename, gray)text = pytesseract.image_to_string(Image.open(filename))
print(text)
os.remove(filename)cv2.imshow("Image", image)
cv2.imshow("Output", gray)
cv2.waitKey(0)

控制臺輸出:
"""
Pasuze InoQuestions 12 to 15 are based on the passage you have just heard.2 Ai Moveable me1 type began to be used in privung
B) Chmese priwing technology was first introduced
C) The earliest known baok was publishedD) Metal type was imported from Korea13. A) It had more than a hundred printing pressesB) It was the bignest printer in the 16th centuryC) It helped the Geman people become lnerate
D; It produced some 20 milion volumes in total14. Aj It pushed hindwntten books out of circulation
B) It boosted the cnculation of popular works
C) It made writing a very profitable career
1) It provided readers with more choicesAj It acceterated the extinction of the Latin languageB) It sndardized the publication of grammur books
C) It turned translation into a welcome professionD) it promoted the growth of national linguagesThe earliest printed book we know today speared in China in the year 868, and metal type was
in use in Kore at the begining of the fifteenth century, but t was in Germany around the year 1450that a printing press using. movable metal type was invented. Capitalism turned printing from anmncenton into an industry. Richt from the start, book printing and publishing were organized oncapitalist fines. The biggest sinteenth-century printer, Plantin of Antwerp, had. twentfour pruing
prewes and employed more than a hundred workers. Only a small fraction of the population was
but the production of books grew at an extraordinary speed. By 1500 some twenty million
volumes hed atready been printedTheeffect of printing was to increase the circulation of works that were already
popular in a handwritten form, while less popular works went out of circulation. Publishers: were
only in books that would sell faily queldy in sufficient numbers to caver the costs of
production and make a profit. Thus, while priting enormously increased access to books by making
cheap. high- salume production possible, it also reduced choiceThe wieat cultural impact of printing was thi it ficifitared thewth of national languages
Most carly books were printed in Latin, but the market for Latin was limited. and in its pursuit of$Process finished with exit code 0
"""
六、完整代碼
對文檔進行透視變換擺正
# 導入工具包
import numpy as np
import argparse
import cv2# 設置參數
ap = argparse.ArgumentParser()
ap.add_argument("-i", "--image", required = True,help = "Path to the image to be scanned")
args = vars(ap.parse_args())def order_points(pts):# 一共4個坐標點rect = np.zeros((4, 2), dtype = "float32")# 按順序找到對應坐標0123分別是 左上,右上,右下,左下# 計算左上,右下s = pts.sum(axis = 1)rect[0] = pts[np.argmin(s)]rect[2] = pts[np.argmax(s)]# 計算右上和左下diff = np.diff(pts, axis = 1)rect[1] = pts[np.argmin(diff)]rect[3] = pts[np.argmax(diff)]return rectdef four_point_transform(image, pts):# 獲取輸入坐標點rect = order_points(pts)(tl, tr, br, bl) = rect"""tl   trbl   br	"""# 計算輸入的w和h值widthA = np.sqrt(((br[0] - bl[0]) ** 2) + ((br[1] - bl[1]) ** 2))widthB = np.sqrt(((tr[0] - tl[0]) ** 2) + ((tr[1] - tl[1]) ** 2))maxWidth = max(int(widthA), int(widthB))#得到的輪廓不保障一點是個矩形,這里將兩條width都計算出來,以最大的width最為最終矩形的widthheightA = np.sqrt(((tr[0] - br[0]) ** 2) + ((tr[1] - br[1]) ** 2))heightB = np.sqrt(((tl[0] - bl[0]) ** 2) + ((tl[1] - bl[1]) ** 2))maxHeight = max(int(heightA), int(heightB))# 變換后對應坐標位置  這時候就需要將文檔擺正,通過識別出來原始文檔的width和height信息來重新擺正,放到(0,0)為左上角,形成一個矩形dst = np.array([[0, 0],[maxWidth - 1, 0],[maxWidth - 1, maxHeight - 1],[0, maxHeight - 1]], dtype = "float32")# 計算變換矩陣M = cv2.getPerspectiveTransform(rect, dst)#rect為輸入的原始圖像的四個點,dst為最后擺正的四個點坐標;透視變換需要將原始的2維平面文檔轉換為3維空間中,變換之后再轉回到2維平面中,調用該函數之后,此時M為3維矩陣warped = cv2.warpPerspective(image, M, (maxWidth, maxHeight))# 返回變換后結果return warpeddef resize(image, width=None, height=None, inter=cv2.INTER_AREA):#對圖像的大小進行變換dim = None(h, w) = image.shape[:2]if width is None and height is None:return imageif width is None:r = height / float(h)dim = (int(w * r), height)else:r = width / float(w)dim = (width, int(h * r))resized = cv2.resize(image, dim, interpolation=inter)return resized# 讀取輸入
image = cv2.imread(args["image"])
#坐標也會相同變化
ratio = image.shape[0] / 500.0#后續需要對圖像進行變換,這里先保留一下變換比例  shape[0]是width寬度
orig = image.copy()image = resize(orig, height = 500)# 預處理
gray = cv2.cvtColor(image, cv2.COLOR_BGR2GRAY)#灰度圖
gray = cv2.GaussianBlur(gray, (5, 5), 0)#高斯濾波去除一些噪音點
edged = cv2.Canny(gray, 75, 200)#Canny邊緣檢測# 展示預處理結果
print("STEP 1: Canny邊緣檢測")
cv2.imshow("Image", image)
cv2.imshow("Edged", edged)
cv2.waitKey(0)
cv2.destroyAllWindows()# 輪廓檢測
cnts = cv2.findContours(edged.copy(), cv2.RETR_LIST, cv2.CHAIN_APPROX_SIMPLE)[1]#邊緣檢測之后再進行輪廓檢測,輪廓檢測這里使用的是邊緣檢測的結果
cnts = sorted(cnts, key = cv2.contourArea, reverse = True)[:5]#對不同的輪廓按照面積排序,這里按面積大小找前5個輪廓# 遍歷輪廓
for c in cnts:#遍歷找到的前5個輪廓# 計算輪廓近似peri = cv2.arcLength(c, True)#計算下每個輪廓的長度# C表示輸入的點集# epsilon表示從原始輪廓到近似輪廓的最大距離,它是一個準確度參數# True表示封閉的approx = cv2.approxPolyDP(c, 0.02 * peri, True)# 4個點的時候就拿出來if len(approx) == 4:#輪廓近似之后看看輪廓有幾個點,若是4個點的輪廓,應該就是矩形了,是我們要找的文檔對象screenCnt = approxbreak# 展示結果
print("STEP 2: 獲取輪廓")
cv2.drawContours(image, [screenCnt], -1, (0, 255, 0), 2)
cv2.imshow("Outline", image)
cv2.waitKey(0)
cv2.destroyAllWindows()# 透視變換
warped = four_point_transform(orig, screenCnt.reshape(4, 2) * ratio)
# orig為原始圖像copy所得
# screenCnt.reshape(4, 2)拿到輪廓的四個坐標,但是這里是以及resize之后的四個點坐標,故需要乘以retio這個比例把四個點的坐標給還原回去# 二值處理
warped = cv2.cvtColor(warped, cv2.COLOR_BGR2GRAY)#為了是得變化之后的圖像更加清晰,對圖像再次進行灰度化和二值化操作
ref = cv2.threshold(warped, 100, 255, cv2.THRESH_BINARY)[1]
cv2.imwrite('scan.jpg', ref)#保存一下識別出來的文檔圖像
# 展示結果
print("STEP 3: 透視變換")
cv2.imshow("Original", resize(orig, height = 650))
cv2.imshow("Scanned", resize(ref, height = 650))
cv2.waitKey(0)
對擺正之后的圖像進行OCR識別
# https://digi.bib.uni-mannheim.de/tesseract/
# 配置環境變量如E:\Program Files (x86)\Tesseract-OCR
# tesseract -v進行測試
# tesseract XXX.png 得到結果
# pip install pytesseract
# anaconda lib site-packges pytesseract pytesseract.py
# tesseract_cmd 修改為絕對路徑即可
from PIL import Image
import pytesseract
import cv2
import ospreprocess = 'thresh' #thresh  濾波二值化操作可以試試image = cv2.imread('scan.jpg')#讀取得到的透視變換擺正之后的測試圖像
gray = cv2.cvtColor(image, cv2.COLOR_BGR2GRAY)#if preprocess == "thresh":gray = cv2.threshold(gray, 0, 255,cv2.THRESH_BINARY | cv2.THRESH_OTSU)[1]if preprocess == "blur":gray = cv2.medianBlur(gray, 3)filename = "{}.png".format(os.getpid())
cv2.imwrite(filename, gray)text = pytesseract.image_to_string(Image.open(filename))
print(text)
os.remove(filename)cv2.imshow("Image", image)
cv2.imshow("Output", gray)
cv2.waitKey(0) 

及封裝dll實例)


和FixedUpdate())
)


