IOS8更新了,oc還將繼續但新增了swift語言,能夠代替oc編寫ios應用,本文將使用swift作為編寫語言,為大家提供step by step的教程。

是不是似曾相識,但組織上更像java和c#的邏輯,但別忘記骨子里還是object c。
默認的ViewController僅僅提供了兩個override的方法viewDidLoad和didReceiveMemoryWarning
添加完后,xcode會提示錯誤,當然不會像eclipse一樣自己主動幫你加入必須的方法和構造函數,須要自行加入。
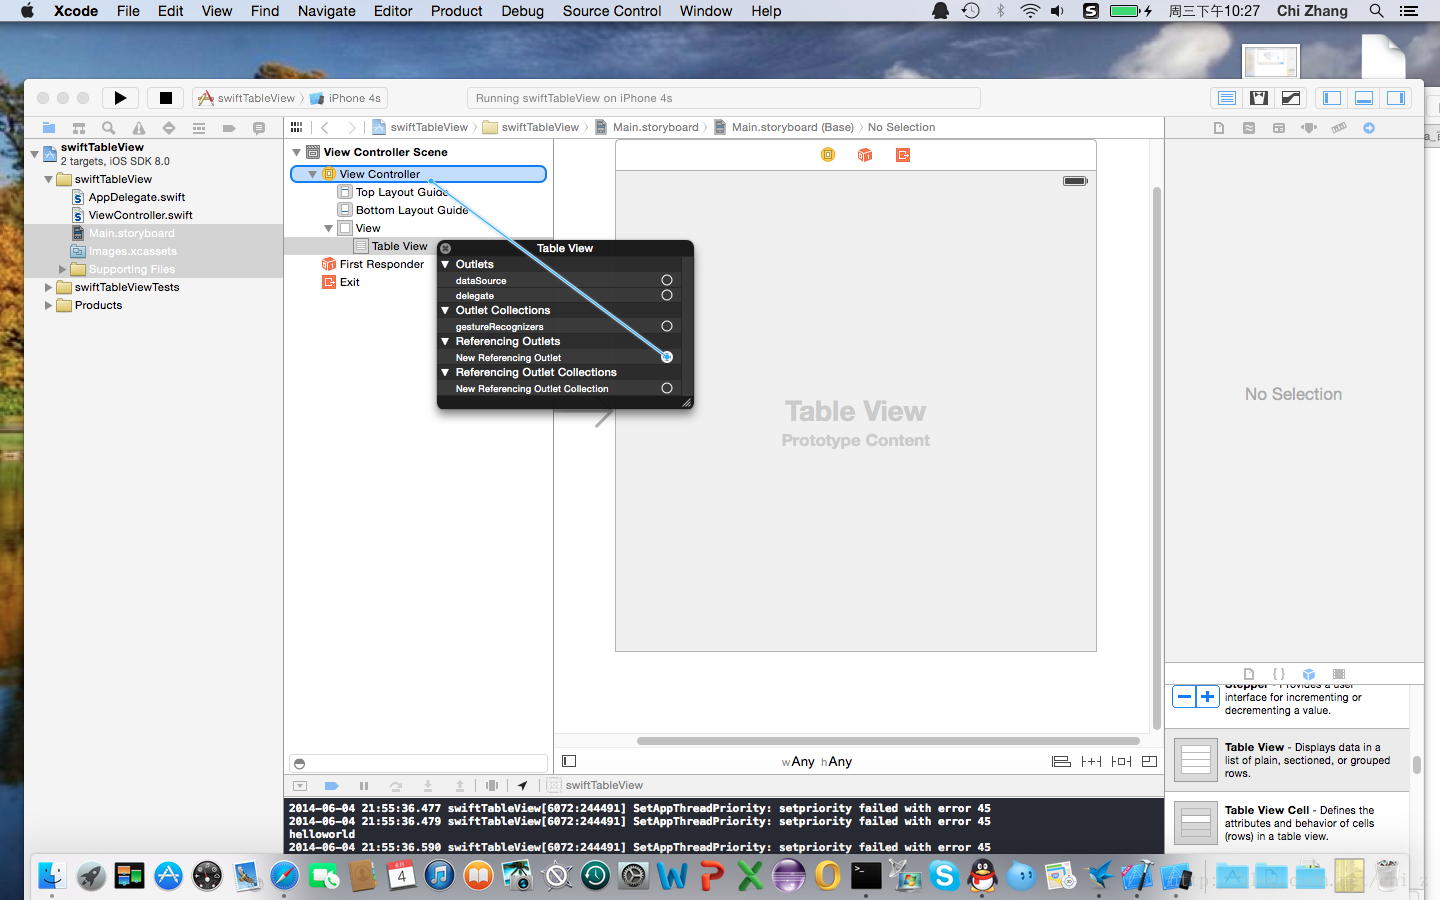
在ViewController中聲明變量tableView用來管理我們之前在Storyboard中加入的tableView。
好了,ViewController的部分基本上就寫完了。然后我們切換回StoryBoard,將Referencing Outlet與ViewController進行連接,選擇我們聲明的變量tableView。

好了,執行一下看看結果: 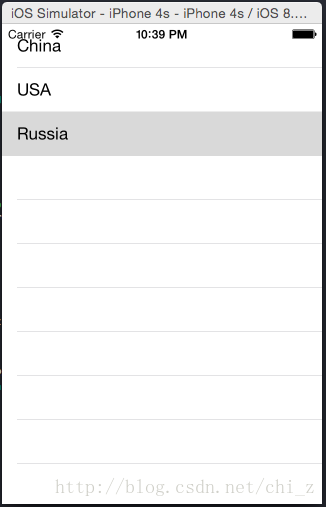
工具
ios每次更新都須要更新xcode,這次也不例外,但使用xcode6,須要先升級到OS X 到Yosemite。具體的升級過程這里就不說了。
須要網盤下載的同學能夠查看一下鏈接
http://bbs.pcbeta.com/viewthread-1516116-1-1.html
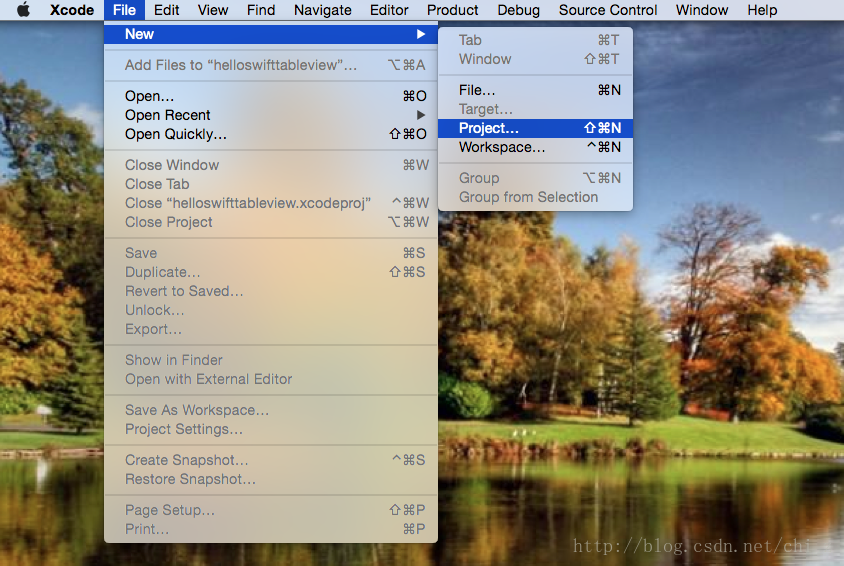
建立project
xocde開啟后選擇File->New->Project 建立新的project
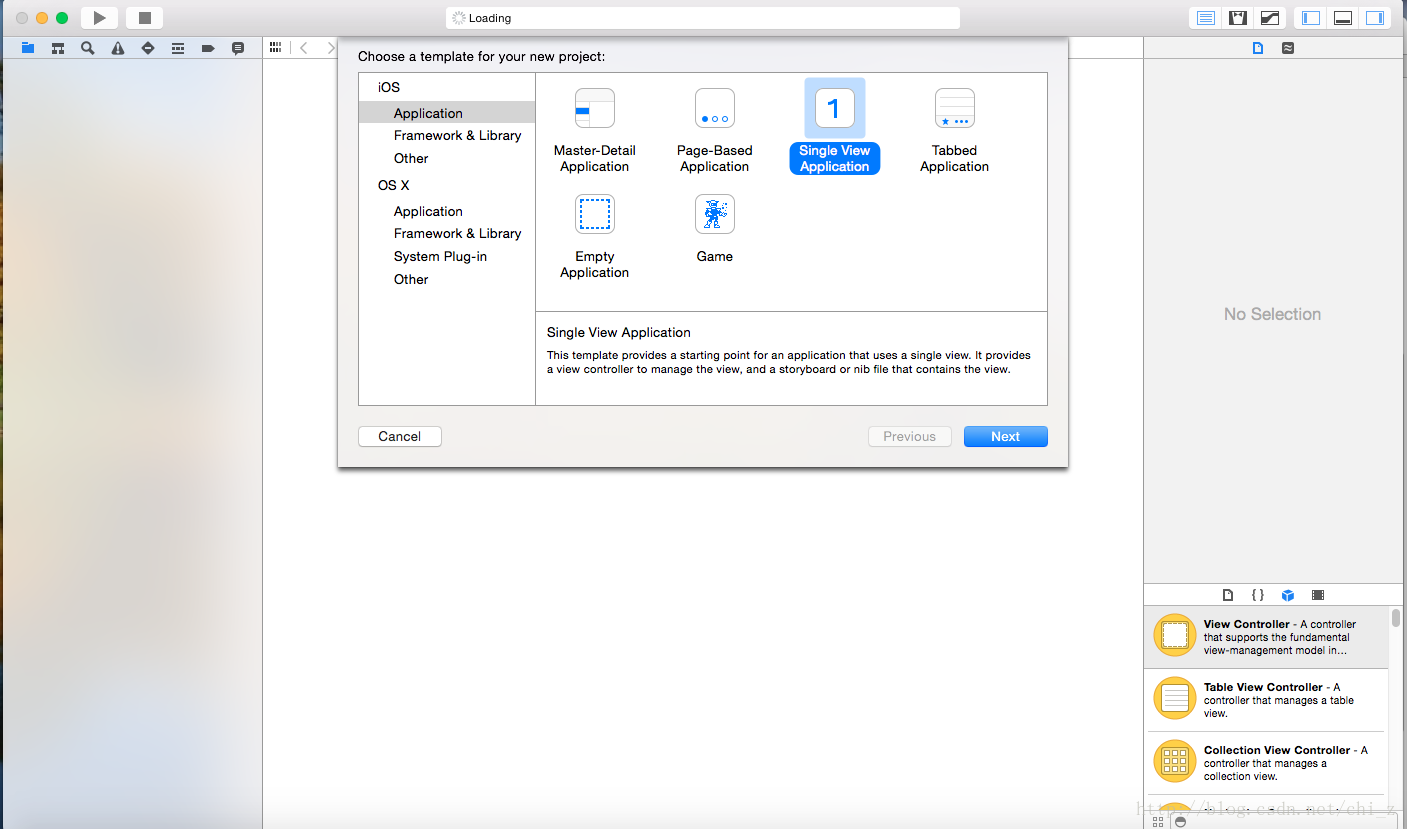
新手教程自然選擇Single View Application
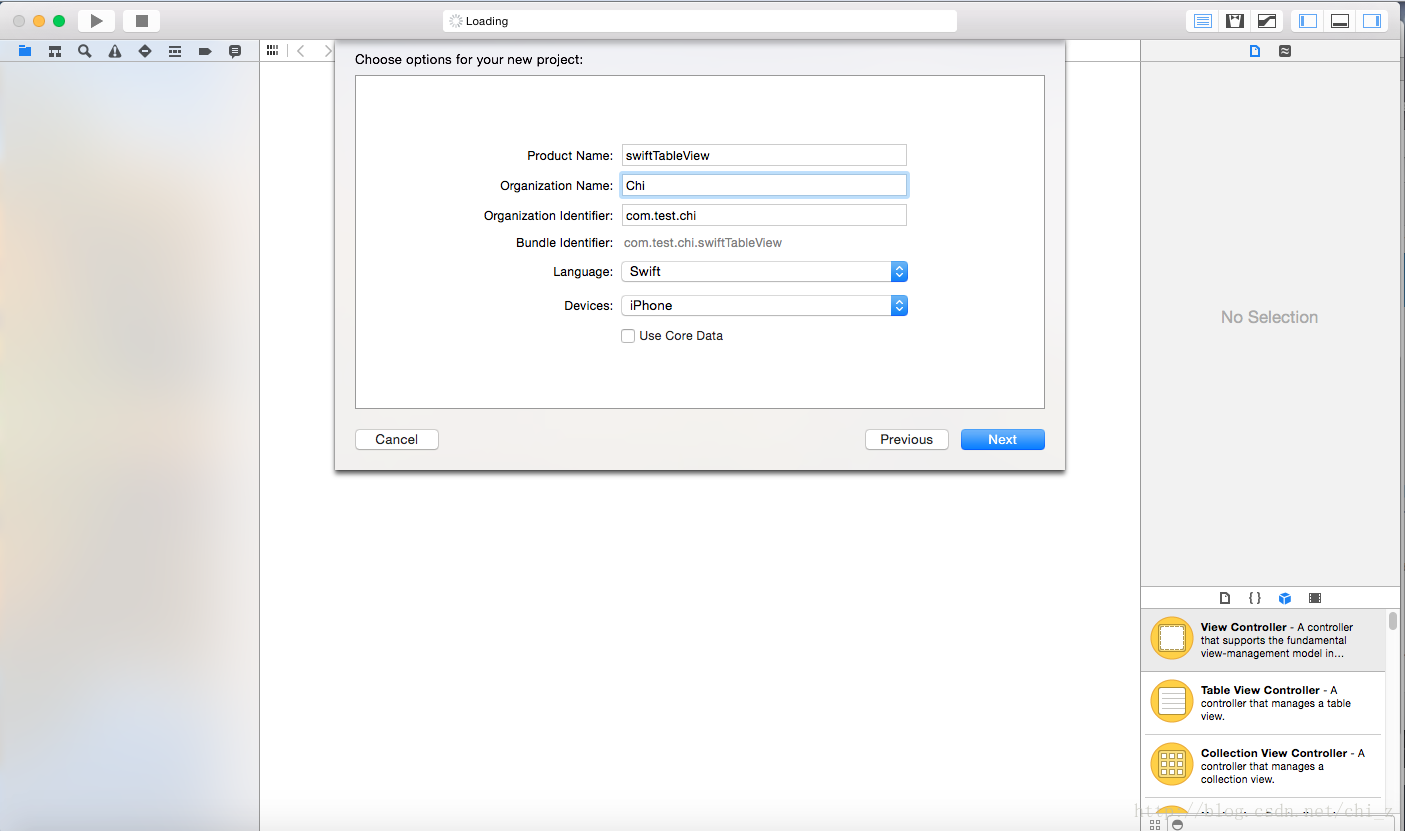
Language 自然選擇 Swift
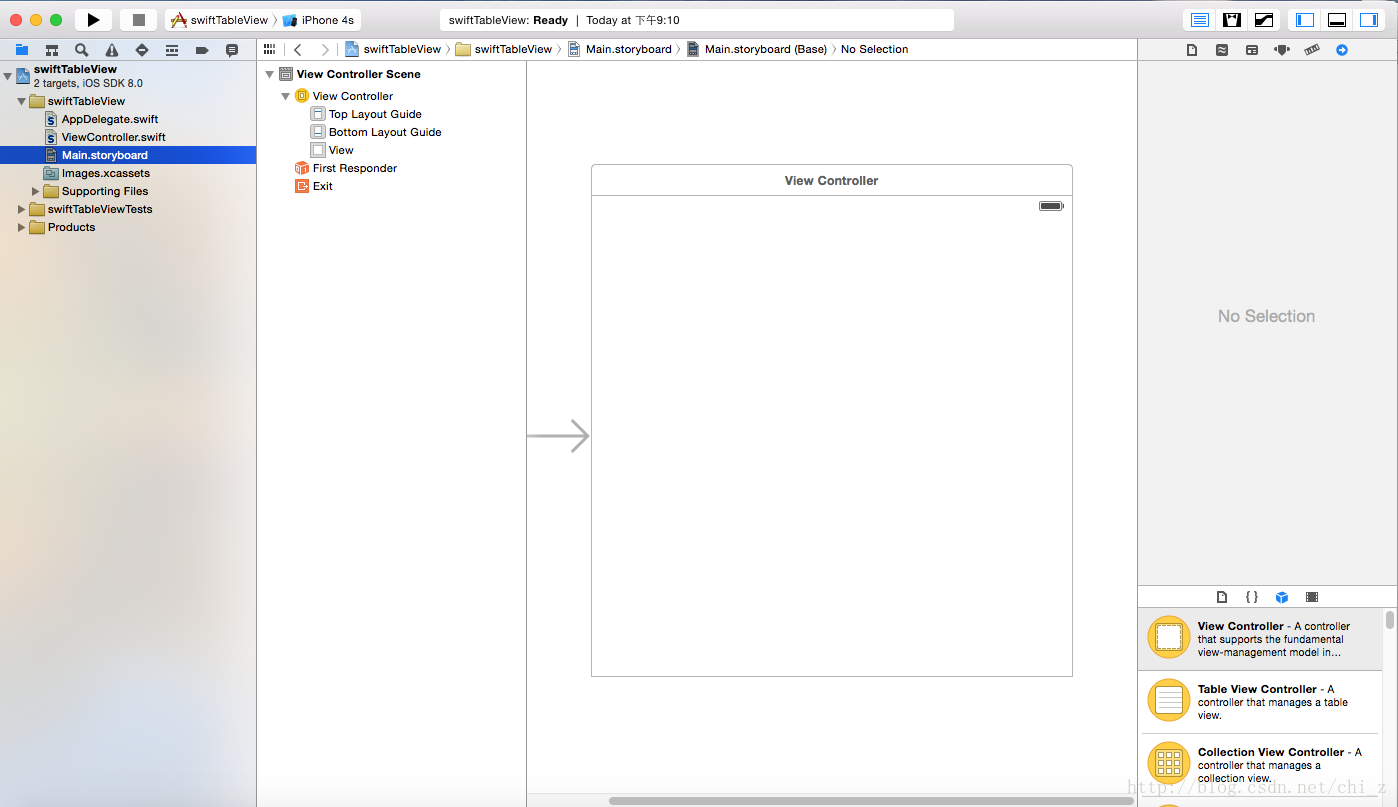
建立好的project例如以下圖所看到的:
Work With StoryBoard
StoryBoard是IOS5和xcode 4.2開始的新特性,使用storyboard會節省手機app設計的時間,將視圖設計最大化,當然對于屌絲程序猿來說,什么board都無所謂。
箭頭表示初始view。右下角的object library還是我們最熟悉的拖拽操作。
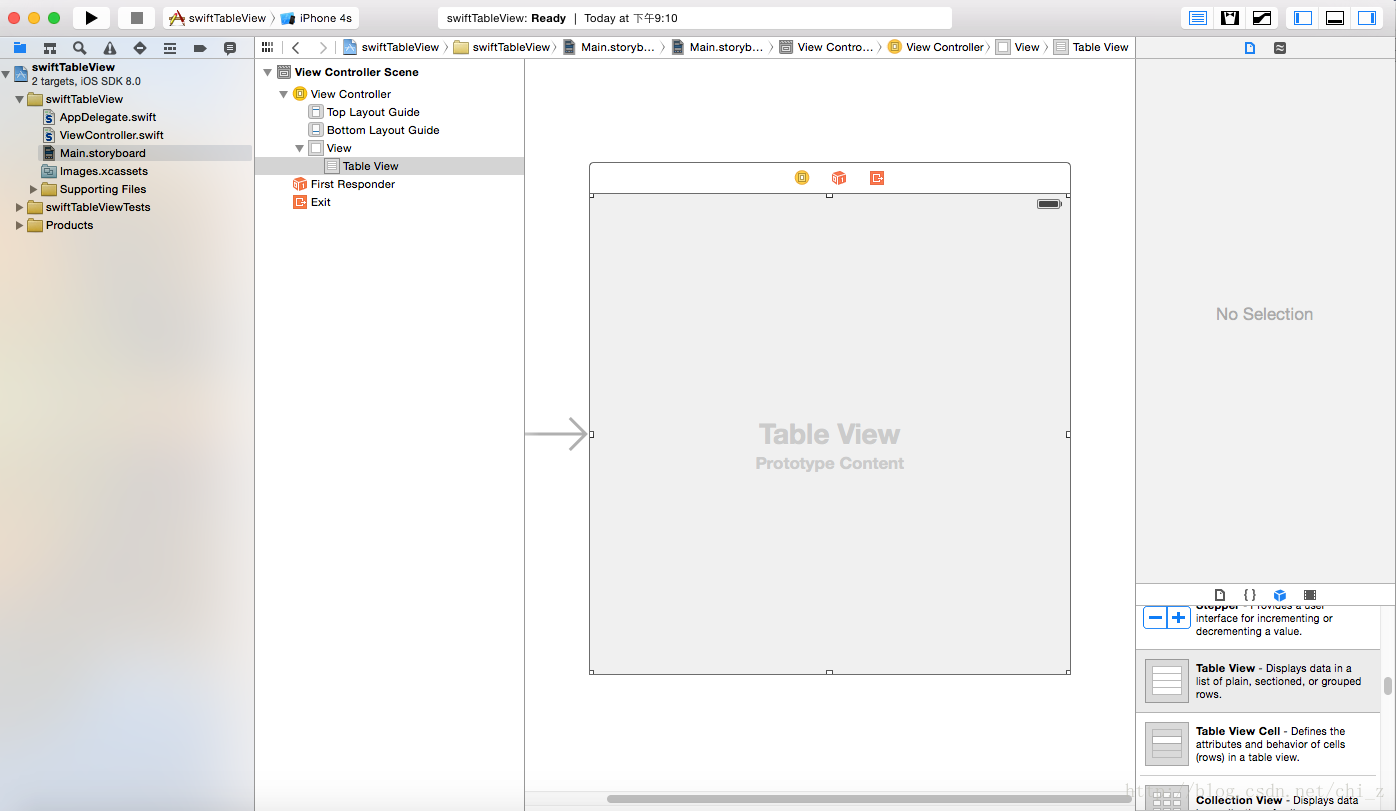
添加一個TableView到當前的ViewController。當然你也能夠直接使用TableViewController。ViewController基本上與Android的Activity相似,都是View的控制器,用來編寫View的邏輯。
好了,能夠Run一下看看效果。
Hello world swift
最終能夠開始swift之旅了,我們來看一下AppDelegate.swift文件。
//
//  AppDelegate.swift
//  swiftTableView
//
//  Created by Chi Zhang on 14/6/4.
//  Copyright (c) 2014年 Chi. All rights reserved.
//import UIKit@UIApplicationMain
class AppDelegate: UIResponder, UIApplicationDelegate {var window: UIWindow?func application(application: UIApplication, didFinishLaunchingWithOptions launchOptions: NSDictionary?) -> Bool {// Override point for customization after application launch.return true}func applicationWillResignActive(application: UIApplication) {// Sent when the application is about to move from active to inactive state. This can occur for certain types of temporary interruptions (such as an incoming phone call or SMS message) or when the user quits the application and it begins the transition to the background state.// Use this method to pause ongoing tasks, disable timers, and throttle down OpenGL ES frame rates. Games should use this method to pause the game.}func applicationDidEnterBackground(application: UIApplication) {// Use this method to release shared resources, save user data, invalidate timers, and store enough application state information to restore your application to its current state in case it is terminated later.// If your application supports background execution, this method is called instead of applicationWillTerminate: when the user quits.}func applicationWillEnterForeground(application: UIApplication) {// Called as part of the transition from the background to the inactive state; here you can undo many of the changes made on entering the background.}func applicationDidBecomeActive(application: UIApplication) {// Restart any tasks that were paused (or not yet started) while the application was inactive. If the application was previously in the background, optionally refresh the user interface.}func applicationWillTerminate(application: UIApplication) {// Called when the application is about to terminate. Save data if appropriate. See also applicationDidEnterBackground:.}}
是不是似曾相識,但組織上更像java和c#的邏輯,但別忘記骨子里還是object c。
打上一句hello world在application方法中。
println("helloworld")
能夠Run一下看看效果,Application方法基本上與Android中的Application類似,都是App在開始載入時最先被運行的。
Swift的語法相對object c更加簡潔,聲明函數使用func開頭,變量var開頭,常量let開頭,感覺上與javascript更加相似。
ViewController綁定TableView
最終到了本章最核心的內容了,怎樣綁定數據到TableView。
首先我們看ViewController的代碼:
//
//  ViewController.swift
//  swiftTableView
//
//  Created by Chi Zhang on 14/6/4.
//  Copyright (c) 2014年 Chi. All rights reserved.
//import UIKitclass ViewController: UIViewController {override func viewDidLoad() {super.viewDidLoad()// Do any additional setup after loading the view, typically from a nib.}override func didReceiveMemoryWarning() {super.didReceiveMemoryWarning()// Dispose of any resources that can be recreated.}}
我們須要讓ViewController繼承 UIViewController UITableViewDelegate UITableViewDataSource 三個類
class ViewController: UIViewController, UITableViewDelegate, UITableViewDataSource { ... }添加完后,xcode會提示錯誤,當然不會像eclipse一樣自己主動幫你加入必須的方法和構造函數,須要自行加入。
func tableView(tableView: UITableView!, numberOfRowsInSection section: Int) -> Int {...} func tableView(tableView: UITableView!, cellForRowAtIndexPath indexPath: NSIndexPath!) -> UITableViewCell! {...}在ViewController中聲明變量tableView用來管理我們之前在Storyboard中加入的tableView。
@IBOutlet
var tableView: UITableView在viewDidLoad時,在tableView變量中添加tableViewCell
self.tableView.registerClass(UITableViewCell.self, forCellReuseIdentifier: "cell")聲明一個String數組作為我們要綁定的數據
var items: String[] = ["China", "USA", "Russia"]
在剛才聲明的兩個構造函數中填充邏輯。
func tableView(tableView: UITableView!, numberOfRowsInSection section: Int) -> Int {return self.items.count;}func tableView(tableView: UITableView!, cellForRowAtIndexPath indexPath: NSIndexPath!) -> UITableViewCell! {var cell:UITableViewCell = self.tableView.dequeueReusableCellWithIdentifier("cell") as UITableViewCellcell.textLabel.text = self.items[indexPath.row]return cell}
好了,ViewController的部分基本上就寫完了。然后我們切換回StoryBoard,將Referencing Outlet與ViewController進行連接,選擇我們聲明的變量tableView。
同一時候連接Outlets中的datasource和deletegate到ViewController。
以下是完整的ViewController代碼:
//
//  ViewController.swift
//  swiftTableView
//
//  Created by Chi Zhang on 14/6/4.
//  Copyright (c) 2014年 Chi. All rights reserved.
//import UIKitclass ViewController: UIViewController, UITableViewDelegate, UITableViewDataSource  {@IBOutletvar tableView: UITableViewvar items: String[] = ["China", "USA", "Russia"]override func viewDidLoad() {super.viewDidLoad()// Do any additional setup after loading the view, typically from a nib.self.tableView.registerClass(UITableViewCell.self, forCellReuseIdentifier: "cell")}override func didReceiveMemoryWarning() {super.didReceiveMemoryWarning()// Dispose of any resources that can be recreated.}func tableView(tableView: UITableView!, numberOfRowsInSection section: Int) -> Int {return self.items.count;}func tableView(tableView: UITableView!, cellForRowAtIndexPath indexPath: NSIndexPath!) -> UITableViewCell! {var cell:UITableViewCell = self.tableView.dequeueReusableCellWithIdentifier("cell") as UITableViewCellcell.textLabel.text = self.items[indexPath.row]return cell}
}
好了,執行一下看看結果:
大功告成。當然我們還能夠在ViewController中添加onCellClick的方法:
func tableView(tableView: UITableView!, didSelectRowAtIndexPath indexPath: NSIndexPath!) {println("You selected cell #\(indexPath.row)!")}完整代碼

 - BeanShell取樣器(一))


 - BeanShell取樣器(二))


)

)

—— 我們的測試為什么不夠敏捷?)
