
office數據集dslr

You’ve got a great digital camera. You’ve got all your social media apps on your phone. Wouldn’t it be nice if you could snap a beautiful shot with your DSLR and shuttle it right over to your phone to throw up on Facebook or Instagram? With an inexpensive upgrade, any camera can become a Wi-Fi enabled one.
您有一臺出色的數碼相機。 您的手機上已經安裝了所有社交媒體應用程序。 如果您可以用DSLR拍出漂亮的照片并將其直接穿梭到手機上,然后扔到Facebook或Instagram上,那不是很好嗎? 通過廉價的升級,任何相機都可以成為支持Wi-Fi的相機。
One of the handiest features you’ll find on newer digital cameras is built-in Wi-Fi connectivity that allows you to transfer files to a computer on your local network or to a nearby smartphone via an ad-hoc Wi-Fi network. If you have an older camera (or newer one that simply didn’t ship with the feature), don’t worry—you aren’t out in the cold. A Wi-Fi SD card can add Wi-Fi connectivity to any camera you have, as long as it has an SD card slot.
內置的Wi-Fi連接是您在較新的數碼相機上發現的最方便的功能之一,它使您可以通過臨時Wi-Fi網絡將文件傳輸到本地網絡上的計算機或附近的智能手機。 如果您有舊相機(或新相機,但該相機沒有附帶該功能),請不要擔心-您不會感到冷漠。 只要有SD卡插槽,Wi-Fi SD卡就可以為您擁有的任何相機添加Wi-Fi連接。
UPDATE: Keenai, the company behind the Eye-Fi product we recommend in this article, announced on September 4, 2018, that they are shutting down. Eye-Fi cards should continue to function in stand-alone mode (which means no cloud syncing) as long as the apps are available in the app store. There will be no future updates to their apps. The Keenai service used for storing your data in the cloud will shut down on November 30, 2018. After December 1, 2018, you will no longer be able to access your data. Keenai’s website has instructions on how to retrieve your data from the service.
更新:我們在本文中推薦的Eye-Fi產品背后的公司Keenai于2018年9月4日宣布,他們將關閉。 只要應用商店中有可用的應用程序,Eye-Fi卡就應繼續在獨立模式下運行(這意味著沒有云同步)。 他們的應用程序將來將不會更新。 用于在云中存儲數據的Keenai服務將于2018年11月30日關閉。2018年12月1日之后,您將不再能夠訪問數據。 Keenai的網站上有關于如何從服務中檢索數據的說明。
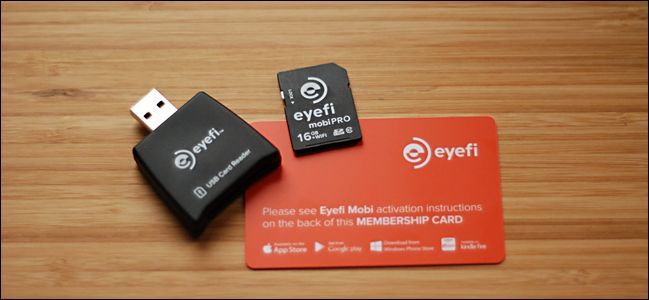
We discussed this at length in?our tutorial on wirelessly transferring photos to your local computer from your camera, and many of the same things apply here. Instead of re-hashing our selection process, we’ll just say that we recommend the?Eye-Fi Mobi Pro ($50). You can check out our previous article if you want more info on the different Wi-Fi SD cards out there and how they work.
我們在關于將照片從相機無線傳輸到本地計算機的教程中詳細討論了這一點,這里有許多相同的內容。 與其重新討論選擇過程,不如說是推薦使用Eye-Fi Mobi Pro (50美元)。 如果您想了解有關不同Wi-Fi SD卡及其工作方式的更多信息,請查閱我們的上一篇文章。
使用手機設置Mobi Pro (Setting Up the Mobi Pro with Your Phone)
Grab your mobile device and download the appropriate software for it by either following one of these links for iOS, Android, or Windows Phone, or searching for it in your device’s app store under “Keenai”. Why Keenai? The Eye-Fi company was purchased a few years back, and the software (but not the card itself) has new branding as a result.
遵循以下iOS , Android或Windows Phone鏈接之一,或在設備的應用商店“ Keenai”下進行搜索,以獲取您的移動設備并下載適用的軟件。 為什么選擇基奈? Eye-Fi公司是幾年前購買的,因此該軟件(但不是卡本身)具有新的品牌。
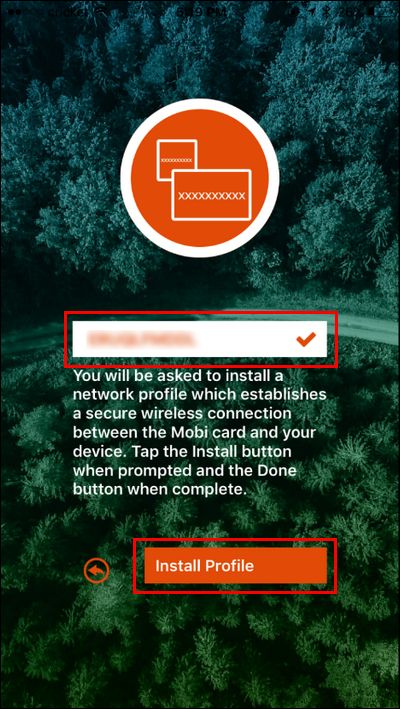
Run the application and then plug in the registration code from the physical card that came with the packaging of your Eye-Fi. Once you’ve entered it, click “Install Profile”. (The “Install Profile” will only appear for iOS users; everyone else can skip to the next step.)
運行該應用程序,然后從Eye-Fi包裝隨附的物理卡中插入注冊碼。 輸入后,單擊“安裝配置文件”。 (“安裝配置文件”僅對iOS用戶顯示;其他所有人都可以跳到下一步。)
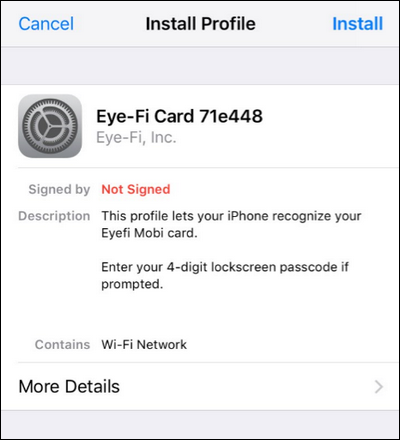
Click “Install” on the profile page that pops up. If it prompts you for a passcode, enter the passcode you use to unlock your device to confirm you wish to install the profile.
在彈出的配置文件頁面上單擊“安裝”。 如果提示您輸入密碼,請輸入用于解鎖設備的密碼以確認您要安裝配置文件。
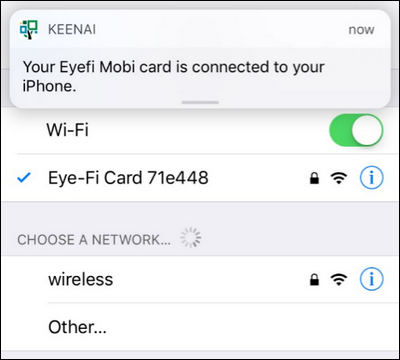
You’ll be returned to the Keenai application where it will instruction you to pop the Eye-Fi card into your camera and turn it on. Do so now. Take a few pictures to power the card and activate the Wi-Fi radio. Then open up the Wi-Fi settings on your phone or tablet. There, look for a new Wi-Fi network with a name that starts with “Eye-Fi”. Select it. You shouldn’t ?be asked for a password but if you are, the password is always the registration code off the card that came with your Eye-Fi card.
您將返回到Keenai應用程序,該應用程序將指示您將Eye-Fi卡彈出到相機中并打開。 現在就這樣做。 拍攝幾張照片以為插卡供電并激活Wi-Fi無線電。 然后在手機或平板電腦上打開Wi-Fi設置。 在此處尋找名稱以“ Eye-Fi”開頭的新Wi-Fi網絡。 選擇它。 不需要輸入密碼,但是如果您輸入密碼,則該密碼始終是Eye-Fi卡隨附卡的注冊碼。
Now that you’ve established a direct connection between the Eye-Fi card in your camera and your mobile device, transferring photos is as simple as taking the photos while connected to the card and then looking in the Keenai app.
現在,您已經在相機中的Eye-Fi卡和移動設備之間建立了直接連接,傳輸照片就像將照片連接到卡上然后在Keenai應用中查看一樣簡單。
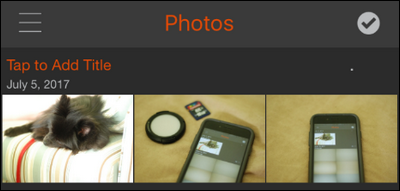
In the screenshot above, you can see the three photos we took after completing the setup process: a photo of our dog and two photos of the iPhone accepting the transfer of of the first photo. We’re in business! We now have wireless transfer on the go so we never have to stop and dump our photos to our laptop just to get them on social media.
在上面的屏幕截圖中,您可以看到我們在完成設置過程后拍攝的三張照片:一張我們的狗的照片和兩張接受第一張照片轉移的iPhone的照片。 我們在做生意! 現在,我們可以隨時隨地進行無線傳輸,因此我們不必為了讓照片出現在社交媒體上而停下來將照片丟到筆記本電腦中。
啟用選擇性轉移 (Enabling Selective Transfer)
We highly recommend you enable selective transfer. Without it, your Eye-Fi card will just chug along in the background, attempting to transfer as many photos as it can from your camera to your mobile device. If the goal of using the card is to do just that (transferring every single photo so you can, say, back them up using Google Photos or iCloud) then that’s fine—but it’s time consuming and chews up your camera’s battery.
我們強烈建議您啟用選擇性轉移。 如果沒有它,您的Eye-Fi卡將僅在后臺跳動,嘗試將盡可能多的照片從相機傳輸到移動設備。 如果使用存儲卡的目的只是做到這一點(傳輸每張照片,以便可以使用Google Photos或iCloud備份它們),那很好-但是這很費時間,并且會消耗相機的電池電量。
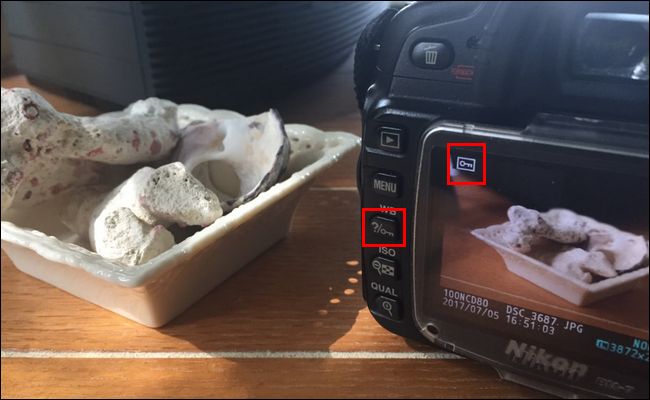
Most people don’t want to transfer every single photo, especially if they just ripped through dozens of shots using burst mode. Instead, it’s more practical to simply transfer the individual photos you want to edit and share. The Eye-Fi includes a neat way of managing this selective transfer that works across different camera platforms. Once enabled, any time you “protect” a photo against deletion on your SD card, the Eye-Fi software on the card itself notes that the protection flag has been set and initiates the transfer. While the protection process varies from camera to camera, most cameras have some sort of clearly labeled button or button combination that triggers it, as seen below.
大多數人都不想傳輸每張照片,特別是如果他們只是使用連拍模式翻錄了數十張照片時。 相反,簡單地傳輸要編輯和共享的單張照片更實用。 Eye-Fi包含一種管理跨不同相機平臺工作的選擇性傳輸的巧妙方法。 啟用后,每當您“保護”照片以防止SD卡上的照片被刪除時,卡本身的Eye-Fi軟件都會注意到已設置了保護標志并啟動了傳輸。 雖然保護過程因攝像機而異,但大多數攝像機都有某種標記清晰的按鈕或觸發它的按鈕組合,如下所示。
Unfortunately (and we consider this a gross oversight on the part of the Eye-Fi company), you can’t toggle on the selective upload function of the Eye-Fi Mobi Pro using the mobile application—you?must use the desktop application. On the upside, however,?it’s trivial to change the setting.
不幸的是(我們認為這是Eye-Fi公司的全面監督),您無法使用移動應用程序啟用Eye-Fi Mobi Pro的選擇性上傳功能-您必須使用桌面應用程序。 從好的方面來說,更改設置很簡單。
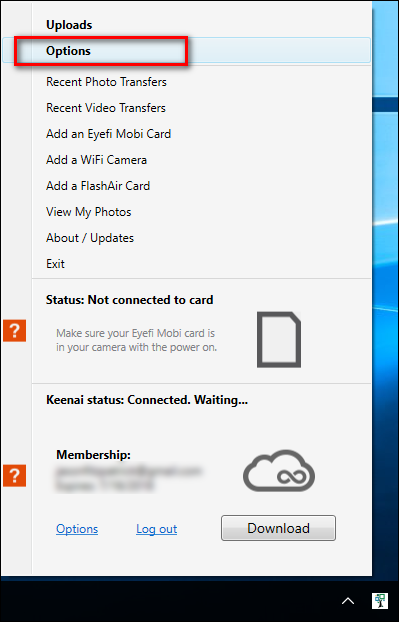
To do so,?download the Eye-Fi card management software. Like the mobile software, the desktop software is also branded “Keenai”. Install the software and run it. It will launch a startup wizard intended to guide you through both registering for the Keenai cloud photo storage and linking the Eye-Fi card to the software so you can modify the settings. If you wish, you can go through the whole setup wizard (the biggest perk for doing so is to activate the free online photo storage trial that comes with the Eye-Fi card), but the fastest way to toggle the selective backup on is to simply cancel out of the all the steps of the wizard, stick your SD card in an SD card reader attached to the computer, and then right click on the Keenai software in your PC’s system tray. There, select “Options”.
為此,請下載Eye-Fi卡管理軟件。 與移動軟件一樣,桌面軟件也被冠以“ Keenai”的商標。 安裝軟件并運行。 它將啟動一個啟動向導,以指導您完成注冊Keenai云照片存儲以及將Eye-Fi卡鏈接到軟件的過程,以便您可以修改設置。 如果愿意,您可以通過整個設置向導(這樣做的最大好處就是激活Eye-Fi卡隨附的免費在線照片存儲試用),但是啟用選擇性備份的最快方法是:只需取消向導的所有步驟,將SD卡插入連接到計算機的SD卡讀取器中,然后右鍵單擊PC系統托盤中的Keenai軟件。 在那里,選擇“選項”。
In the resulting Options menu, look for the “Activate” button in the lower corner. Click it.
在出現的“選項”菜單中,在右下角找到“激活”按鈕。 點擊它。
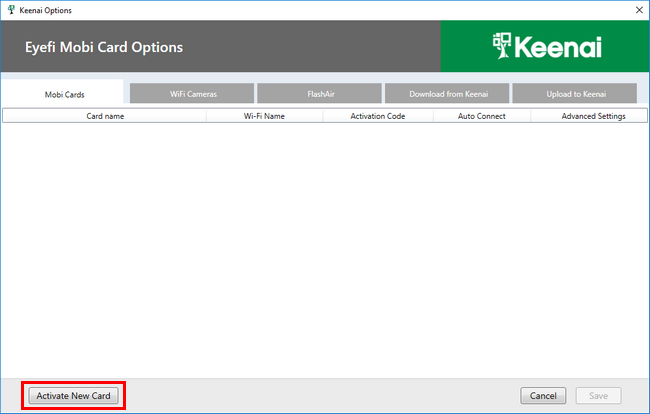
Because your Eye-Fi card is currently mounted on your PC via the card reader, it will read the activation number directly off the SD card.
由于您的Eye-Fi卡當前是通過讀卡器安裝在PC上的,因此它將直接從SD卡上讀取激活碼。
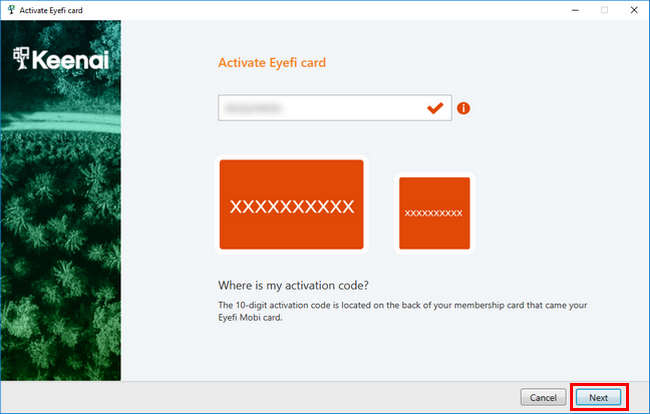
Confirm the code in the slot matches the card that came with your Eye-Fi, and click “Next”. At this point you can close the wizard. It will want you to continue the process of setting up the card for use in a camera-to-computer wireless workflow, but we’re not interested in that: all we wanted was to get the card in the Keenai software so we can toggle some settings.
確認插槽中的代碼與Eye-Fi隨附的卡匹配,然后單擊“下一步”。 此時,您可以關閉向導。 它會希望您繼續設置卡以用于相機到計算機的無線工作流程中,但是我們對此并不感興趣:我們所要做的只是在Keenai軟件中獲取卡,以便我們可以切換一些設置。
After closing the wizard, open up the “Options” menu again. You’ll see your Eye-Fi card listed. Click on the arrow under the “Advanced” column and then activate the toggle for “Selective Transfer”. (You can also active “Wireless RAW transfer” if you wish and have a use for RAW file transfer in your mobile workflow). Don’t change any other advanced settings. Click “Save” at the bottom of the Settings window.
關閉向導后,再次打開“選項”菜單。 您會看到列出了Eye-Fi卡。 單擊“高級”列下的箭頭,然后激活“選擇性傳輸”的切換。 (如果愿意,還可以激活“無線RAW傳輸”,并在移動工作流程中用于RAW文件傳輸)。 不要更改任何其他高級設置。 單擊“設置”窗口底部的“保存”。

Eject the card from your computer and put it back into your camera. Now anytime you’re snapping away and want to send some of your shots over to your mobile device, you can do so simply by flagging them, as mentioned above, with your camera’s image “protect” feature. Only the flagged images will transfer over to your device.
從計算機中彈出存儲卡,然后將其放回相機。 現在,無論何時要拍攝并想將一些鏡頭發送到移動設備上,您都可以通過如上所述使用相機的圖像“保護”功能對其進行標記來簡單地做到這一點。 只有被標記的圖像才會轉移到您的設備上。
With a little outlay of time and money upfront you can easily convert your “dumb” camera to a smart one and enjoy all the convenience of computing on the go (like easy uploads to social media right from your phone) with the superior photos only a dedicated camera can provide.
只需花費很少的時間和金錢,您就可以輕松地將“傻瓜”相機轉換為智能相機,并在旅途中享受所有計算的便利(例如直接從手機輕松上傳到社交媒體),而僅使用優質照片即可。可以提供專用相機。
翻譯自: https://www.howtogeek.com/311107/how-to-wirelessly-transfer-photos-from-your-dslr-to-your-smartphone/
office數據集dslr


)


![8-[多線程] 進程池線程池](http://pic.xiahunao.cn/8-[多線程] 進程池線程池)
