
文件下載至storage

Storage Sense is the Disk Cleanup replacement for the modern world. It frees up space on your computer by deleting things like recycle bin contents, temporary internet files, and app temporary files. This also includes the Downloads folder, but you can change that if you don’t want Storage Sense emptying it.
Storage Sense是現代磁盤清理的替代品。 通過刪除回收站內容,Internet臨時文件和應用程序臨時文件之類的內容,它可以釋放計算機上的空間。 這也包括Downloads文件夾,但是如果您不希望Storage Sense清空它,則可以更改它。
We’ve mentioned before how the Free Up Space tool in Windows 10 will delete your downloads by default (though you can turn it off, too). Storage Sense is the automatic equivalent to that tool and is the intended replacement for the venerable Disk Cleanup tool. By default, Storage Sense treats your Downloads folder as a temp folder, deleting anything older than 30 days when it runs. If you use your?Downloads as a more permanent storage area for downloads, you can prevent Storage Sense from deleting your downloads.
前面我們已經提到過Windows 10中的“釋放空間”工具將如何默認刪除您的下載內容(盡管您也可以將其關閉)。 Storage Sense是該工具的自動等同工具,并且是預期的磁盤清理工具的預期替代品。 默認情況下,Storage Sense會將您的Downloads文件夾視為臨時文件夾,并在運行30天之前刪除所有早于該日期的文件。 如果將“下載內容”用作更永久的下載存儲區,則可以防止Storage Sense刪除下載內容。
如何防止Storage Sense刪除下載的文件 (How to Prevent Storage Sense From Deleting Your Downloaded Files)
Open the Settings app by pressing Win+I, then clicking on “System.”
通過按Win + I,然后單擊“系統”來打開“設置”應用程序。

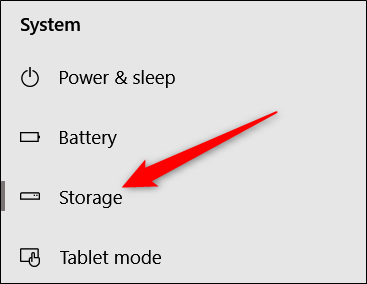
On the left side of the System page, click the “Storage” category.
在系統頁面的左側,單擊“存儲”類別。
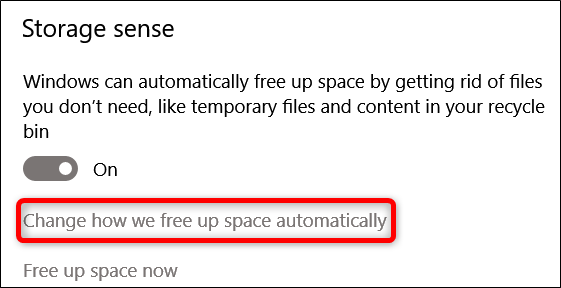
Under the “Storage Sense” section on the right, click the “Change how we free up space automatically” link.
在右側的“ Storage Sense”部分下,單擊“更改我們如何自動釋放空間”鏈接。
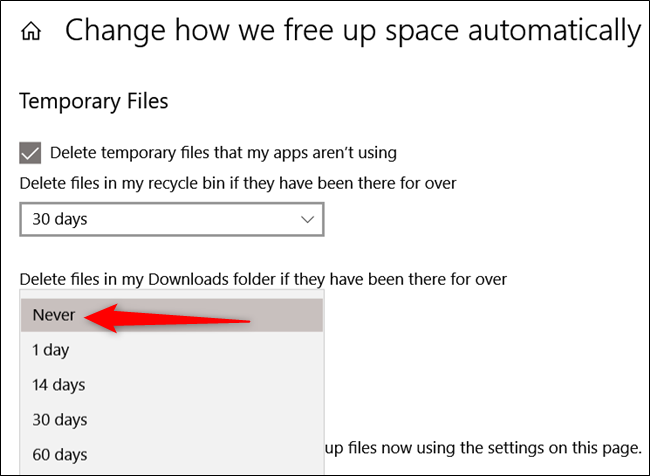
Now, open the “Delete files in my Downloads folder” drop-down menu and select the “Never” option.
現在,打開“刪除我的下載文件夾中的文件”下拉菜單,然后選擇“從不”選項。
After you’ve completed this, Smart Sense continues to run periodically but leaves your precious downloads alone.
完成此操作后,Smart Sense會繼續定期運行,但您的寶貴下載將獨自保留。
翻譯自: https://www.howtogeek.com/403009/how-to-prevent-storage-sense-from-deleting-your-downloaded-files-on-windows-10/
文件下載至storage
)


)
)
試題及答案(標有頁碼)...)