上一篇文章我們使用Teams Toolkit 來創建、運行 tab app。這篇文章我們深入來分析看一下tab app 的代碼。
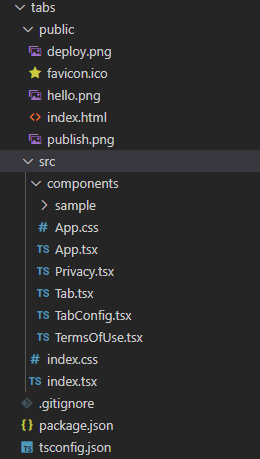
先打開代碼目錄,可以看到在 src 目錄下有入口文件?index.tsx,然后在?components?目錄下有更多的一些 tsx 文件,tsx 是 typescript的一種擴展文件,主要用于 react 開發。
我們打開?index.tsx,看一下代碼。
import React from "react";
import ReactDOM from "react-dom";
import App from "./components/App";
import "./index.css";ReactDOM.render(<App />, document.getElementById("root"));
可以看到代碼極其簡單明了,就是一個?<App>,那我們就打開?App.tsx?看看。
import { Provider, teamsTheme } from "@fluentui/react-northstar";
import Privacy from "./Privacy";
import TermsOfUse from "./TermsOfUse";
import Tab from "./Tab";
import TabConfig from "./TabConfig";
import { useTeams } from "msteams-react-base-component";.........export default function App() {const { theme } = useTeams({})[0];return (<Provider theme={theme || teamsTheme} styles=><Router><Route exact path="/"><Redirect to="/tab" /></Route><><Route exact path="/privacy" component={Privacy} /><Route exact path="/termsofuse" component={TermsOfUse} /><Route exact path="/tab" component={Tab} /><Route exact path="/config" component={TabConfig} /></></Router></Provider>);
}
App.tsx?也算簡單,有幾個地方需要我們注意的,第一個就是調用了?useTeams()?方法來獲取當前的 teams 的theme,teams實際上有幾個不同的theme,調用 “msteams-react-base-component” 的?useTeams()?就能夠拿到當前的 theme,然后把 theme 設置給了 Provider,在 Router方面則一看就明白,配置了一些路徑和對應的 component。
這些路徑實際上在 manifest.json 里有用到。我們打開?/build/appPackage/manifest.local.json?文件,我們可以看到:
{..."developer": {"name": "Teams App, Inc.","websiteUrl": "https://localhost:53000","privacyUrl": "https://localhost:53000/index.html#/privacy","termsOfUseUrl": "https://localhost:53000/index.html#/termsofuse"},"configurableTabs": [{"configurationUrl": "https://localhost:53000/index.html#/config","canUpdateConfiguration": true,"scopes": ["team","groupchat"]}],"staticTabs": [{"entityId": "index","name": "Personal Tab","contentUrl": "https://localhost:53000/index.html#/tab","websiteUrl": "https://localhost:53000/index.html#/tab","scopes": ["personal"]}],....
}
Privacy.tsx?和?TermsOfUse.tsx?非常簡單,我們不在展開,我們先來看一下?TabConfig.tsx。簡化后的內容如下:
import { app, pages } from "@microsoft/teams-js";class TabConfig extends React.Component {render() {app.initialize().then(() => {pages.config.registerOnSaveHandler((saveEvent) => {const baseUrl = `https://${window.location.hostname}:${window.location.port}`;pages.config.setConfig({suggestedDisplayName: "My Tab",entityId: "Test",contentUrl: baseUrl + "/index.html#/tab",websiteUrl: baseUrl + "/index.html#/tab",}).then(() => {saveEvent.notifySuccess();});});pages.config.setValidityState(true);});return (<div>...</div>);}
}
這個基本是 tab 配置頁面的標準寫法,調用?app.initialize()?方法,然后注冊一個 “Save” buttton 的回調函數,在這個回調函數里,調用?pages.config.setConfig()?函數來告訴 Teams,我們新建的tab的配置,新建的tab 的url是什么。
注冊完后,調用了?pages.config.setValidityState(true);?來告訴 Teams,我們的 config 頁面已經配置好了,可以讓用戶來點擊 Save 按鈕了。這里面有點繞,但如果各位仔細看上面的代碼,也不難理解。
我們再來整理一下這個流程:
app.initialize().then(() => {pages.config.registerOnSaveHandler((saveEvent) => { // 注冊回調函數,當用戶點擊 Save 按鈕時,這個方法會被觸發const baseUrl = `https://${window.location.hostname}:${window.location.port}`;pages.config.setConfig({ // 告訴 Teams 新建的 tab 的具體情況,比如tab 名字和 urlsuggestedDisplayName: "My Tab",entityId: "Test",contentUrl: baseUrl + "/index.html#/tab",websiteUrl: baseUrl + "/index.html#/tab",}).then(() => {saveEvent.notifySuccess(); // 告訴 Teams,Save點擊事件處理完畢});});pages.config.setValidityState(true); // 告訴 Teams可以允許用戶點擊 Save 按鈕});return (<div>...</div> // 返回 config 頁面的 html 內容);
*/index.html#/tab?對應到的是 Tab component,對于 Tab 具體頁面里基本都是React的一些寫法,我這里就不再展開講 React 開發了,值得一提的是,我們應該盡量使用?fluentui?和?msteams-react-base-component?庫,讓使用 React 開發teams tab更加方便,并且風格和teams更加一致。
?
)


qbxt2019.05 總結2 - 數位DP)


路徑(面包屑導航)分頁標簽和徽章組件)


之 Requests庫的基本使用)
