大家好,我是若川。持續組織了8個月源碼共讀活動,感興趣的可以?點此加我微信ruochuan12?參與,每周大家一起學習200行左右的源碼,共同進步。同時極力推薦訂閱我寫的《學習源碼整體架構系列》?包含20余篇源碼文章。歷史面試系列。另外:目前建有江西|湖南|湖北籍前端群,可加我微信進群。
本文是 @NewName 小伙伴參加源碼共讀活動第30期(@tarojs/plugin-mini-ci 小程序上傳代碼 ci)的投稿。
原文鏈接:https://juejin.cn/post/7089819849257385997
此人非同尋常,我發布了多少期源碼共讀、他就基本寫了多少期文章。
Part1學習準備工作
閱讀相關學習資料:
微信小程序CI?:https://developers.weixin.qq.com/miniprogram/dev/devtools/ci.html
taro?CI:?https://link.juejin.cn/?target=https%3A%2F%2Ftaro-docs.jd.com%2Ftaro%2Fdocs%2Fnext%2Fplugin-mini-ci%2F
coding自動構建微信小程序:https://help.coding.net/docs/ci/practice/quick/wechat-mini-program.html
小打卡小程序自動化構建:https://www.yuque.com/jinxuanzheng/gvhmm5/uy4qu9#mmmx7
clone源碼:源碼路徑如下:
https://github.com/NervJS/taro/tree/next/packages/taro-plugin-mini-ci我是把taro整個clone下來的。
Part2源碼學習
1小程序CI的整體流程
首先看index.js:
module.exports?=?require('./dist/index.js').default
module.exports.default?=?module.exports
含義是引入dist文件夾下的index.js文件, 但是剛克隆下來的代碼中并沒有dist文件夾。很容易想到dist文件夾是打包后產生的,所以執行命令:
npm?i
npm?run?build
注意是在taro/packages/taro-plugin-mini-ci目錄下執行 install和build命令: build之后可以看到有了dist文件夾:
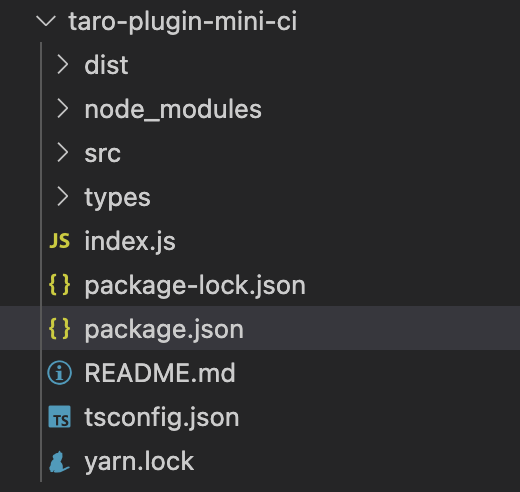 對應目錄下也生成了index.js文件,生成的js文件和原來的ts文件也沒差太多,再加上最近再自學ts,就看index.ts吧(代碼有刪減):
import?{?IPluginContext?}?from?'@tarojs/service'
import?*?as?minimist?from?'minimist'
import?{?CIOptions?}?from?'./BaseCi'
import?WeappCI?from?'./WeappCI'
import?TTCI?from?'./TTCI'
import?AlipayCI?from?'./AlipayCI'
import?SwanCI?from?'./SwanCI'export?{?CIOptions?}?from?'./BaseCi'
export?default?(ctx:?IPluginContext,?pluginOpts:?CIOptions)?=>?{const?onBuildDone?=?ctx.onBuildComplete?||?ctx.onBuildFinishctx.addPluginOptsSchema((joi)?=>?{return?joi.object().keys({/**?微信小程序上傳配置?*/weapp:?joi.object({appid:?joi.string().required(),projectPath:?joi.string(),privateKeyPath:?joi.string().required(),type:?joi.string().valid('miniProgram',?'miniProgramPlugin',?'miniGame',?'miniGamePlugin'),ignores:?joi.array().items(joi.string().required())}),/**?字節跳動小程序上傳配置?*//**?阿里小程序上傳配置?*//**?百度小程序上傳配置?*/swan:?joi.object({token:?joi.string().required(),minSwanVersion:?joi.string()}),version:?joi.string(),desc:?joi.string()}).required()})onBuildDone(async?()?=>?{const?args?=?minimist(process.argv.slice(2),?{boolean:?['open',?'upload',?'preview']})const?{?printLog,?processTypeEnum?}?=?ctx.helperconst?platform?=?ctx.runOpts.options.platformlet?ciswitch?(platform)?{case?'weapp':ci?=?new?WeappCI(ctx,?pluginOpts)breakcase?'tt':ci?=?new?TTCI(ctx,?pluginOpts)breakcase?'alipay':case?'iot':ci?=?new?AlipayCI(ctx,?pluginOpts)breakcase?'swan':ci?=?new?SwanCI(ctx,?pluginOpts)breakdefault:break}if?(!ci)?{printLog(processTypeEnum.WARNING,?`"@tarojs/plugin-mini-ci"?插件暫時不支持?"${platform}"?平臺`)return}switch?(true)?{case?args.open:ci.open()breakcase?args.upload:ci.upload()breakcase?args.preview:ci.preview()breakdefault:break}})
}
代碼的整體流程比較簡單,判斷平臺,創建CI實例, 執行對應的CI。
可以在啟動Node.js 程序時直接指定命令行參數,例如:
node?index.js?--beep=boop?-t?-z?12?-n5?foo?barNode.js 程序啟動后可以直接從process.argv中讀取到參數列表:
console.log(process.argv);
//?['/bin/node',?'/tmp/index.js',?'--beep=boop',?'-t',?'-z',?'12',?'-n5',?'foo',?'bar']
從上述代碼中可以看到,process.argv 變量是一個數組,數組前兩項分別是 node 程序位置和js腳本位置,數組中隨后的元素都是我們啟動Node.js后的參數,這些參數以空格分隔成數組。而minimist 是一個專門用于處理Node.js啟動參數的庫,可以將 process.argv 中的參數列表轉換成更加易于使用的格式:
const?argv?=?require('minimist')(process.argv.slice(2));
console.dir(argv);
//?{?_:?[?'foo',?'bar'?],?beep:?'boop',?t:?true,?z:?12,?n:?5?}
具體使用可以參考https://www.npmjs.com/package/minimist, 使用的時候接收參數和配置對象。
2CI抽象類:BaseCI
packages/taro-plugin-mini-ci/src/BaseCi.ts(代碼有刪減):
import?{?IPluginContext?}?from?'@tarojs/service'
import?*?as?path?from?'path'export?type?ProjectType?=?'miniProgram'?|?'miniGame'?|?'miniProgramPlugin'?|?'miniGamePlugin';/**?微信小程序配置?*//**?頭條小程序配置?*//**?支付寶系列小程序配置?*//**?百度小程序配置?*/export?interface?CIOptions?{/**?發布版本號,默認取?package.json?文件的?taroConfig.version?字段?*/version:?string;/**?版本發布描述,?默認取?package.json?文件的?taroConfig.desc?字段?*/desc:?string;/**?微信小程序CI配置, 官方文檔地址:https://developers.weixin.qq.com/miniprogram/dev/devtools/ci.html */weapp?:?WeappConfig;/**?頭條小程序配置, 官方文檔地址:https://microapp.bytedance.com/docs/zh-CN/mini-app/develop/developer-instrument/development-assistance/ide-order-instrument */tt?:?TTConfig;/**?支付寶系列小程序配置,官方文檔地址:https://opendocs.alipay.com/mini/miniu/api */alipay?:?AlipayConfig;/**?百度小程序配置, 官方文檔地址:https://smartprogram.baidu.com/docs/develop/devtools/commandtool/?*/swan?:?SwanConfig;
}export?default?abstract?class?BaseCI?{/**?taro?插件上下文?*/protected?ctx:?IPluginContext/**?傳入的插件選項?*/protected?pluginOpts:?CIOptions/**?當前要發布的版本號?*/protected?version:?string/**?當前發布內容的描述?*/protected?desc:?stringconstructor?(ctx:?IPluginContext,?pluginOpts:?CIOptions)?{this.ctx?=?ctxthis.pluginOpts?=?pluginOptsconst?{?appPath?}?=?ctx.pathsconst?{?fs?}?=?ctx.helperconst?packageInfo?=?JSON.parse(fs.readFileSync(path.join(appPath,?'package.json'),?{encoding:?'utf8'}))this.version?=?pluginOpts.version?||?packageInfo.taroConfig?.version?||?'1.0.0'this.desc?=?pluginOpts.desc?||?packageInfo.taroConfig?.desc?||?`CI構建自動構建于${new?Date().toLocaleTimeString()}`this._init()}/**?初始化函數,會被構造函數調用?*/protected?abstract?_init():void;/**?打開小程序項目?*/abstract?open();/**?上傳小程序?*/abstract?upload();/**?預覽小程序?*/abstract?preview();
}
在抽象類中定義了一些屬性是protected的,意味著可以在本類以及子類中訪問;在constructor中對屬性進行了初始化,并調用初始化函數。然后是定義了一些CI操作的抽象方法。
3CI子類:AlipayCI
packages/taro-plugin-mini-ci/src/AlipayCI.ts
/*?eslint-disable?no-console?*/
import?*?as?miniu?from?'miniu'
import?*?as?path?from?'path'
import?BaseCI?from?'./BaseCi'
import?generateQrCode?from?'./QRCode'/**?文檔地址:https://opendocs.alipay.com/mini/miniu/api */
export?default?class?AlipayCI?extends?BaseCI?{protected?_init?():?void?{if?(this.pluginOpts.alipay?==?null)?{throw?new?Error('請為"@tarojs/plugin-mini-ci"插件配置?"alipay"?選項')}const?{?appPath?}?=?this.ctx.pathsconst?{?fs?}?=?this.ctx.helperconst?{?toolId,?privateKeyPath:?_privateKeyPath,?proxy?}?=?this.pluginOpts.alipayconst?privateKeyPath?=?path.isAbsolute(_privateKeyPath)???_privateKeyPath?:?path.join(appPath,?_privateKeyPath)if?(!fs.pathExistsSync(privateKeyPath))?{throw?new?Error(`"alipay.privateKeyPath"選項配置的路徑不存在,本次上傳終止:${privateKeyPath}`)}miniu.setConfig({toolId,privateKey:?fs.readFileSync(privateKeyPath,?'utf-8'),proxy})}open?()?{const?{?printLog,?processTypeEnum?}?=?this.ctx.helperprintLog(processTypeEnum.WARNING,?'阿里小程序不支持?"--open"?參數打開開發者工具')}async?upload?()?{const?{?chalk,?printLog,?processTypeEnum?}?=?this.ctx.helperconst?clientType?=?this.pluginOpts.alipay!.clientType?||?'alipay'printLog(processTypeEnum.START,?'上傳代碼到阿里小程序后臺',?clientType)//?上傳結果CI庫本身有提示,故此不做異常處理//?TODO?阿里的CI庫上傳時不能設置“禁止壓縮”,所以上傳時被CI二次壓縮代碼,可能會造成報錯,這塊暫時無法處理;?SDK上傳不支持設置描述信息const?result?=?await?miniu.miniUpload({project:?this.ctx.paths.outputPath,appId:?this.pluginOpts.alipay!.appId,packageVersion:?this.version,clientType,experience:?true,onProgressUpdate?(info)?{const?{?status,?data?}?=?infoconsole.log(status,?data)}})if?(result.packages)?{const?allPackageInfo?=?result.packages.find(pkg?=>?pkg.type?===?'FULL')const?mainPackageInfo?=?result.packages.find((item)?=>?item.type?===?'MAIN')const?extInfo?=?`本次上傳${allPackageInfo!.size}?${mainPackageInfo???',其中主包'?+?mainPackageInfo.size?:?''}`console.log(chalk.green(`上傳成功?${new?Date().toLocaleString()}?${extInfo}`))}}async?preview?()?{const?previewResult?=?await?miniu.miniPreview({project:?this.ctx.paths.outputPath,appId:?this.pluginOpts.alipay!.appId,clientType:?this.pluginOpts.alipay!.clientType?||?'alipay',qrcodeFormat:?'base64'})console.log('預覽二維碼地址:',?previewResult.packageQrcode)generateQrCode(previewResult.packageQrcode!)}
}
支付寶小程序子類的_init()方法主要做參數的驗證和設置;open,upload,preview實現了抽象類定義的方法,分別用于打開開發者工具,上傳代碼,預覽二維碼。核心功能的實現依賴于miniu。可以查看相應的資料。 這篇文章介紹了使用MiniU完成CI/CD:https://forum.alipay.com/mini-app/post/35101018。生成二維碼調用了generateQrCode方法:
/***?生產二維碼輸出到控制臺*?@param?url?鏈接地址*/
export?default?function?generateQrCode?(url:?string)?{require('qrcode-terminal').generate(url,?{?small:?true?})
}
generateQrCode實際上是通過三方包qrcode-terminal來實現的。
4CI子類:SwanCI
在SwanCI類中open方法和preview方法的實現與AlipayCI一樣,upload實現有所不同:
async?upload?()?{const?{?outputPath?}?=?this.ctx.pathsconst?{?chalk,?printLog,?processTypeEnum?}?=?this.ctx.helperprintLog(processTypeEnum.START,?'上傳體驗版代碼到百度后臺')printLog(processTypeEnum.REMIND,?`本次上傳版本號為:"${this.version}",上傳描述為:“${this.desc}”`)shell.exec(`${this.swanBin}?upload?--project-path?${outputPath}?--token?${this.pluginOpts.swan!.token}?--release-version?${this.version}?--min-swan-version?${this.pluginOpts.swan!.minSwanVersion?||?'3.350.6'}?--desc?${this.desc}?--json`,?(_code,?_stdout,?stderr)?=>?{if?(!stderr)?{//?stdout?=?JSON.parse(stdout)console.log(chalk.green(`上傳成功?${new?Date().toLocaleString()}`))}})}上傳的時候執行shell腳本,通過shelljs來實現的 。
5CI子類:WeappCI
WeappCI主要是使用了miniprogram-ci ,具體看一下open, upload, preview方法:open方法(代碼有刪減):
import?*?as?cp?from?'child_process'async?open?()?{const?{?fs,?printLog,?processTypeEnum,?getUserHomeDir?}?=?this.ctx.helperconst?{?appPath?}?=?this.ctx.paths//?檢查安裝路徑是否存在/**?命令行工具所在路徑?*///?檢查是否開啟了命令行cp.exec(`${cliPath}?open?--project?${appPath}`,?(err)?=>?{if?(err)?{printLog(processTypeEnum.ERROR,?err.message)}})}open方法用于打開開發者工具,通過node.js child_process的exec執行命令。upload方法:
import?*?as?ci?from?'miniprogram-ci'async?upload?()?{const?{?chalk,?printLog,?processTypeEnum?}?=?this.ctx.helpertry?{printLog(processTypeEnum.START,?'上傳體驗版代碼到微信后臺')printLog(processTypeEnum.REMIND,?`本次上傳版本號為:"${this.version}",上傳描述為:“${this.desc}”`)const?uploadResult?=?await?ci.upload({project:?this.instance,version:?this.version,desc:?this.desc,onProgressUpdate:?undefined})if?(uploadResult.subPackageInfo)?{const?allPackageInfo?=?uploadResult.subPackageInfo.find((item)?=>?item.name?===?'__FULL__')const?mainPackageInfo?=?uploadResult.subPackageInfo.find((item)?=>?item.name?===?'__APP__')const?extInfo?=?`本次上傳${allPackageInfo!.size?/?1024}kb?${mainPackageInfo???',其中主包'?+?mainPackageInfo.size?+?'kb'?:?''}`console.log(chalk.green(`上傳成功?${new?Date().toLocaleString()}?${extInfo}`))}}?catch?(error)?{console.log(chalk.red(`上傳失敗?${new?Date().toLocaleString()}?\n${error.message}`))}}上傳代碼的方法使用miniprogram-ci的upload方法,得到結果信息后根據分包信息來提示整體包大小和主包大小。preview方法(代碼有刪減):
async?preview?()?{const?{?chalk,?printLog,?processTypeEnum?}?=?this.ctx.helpertry?{printLog(processTypeEnum.START,?'上傳開發版代碼到微信后臺并預覽')const?uploadResult?=?await?ci.preview({project:?this.instance,version:?this.version,desc:?this.desc,onProgressUpdate:?undefined})if?(uploadResult.subPackageInfo)?{const?allPackageInfo?=?uploadResult.subPackageInfo.find((item)?=>?item.name?===?'__FULL__')const?mainPackageInfo?=?uploadResult.subPackageInfo.find((item)?=>?item.name?===?'__APP__')const?extInfo?=?`本次上傳${allPackageInfo!.size?/?1024}kb?${mainPackageInfo???',其中主包'?+?mainPackageInfo.size?+?'kb'?:?''}`console.log(chalk.green(`上傳成功?${new?Date().toLocaleString()}?${extInfo}`))}}?catch?(error)?{console.log(chalk.red(`上傳失敗?${new?Date().toLocaleString()}?\n${error.message}`))}
}
preview方法使用的是miniprogram-ci的preview方法, 得到結果信息后根據分包信息來提示整體包大小和主包大小。
6CI子類:TTCI
TTCI使用tt-ide-cli來完成預覽和上傳,使用child_process的exec來完成打開開發者工具的功能。open(代碼有刪除):
open?()?{if?(fs.existsSync(projectPath))?{console.log(chalk.green(`open?projectPath:?${projectPath}`))const?openPath?=?`${openCmd}?path=${projectPath}`cp.exec(openPath,?(error)?=>?{if?(!error)?{console.log('打開IDE成功',?openPath)}?else?{console.log(chalk.red('打開IDE失敗',?error))}})}}這里open方法也是通過node.js child_process的exec執行命令。upload(代碼有刪除):
import?*?as?tt?from?'tt-ide-cli'
async?upload?()?{try?{await?tt.upload({entry:?outputPath,version:?this.version,changeLog:?this.desc})}?catch?(error)?{}}
上傳代碼使用tt-ide-cli的upload方法。preview(代碼有刪除):
import?*?as?tt?from?'tt-ide-cli'async?preview?()?{try?{await?tt.preview({entry:?outputPath,force:?true,small:?true})}?catch?(error)?{console.log(chalk.red(`上傳失敗?${new?Date().toLocaleString()}?\n${error.message}`))}}生成預覽二維碼使用了tt-ide-cli的upload方法。
Part3總結
1.taro小程序ci的核心代碼邏輯是:判斷平臺,創建CI實例, 執行對應的CI。2.不同平臺對應不同的CI類,但都繼承了基礎的CI抽象類,實現了抽象類聲明的open,upload和preview方法。3.實現具體的open,upload和preview方法時根據對應小程序是否提供了命令行工具,有用到miniu,tt-ide-cli,miniprogram-ci,還有的使用shelljs,qrcode-terminal,以及child_process來執行命令。

·················?若川簡介?·················
你好,我是若川,畢業于江西高校。現在是一名前端開發“工程師”。寫有《學習源碼整體架構系列》20余篇,在知乎、掘金收獲超百萬閱讀。
從2014年起,每年都會寫一篇年度總結,已經堅持寫了8年,點擊查看年度總結。
同時,最近組織了源碼共讀活動,幫助4000+前端人學會看源碼。公眾號愿景:幫助5年內前端人走向前列。

掃碼加我微信 ruochuan02、拉你進源碼共讀群
今日話題
目前建有江西|湖南|湖北?籍 前端群,想進群的可以加我微信 ruochuan12?進群。分享、收藏、點贊、在看我的文章就是對我最大的支持~


)

?)


