ios 刷新遮罩遮罩
Are you new to Adobe XD? Or maybe you’re just stuck on how to create a simple mask? Here are 3 quick tips for how to mask your photos and designs in Adobe XD.
您是Adobe XD的新手嗎? 或者,也許您只是停留在如何創建簡單的蒙版上? 以下是有關如何在Adobe XD中遮罩照片和設計的3個快速提示。
1.使用形狀遮罩 (1. Use shapes to mask)
One of the easiest ways to mask in Adobe XD is to use shapes. For example, let’s say I want this profile photo placed inside a circle.
在Adobe XD中進行蒙版的最簡單方法之一就是使用形狀。 例如,假設我要將這張個人資料照片放在一個圓圈內。

Use the Ellipse tool, click and drag while using the Option key to create a perfect circle.
使用橢圓工具,在使用Option鍵創建完美圓的同時單擊并拖動。

Select both the circle and the photo and use the keyboard shortcut Command + Shift + Mask to mask the photo within the shape.
選擇圓圈和照片,然后使用鍵盤快捷鍵Command + Shift +遮罩在形狀中遮蓋照片。

If you want to reposition or scale your photo within the frame, double-click into the group.
如果要在框架中重新定位照片或縮放照片,請雙擊該組。

拖放 (Drag and drop)
A similar technique is to draw the shape first then drag and drop the photo into the shape.
一種類似的技術是先繪制形狀,然后將照片拖放到形狀中。
For example, let’s say I want to have a background photo on my artboard. Use the Rectangle tool to draw a rectangle the same size as the artboard. Then simply drag and drop your image into the rectangle. And again, you can double-click if you want to rescale or reposition.
例如,假設我要在畫板上有一張背景照片。 使用“矩形”工具繪制與畫板相同大小的矩形。 然后,只需將您的圖像拖放到矩形中即可。 再次,您可以雙擊是否要縮放或重新定位。


2.使用鋼筆工具 (2. Use the pen tool)
Another option is to use the pen tool in Adobe XD to draw any shape. This is the best option to create more complex masks for your photos.
另一個選擇是使用Adobe XD中的鋼筆工具繪制任何形狀。 這是為照片創建更復雜的蒙版的最佳選擇。
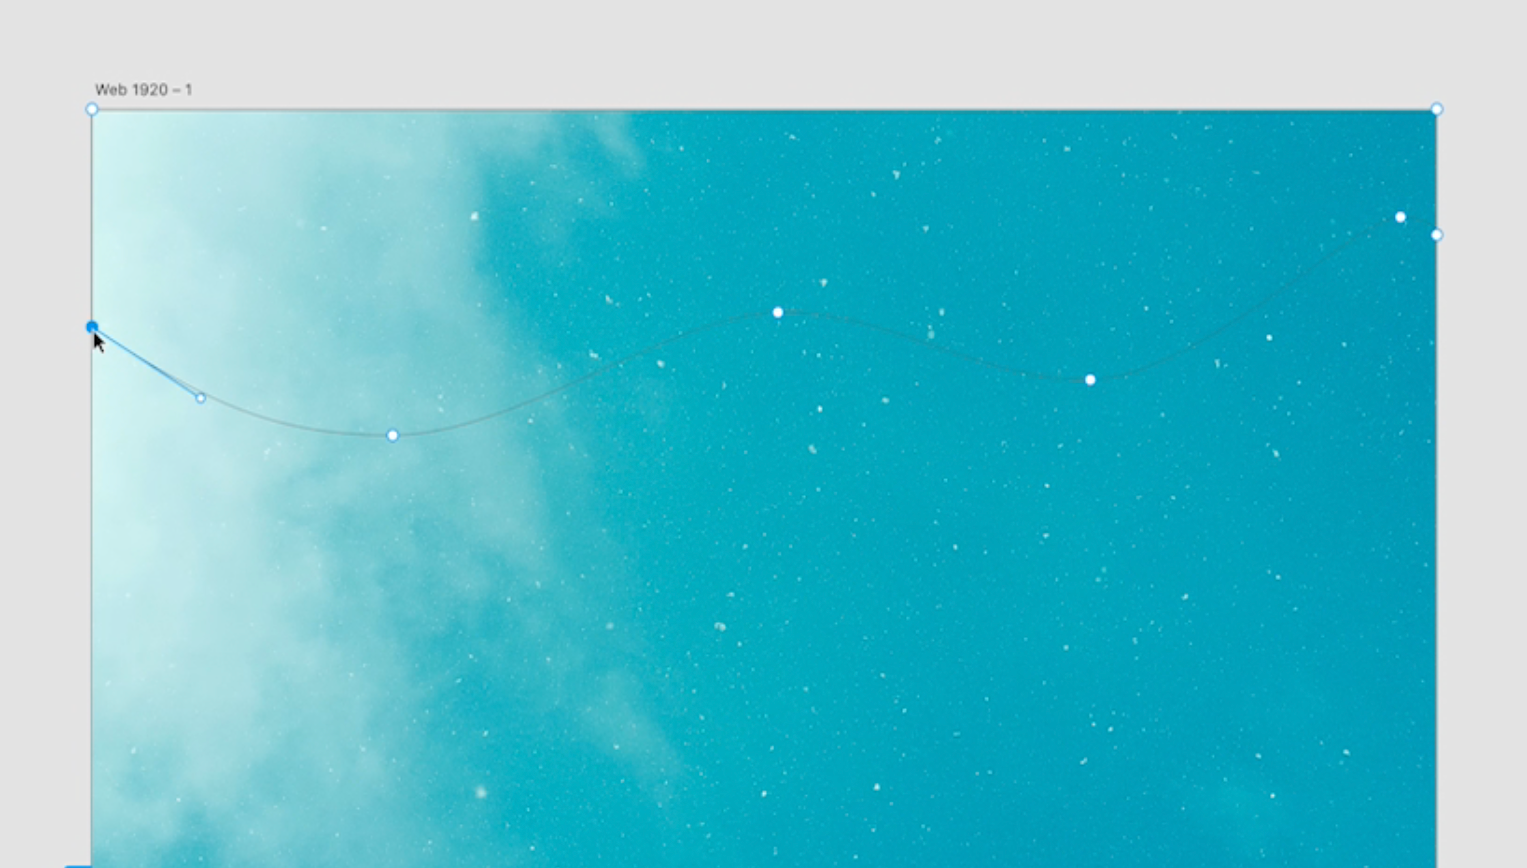
As with the first option, select both the shape and photo, use keyboard shortcut Command + Shift + M to mask.
與第一個選項一樣,選擇形狀和照片,使用鍵盤快捷鍵Command + Shift + M進行遮罩。

3.在Photoshop中使用鋼筆工具... (3. Use the pen tool… in Photoshop)
This last option is kind of a cheat. Sometimes I prefer to do custom masking in Photoshop as it’s easier and more accurate.
最后一個選擇有點作弊。 有時我更喜歡在Photoshop中進行自定義遮罩,因為它更簡單,更準確。
For this photo, I want the hand and the cup to cut out from the background. In Photoshop, I’ll use the Quick Selection tool and click on Select Subject. At the bottom of the Layers panel, click Add a Mask.
對于這張照片,我希望手和杯子從背景中切出。 在Photoshop中,我將使用“ 快速選擇”工具,然后單擊“ 選擇主題” 。 在“ 圖層”面板的底部,單擊“ 添加蒙版”。

Zoom in and make sure everything was selected. In this case, Photoshop missed a little bit of the lip of the cup, so I zoom in and use the Brush tool to paint the area back in.
放大并確保已選擇所有內容。 在這種情況下,Photoshop會漏掉杯子的一些邊緣,因此我放大并使用“畫筆”工具將區域重新繪畫。


Then go to Image > Trim > and choose the Transparent Pixels option. This will get rid of all transparent pixels and crop your image.
然后轉到“圖像”>“修剪”>,然后選擇“ 透明像素”選項。 這將消除所有透明像素并裁剪圖像。
Go to File > Save As > PNG.
轉到文件>另存為> PNG。
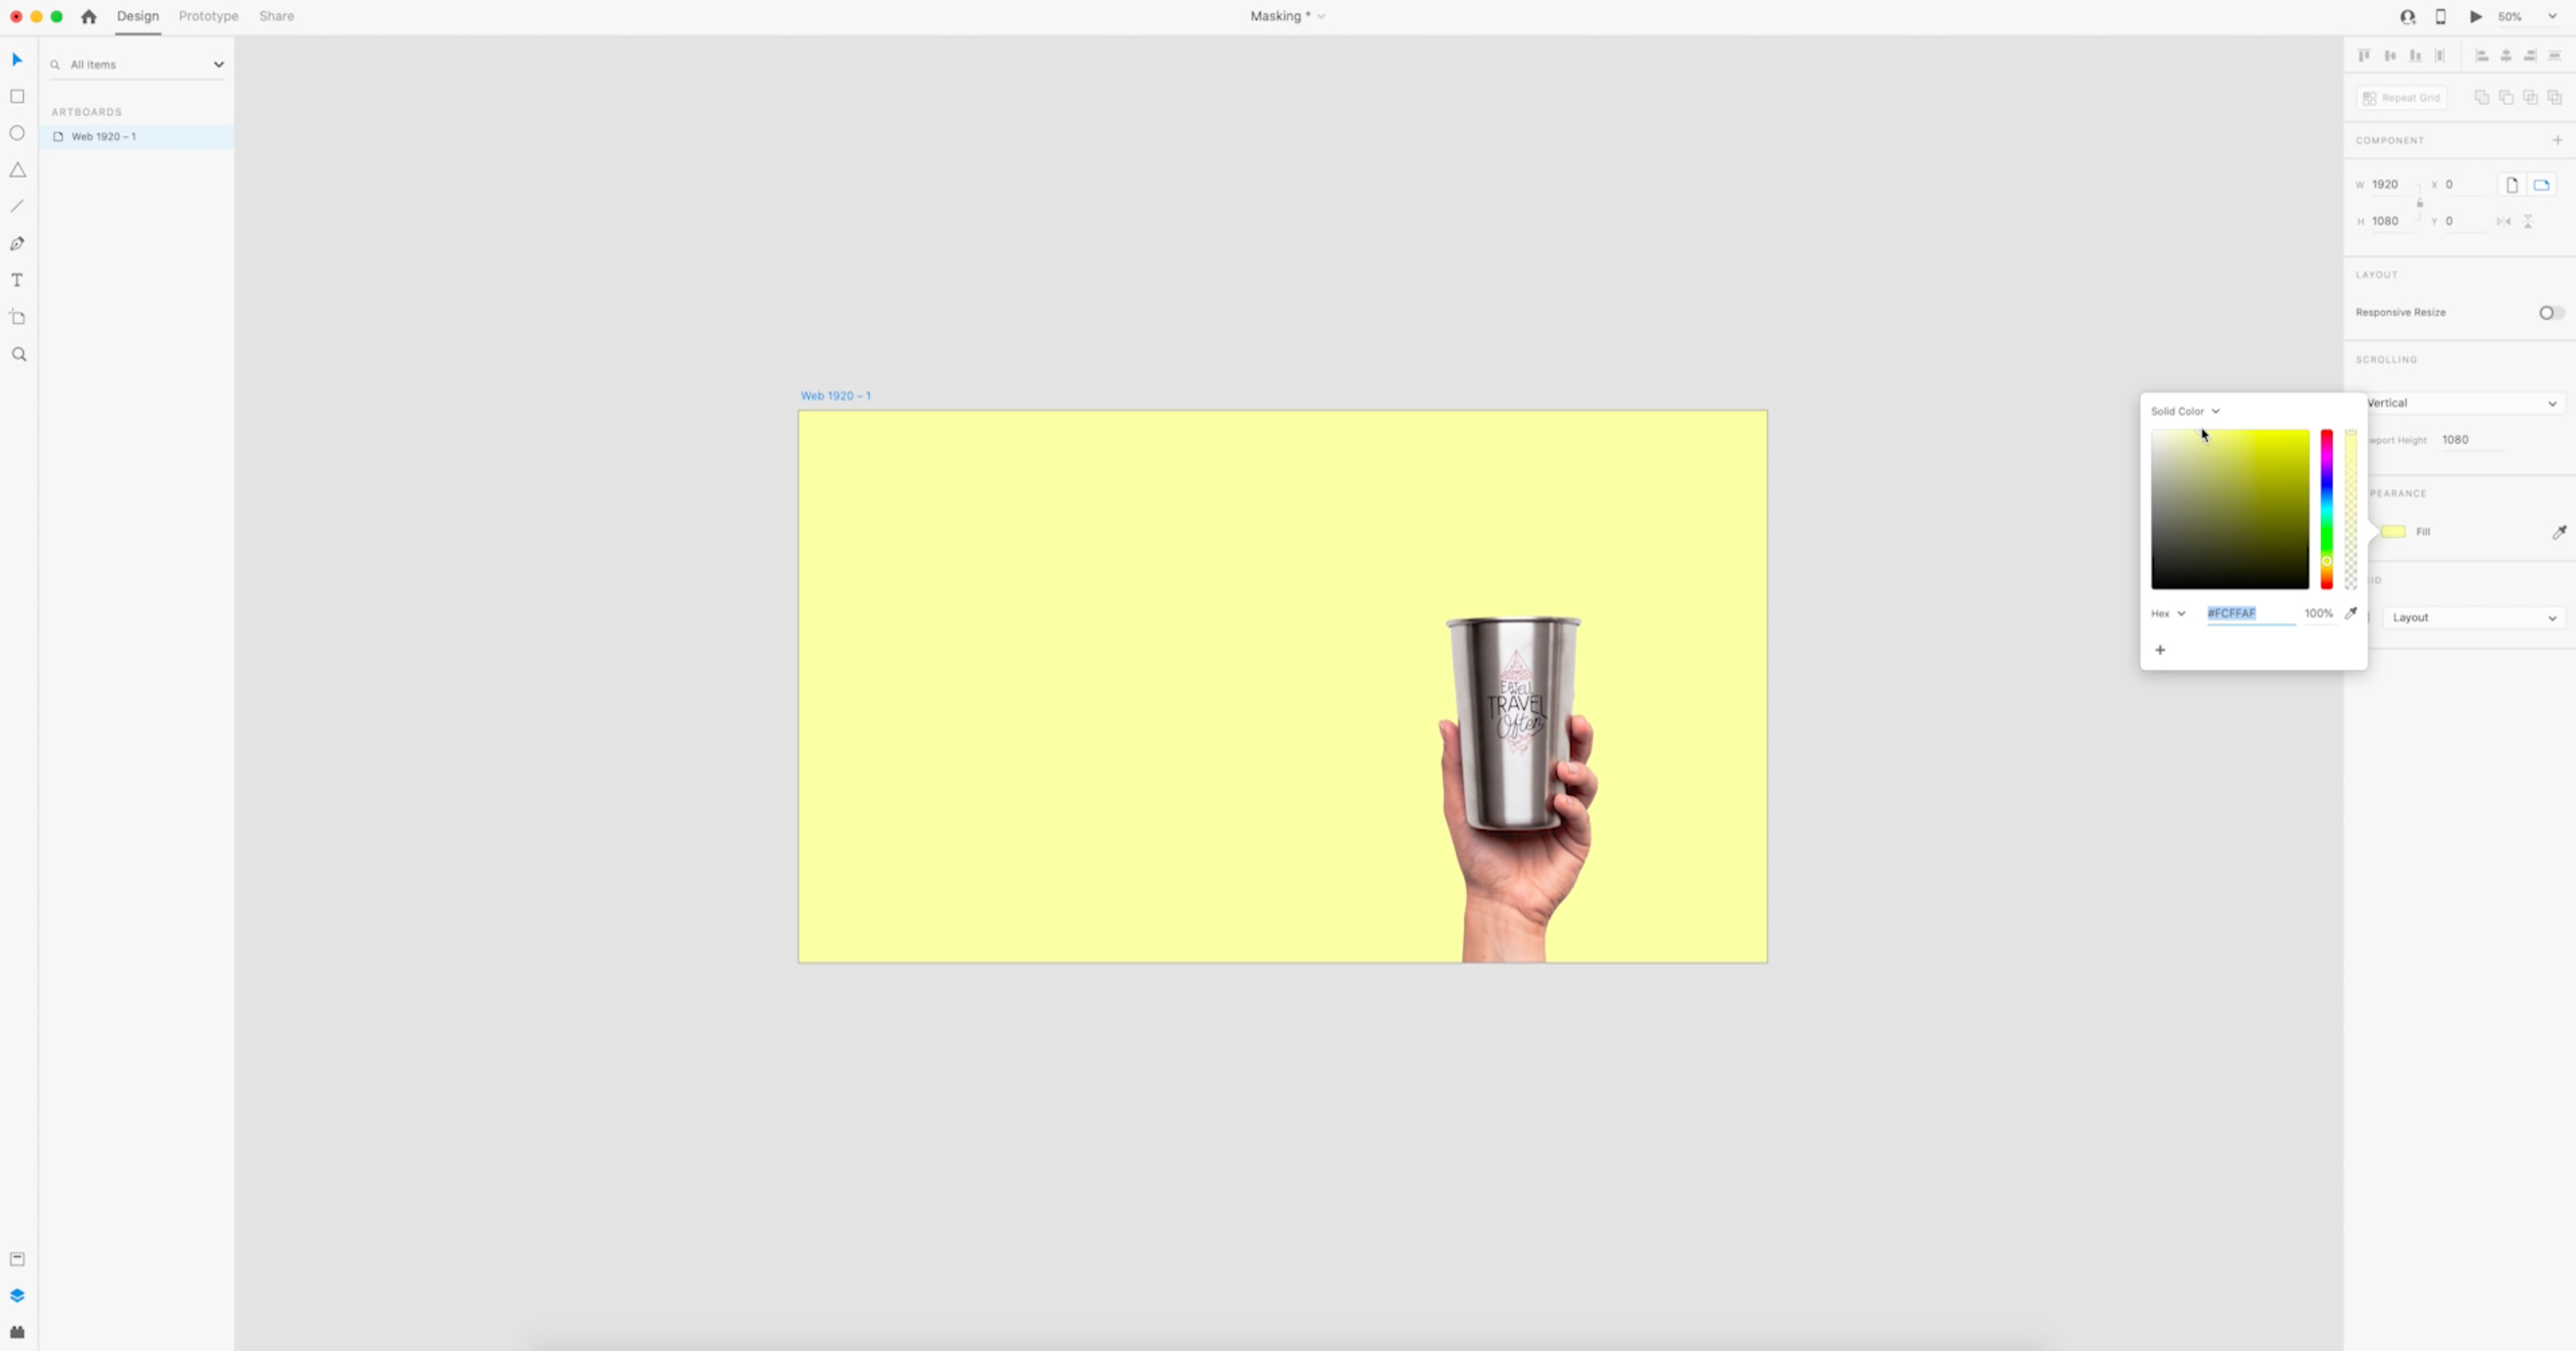
Now I can drag and drop this image into my XD file. And because I used Photoshop to mask out the background, now I can add a color background to the landing page.
現在,我可以將該圖像拖放到XD文件中。 并且由于我使用Photoshop掩蓋了背景,因此現在可以將彩色背景添加到登錄頁面。
喜歡看教程嗎? (Prefer to watch a tutorial?)
Watch this 2-minute tutorial video to see these 3 mask options in action.
觀看此2分鐘的教程視頻,以了解這3個口罩選項的實際作用。
翻譯自: https://uxdesign.cc/3-ways-to-mask-in-adobe-xd-81ff9cdf8b17
ios 刷新遮罩遮罩
本文來自互聯網用戶投稿,該文觀點僅代表作者本人,不代表本站立場。本站僅提供信息存儲空間服務,不擁有所有權,不承擔相關法律責任。 如若轉載,請注明出處:http://www.pswp.cn/news/274439.shtml 繁體地址,請注明出處:http://hk.pswp.cn/news/274439.shtml 英文地址,請注明出處:http://en.pswp.cn/news/274439.shtml
如若內容造成侵權/違法違規/事實不符,請聯系多彩編程網進行投訴反饋email:809451989@qq.com,一經查實,立即刪除!相關文章


Vite 4.0 正式發布!


圖像標注技巧_保護互聯網上圖像的一個簡單技巧

【VueConf 2022】尤雨溪:Vue的進化歷程

WCF netTcpBinding寄宿到IIS7

ar軟件測試工具_如何為用戶測試制作快速的AR原型

未來ui設計的發展趨勢_2025年的未來UI趨勢?

內存泄露檢測 vld

Monorepo 在網易的工程改造實踐

這一年,Vue.js 生態開源之旅帶給我很大收獲~

CSSyphus:煩躁不安的煩惱設計指南。


你構建的代碼為什么這么大?如何優化~

用戶體驗需求層次_需求和用戶體驗
)
VMwareWorkstation設置U盤啟動(或U盤使用)

類從未使用_如果您從未依賴在線銷售,如何優化您的網站

狼書三卷終大成,狼叔親傳Node神功【留言送書】
報未啟用MSDTC錯誤解決辦法)
entity framework5 sqlserver2005 事務(TransactionScope)報未啟用MSDTC錯誤解決辦法
