1、Nginx環境搭建(基于lnmp環境)//下載并安裝lnmp環境
wget -c http://soft.vpser.net/lnmp/lnmp1.3.tar.gz && tar zxf lnmp1.3.tar.gz && cd lnmp1.3 && ./install.sh lnmp
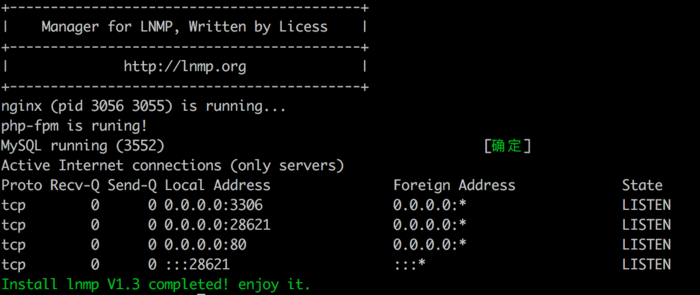
安裝完成
安裝完成后訪問服務器地址會出現如下界面
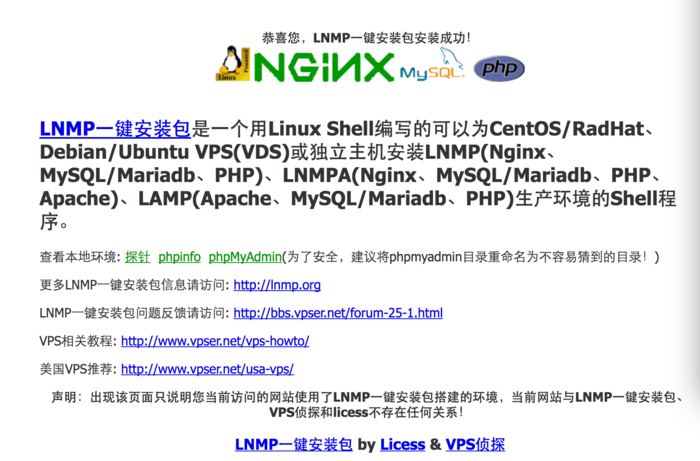
lnmp
PS:安裝時生成的解壓文件夾lnmp1.3先別刪除!!!
2、安裝Nginx的擴展rtmp模塊github:https://github.com/arut/nginx-rtmp-module
//下載擴展包
wget https://github.com/arut/nginx-rtmp-module/archive/v1.1.10.tar.gz
//解壓擴展包
tar -xzvf v1.1.10.tar.gz
//為nginx創建擴展模塊目錄
mkdir /usr/local/nginx/extend_module
//將解壓后的nginx-rtmp-module目錄移動到nginx擴展模塊目錄下
mv nginx-rtmp-module-1.1.10/ /usr/local/nginx/extend_module/nginx-rtmp-module
nginx -V //查看nginx配置參數

nginx
復制configure arguments:后的所有參數!
例如:--user=www --group=www --prefix=/usr/local/nginx --with-http_stub_status_module --with-http_ssl_module --with-http_v2_module --with-http_gzip_static_module --with-ipv6 --with-http_sub_module
關閉nginx、php-fpm服務
//關閉nginx
service nginx stop
//關閉php-fpm
service php-fpm stop
進入安裝時生成的文件夾:lnmp1.3/lnmp1.3/src
//解壓nginx源碼包
tar -xzvf nginx-1.10.0.tar.gz
//進入nginx源碼目錄
cd nginx-1.10.0
//安裝rtmp擴展模塊
./configure 剛才復制的nginx configure參數 --add-module=rtmp擴展包目錄
如:
./configure --user=www --group=www --prefix=/usr/local/nginx --with-http_stub_status_module --with-http_ssl_module --with-http_v2_module --with-http_gzip_static_module --with-ipv6 --with-http_sub_module --add-module=/usr/local/nginx/extend_module/nginx-rtmp-module
//編譯
make
//安裝
make install
//重啟nginx
service nginx start
service php-fpm start
//查看安裝狀態
nginx -V

nginx
!上圖如果出現nginx-rtmp-module說明安裝成功!
3、配置rtmp進入cd /usr/local/nginx/conf 目錄
//編輯配置
vim nginx.conf
#尾部加入
rtmp {
server {
listen 1935; #監聽的端口
chunk_size 4000;
application hls { #rtmp推流請求路徑
live on;
record off;
}
}
}
參數說明:
rtmp是協議名稱
server 說明內部中是服務器相關配置
listen 監聽的端口號,rtmp協議的默認端口號是1935
application 訪問的應用路徑是 hls
live on; 開啟實時
record off; 不記錄數據
保存修改后:nginx -s reload //重載下nginx配置
4、服務器開放1935端口(如服務器防火墻已關閉跳過此步)
//開放1935端口
/sbin/iptables -I INPUT -p tcp --dport 1935 -j ACCEPT
//保存配置
/etc/rc.d/init.d/iptables save
//重啟服務
/etc/rc.d/init.d/iptables restart
//查看端口開放狀態
/etc/init.d/iptables status
5、本地安裝推流工具(ffmepg)及rtmp播放器(VLC)測試ffmepg安裝:brew install ffmpeg
VLC播放器下載:VLC
//ffmepg推流(本地準備一個視頻文件)
ffmpeg -re -i 本地視頻文件的絕對路徑(如/Users/flycorn/Downloads/demo-hls.mp4) -vcodec copy -f flv rtmp://服務器IP:1935/hls/test
// 如:
ffmpeg -re -i /Users/flycorn/Downloads/demo-hls.mp4 -vcodec copy -f flv rtmp://服務器IP:1935/hls/test
PS:
如推流時出現
Connection to tcp://服務器IP:1935 failed: Connection refused
請先執行:
nginx -s reload
如不成功執行:
service nginx reload
推流界面如下:

推流中
開始推流后,打開VLC播放器驗證結果
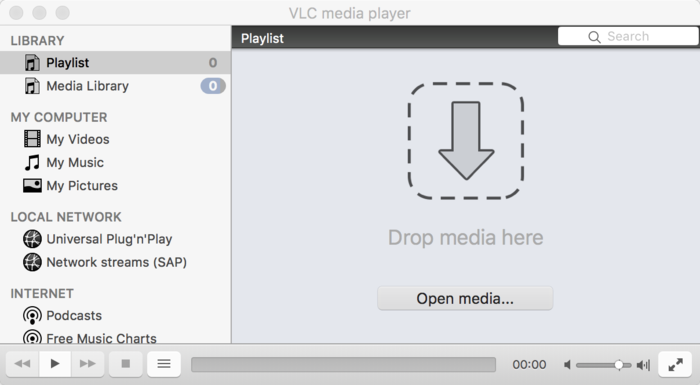
VLC
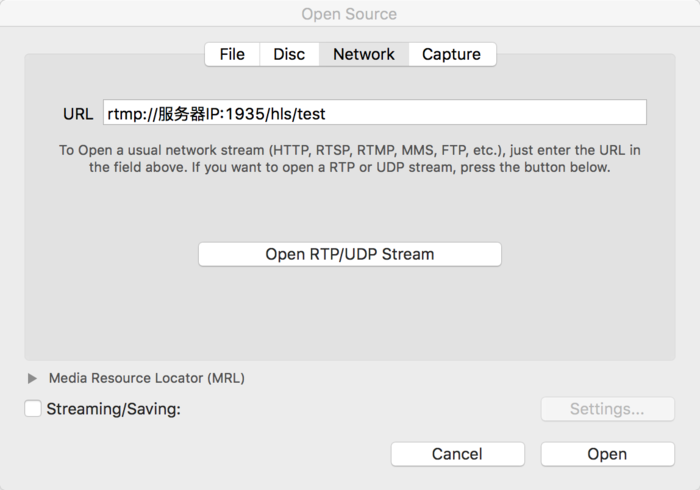
Open media

直播視頻中
5、配置HLS進入/usr/local/nginx/conf 目錄
//編輯配置
vim nginx.conf
//修改rtmp配置
rtmp {
server {
listen 1935; #監聽的端口
chunk_size 4000;
application hls { #rtmp推流請求路徑
live on;
hls on;
hls_path /home/hls/test; #視頻流文件目錄(自己創建)
hls_fragment 3s;
}
}
}
//修改server的配置
server
{
listen 80 default_server;
#listen [::]:80 default_server ipv6only=on;
server_name www.lnmp.org;
index index.html index.htm index.php;
root /home/wwwroot/default;
#error_page 404 /404.html;
include enable-php.conf;
#加入hls支持
location /hls {
types {
application/vnd.apple.mpegurl m3u8;
#或 application/x-mpegURL
video/mp2t ts;
}
alias /home/hls/test/; #視頻流文件目錄(自己創建)
expires -1;
add_header Cache-Control no-cache;
}
#end...
#以下代碼省略.....
}
進入/home目錄并創建 hls及其子目錄test
配置改完后執行nginx -s reload
在/home/wwwroot/default目錄下創建test.html文件
//test.html
Your browser does not support HTML5 video.
使用ffmpeg進行推流:
ffmpeg -re -i /Users/flycorn/Downloads/demo-hls.mp4 -vcodec copy -f flv rtmp://服務器IP:1935/hls/test
此時服務器上的/home/hls/test/目錄下會生成許多ts文件及test.m3u8文件!
使用Safari瀏覽器訪問 http://服務器IP/test.html
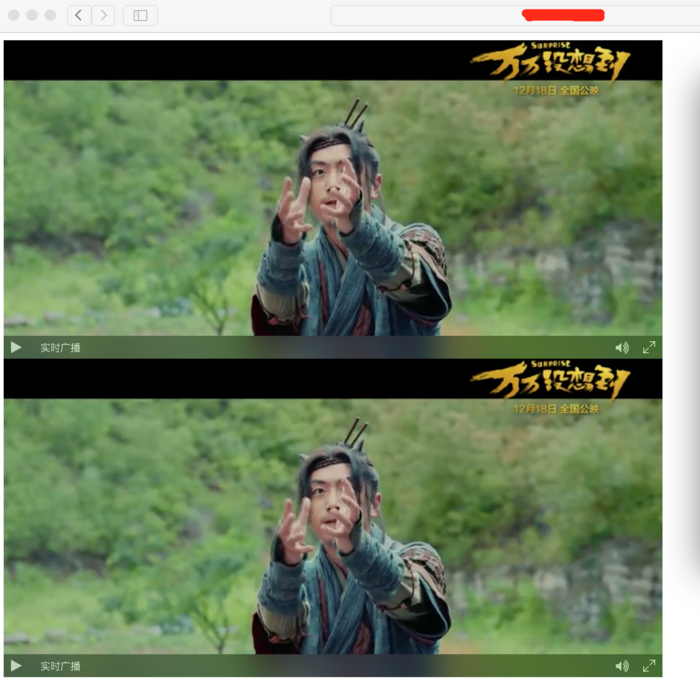
直播中
如直播沒有聲音,請參考ffmpeg沒有聲音!~
PS:瀏覽器對hls的支持
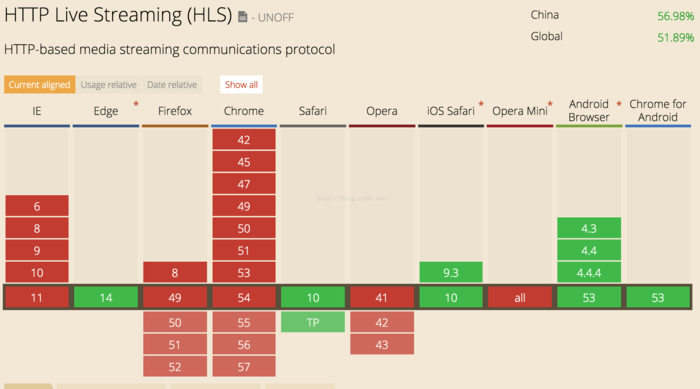
hls瀏覽器支持情況
也可使用第三方插件實現對hls的支持!如videojs-contrib-hls


方法)


在內存中占幾個字節)


