目錄
前言
1.介紹
2.整合 Shiro 到 Spring Boot
3.Shiro 相關配置
總結
前言
幾乎所有涉及用戶的系統都需要進行權限管理,權限管理涉及到一個系統的安全。Spring Boot 的安全框架整合方案中還有一個璀璨的明珠:Shrio。
1.介紹
Shiro是一款由Java 編寫的安全框架,功能強大,入手容易。Shiro 提供了一套完的RABC模式的授權認證體系,可以對密碼進行加密,并完成安全的會話管理。與SpringSecurity 相比顯得功能較少,但是對于追求“小而美”的解決方案的開發者和項目來說Shiro使用起來更加得心應手。?
- 用于身份驗證以及登錄,檢查用戶是否擁有相應的角色權限。
- 進行權限驗證,驗證某個已登錄認證的用戶是否擁有某個具體的角色權限; 常的如:檢驗某個用戶是否有對某些資源包括頁面的訪問和操作權限等。
- 進行會話管理,每當用戶登錄就是一次會話,在沒有退出賬號登錄之前,用戶的所有信息都在會話中存儲。
- 對數據加密,保護數據的安全性,如密碼加密存儲到數據庫,不是明文存儲,更加安全。
- 對Web 支持,非常方便地集成到 Web 環境中
- 支持多線程并發驗證。?
這里介紹 Shiro 的一些核心的概念,Shiro 主要由三部分組成:?
- Subject: 主體,外部應用會和 Subject 進行交互。Subject 會記錄當前的用戶,用在這里就是 Subject (主體),比如通過瀏覽器進行請求的用戶。而 Subject 要通過 SecurityManager 進行認證授權。在代碼層面,Subject 是一個定義了一些授權方法的接口 。
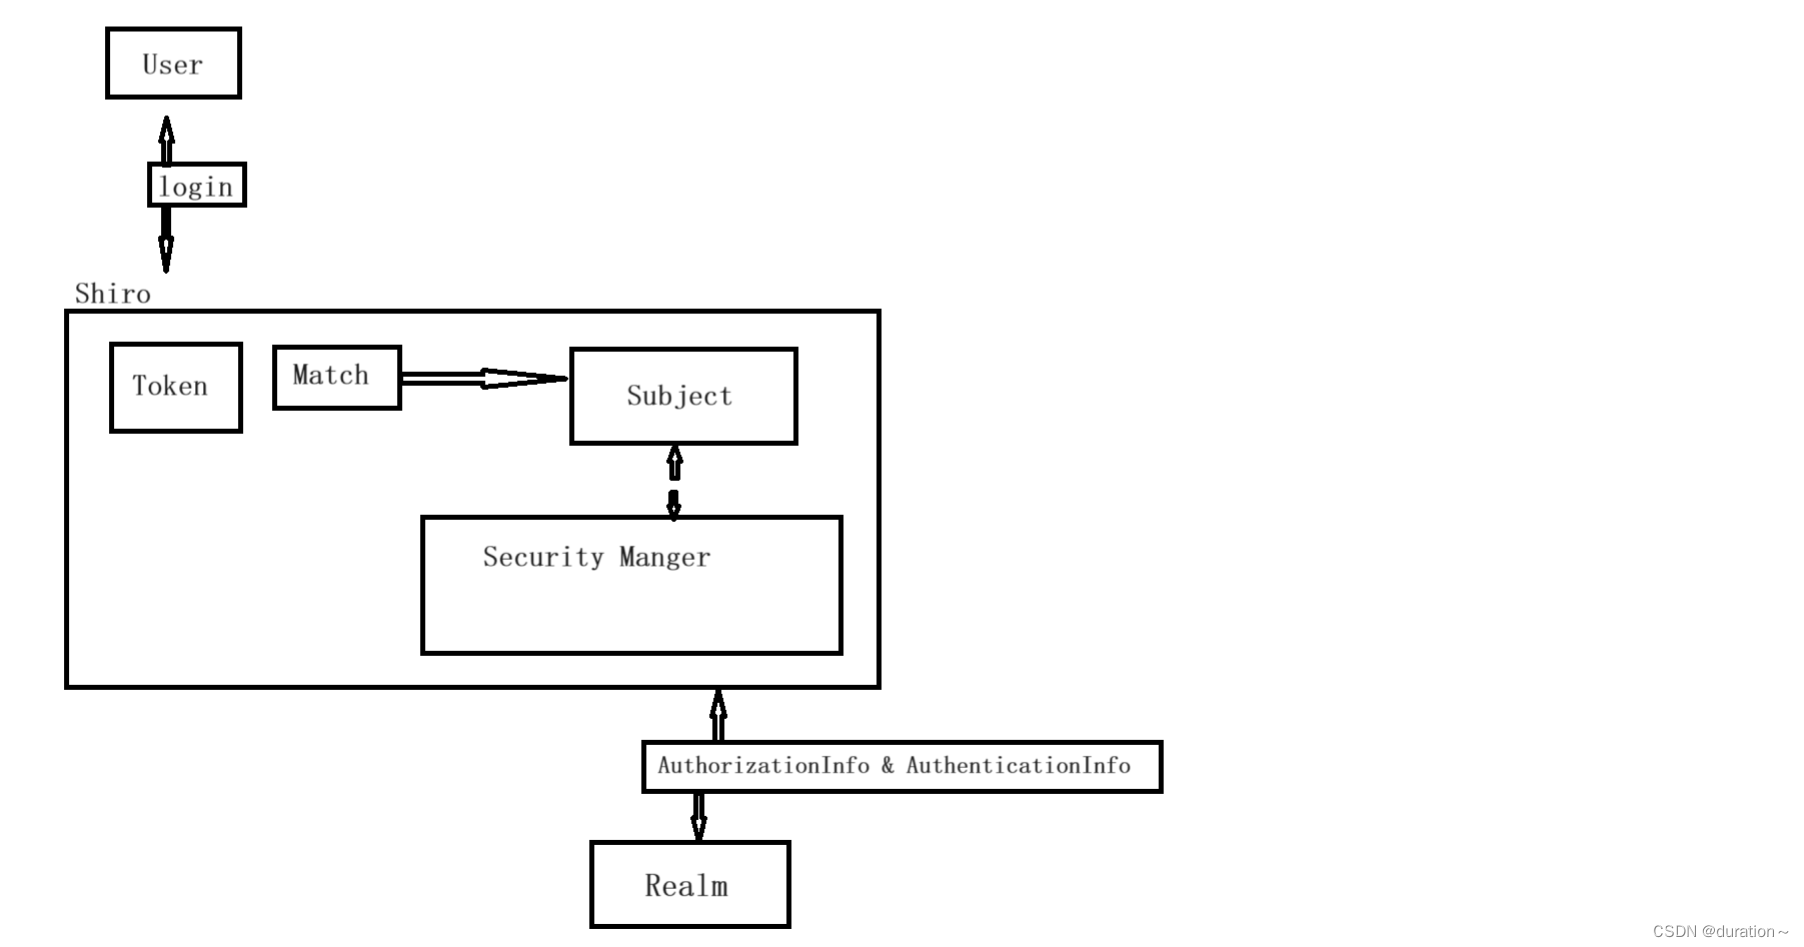
- Security Manager: 即安全管理器,它是 Shiro 的核心,將對所有的 Subject 進行安全管理。從代碼層面上來說,Security Manager 是一個多繼承接口,繼承了Authenticator、Authorizer、SessionManager 這三個接口。
- Realm:是 Shiro 和安全應用之間的連接器,類似于一個安全相關的 DAO,在進行認證和授權時,Shiro 會從 Realm 中獲取想要的數據
2.整合 Shiro 到 Spring Boot
新建一個 SpringBoot 項目 ,在 pom.xml 中添加如下配置:
<dependency><groupId>org.apache.shiro</groupId><artifactId>shiro-spring-boot-web-starter</artifactId><version>1.7.0</version></dependency>3.Shiro 相關配置
在 applcation.yml 中編寫相關配置。
shiro:# 開啟 Shrio 配置,默認為 trueenabled: trueweb:#開啟 Shrio Web 配置,默認為 trueenabled: true#配置登錄地址,默認為"login.jsp"loginUrl: /login#配置登錄成功地址 默認為 /successUrl: /index# 配置未獲取授權默認跳轉地址unauthorizedUrl: /unauthorizedsessionManager:# 是否允許通過 Cookie,實現會話跟蹤,默認為 true。sessionIdCookieEnabled: true#是否允許通過 URL 參數實現會話跟蹤,默認為 true,如果網站支持 Cookie,可以關閉此選項
# thymeleaf
spring:thymeleaf:prefix: classpath:templates/suffix: .htmlmode: HTMLencoding: UTF-8cache: false # 對于開發,最好禁用緩存
編寫 ShiroConfig 文件,具體代碼如下:
package org.example.config;import org.apache.shiro.realm.Realm;
import org.apache.shiro.spring.web.config.DefaultShiroFilterChainDefinition;
import org.apache.shiro.spring.web.config.ShiroFilterChainDefinition;
import org.springframework.context.annotation.Bean;
import org.springframework.context.annotation.Configuration;
import org.apache.shiro.realm.text.TextConfigurationRealm;
@Configuration
public class ShiroConfig {@Beanpublic Realm realm(){TextConfigurationRealm realm = new TextConfigurationRealm();realm.setUserDefinitions("freephp=123456,user\n admin=123456,admin");realm.setRoleDefinitions("user=read\n admin=read,write");return  realm;}@Beanpublic ShiroFilterChainDefinition shiroFilterChainDefinition(){DefaultShiroFilterChainDefinition chainDefinition = new DefaultShiroFilterChainDefinition();chainDefinition.addPathDefinition("/logout","logout");chainDefinition.addPathDefinition("/login","anon");//匿名訪問chainDefinition.addPathDefinition("/doLogin","anon");//匿名訪問chainDefinition.addPathDefinition("/**","authc");return chainDefinition;}
}
上面的代碼中有兩個方法,一個是 realm 方法,另一個是 shiroFilterChainDefinition 方法。realm 方法用于獲取權限認證數據,例如此處存儲了兩個賬號:freephp 和 admin。
然后再編寫 Controller 文件,只做簡單的邏輯判斷,代碼如下:
package org.example.controller;import org.apache.shiro.SecurityUtils;
import org.apache.shiro.authc.AuthenticationException;
import org.apache.shiro.authc.UsernamePasswordToken;
import org.apache.shiro.subject.Subject;
import org.springframework.stereotype.Controller;
import org.springframework.ui.Model;
import org.springframework.web.bind.annotation.GetMapping;
import org.springframework.web.bind.annotation.RequestMapping;@Controller
public class UserController {@RequestMapping("/doLogin")public String doLogin(String username, String password, Model model){System.out.println("userName is"+username);UsernamePasswordToken token = new UsernamePasswordToken(username,password);Subject subject = SecurityUtils.getSubject();try {subject.login(token);return "index";}catch (AuthenticationException e){System.out.println(e.getCause());model.addAttribute("error","Username or Password is wrong!");return "login";}}@GetMapping("/admin")public String admin(){return "admin";}@GetMapping("/user")public String user(){return "user";}}
上面的代碼定義了三個接口,其中 doLogin 用于登錄,使用 UsernamePasswordToken 類創建 token。然后根據賬號和密碼進行匹配判斷,如果驗證失敗則返回 /dologin 頁面并顯示錯誤提示,如果驗證成功則可以訪問 index 頁面。
登錄頁面和首頁頁面都需要單獨編寫,在 resources 目錄下創建 templates 文件夾,然后分別創建 index.html 和 login.html。
<!DOCTYPE html>
<html lang="en">
<head><meta charset="UTF-8"><title>Title</title>
</head>
<body>
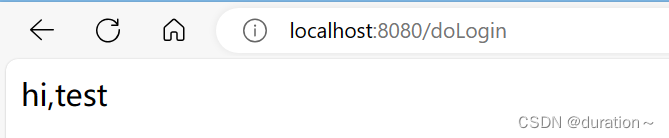
hi,test
</body>
</html><!DOCTYPE html>
<html lang="en" xmlns:th="http://www.thymeleaf.org">
<head><meta charset="UTF-8"><title>Login</title>
</head>
<body>
<form action="/doLogin" method="post"><label>username:</label><input type="text" name="username"><br/><label>password:</label><input type="text" name="password"><br/><div th:text>${error}</div><input type="submit" value="登錄"/></form>
</body>
</html>為了更好的加載上面的頁面,編寫一個 WebMvcConfig 來加載:
package org.example.config;import org.springframework.context.annotation.Configuration;
import org.springframework.web.servlet.config.annotation.ViewControllerRegistry;
import org.springframework.web.servlet.config.annotation.WebMvcConfigurer;@Configuration
public class WebMvcConfig implements WebMvcConfigurer {@Overridepublic void addViewControllers(ViewControllerRegistry registry) {registry.addViewController("index").setViewName("index");registry.addViewController("login").setViewName("login");}
}
訪問之后,輸入正確的賬號和密碼,則可以看到登錄成功的頁面,反之則提示登錄失敗。
總結
Shiro 的使用非常方便,只需實現最核心的 realm 定義和 shiroFilterChainDefinition 功能就可以很好地完成認證授權功能。除此之外,Shiro 還提供緩存功能,感興趣的同學可以自行查閱官方文檔進行學習。


