地位:
對于任何一門編程語言的學習,print函數毫無疑問是一種最好的調試手段,調試者不僅能通過它獲取程序變量的運行狀態而且通過對其合理使用獲取程序的運行流程,更能通過關鍵變量的輸出幫你驗證推理的正確與否,樸素的講print函數就是人與程序交流的媒介,能否合理運用print函數處理問題是學好程序的關鍵
在嵌入式的學習中Oled顯示就充當人與程序與實驗板子之間溝通的媒介,合理使用Oled調試程序將會給后續程序調試帶來巨大便利,這就是為什么在點燈之后就立即學習Oled顯示
OLed1線路圖:
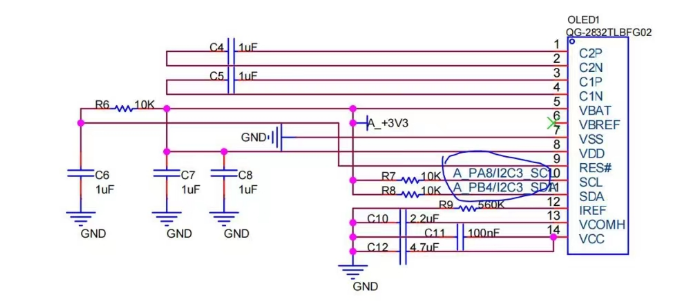
這是Oled連線原理圖,主要看畫圈部分即可,PA8以及PB4是Stm32l071kbu6芯片控制,所以只需要調這倆引腳即可,哦還有就是上面A_+3V3也是需要用芯片控制這個等會說
Stm32l071連線圖:
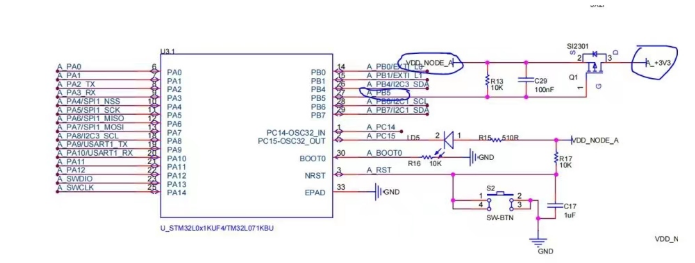
可以看出本芯片控制著Oled的電源以及倆引腳
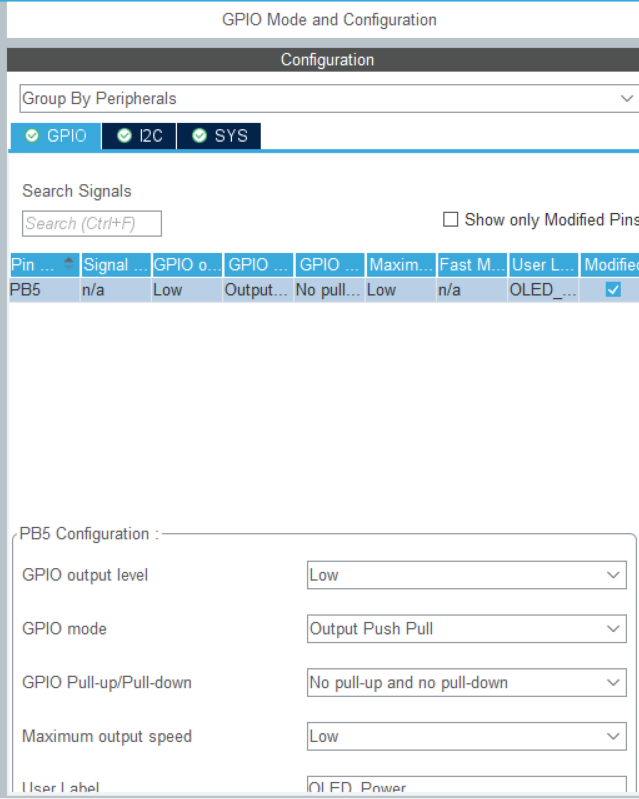
當PB5為低電平時,三極管SI2301導通,A_3V3得電,OLED工作;
反之,三極管SI2301不導通,A_3V3失電,OLED熄滅。
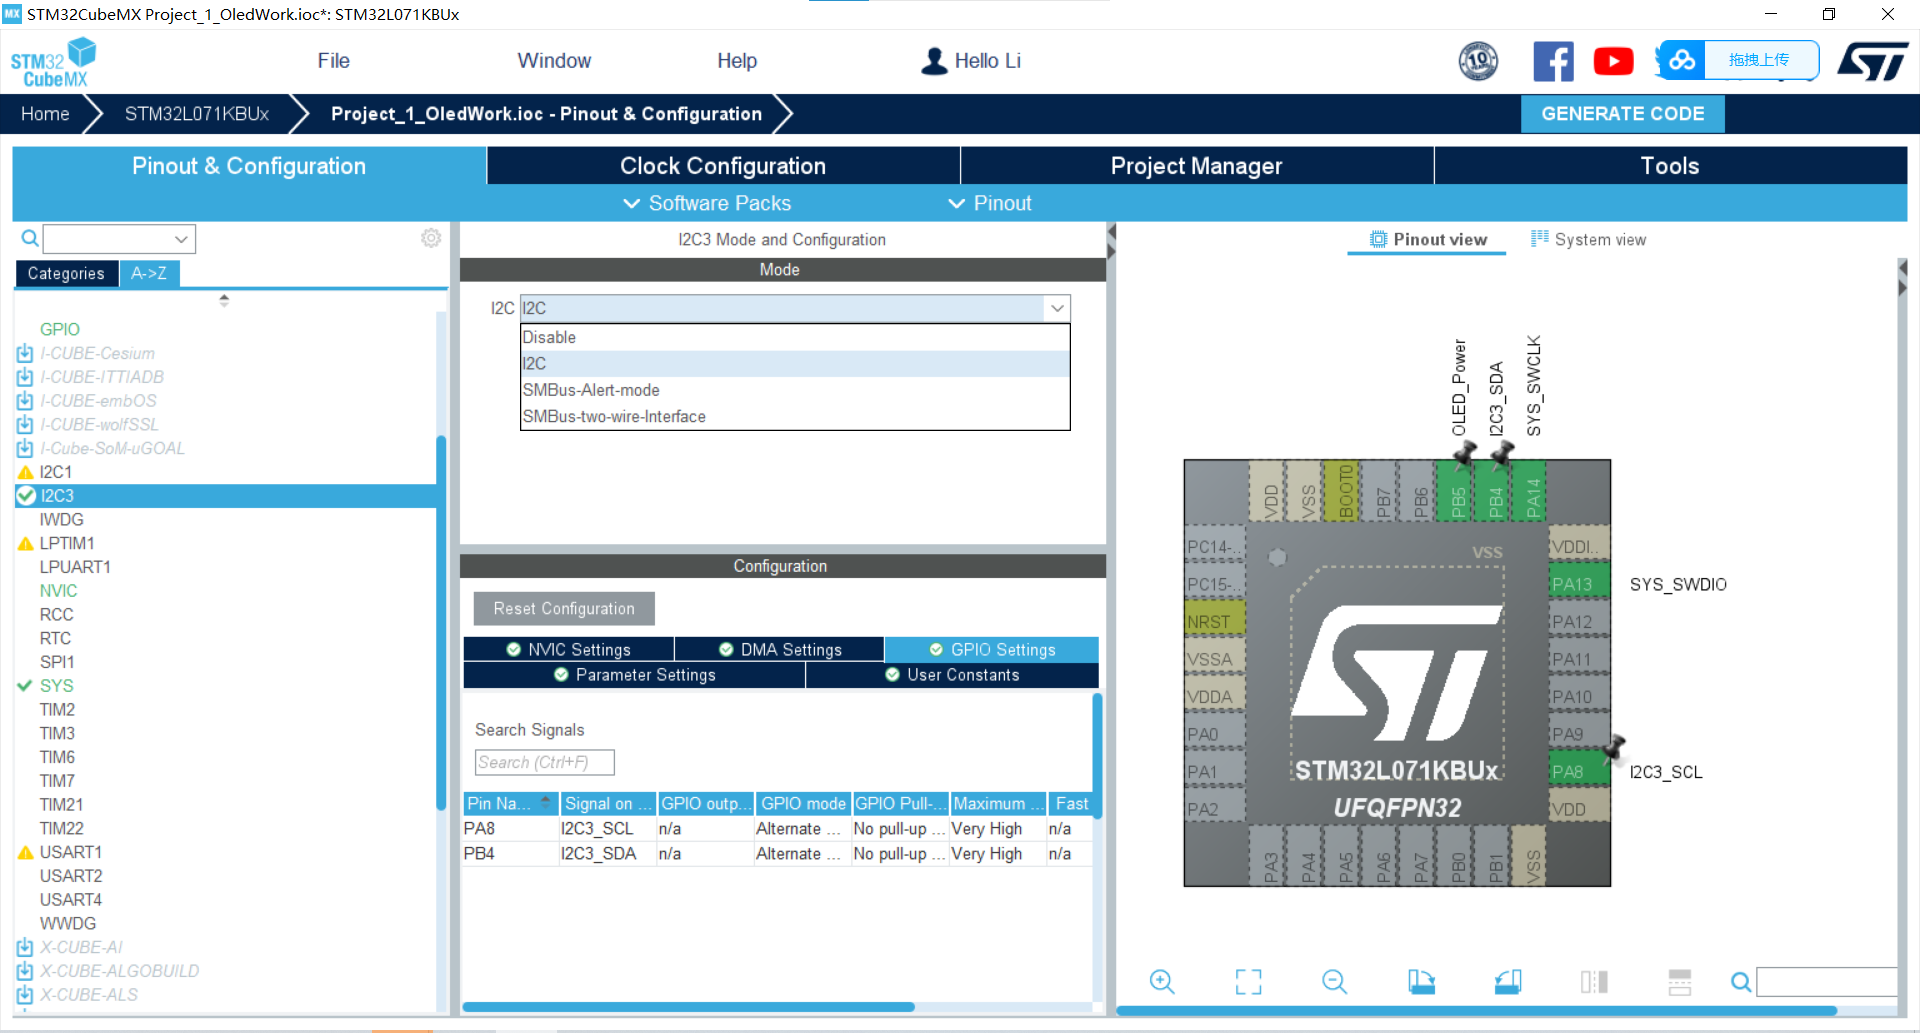
引腳配置:

以下是對I2C3_CS及I2C3_SDA的概述:
I2C 是一種串行通信協議,用于在微控制器和外部設備之間進行數據傳輸和通信。I2C3即I2C3外設,I2C有多個外設,這里指第三個。
SDA(串行數據線): SDA 是用于實際傳輸數據的線路。數據在 SDA 上進行傳輸,包括地址、命令和實際的數據位。當時鐘線(SCL)處于特定狀態(上升沿或下降沿)時,數據線(SDA)上的數據被讀取或寫入。SDA 線由主設備或從設備控制,用于傳輸數據。
SCL(串行時鐘線): SCL 是用于同步數據傳輸的時鐘信號線。SCL 確定了數據傳輸的時序和速率。數據線(SDA)上的數據傳輸在 SCL
信號的節拍下進行。每個數據位都在 SCL 上的每個脈沖中傳輸。SCL 由主設備產生和控制。
接通電源后Oled傳輸數據的過程需要SDA和SCL配合傳輸數據,SCL打節拍,SDA傳數據
CubMX配置:
Keil5配置:
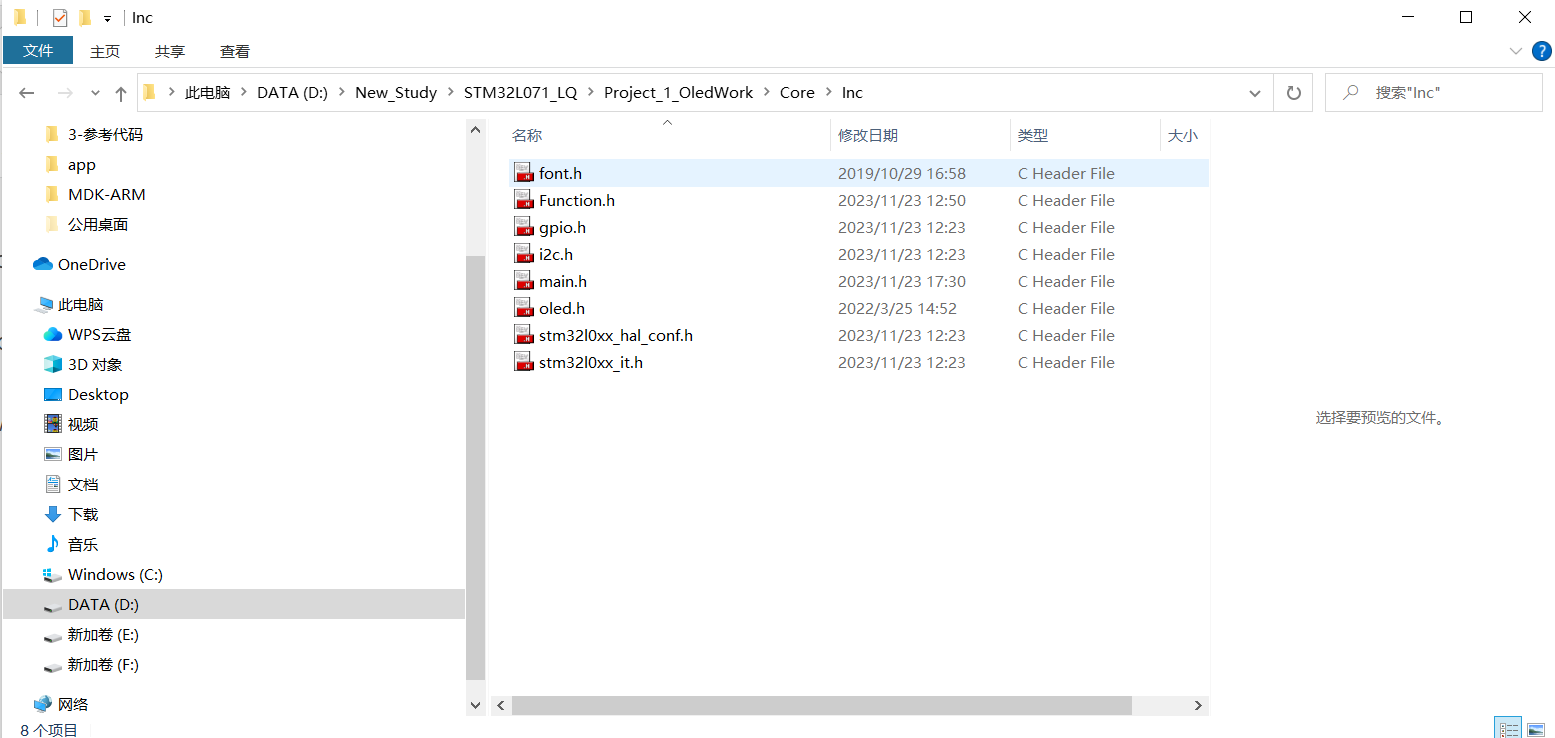
注意:
oled.c及.h以及font.h藍橋杯官方會提供,但是需要將OLED_Write函數寫好。
鏈接: https://pan.baidu.com/s/1cDqH-5il_ca5lCBzMpnCEg 提取碼:lq14
main.c:
/* USER CODE BEGIN Header */
/********************************************************************************* @file : main.c* @brief : Main program body******************************************************************************* @attention** Copyright (c) 2023 STMicroelectronics.* All rights reserved.** This software is licensed under terms that can be found in the LICENSE file* in the root directory of this software component.* If no LICENSE file comes with this software, it is provided AS-IS.********************************************************************************/
/* USER CODE END Header */
/* Includes ------------------------------------------------------------------*/
#include "main.h"
#include "i2c.h"
#include "gpio.h"
#include "Function.h"
#include "oled.h"
#include "stdio.h"
#include "string.h"
/* Private includes ----------------------------------------------------------*/
/* USER CODE BEGIN Includes *//* USER CODE END Includes *//* Private typedef -----------------------------------------------------------*/
/* USER CODE BEGIN PTD *//* USER CODE END PTD *//* Private define ------------------------------------------------------------*/
/* USER CODE BEGIN PD *//* USER CODE END PD *//* Private macro -------------------------------------------------------------*/
/* USER CODE BEGIN PM *//* USER CODE END PM *//* Private variables ---------------------------------------------------------*//* USER CODE BEGIN PV *//* USER CODE END PV *//* Private function prototypes -----------------------------------------------*/
void SystemClock_Config(void);
/* USER CODE BEGIN PFP *//* USER CODE END PFP *//* Private user code ---------------------------------------------------------*/
/* USER CODE BEGIN 0 *//* USER CODE END 0 *//*** @brief The application entry point.* @retval int*/
int main(void)
{char *a = "sjkjfisd";HAL_Init();SystemClock_Config();/* USER CODE BEGIN SysInit *//* USER CODE END SysInit *//* Initialize all configured peripherals */MX_GPIO_Init();MX_I2C3_Init();/* USER CODE BEGIN 2 *//* USER CODE END 2 */Function_OledEnable(50);/* Infinite loop *//* USER CODE BEGIN WHILE */while (1){/* USER CODE END WHILE */OLED_ShowString(5,2,a,16);/* USER CODE BEGIN 3 */}/* USER CODE END 3 */
}/*** @brief System Clock Configuration* @retval None*/
void SystemClock_Config(void)
{RCC_OscInitTypeDef RCC_OscInitStruct = {0};RCC_ClkInitTypeDef RCC_ClkInitStruct = {0};RCC_PeriphCLKInitTypeDef PeriphClkInit = {0};/** Configure the main internal regulator output voltage*/__HAL_PWR_VOLTAGESCALING_CONFIG(PWR_REGULATOR_VOLTAGE_SCALE1);/** Initializes the RCC Oscillators according to the specified parameters* in the RCC_OscInitTypeDef structure.*/RCC_OscInitStruct.OscillatorType = RCC_OSCILLATORTYPE_HSI;RCC_OscInitStruct.HSIState = RCC_HSI_ON;RCC_OscInitStruct.HSICalibrationValue = RCC_HSICALIBRATION_DEFAULT;RCC_OscInitStruct.PLL.PLLState = RCC_PLL_ON;RCC_OscInitStruct.PLL.PLLSource = RCC_PLLSOURCE_HSI;RCC_OscInitStruct.PLL.PLLMUL = RCC_PLLMUL_4;RCC_OscInitStruct.PLL.PLLDIV = RCC_PLLDIV_2;if (HAL_RCC_OscConfig(&RCC_OscInitStruct) != HAL_OK){Error_Handler();}/** Initializes the CPU, AHB and APB buses clocks*/RCC_ClkInitStruct.ClockType = RCC_CLOCKTYPE_HCLK|RCC_CLOCKTYPE_SYSCLK|RCC_CLOCKTYPE_PCLK1|RCC_CLOCKTYPE_PCLK2;RCC_ClkInitStruct.SYSCLKSource = RCC_SYSCLKSOURCE_PLLCLK;RCC_ClkInitStruct.AHBCLKDivider = RCC_SYSCLK_DIV1;RCC_ClkInitStruct.APB1CLKDivider = RCC_HCLK_DIV1;RCC_ClkInitStruct.APB2CLKDivider = RCC_HCLK_DIV1;if (HAL_RCC_ClockConfig(&RCC_ClkInitStruct, FLASH_LATENCY_1) != HAL_OK){Error_Handler();}PeriphClkInit.PeriphClockSelection = RCC_PERIPHCLK_I2C3;PeriphClkInit.I2c3ClockSelection = RCC_I2C3CLKSOURCE_PCLK1;if (HAL_RCCEx_PeriphCLKConfig(&PeriphClkInit) != HAL_OK){Error_Handler();}
}/* USER CODE BEGIN 4 *//* USER CODE END 4 *//*** @brief This function is executed in case of error occurrence.* @retval None*/
void Error_Handler(void)
{/* USER CODE BEGIN Error_Handler_Debug *//* User can add his own implementation to report the HAL error return state */__disable_irq();while (1){}/* USER CODE END Error_Handler_Debug */
}#ifdef USE_FULL_ASSERT
/*** @brief Reports the name of the source file and the source line number* where the assert_param error has occurred.* @param file: pointer to the source file name* @param line: assert_param error line source number* @retval None*/
void assert_failed(uint8_t *file, uint32_t line)
{/* USER CODE BEGIN 6 *//* User can add his own implementation to report the file name and line number,ex: printf("Wrong parameters value: file %s on line %d\r\n", file, line) *//* USER CODE END 6 */
}
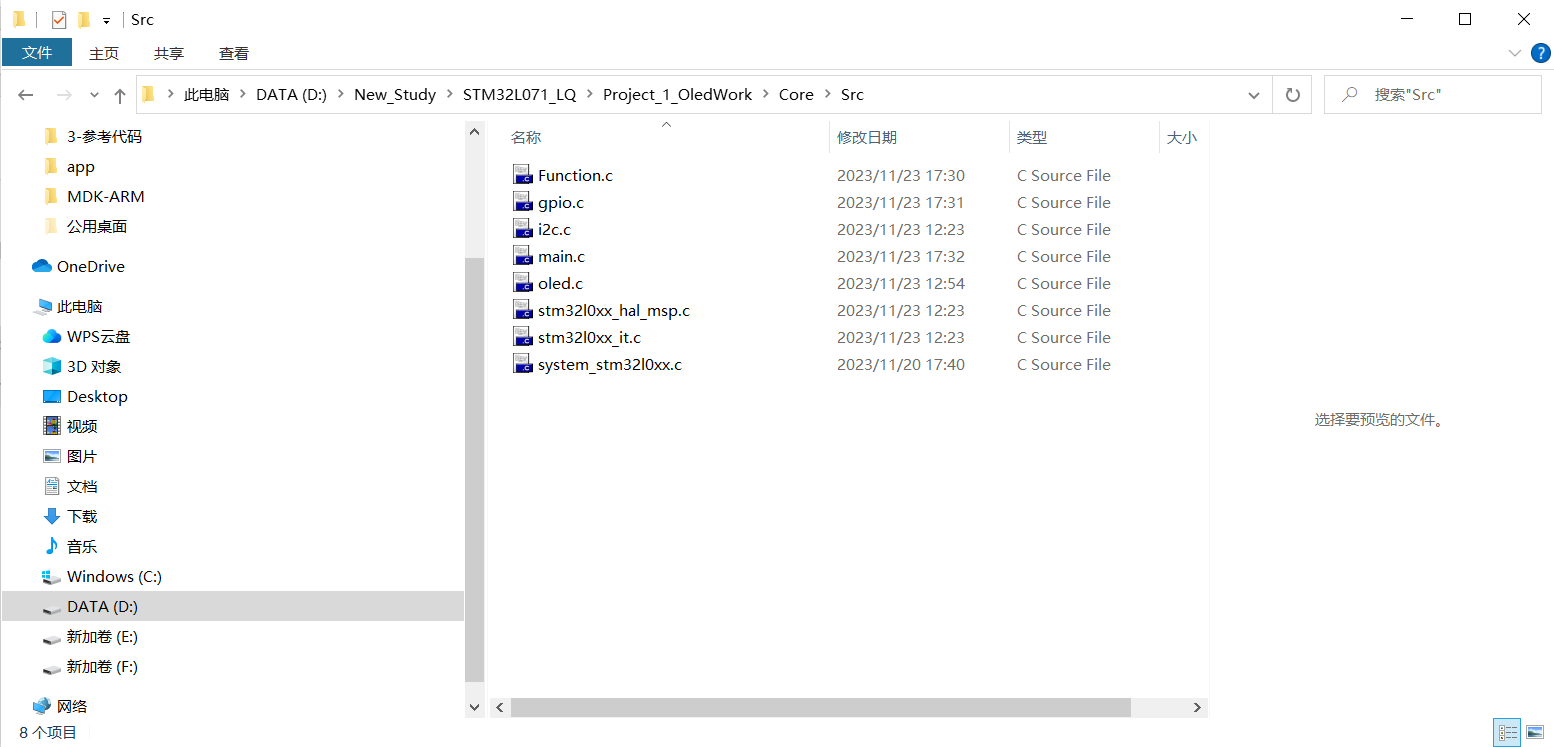
#endif /* USE_FULL_ASSERT */Function.c及.h:
#include "Function.h"
#include "oled.h"
#include "stdio.h"
#include "gpio.h"
#include "i2c.h"void OLED_Write(unsigned char type, unsigned char data){ // 配置寫函數unsigned char Write_Data[2]; // 需要傳輸的數據Write_Data[0] = type; // 寫入的數據類型Write_Data[1] = data; // 寫入的數據HAL_I2C_Master_Transmit(&hi2c3, 0x78, Write_Data, 2, 0xff); // i2c配置、傳入數據位置、傳入數據信息、傳入數據大小、超時傳輸時間
}void Function_OledEnable(unsigned char ms){ // Oled使能HAL_GPIO_WritePin(OLED_Power_GPIO_Port, OLED_Power_Pin, GPIO_PIN_RESET); // 通電HAL_Delay(ms); // 延時等待,等待數據傳輸完再顯示數據OLED_Init(); // 初始化OLed
}
#ifndef __FUNCTION__
#define __FUNCTION__void OLED_Write(unsigned char comm, unsigned char data);
void Function_OledEnable(unsigned char ms);#endif
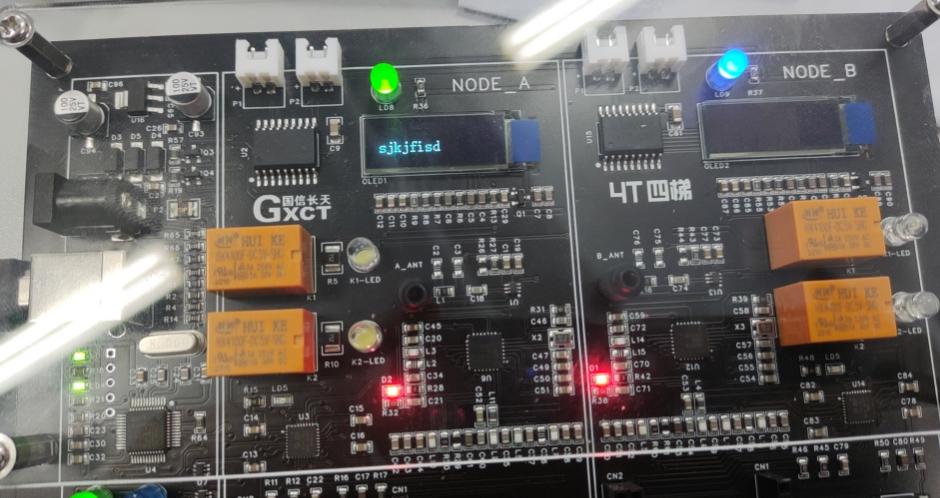
運行效果:
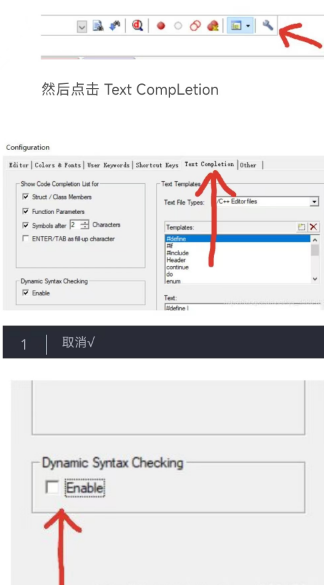
黃色警告消除:


)


 處理Get、Post請求)


