今天繼續批量創建常用的基礎元素:樓板。這次以簡單的輪廓為矩形的樓板為例。讓我們來看一看如何讓Revit自動干活:
from typing import List
import math
# drvt_pybind 支持多會話、多文檔,先從簡單的單會話、單文檔開始
# MyContext是在Python中用戶自定義的單會話、單文檔的上下文管理類
from packs.core import MyContext, m2feet, feet2m, isNone# 導入驅動 Revit 的核心模塊
from drvt_pybind.Autodesk import Revit
from drvt_pybind.Autodesk.Revit import DB# 批量創建標高(沒錯,就是從“Python+DRVT 從外部調用 Revit:批量創建標高”示例中搬過來稍作擴展)
def createLevels(ctx: MyContext, levels: List[DB.Level]) -> None:"""本示例移值自 Revit 2025.3 SDK 中的相關示例"""session = ctx.sessiondoc = ctx.doctry:# 涉及到修改操作的,需要鎖定并用事務包裝ctx.lockAndStartTransaction("創建標高")floorPlanTypeId = DB.FilteredElementCollector.ctor(ctx.session, ctx.doc).OfClass(ctx.session.typeof(DB.ViewFamilyType)).FirstElementId()if isNone(floorPlanTypeId):raise AssertionError("嘗試獲取ViewFamilyType失敗")for i in range(0,8):l = 9 + i * 3level = DB.Level.Create(session, doc, m2feet(l))name = f"測試標高 {l}"# 更新標高的名稱level.setName(name)levels.append(level)# 創建與標高對應的 ViewPlan,這樣 樓層平面 視圖會出現在項目管理器中levelId = level.getId()vp = DB.ViewPlan.Create(session, doc, floorPlanTypeId, levelId)if vp is not None:vp.setName(name)# 提交事務并解鎖,若沒有錯誤則修改操作將會生效ctx.commitTransactionAndUnlock()except Exception as e:print(f"【異常】{e}")# 回滾事務并解鎖ctx.rollbackTransactionAndUnlock()# 遍歷文檔中已有的標高然后再批量創建一些,返回按Elevation從低到高的List[DB.Level]
def getLevels(ctx : MyContext) -> List[DB.Level]:tmp : List[DB.Level] = []levelList = DB.FilteredElementCollector.ctor(ctx.session, ctx.doc).OfClass(ctx.session.typeof(DB.Level)).ToElements()for i in range(levelList.getCount()):l = DB.asLevel(levelList.getItem(i))if isNone(l):continuetmp.append(l)ret = sorted(tmp, key=lambda x:x.getElevation())createLevels(ctx, ret)return ret# 遍歷FloorType,返回List[DB.FloorType]
def getFloorTypes(ctx : MyContext) -> List[DB.FloorType]:floorTypeList : List[DB.FloorType] = []listWt = DB.FilteredElementCollector.ctor(ctx.session, ctx.doc).OfClass(ctx.session.typeof(DB.FloorType)).ToElements()for i in range(listWt.getCount()):wt = DB.asFloorType(listWt.getItem(i))if isNone(wt):continuefloorTypeList.append(wt)return floorTypeList# 示例創建板
def FloorCreation(ctx: MyContext) -> None:"""本示例展示如何使用Python+DRVT,在外部讓Revit批量創建墻"""if ctx.doc is not None:ctx.closeDoc(True)template = "建筑樣板.rte"fileName = "FloorCreation.rvt"err = ctx.createAndActiveDoc(template, fileName)if err != 0:raise AssertionError(f"創建項目文檔失敗: 錯誤碼 {err}")session = ctx.sessiondoc = ctx.doc# 取所有標高,缺省是兩個levels = getLevels(ctx)try:# 取所有FloorTypefloorTypeList = getFloorTypes(ctx)# 涉及到修改操作的,需要鎖定并用事務包裝ctx.lockAndStartTransaction("批量創建板")for i in range(len(levels)):locLev = levels[i]ele = locLev.getElevation()# 選擇一個FloorTypefloorType = floorTypeList[i % len(floorTypeList)]# 定義板的輪廓線a = m2feet(5)b = m2feet(3) p0 = DB.XYZ.ctor(session, 0, 0, ele)p1 = DB.XYZ.ctor(session, a, 0, ele)p2 = DB.XYZ.ctor(session, a, b, ele)p3 = DB.XYZ.ctor(session, 0, b, ele)profileCurves = DB.ListCurve.ctor(session)profileCurves.Add(DB.Line.CreateBound(session, p0, p1))profileCurves.Add(DB.Line.CreateBound(session, p1, p2))profileCurves.Add(DB.Line.CreateBound(session, p2, p3))profileCurves.Add(DB.Line.CreateBound(session, p3, p0))profileLoop = DB.CurveLoop.Create(session, profileCurves)listCurveLoop = DB.ListCurveLoop.ctor(session)listCurveLoop.Add(profileLoop)# 創建板floor = DB.Floor.Create(session, doc, listCurveLoop, floorType.getId(), locLev.getId())# 取“結構”參數p = floor.getParameter(DB.BuiltInParameter.FLOOR_PARAM_IS_STRUCTURAL)# 更新其值為“1”(等價于:True)p.Set(1)print(f"在 {locLev.getName()} 創建了 {floorType.getName()} 矩形板")# 提交事務并解鎖,若沒有錯誤則修改操作將會生效ctx.commitTransactionAndUnlock()except Exception as e:print(f"【異常】{e}")# 回滾事務并解鎖ctx.rollbackTransactionAndUnlock()# 保存文檔并關閉ctx.closeDoc(True)# 下面這段代碼,看過“創建新項目”示例的會很熟悉,就是照搬過來的
# 創建新的上下文(可以按需創建多個,意味著能直接管理多個 Revit 會話)
ctx = MyContext("在這里指定會話名稱")
# 初始化會話(啟動 Revit 進程實例)
ctx.initSession()# 調用FloorCreation
FloorCreation(ctx)# 結束會話(Revit 進程實例將退出)
ctx.dispose()
又一個完整的自動化腳本,上面的代碼做了什么?
1、創建Revit會話,啟動Revit進程(可見、可交互,與手工啟動的無任何差異)
2、批量創建樓板
3、結束會話,退出Revit進程
其中“2、批量創建樓板”做了以下工作:
????????1)以“建筑樣板.rte”為樣板,創建項目 “FloorCreation.rvt” 并作為當前活動文檔(可見、可交互)
????????2)獲取該文檔中所有標高(缺省僅2個),并批量創建多個,按Elevation排序
????????3)獲取該文檔中所有FloorType
? ? ? ? 4)在每一個標高上
? ? ? ????????? a)按次序選擇一FloorType
? ? ? ? ????????b)在當前標高的高度上創建一個長5米、寬3米的矩形輪廓
? ? ? ? ????????c)基于a)選擇的FloorType + b)中創建的輪廓在當前標高上創建一個樓板
? ? ? ? ? ? ? ? d)更新樓板對象的“結構”參數值為True(選中樓板在其“屬性”中可見“結構”參數打勾)
????????保存項目文件并關閉
運行結果(三維視圖):
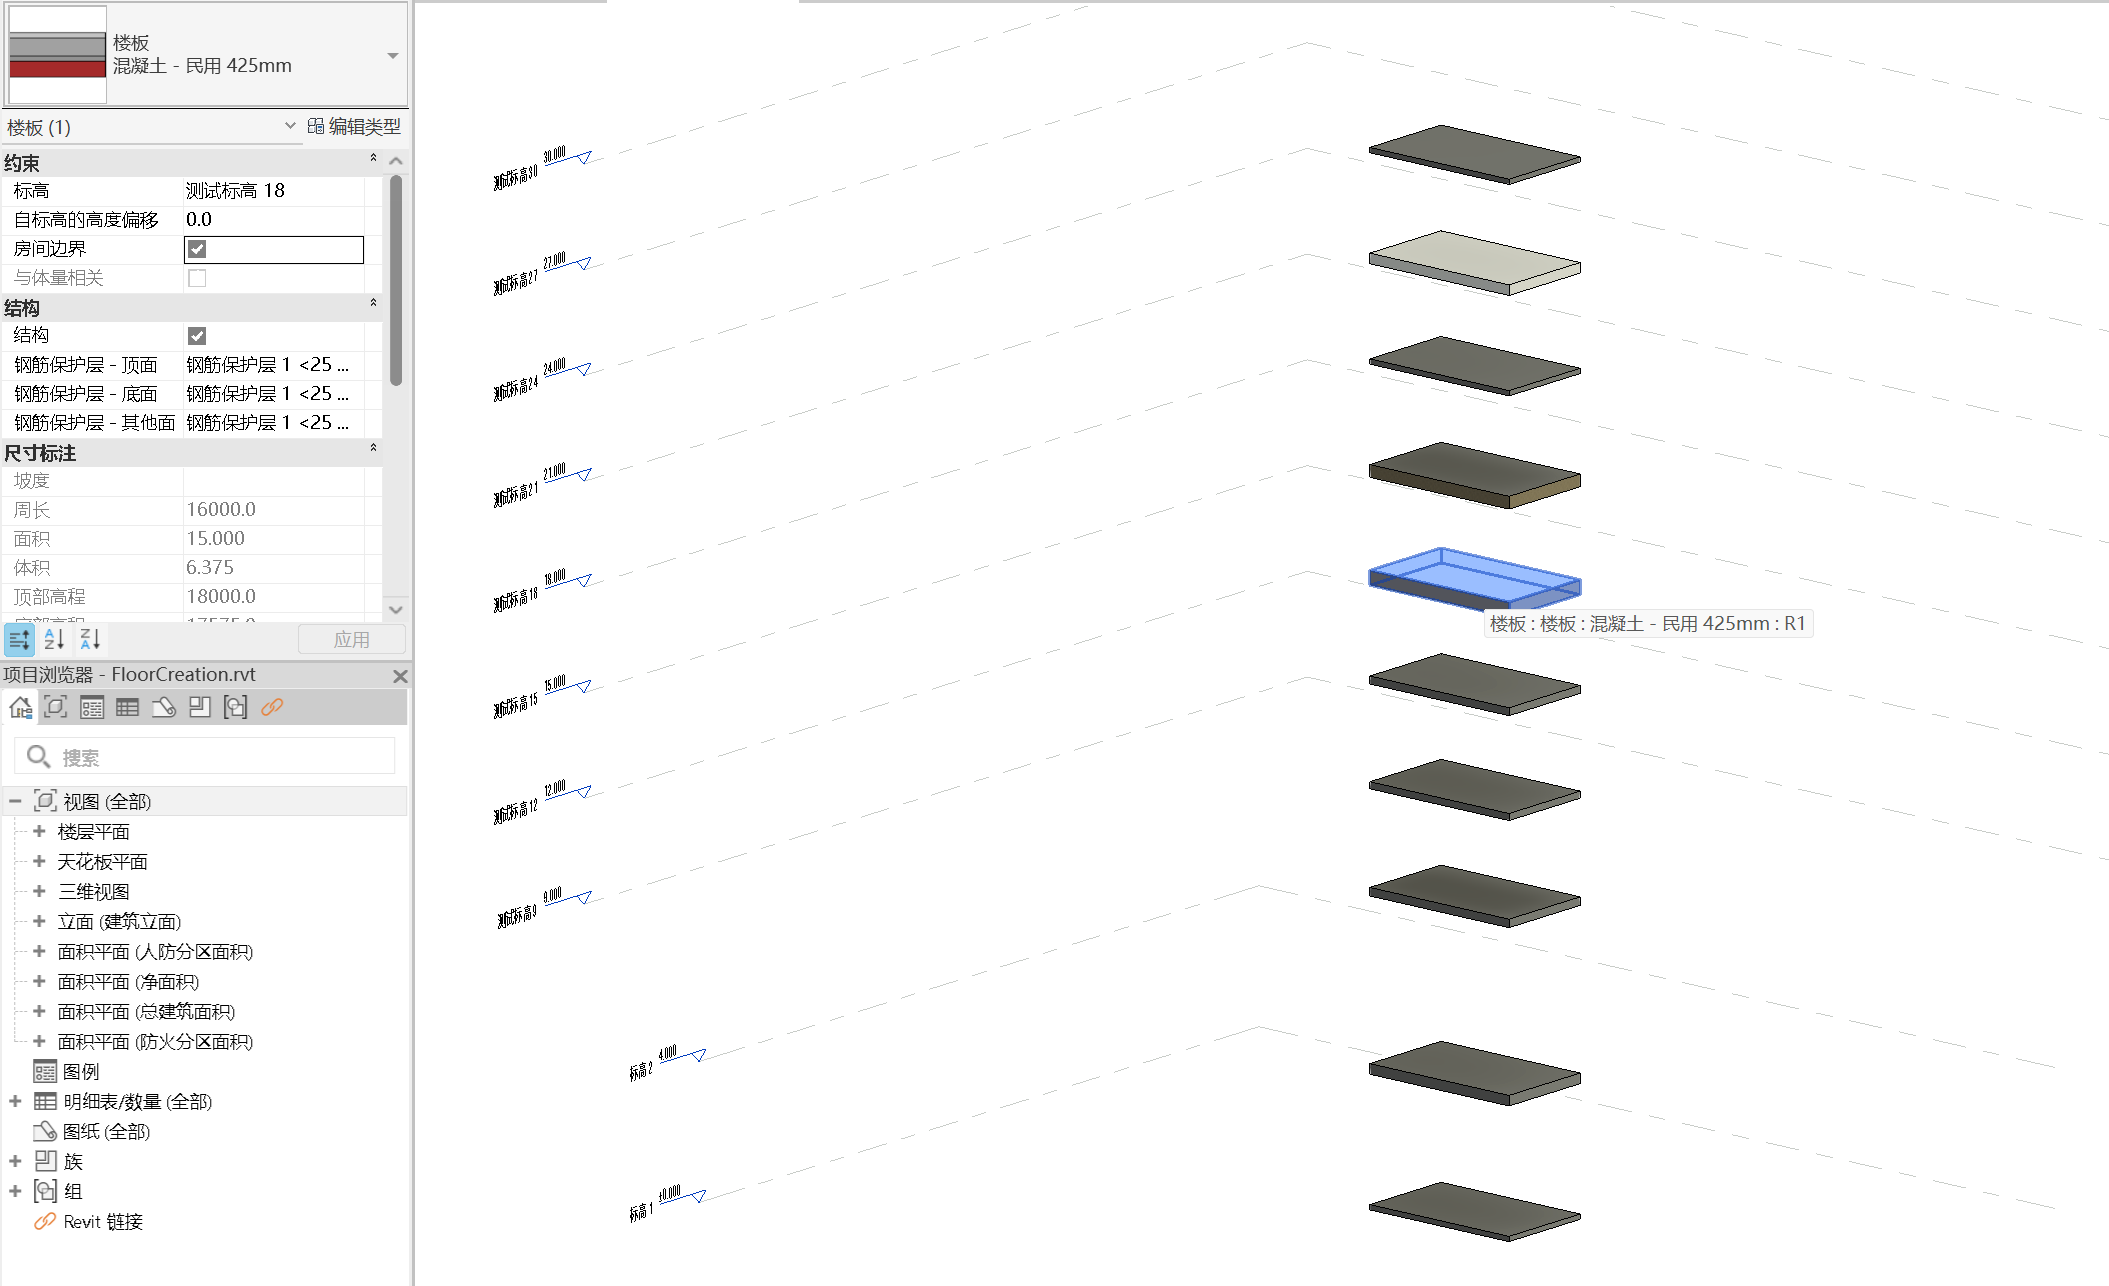
三維
控制臺輸出:
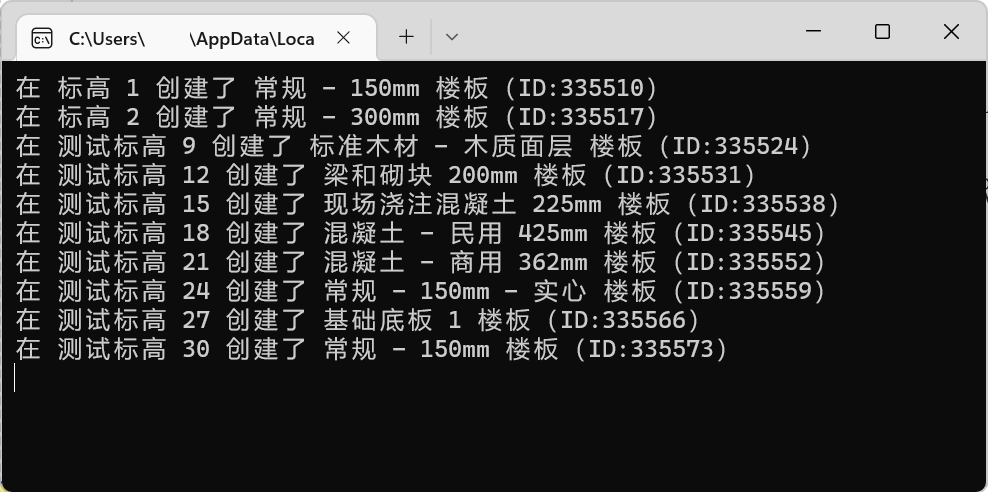
依舊是全自動完成,啟動Revit => 創建項目 => 批量創建 => 保存項目文檔 => 結束Revit 全程無需手工操作。Python+DRVT,輕松跨越了應用邊界與技術壁壘,實現對Revit插件核心能力的高效駕馭。
隨著展示出來的能力越來越多,并且保持一貫簡潔的同時又能專注于業務邏輯+雙向訪問。那么,對于充分挖掘Revit的價值、構建自動化生產流水線、將Revit深度集成到自己的系統……會不會有新的想法?創意有沒有閃現?
相關文章
Python+DRVT 從外部調用 Revit:從外部啟動 Revit-CSDN博客
Python+DRVT 從外部調用 Revit:打開項目文件-CSDN博客
Python+DRVT 從外部調用 Revit:獲取項目信息-CSDN博客
Python+DRVT 從外部調用 Revit:更新項目信息-CSDN博客
Python+DRVT 從外部調用 Revit:第一個完整示例-CSDN博客
Python+DRVT 從外部調用 Revit:創建新項目-CSDN博客
Python+DRVT 從外部調用 Revit:創建族文檔-CSDN博客
Python+DRVT 從外部調用 Revit:批量創建軸網-CSDN博客
Python+DRVT 從外部調用 Revit:批量創建標高-CSDN博客
Python+DRVT 從外部調用 Revit:創建風管系統加勁肋-CSDN博客
Python+DRVT 從外部調用 Revit:創建剖面-CSDN博客
Python+DRVT 從外部調用 Revit:創建桁架族-CSDN博客
Python+DRVT 從外部調用 Revit:批量創建墻-CSDN博客
Python+DRVT 從外部調用 Revit:批量創建門-CSDN博客
Python+DRVT 從外部調用 Revit:批量創建門和窗-CSDN博客
Python+DRVT 從外部調用 Revit:批量創建梁-CSDN博客
Python+DRVT 從外部調用 Revit:批量創建梁(2)-CSDN博客
深度嵌入數字化工作流:DRVT 的思考與實踐-CSDN博客
從插件化走向系統集成——Revit-CSDN博客
Revit變身智能組件,BIM未來可期-CSDN博客
#SystemIntegration #Revit #RevitAPI #Python #Automation #DesignAutomation #BIM #Interop #AEC #DigitalTwin #Workflow

 詳細指南)


 egui (0.32.1) 學習筆記(逐行注釋)(二十六)windows平臺運行時隱藏控制臺)


 如何搭建Redis哨兵?)


