文章目錄
- 環境背景
- 1. 配置域名映射
- 2. 配置免密登錄
- 2.1 在每臺機器上生成SSH密鑰對:
- 2.2 將公鑰分發到其他機器:
- 2.2.1 報錯問題
- 2.2.2 修復方法
- 3. 驗證免密登錄
- 在 `ubuntu1` 上:
- 在 `ubuntu2` 上:
- 在 `ubuntu3` 上:
- 測試連接
環境背景
當前三臺ubuntu節點已經完成了虛擬機在vmware fusion中的部署,網絡經過測試均已經互通,并且開機使用遠程連接進行訪問。
1. 配置域名映射
編輯每臺機器的 /etc/hosts 文件,添加以下內容:
sudo vim /etc/hosts
添加以下行:
172.16.167.131 ubuntu1
172.16.167.132 ubuntu2
172.16.167.133 ubuntu3
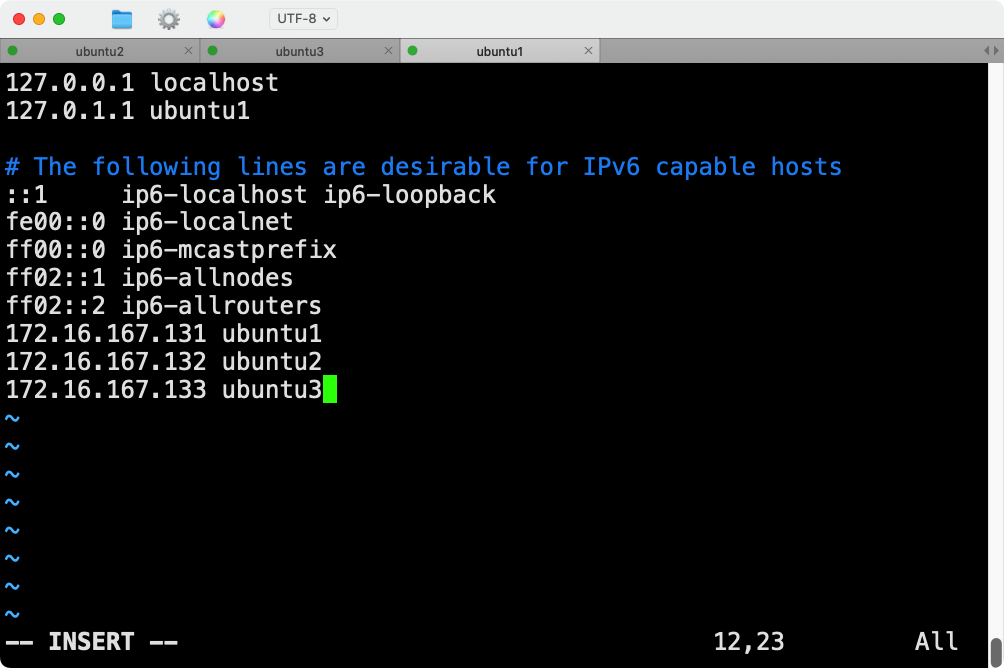
保存并退出文件。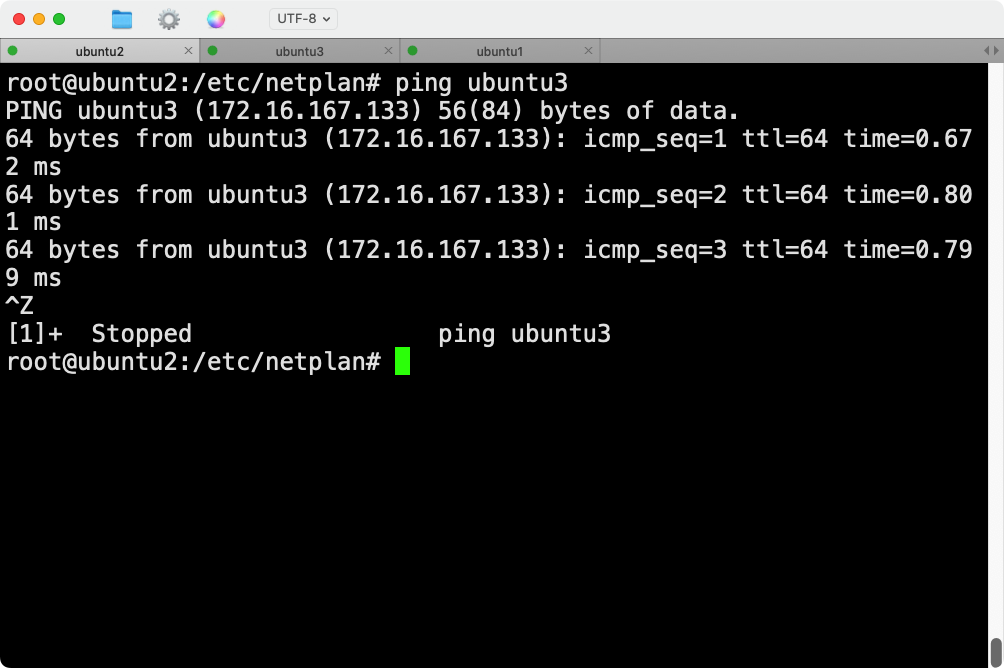
同時,可以給mac物理機主機映射也配置上 ,打開mac終端,先進入root,再編輯hosts文件:
su root
vim /etc/hosts
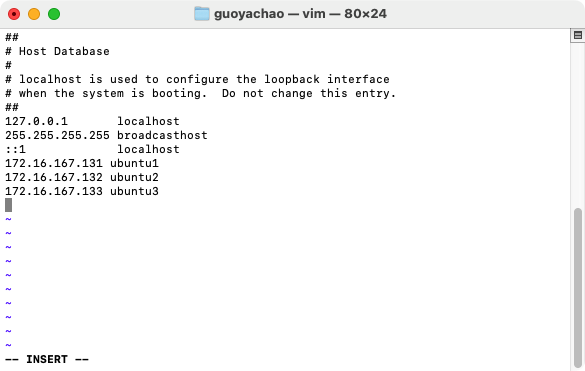
這樣,每臺機器都能通過域名訪問其他機器。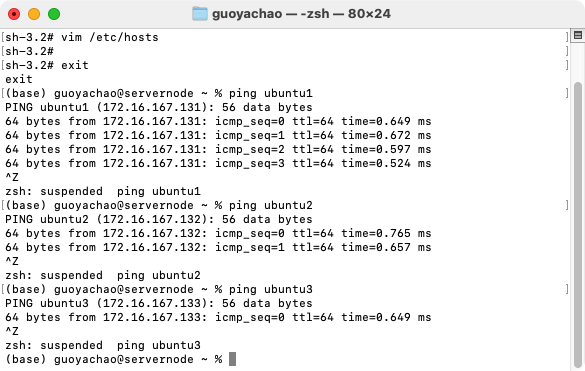
2. 配置免密登錄
在每臺機器上生成SSH密鑰對,并將公鑰分發到其他機器。
2.1 在每臺機器上生成SSH密鑰對:
ssh-keygen -t rsa -b 2048
在提示時按Enter鍵,使用默認文件路徑,不設置密碼短語。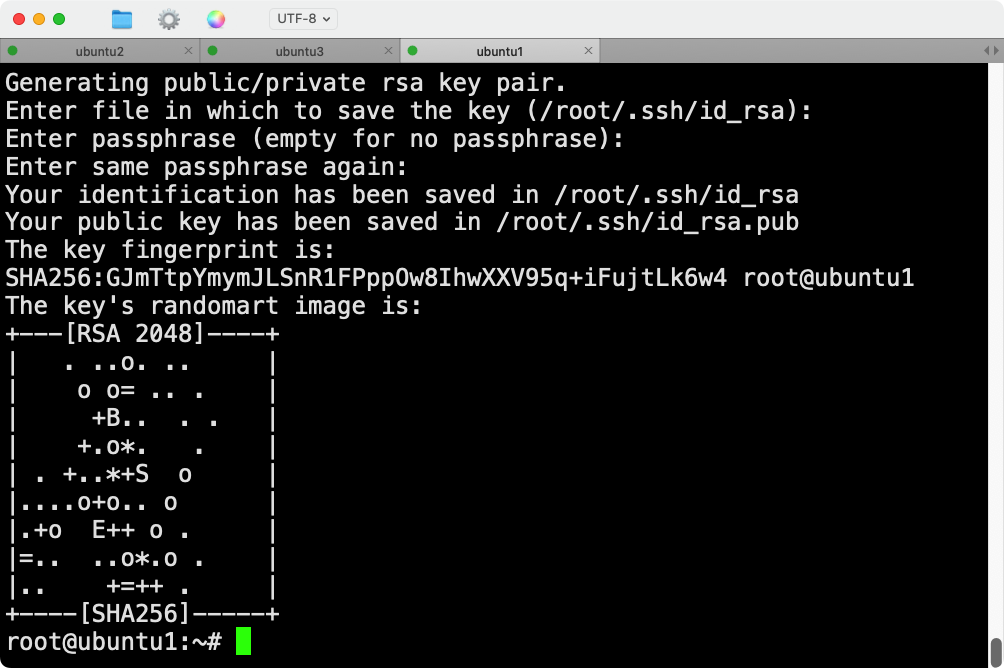
2.2 將公鑰分發到其他機器:
假設現在在 ubuntu1 上,運行以下命令將公鑰分發到 ubuntu2 和 ubuntu3:
ssh-copy-id ubuntu2
ssh-copy-id ubuntu3
成功的回顯如下:
root@ubuntu1:~# ssh-copy-id ubuntu3
/usr/bin/ssh-copy-id: INFO: Source of key(s) to be installed: "/root/.ssh/id_rsa.pub"
The authenticity of host 'ubuntu3 (172.16.167.133)' can't be established.
ED25519 key fingerprint is SHA256:kT9JZ/VheFqnJ6JjAA7RTTRzpdFCJ0DE+SbAAYgeCLc.
This host key is known by the following other names/addresses:~/.ssh/known_hosts:1: [hashed name]
Are you sure you want to continue connecting (yes/no/[fingerprint])? yes
/usr/bin/ssh-copy-id: INFO: attempting to log in with the new key(s), to filter out any that are already installed
/usr/bin/ssh-copy-id: INFO: 1 key(s) remain to be installed -- if you are prompted now it is to install the new keys
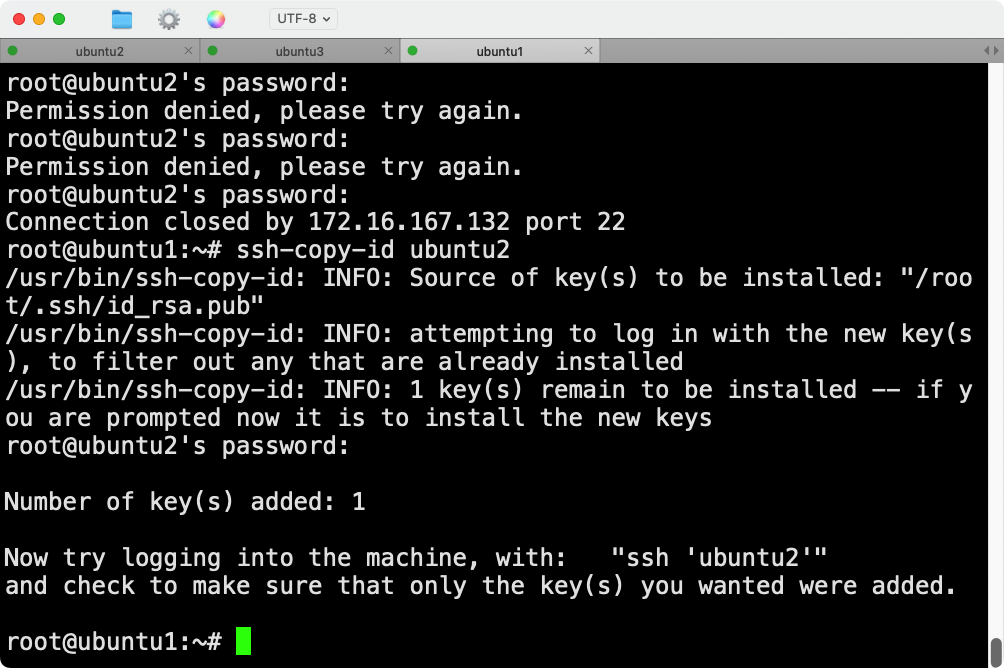
root@ubuntu3's password: Number of key(s) added: 1Now try logging into the machine, with: "ssh 'ubuntu3'"
and check to make sure that only the key(s) you wanted were added.root@ubuntu1:~#
然后在 ubuntu2 上,將公鑰分發到 ubuntu1 和 ubuntu3:
ssh-copy-id ubuntu1
ssh-copy-id ubuntu3
最后在 ubuntu3 上,將公鑰分發到 ubuntu1 和 ubuntu2:
ssh-copy-id ubuntu1
ssh-copy-id ubuntu2
2.2.1 報錯問題
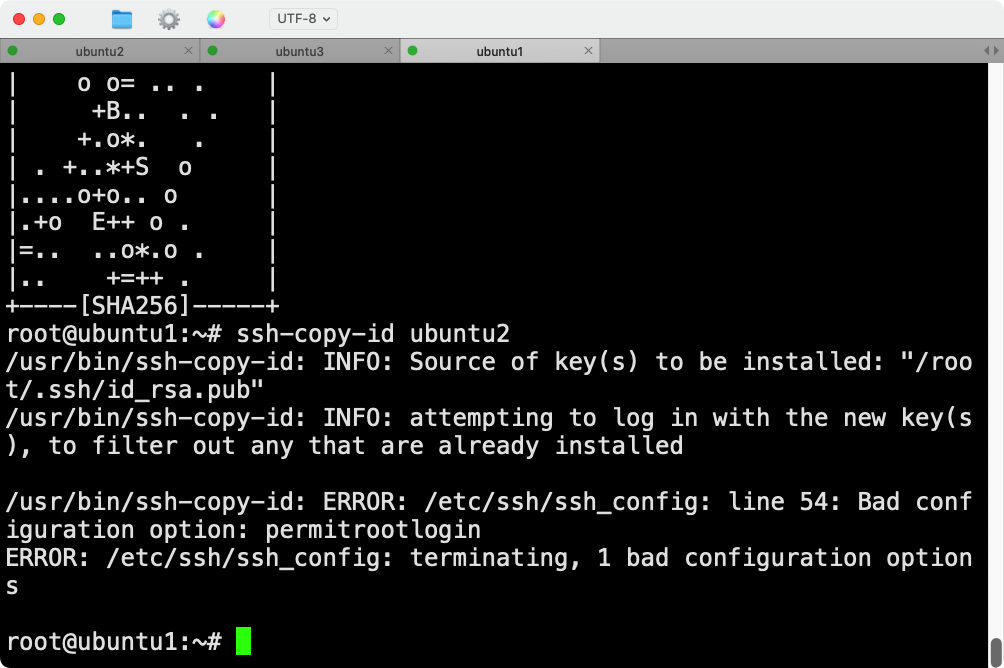
root@ubuntu1:~# ssh-copy-id ubuntu2
/usr/bin/ssh-copy-id: INFO: Source of key(s) to be installed: "/root/.ssh/id_rsa.pub"
/usr/bin/ssh-copy-id: INFO: attempting to log in with the new key(s), to filter out any that are already installed/usr/bin/ssh-copy-id: ERROR: /etc/ssh/ssh_config: line 54: Bad configuration option: permitrootlogin
ERROR: /etc/ssh/ssh_config: terminating, 1 bad configuration options
出現這個錯誤是因為 /etc/ssh/ssh_config 文件中包含無效的配置選項 PermitRootLogin。實際上,這個選項應該出現在 sshd_config 文件中,而不是 ssh_config 文件中。ssh_config 是客戶端配置文件,而 sshd_config 是服務器配置文件。
2.2.2 修復方法
- 編輯
/etc/ssh/ssh_config文件:打開并編輯/etc/ssh/ssh_config文件,找到包含PermitRootLogin的行并刪除它:
sudo vim /etc/ssh/ssh_config
找到并刪除或注釋掉這行:
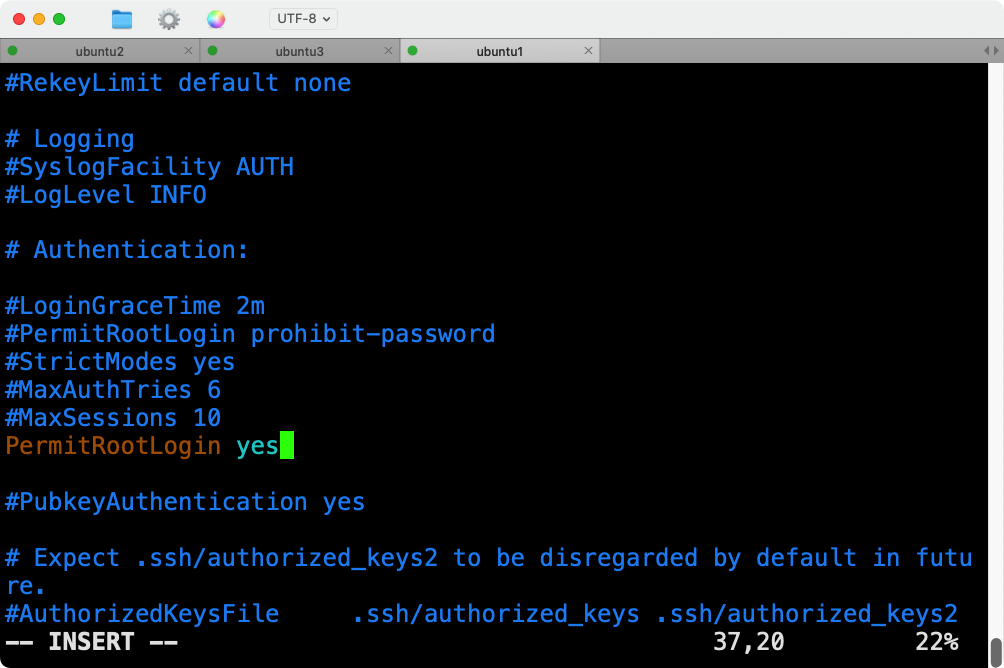
PermitRootLogin yes
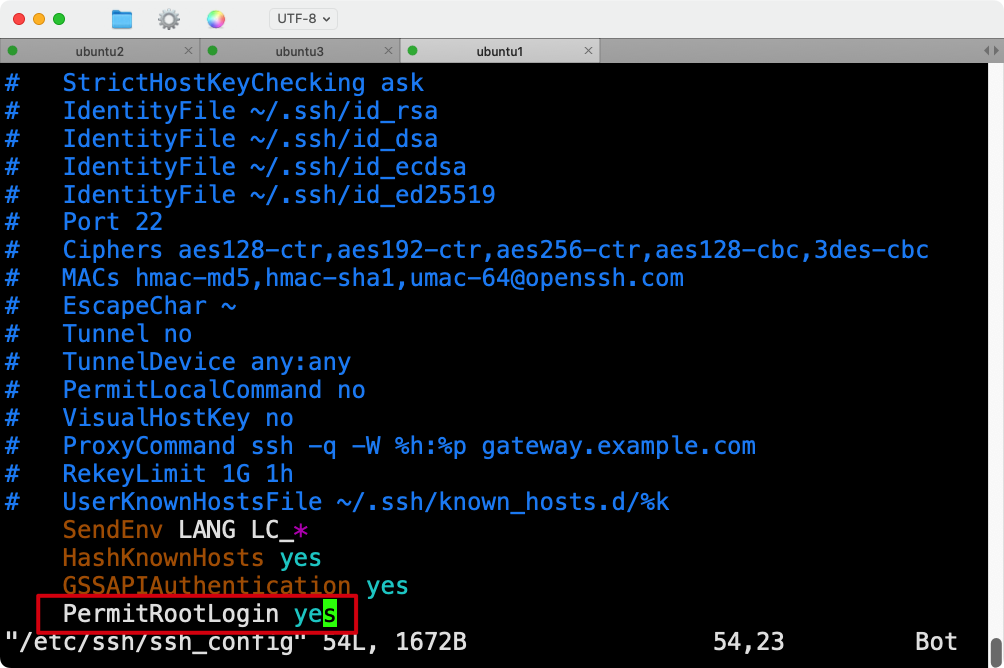
保存并退出文件。
- 編輯
/etc/ssh/sshd_config文件:確保PermitRootLogin設置在服務器端配置文件/etc/ssh/sshd_config中正確配置:
sudo vim /etc/ssh/sshd_config
確保有如下配置:
PermitRootLogin yes
保存并退出文件,然后重啟SSH服務,要在三臺節點上都重新配置一下ssh:
sudo systemctl restart ssh
- **再次嘗試 **
ssh-copy-id:現在,你可以再次嘗試使用ssh-copy-id命令將公鑰復制到ubuntu2:
ssh-copy-id ubuntu2
3. 驗證免密登錄
在每臺機器上測試是否可以免密登錄到其他機器:
在 ubuntu1 上:
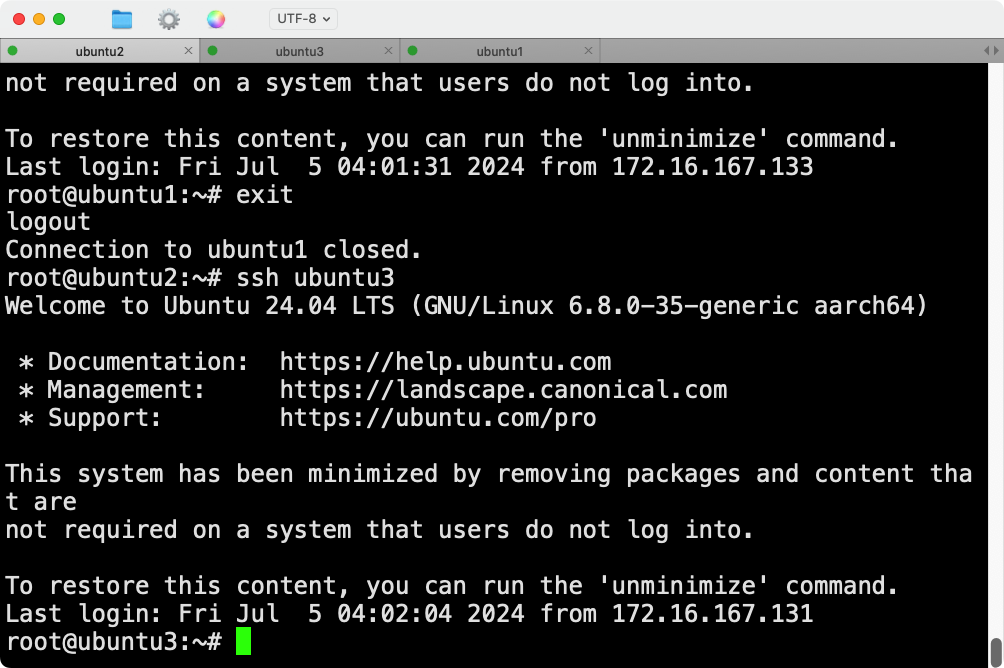
ssh ubuntu2
ssh ubuntu3
在 ubuntu2 上:
ssh ubuntu1
ssh ubuntu3
在 ubuntu3 上:
ssh ubuntu1
ssh ubuntu2
測試連接
可以在每臺機器上使用以下命令測試連接:
ssh ubuntu1
ssh ubuntu2
ssh ubuntu3
通過上述步驟,成功為三臺Ubuntu虛擬機配置域名映射和免密登錄。這樣,可以通過域名而不是IP地址訪問每臺機器,并且在每臺機器之間進行免密SSH登錄。


: Gradle 插件開發與發布)


)


(11.8排列活動順序))


![[FFmpeg] windows下安裝帶gpu加速的ffmpeg](http://pic.xiahunao.cn/[FFmpeg] windows下安裝帶gpu加速的ffmpeg)


