Element UI
介紹
-
官網(基于 Vue 2.x ):https://element.eleme.cn/#/zh-CN
-
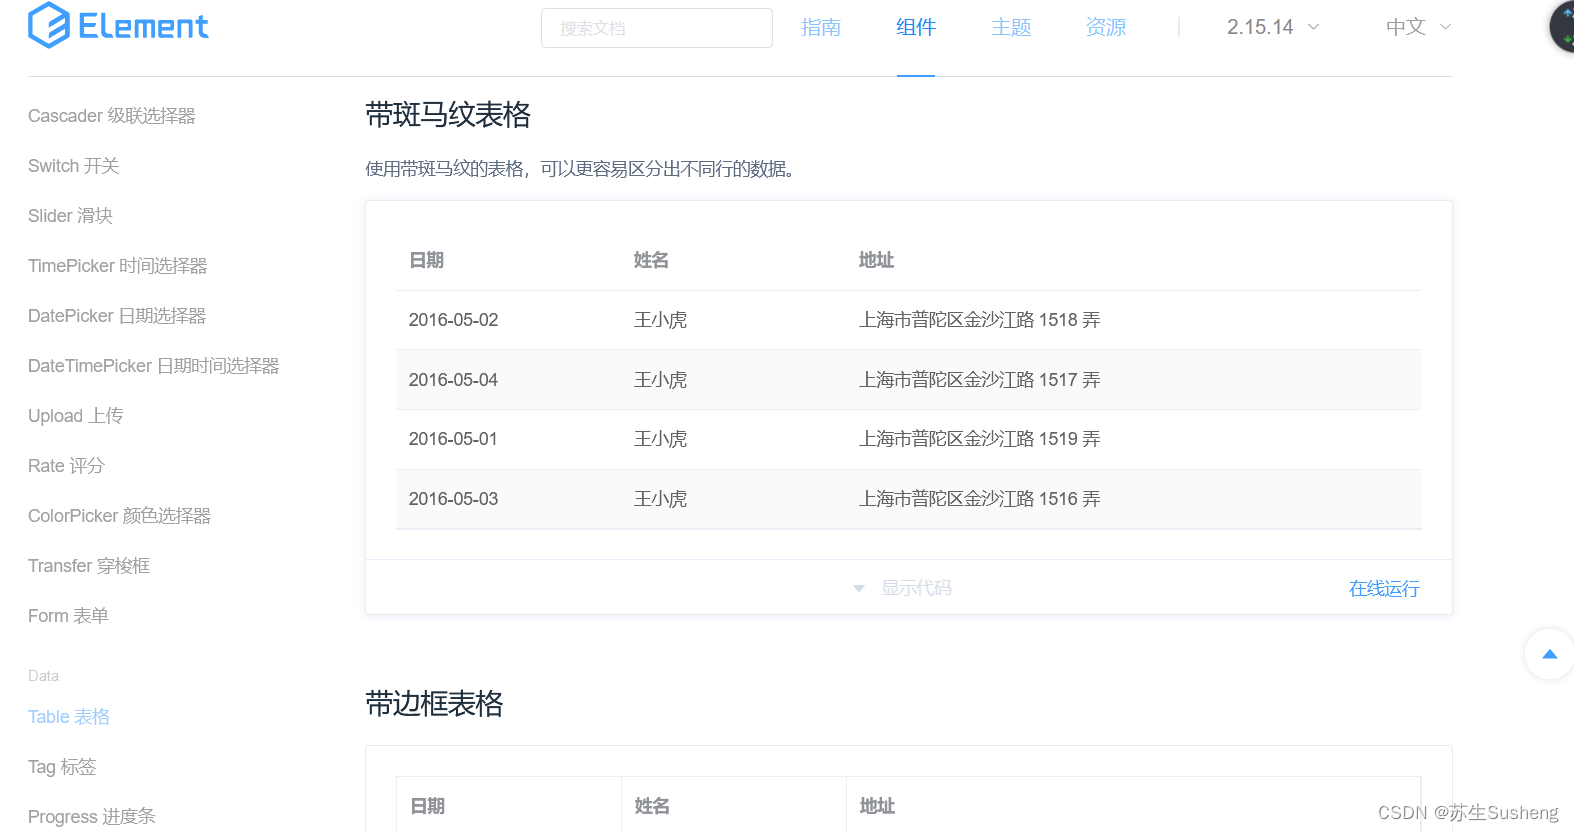
ElementUI 是一個基于 Vue.js 的桌面端組件庫,由餓了么前端團隊開發并維護。它提供了一套豐富的 UI 組件和布局,以及一些常用的功能組件,讓開發者可以快速搭建美觀、可用的 Web 應用。
-
ElementUI 的組件庫包括按鈕、表單、輸入框、下拉菜單、表格、彈窗等等,它們都具有一致的樣式和交互效果,可以方便地進行組合和定制。ElementUI 還提供了一些常用的功能組件,如日期選擇器、分頁器、消息提示等,這些組件可以大大簡化開發過程,提高效率。
-
ElementUI 的設計風格簡潔大方,符合現代化的 UI 設計規范。它使用了靈活的柵格系統來布局頁面,可以適應不同尺寸的屏幕。同時,ElementUI 支持多語言和主題定制,開發者可以根據自己的需求進行配置。
-
ElementUI 提供了詳細的文檔和示例代碼,可以幫助開發者快速上手并解決問題。此外,ElementUI 還有一個活躍的社區,開發者可以在社區中分享經驗、提問問題,并獲取幫助。
-
ElementUI 是一個功能強大、易于使用的前端組件庫,適用于快速構建漂亮且可用的 Web 應用。無論是個人項目還是企業級應用,ElementUI 都能提供良好的支持,讓開發變得更加高效和愉快。
特點
ElementUI 的特點有以下幾個:
-
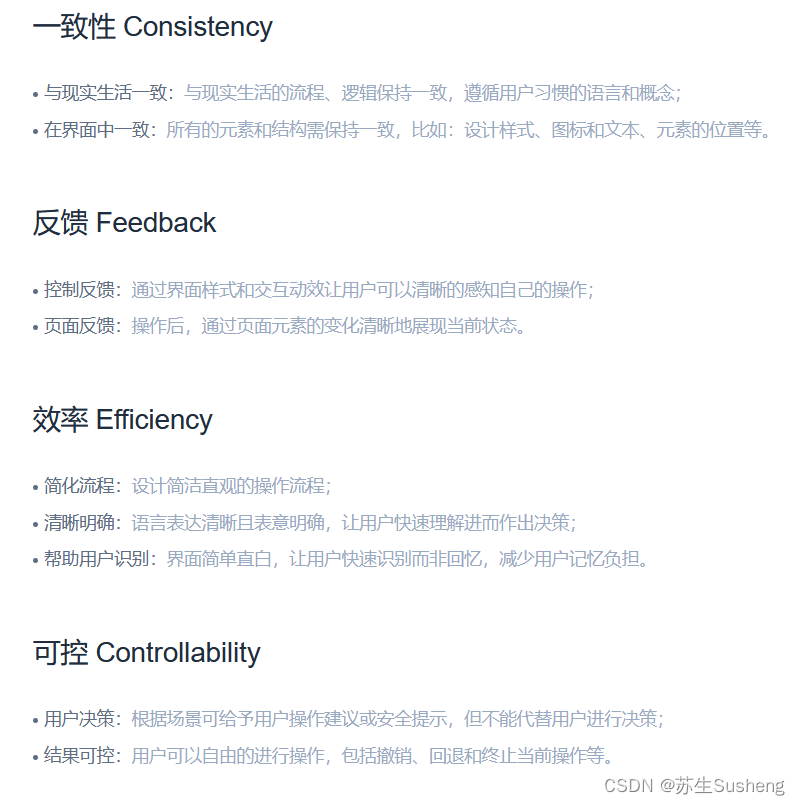
簡潔美觀:ElementUI 的設計風格簡潔大方,符合現代化的 UI 設計規范。它提供了一致的樣式和交互效果,使得應用看起來非常美觀,并且可以適應不同尺寸的屏幕。
-
豐富的組件:ElementUI 提供了一套豐富的 UI 組件,包括按鈕、表單、輸入框、下拉菜單、表格、彈窗等等。這些組件具有靈活的用法和豐富的功能,可以滿足各種需求。
-
響應式布局:ElementUI 使用了靈活的柵格系統來布局頁面,可以適應不同尺寸的屏幕。它支持響應式布局,使得應用在不同設備上都能有良好的展示效果。
-
高度可定制:ElementUI 支持多語言和主題定制,開發者可以根據自己的需求進行配置。它提供了豐富的主題和樣式變量,可以方便地定制組件的外觀和樣式。
-
完善的文檔和示例:ElementUI 提供了詳細的文檔和示例代碼,開發者可以通過閱讀文檔和參考示例來快速上手和解決問題。它還有一個活躍的社區,開發者可以在社區中分享經驗、提問問題,并獲取幫助。
Vue2使用Element
安裝
npm下載ElementUI:npm install element-ui@2.15.3或者npm i element-ui -S
引入ElementUI組件庫
在main.js中內容:
import Vue from 'vue'
import App from './App.vue'
import ElementUI from 'element-ui';
//樣式文件需要單獨引入
import 'element-ui/lib/theme-chalk/index.css';
Vue.use(ElementUI);
Vue.config.productionTip = falsenew Vue({render: h => h(App),
}).$mount('#app')
使用ElementUI
其實在官網有很多很多案例,這里我準備了一個用戶注冊的form表單案例,和一個表格展示案例
用戶注冊
<template><div><el-form :model="user" status-icon :rules="rules" ref="user" label-width="100px" class="demo-user"><el-form-item label="賬號" prop="userCode"><el-input type="text" v-model="user.userCode" autocomplete="off"></el-input></el-form-item><el-form-item label="姓名" prop="userName"><el-input type="text" v-model="user.userName" autocomplete="off"></el-input></el-form-item><el-form-item label="密碼" prop="userPassword"><el-input type="userPassword" v-model="user.userPassword" autocomplete="off"></el-input></el-form-item><el-form-item label="確認密碼" prop="checkPass"><el-input type="password" v-model="user.checkPass" autocomplete="off"></el-input></el-form-item><el-form-item label="性別" prop=""><el-radio-group v-model="user.gender"><el-radio-button label="0" >男</el-radio-button><el-radio-button label="1" >女</el-radio-button></el-radio-group></el-form-item><el-form-item label="出生年月" prop="birthday"><el-date-pickerv-model="user.birthday"align="right"type="date"placeholder="選擇日期":picker-options="pickerOptions"></el-date-picker></el-form-item><el-form-item label="地址" prop="address"><el-input type="text" v-model="user.address" autocomplete="off"></el-input></el-form-item><el-form-item label="手機號" prop="phone"><el-input type="text" v-model="user.phone" autocomplete="off"></el-input></el-form-item><el-form-item label="角色" prop="userRole"><el-select v-model="user.userRole" placeholder="請選擇"><el-optionv-for="item in roleList":key="item.value":label="item.name":value="item.value":disabled="item.disabled"></el-option></el-select></el-form-item><el-form-item label="興趣愛好" prop="hobbys"><el-checkbox-groupv-model="user.hobbys"max="3"><el-checkbox v-for="hobby in hobbys" :label="hobby" :key="hobby">{{hobby}}</el-checkbox></el-checkbox-group></el-form-item><el-form-item><el-button type="primary" @click="submitForm('user')">提交</el-button><el-button @click="resetForm('user')">重置</el-button></el-form-item></el-form></div>
</template>
<script>
export default {// eslint-disable-next-line vue/multi-word-component-namesname:'Register',data() {//自定義校驗規則var validatePass2 = (rule, value, callback) => {if (value === '') {callback(new Error('請再次輸入密碼'));} else if (value !== this.user.userPassword) {callback(new Error('兩次輸入密碼不一致!'));} else {callback();}};return {hobbys:["唱","跳","RAP","打籃球"],roleList:[{name:'系統管理員',value:1},{name:'管理員',value:2},{name:'會員',value:3},{name:'游客',value:4}],//表單數據綁定user:{userCode:'',userName:'',userPassword:'',gender:0,birthday:'',phone:'',address:'',userRole:4,hobbys:[],checkPass:''},//定義表單基本的驗證rules: {userCode: [{ required:true,trigger: 'blur', message: '請輸入賬號',  }],userName: [{ required:true,trigger: 'blur', message: '請輸入用戶名',  }],userPassword: [{ required:true,trigger: 'blur', message: '請輸入密碼',  }],checkPass: [{ validator: validatePass2, trigger: 'blur' }],},//日期插件設置pickerOptions: {disabledDate(time) {return time.getTime() > Date.now();},shortcuts: [{text: '今天',onClick(picker) {picker.$emit('pick', new Date());}}, {text: '昨天',onClick(picker) {const date = new Date();date.setTime(date.getTime() - 3600 * 1000 * 24);picker.$emit('pick', date);}}, {text: '一周前',onClick(picker) {const date = new Date();date.setTime(date.getTime() - 3600 * 1000 * 24 * 7);picker.$emit('pick', date);}}]},};},methods: {submitForm(formName) {this.$refs[formName].validate((valid) => {if (valid) {alert('submit!');} else {console.log('error submit!!');return false;}});},resetForm(formName) {this.$refs[formName].resetFields();}}
}
</script>
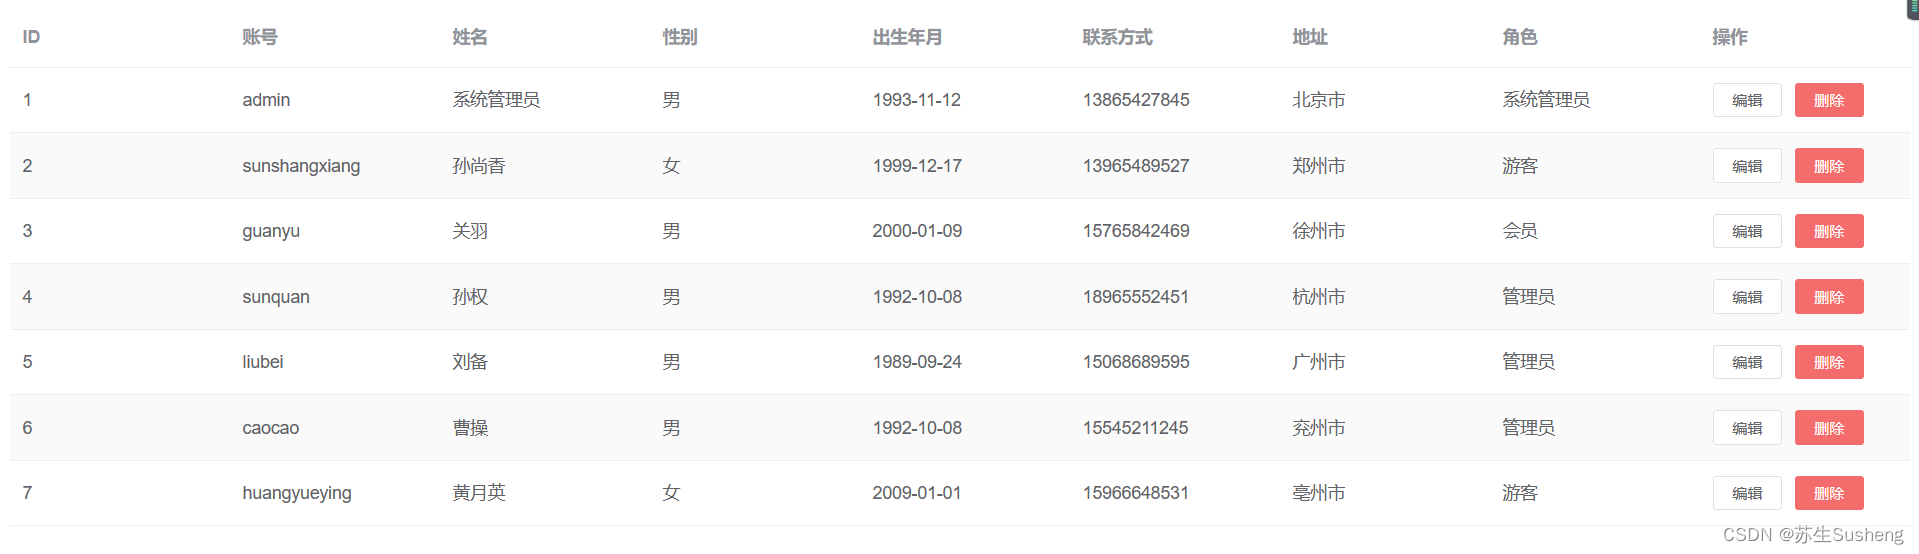
列表展示
<template><div><el-table:data="userList"stripestyle="width: 100%"><el-table-columnprop="id"label="ID"style="width: 15%"></el-table-column><el-table-columnprop="userCode"label="賬號"style="width: 15%"></el-table-column><el-table-columnprop="userName"label="姓名"style="width: 15%"></el-table-column><el-table-columnprop="gender"label="性別"style="width: 6%"></el-table-column><el-table-columnprop="birthday"label="出生年月"style="width: 15%"></el-table-column><el-table-columnprop="phone"label="聯系方式"style="width: 15%"></el-table-column><el-table-columnprop="address"label="地址"style="width: 15%"></el-table-column><el-table-columnprop="userRole"label="角色"></el-table-column><el-table-column label="操作"><template slot-scope="scope"><el-buttonsize="mini"@click="handleEdit(scope.$index, scope.row)">編輯</el-button><el-buttonsize="mini"type="danger"@click="handleDelete(scope.$index, scope.row)">刪除</el-button></template></el-table-column></el-table></div>
</template>
<script>
export default {// eslint-disable-next-line vue/multi-word-component-namesname:'Register',data() {return{userList:[{id:1,userCode:'admin',userName:'系統管理員',gender:'男',birthday:'1993-11-12',phone:'13865427845',address:'北京市',userRole:'系統管理員'},{id:2,userCode:'sunshangxiang',userName:'孫尚香',gender:'女',birthday:'1999-12-17',phone:'13965489527',address:'鄭州市',userRole:'游客'},{id:3,userCode:'guanyu',userName:'關羽',gender:'男',birthday:'2000-01-09',phone:'15765842469',address:'徐州市',userRole:'會員'},{id:4,userCode:'sunquan',userName:'孫權',gender:'男',birthday:'1992-10-08',phone:'18965552451',address:'杭州市',userRole:'管理員'},{id:5,userCode:'liubei',userName:'劉備',gender:'男',birthday:'1989-09-24',phone:'15068689595',address:'廣州市',userRole:'管理員'},{id:6,userCode:'caocao',userName:'曹操',gender:'男',birthday:'1992-10-08',phone:'15545211245',address:'兗州市',userRole:'管理員'},{id:7,userCode:'huangyueying',userName:'黃月英',gender:'女',birthday:'2009-01-01',phone:'15966648531',address:'亳州市',userRole:'游客'},]}},methods: {}
}
</script>
其他
詳見官網…
mint-ui
介紹
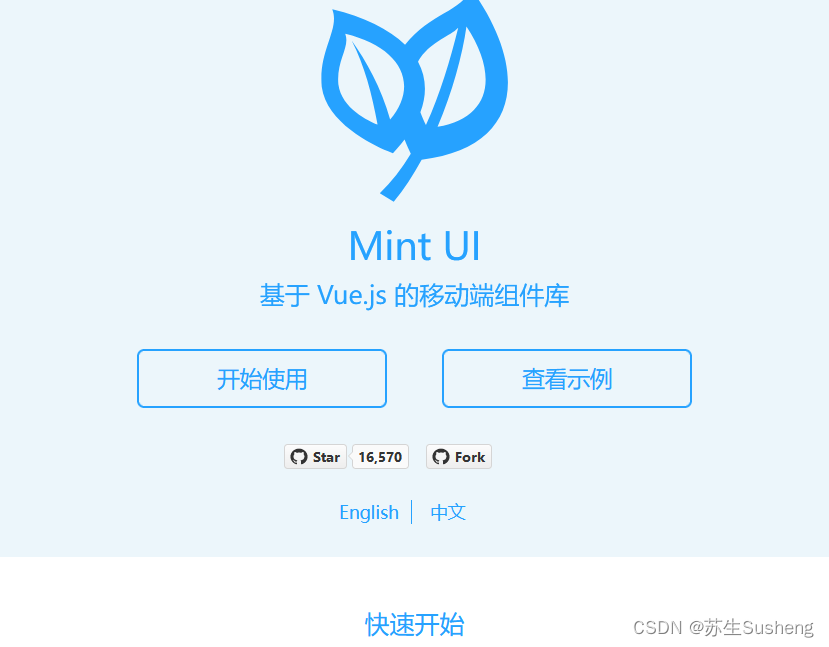
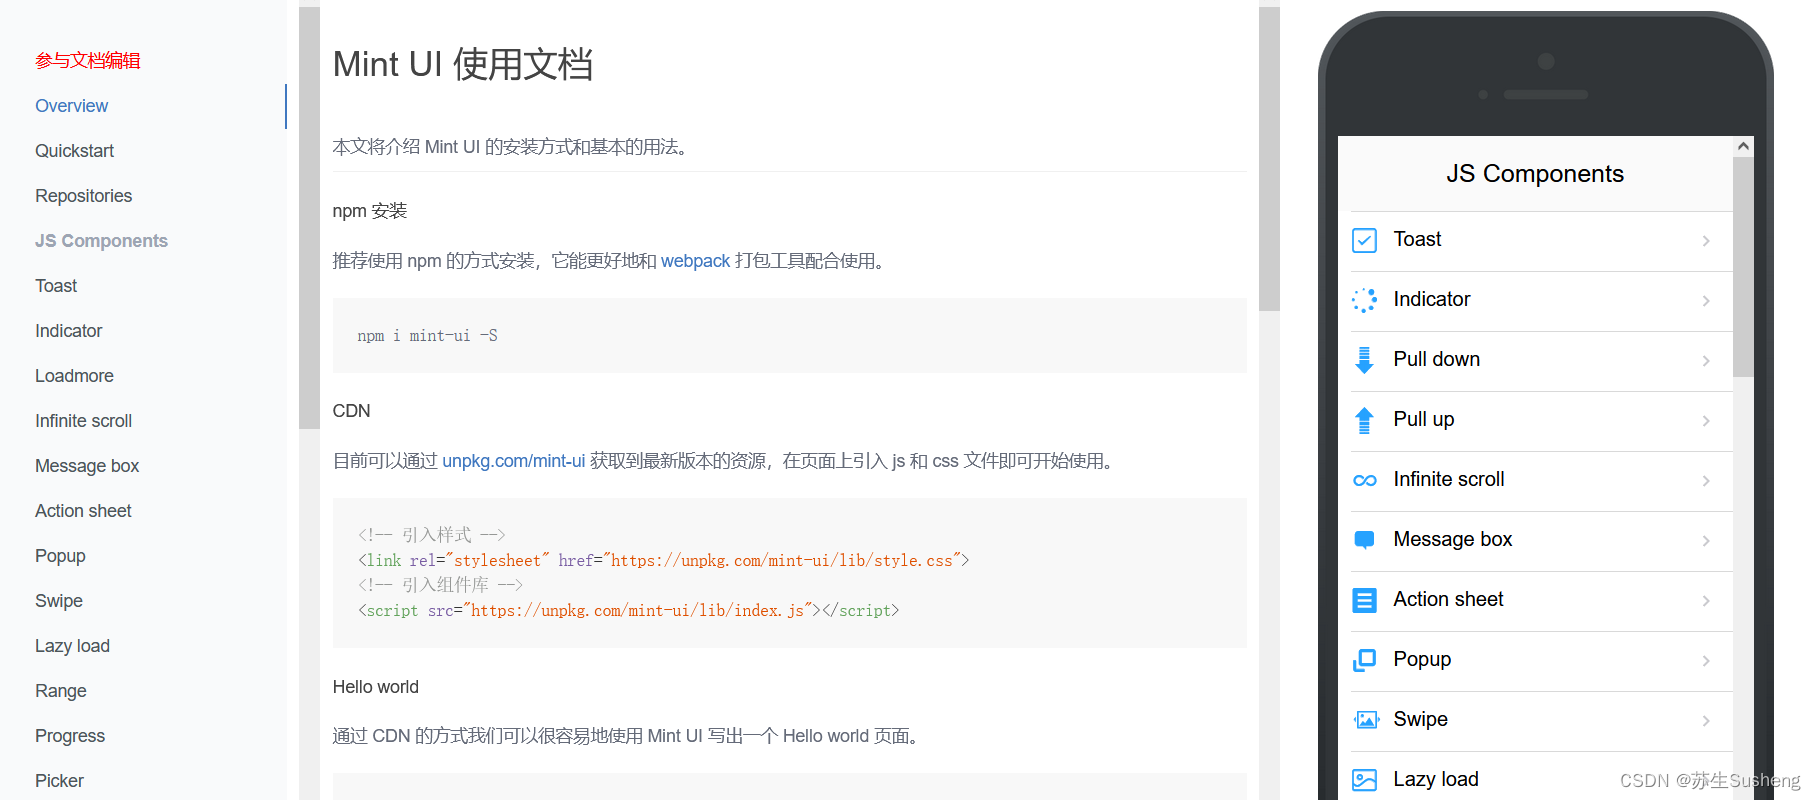
- Mint UI是一個基于Vue.js的移動端組件庫,由餓了么前端團隊開發。
- 它提供了一系列豐富的UI組件,包括按鈕、輸入框、彈窗、輪播圖、下拉刷新等常用組件,可以幫助開發者快速構建移動端的Web應用。
- Mint UI具有簡單易用、效果好、樣式漂亮等特點,受到了廣大開發者的歡迎。
- Mint UI官網: http://mint-ui.github.io/#!/zh-cn
特點
Mint UI具有以下特點:
-
簡單易用:Mint UI提供了豐富的移動端UI組件,使用簡單,開發者可以快速上手,并快速構建移動端應用。
-
輕量化:Mint UI的組件庫比較輕量,可以高效地加載和運行在移動設備上,提供了更好的用戶體驗。
-
樣式漂亮:Mint UI的組件擁有精美的視覺效果,具有現代化、時尚的外觀,能夠滿足用戶對于UI設計的要求。
-
功能豐富:Mint UI提供了豐富的組件,包括按鈕、輸入框、彈窗、輪播圖、下拉刷新等常見的移動端UI組件,滿足開發者在移動應用開發中的各種需求。
-
支持Vue.js:Mint UI是基于Vue.js開發的組件庫,與Vue.js完美融合,開發者可以使用Vue.js的特性和功能來更加靈活地定制和使用組件。
總之,Mint UI具有簡單易用、輕量化、樣式漂亮、功能豐富等特點,適用于開發移動端的Web應用。Mint UI具有以下特點:
安裝組件
npm install mint-ui -S
引入組件
-
引入全部組件
// 引入全部組件 import Vue from 'vue'; import Mint from 'mint-ui'; Vue.use(Mint); -
按需引入
-
借助 babel-plugin-component,我們可以只引入需要的組件,以達到減小項目體積的目的。
-
首先,安裝 babel-plugin-component:
npm install babel-plugin-component -D{"presets": [["es2015", { "modules": false }]],"plugins": [["component", [{"libraryName": "mint-ui","style": true}]]] } -
如果你只希望引入部分組件,比如 Button 和 Cell,那么需要在 main.js 中寫入以下內容:需要引入樣式:
import 'mint-ui/lib/style.css';// The Vue build version to load with the `import` command // (runtime-only or standalone) has been set in webpack.base.conf with an alias. import Vue from 'vue' import App from './App' import router from './router'// 1、引入Element-ui組件 // import { Button } from 'element-ui'; // Vue.use(Button)// 2、引入Mint-ui組件 import 'mint-ui/lib/style.css'; import {Button} from 'mint-ui'; Vue.component(Button.name, Button);Vue.config.productionTip = false //設置在控制臺環境進行代碼提示作用// 1.全局路由守衛 router.beforeEach((to,from,next) => {/*to:表示要去的新頁面from:表示舊的頁面next:表示是否*/// 0——表示未登錄// 1——表示已登錄var islogin = 1;if(to.meta.needAuth){if(islogin == 0){router.push({name:'login'})}if(islogin == 1){next()}}else{next()} })// 2.全局過濾器 Vue.filter('toFixed1',function(val,data,data1){return data1 + val.toFixed(data) })/* eslint-disable no-new */ new Vue({el: '#app',router,components: { App },template: '<App/>' })
Mint-ui相關組件
官網文檔: https://mint-ui.github.io/docs/#/zh-cn2
<template><div class="hello"><mt-button type="danger" @click="myToast">danger</mt-button><hr><el-button type="primary">主要按鈕</el-button><hr><router-link to="/mydetail">產品詳情</router-link><router-link to="/mycar">購物車</router-link><router-link to="/myorder">下單頁面</router-link><hr><button @click="mytab">點擊</button><hr/><router-link to="/tab">選項卡</router-link><hr/><myslot><div slot="name1">{{msg}}</div><div slot="name2">{{num}}</div></myslot><hr/><input type="text" placeholder="請輸入用戶名" v-model="t1"/><input type="text" placeholder="請輸入密碼" v-model="t2"/><button :class="{active:isTrue}">登錄</button><hr/><input type="text" name="" id="" v-model="num3"/><hr/><input type="text" placeholder="請輸入用戶名" v-model="user"/><input type="text" placeholder="請輸入密碼" v-model="password"/><button :class="{active:getActive}">登錄</button><h1>{{getAvg}}</h1><h1>{{getSum}}</h1><h1>{{num | toFixed(5,"$")}}</h1><h1>{{num1 | toFixed1(5,"$")}}</h1><h1>{{msg}}</h1></div>
</template><script>
import { Toast } from 'mint-ui';
import myslot from './02slot';export default {name: 'HelloWorld',data () {return {num:10,num1:20,num3:100,msg: 'Welcome to Your Vue.js App',user:'',password:'',isTrue:false,t1:'',t2:'',}},filters:{toFixed(val,data,data1){return data1 + val.toFixed(data)}},computed:{getSum(){return this.num + this.num1;},getAvg(){return this.getSum/2;},getActive(){if(this.user==''||this.password==''){return false}return true}},watch:{num3(){console.log("num3修改了")},t1(){if(this.t1 == '' || this.t2 ==''){this.isTrue = false}else{this.isTrue = true}},t2(){if(this.t1 == '' || this.t2 ==''){this.isTrue = false}else{this.isTrue = true}}},components:{myslot,},methods:{mytab(){//鏈式路由跳轉this.$router.push({// 方式一// name:'tab'// 方式二path:'/tab',query:{id:100}})},myToast(){Toast({message: '提示',position: 'center',duration: 5000});}},
}
</script><!-- Add "scoped" attribute to limit CSS to this component only -->
<style scoped>.active{color: red;}h1, h2 {font-weight: normal;}ul {list-style-type: none;padding: 0;}li {display: inline-block;margin: 0 10px;}a {color: #42b983;}
</style>
前端第三方組件庫國內官網地址
Vant-ui 國內官網: https://vant-contrib.gitee.io/vant/#/zh-CN/
layui 官網: https://layuion.com/docs/element/color.html
jQuery 官網:https://www.jquery123.com/
Apache ECharts 官網:https://echarts.apache.org/zh/index.html
微信開發文檔官網:https://developers.weixin.qq.com/miniprogram/dev/framework/
w3c國內官網:https://www.w3school.com.cn/
mdn國內官網:https://developer.mozilla.org/zh-CN/docs/Web/HTML
swiper官網 :https://www.swiper.com.cn/usage/index.html
betterscroll官網:添加鏈接描述


抽象類與接口【求個關注!】)


)


的CAN報文)
——深度循環神經網絡)