1-ruby介紹、環境搭建、運行 hello world 程序
Ruby 簡介
Ruby 是一種開源的、面向對象的、解釋型的動態編程語言,由 Yukihiro “Matz” Matsumoto 于 1995 年發布。主要特點包括:
- 純面向對象:所有東西都是對象
- 動態類型:變量不需要聲明類型
- 簡潔優雅的語法
- 強大的元編程能力
- 豐富的標準庫和活躍的社區
- 著名的 Ruby on Rails 框架
環境搭建
Ruby 可以安裝在 windows、linux、macOS 系統上,下面以 windows 為例進行環境搭建介紹
1. 安裝 Ruby
Windows 系統
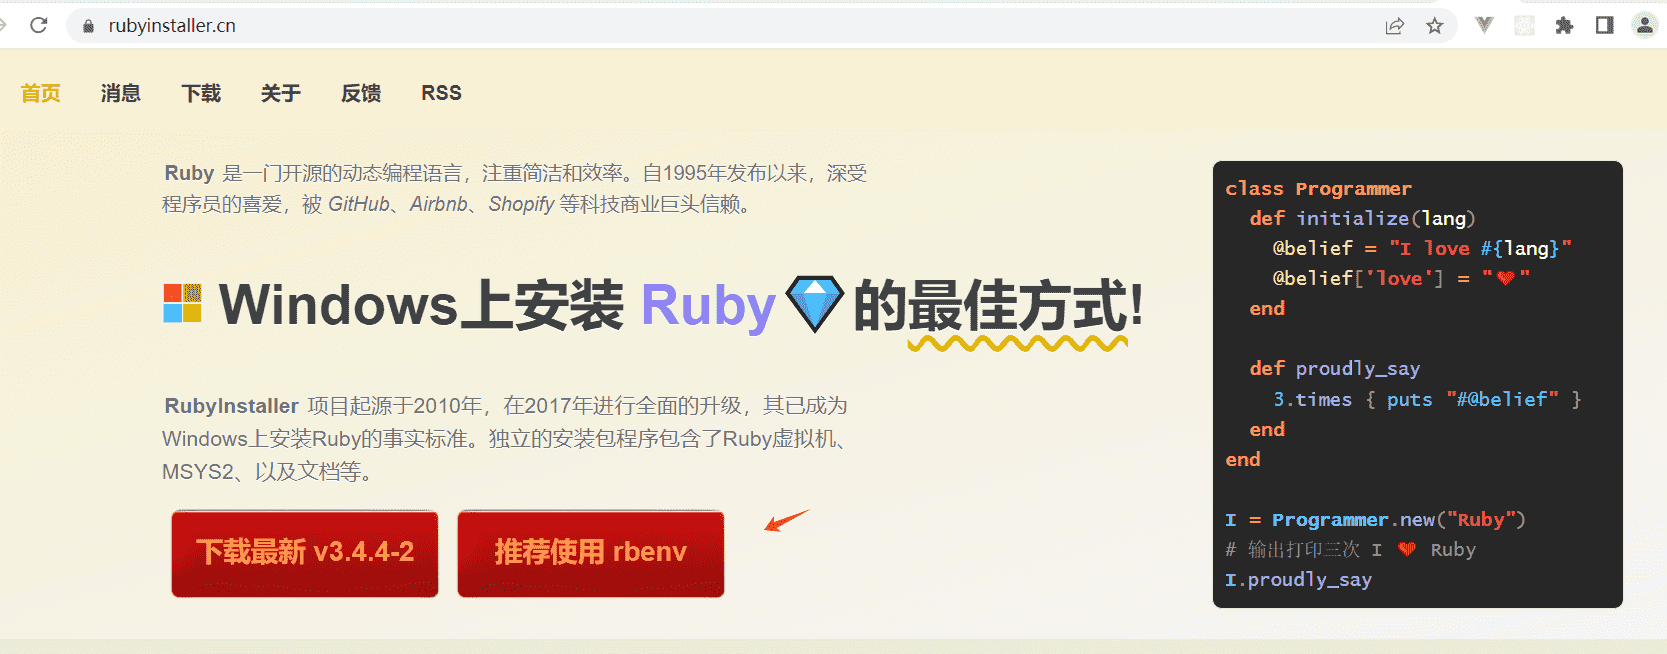
使用 RubyInstaller,下載地址如下:
- 官網:http://rubyinstaller.org/downloads/
- 國內:https://rubyinstaller.cn/
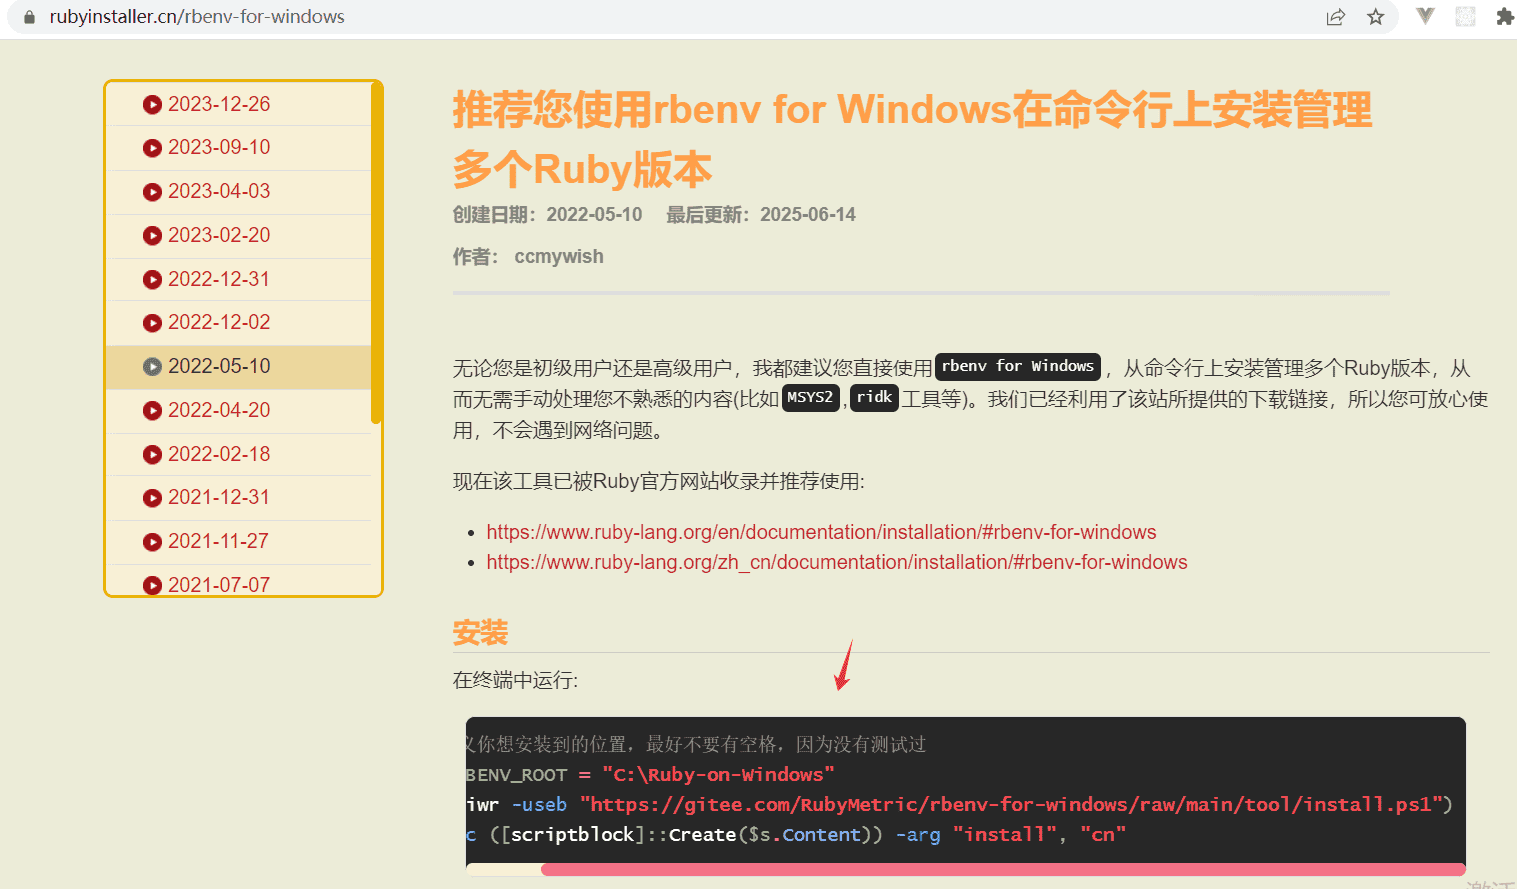
https://rubyinstaller.cn/rbenv-for-windows
軟件需要
-
Windows 7 SP1+ / Windows Server 2008+
-
PowerShell 5 (or later, include PowerShell Core) and .NET Framework 4.5 (or later)
PowerShell must be enabled for your user account e.g.
Set-ExecutionPolicy -ExecutionPolicy RemoteSigned -Scope CurrentUser -
cURL
-
Git
-
7zip
安裝 PowerShell
https://learn.microsoft.com/zh-cn/powershell/scripting/install/installing-powershell-on-windows?view=powershell-7.5#winget
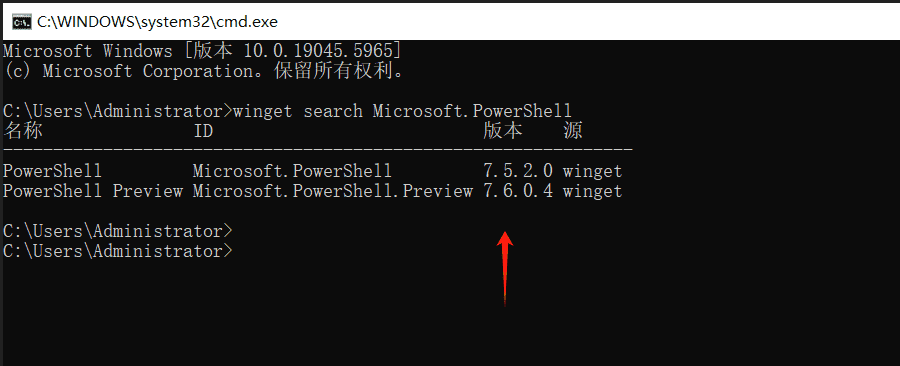
- 在CMD終端:搜索最新版本的 PowerShell
winget search Microsoft.PowerShell
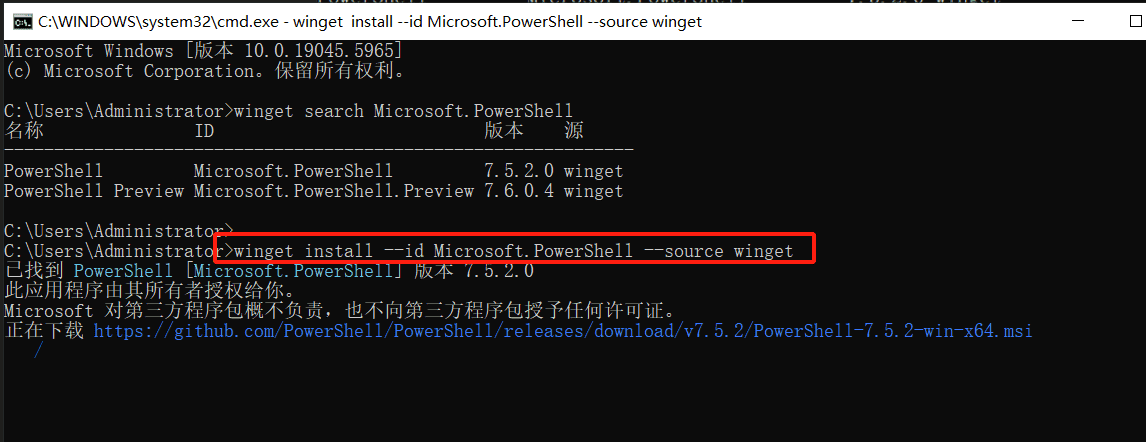
- 使用
id參數安裝 PowerShell 或 PowerShell 預覽版
# 安裝 PowerShell
winget install --id Microsoft.PowerShell --source winget# 安裝 PowerShell 預覽版
winget install --id Microsoft.PowerShell.Preview --source winget
這里我就安裝 PowerShell 就好了,如下:
winget install --id Microsoft.PowerShell --source winget

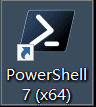
安裝好了之后,可以啟動 PowerShell:
查看 PowerShell 的版本:
$PSVersionTable.PSVersion | Select-Object -ExpandProperty Major

安裝 rbenv-for-windows
在 PowerShell 終端中運行:
# 自定義你想安裝到的位置,最好不要有空格
$env:RBENV_ROOT = "G:\RubyInstall\Ruby-on-Windows"
$s = (iwr -useb "https://gitee.com/RubyMetric/rbenv-for-windows/raw/main/tool/install.ps1")
icm -sc ([scriptblock]::Create($s.Content)) -arg "install", "cn"
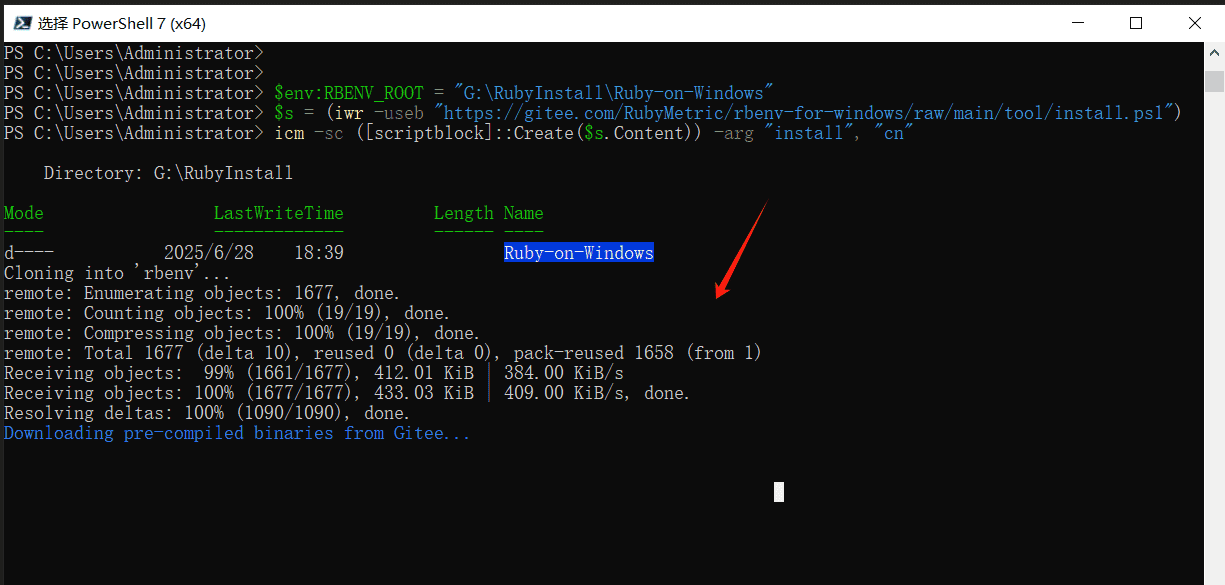
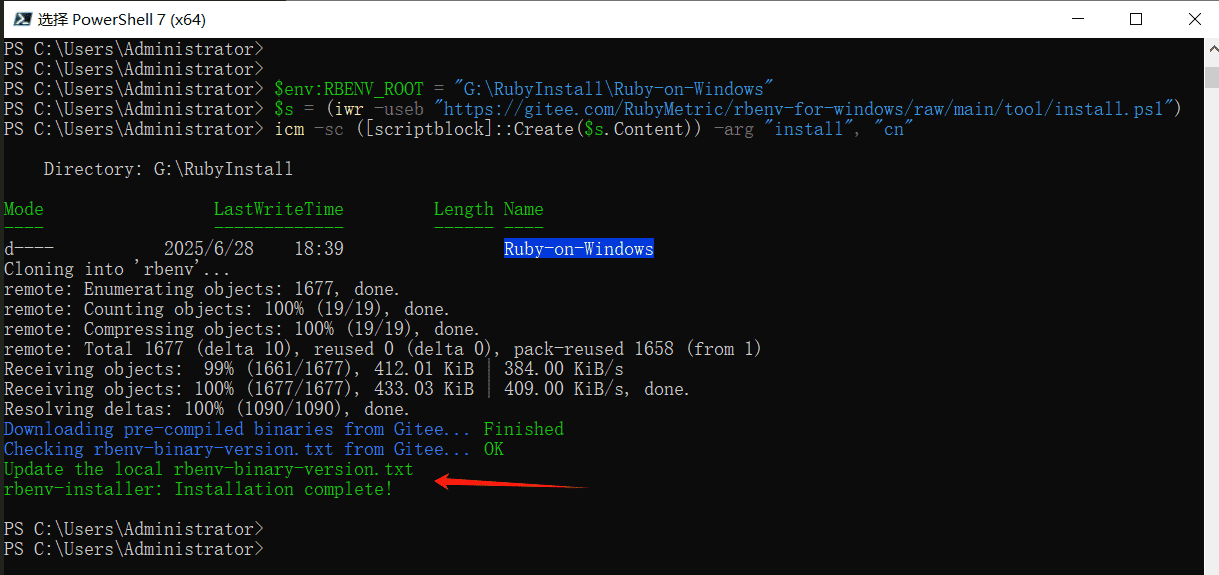
查看下載安裝好的文件:

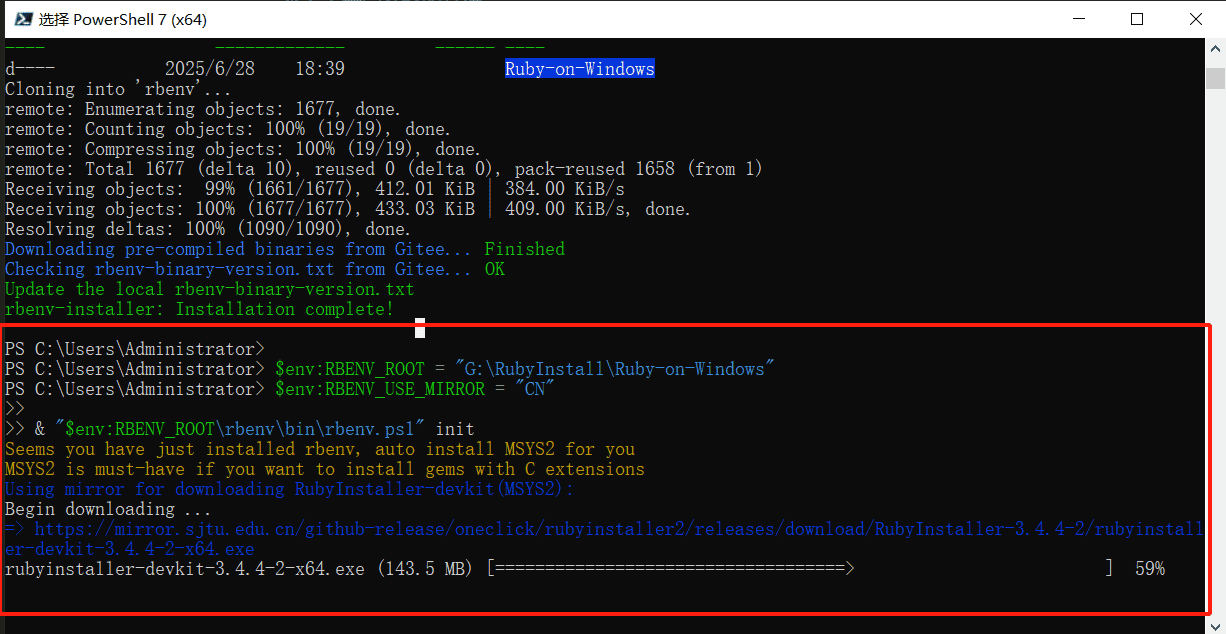
然后在$profile中添加這些內容:
# rbenv for Windows
$env:RBENV_ROOT = "G:\RubyInstall\Ruby-on-Windows"# 國內用戶使用內置鏡像
# 注意,這一行必須放在init之前
$env:RBENV_USE_MIRROR = "CN"& "$env:RBENV_ROOT\rbenv\bin\rbenv.ps1" init
打開 PowerShell
按 Win + R,輸入 powershell 并回車,打開 PowerShell
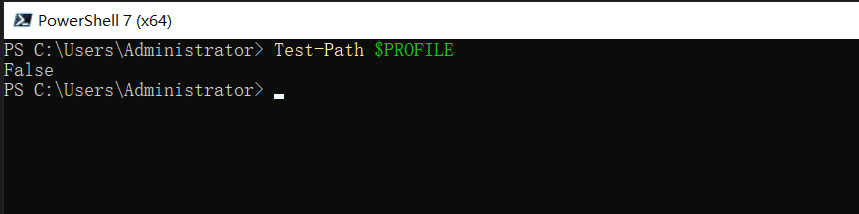
檢查 $PROFILE 文件是否存在
運行以下命令檢查當前用戶的 PowerShell 配置文件是否存在:
Test-Path $PROFILE
-
如果返回
True,說明配置文件已存在,可以直接編輯。 -
如果返回
False,需要先創建配置文件:New-Item -Path $PROFILE -Type File -Force
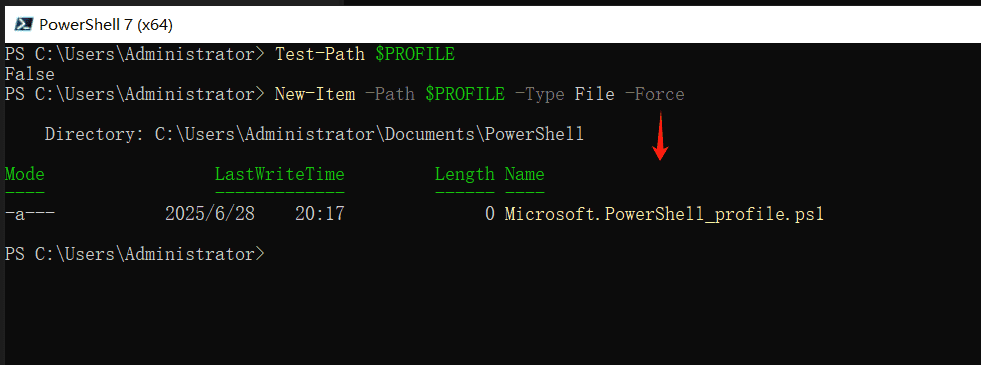
創建好的文件:

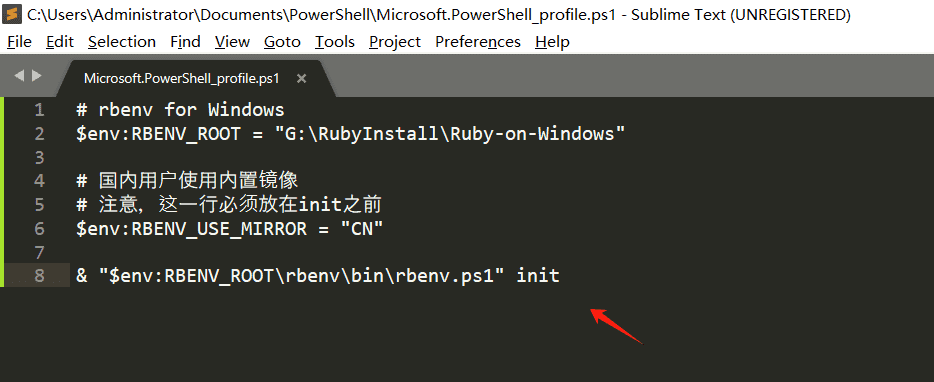
編輯 $PROFILE 文件
C:\Users\Administrator\Documents\PowerShell\Microsoft.PowerShell_profile.ps1
添加 rbenv 環境變量
在打開的 $PROFILE 文件中,添加以下內容
# rbenv for Windows
$env:RBENV_ROOT = "G:\RubyInstall\Ruby-on-Windows"# 國內用戶使用內置鏡像
# 注意,這一行必須放在init之前
$env:RBENV_USE_MIRROR = "CN"& "$env:RBENV_ROOT\rbenv\bin\rbenv.ps1" init
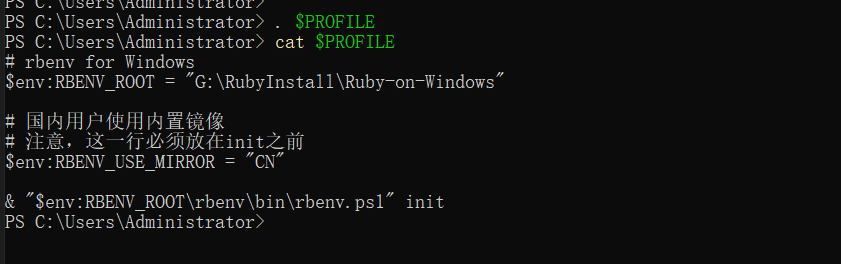
重新加載 $PROFILE
運行以下命令使更改生效:
. $PROFILE
或者直接重啟 PowerShell。
驗證 rbenv 是否可用
運行以下命令檢查 rbenv 是否正常工作:
rbenv --version
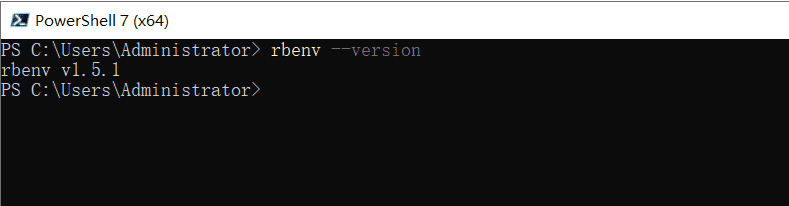
如果正確配置,會顯示 rbenv 的版本信息。
使用 rbenv 安裝 ruby 版本
列出所有可安裝的 Ruby 版本:
rbenv install -l
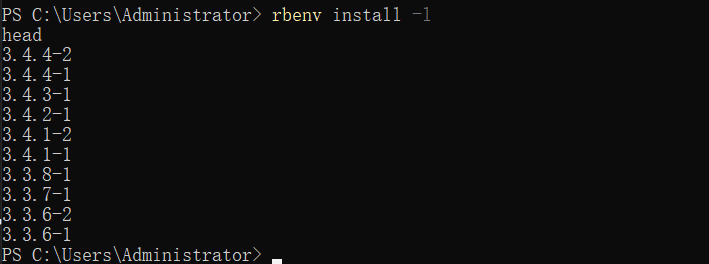
安裝特定版本的 Ruby:
rbenv install 3.2.2
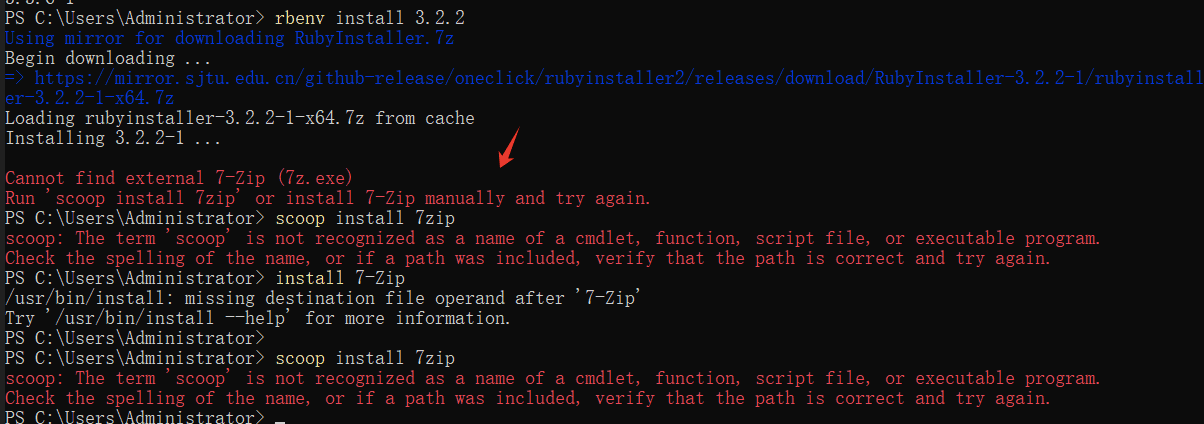
安裝 rbenv 發現缺少 7-zip、scoop 等工具,還需要安裝。
安裝 scoop
在 PowerShell 中運行以下命令:
# 1. 允許執行遠程腳本
Set-ExecutionPolicy RemoteSigned -Scope CurrentUser# 2. 安裝 Scoop
irm get.scoop.sh | iex
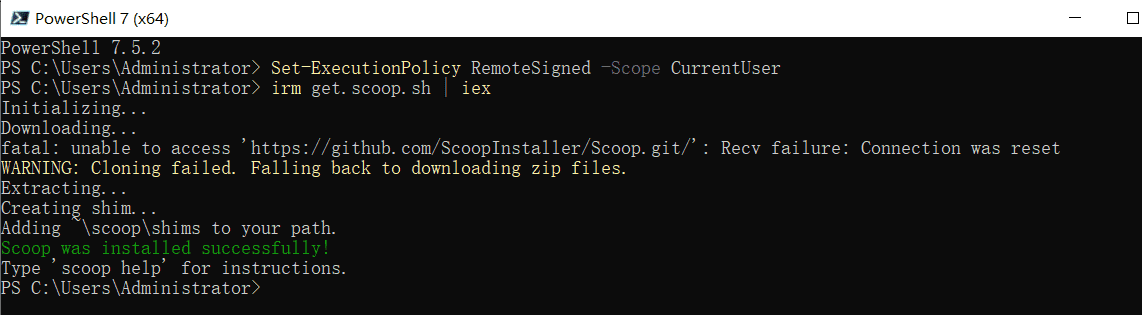
如果安裝出現權限問題,如下:
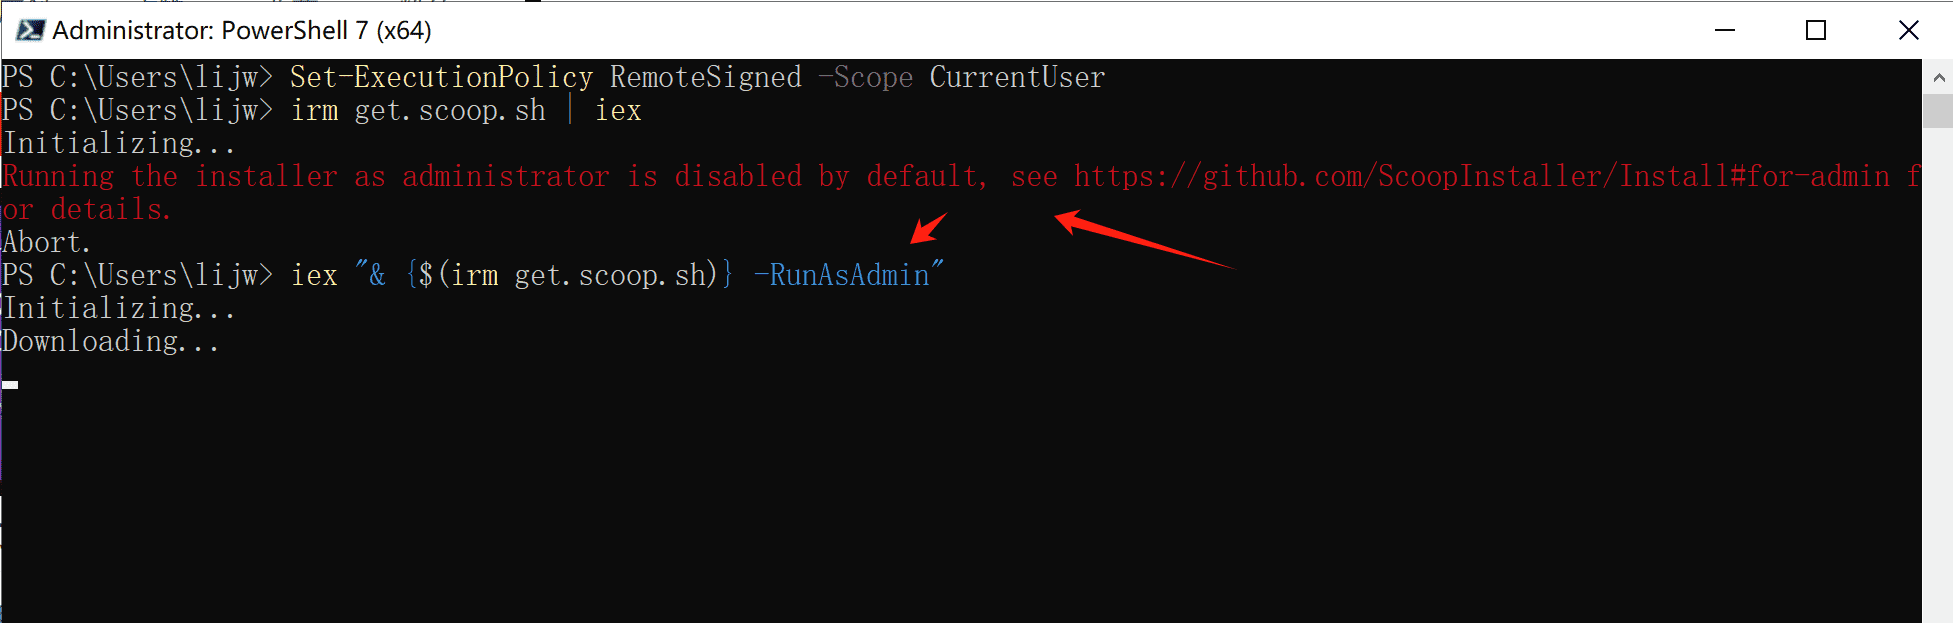
可以使用管理員的角色安裝,如下:
iex "& {$(irm get.scoop.sh)} -RunAsAdmin"
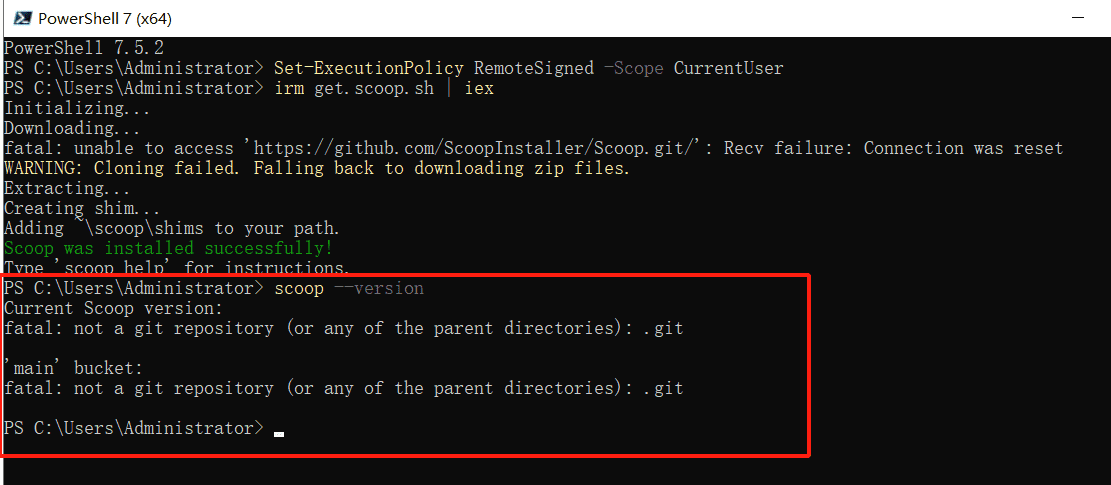
驗證 Scoop 是否安裝成功
scoop --version
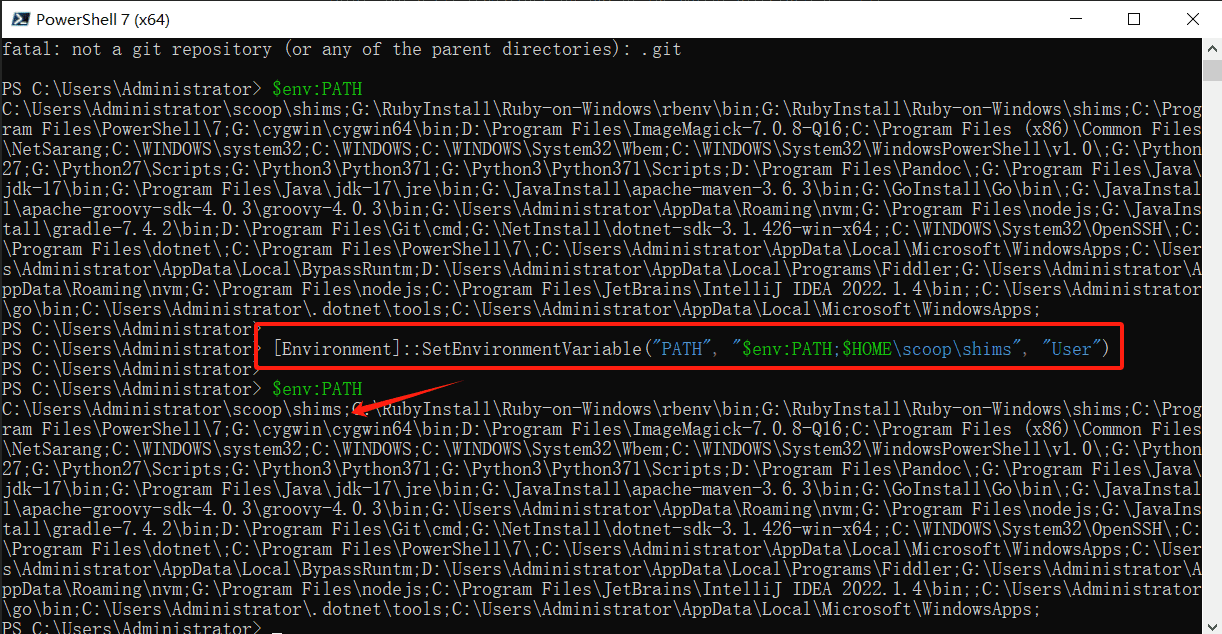
檢查環境變量:
$env:PATH
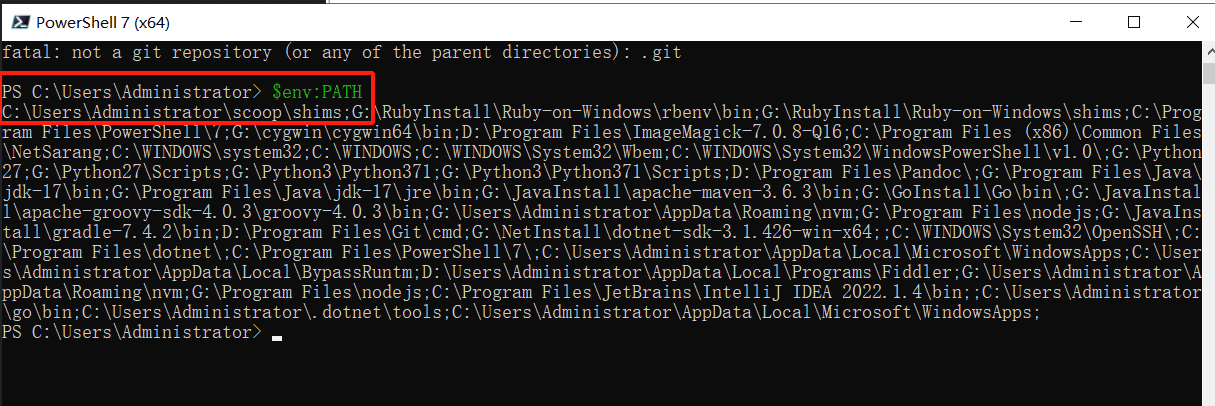
如果沒有環境變量,那么也可以手動添加:
# 手動添加 Scoop 到 PATH:
# 臨時生效(僅當前會話)
$env:PATH += ";$HOME\scoop\shims"# 永久生效(需重啟 PowerShell)
[Environment]::SetEnvironmentVariable("PATH", "$env:PATH;$HOME\scoop\shims", "User")
安裝 7-zip
# 通過 Scoop 安裝 7-Zip
scoop install 7zip
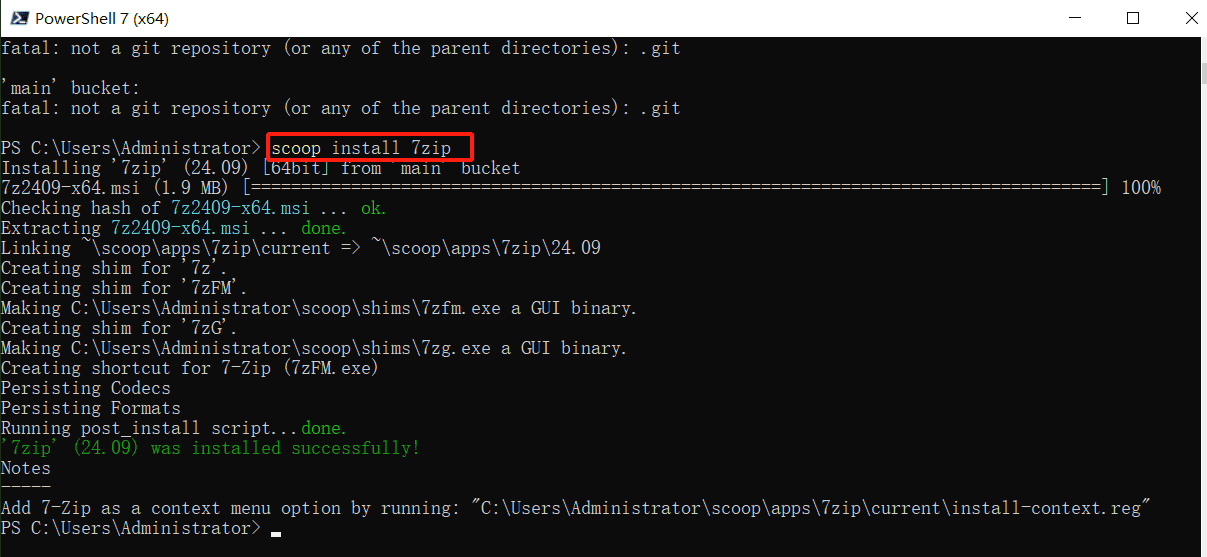
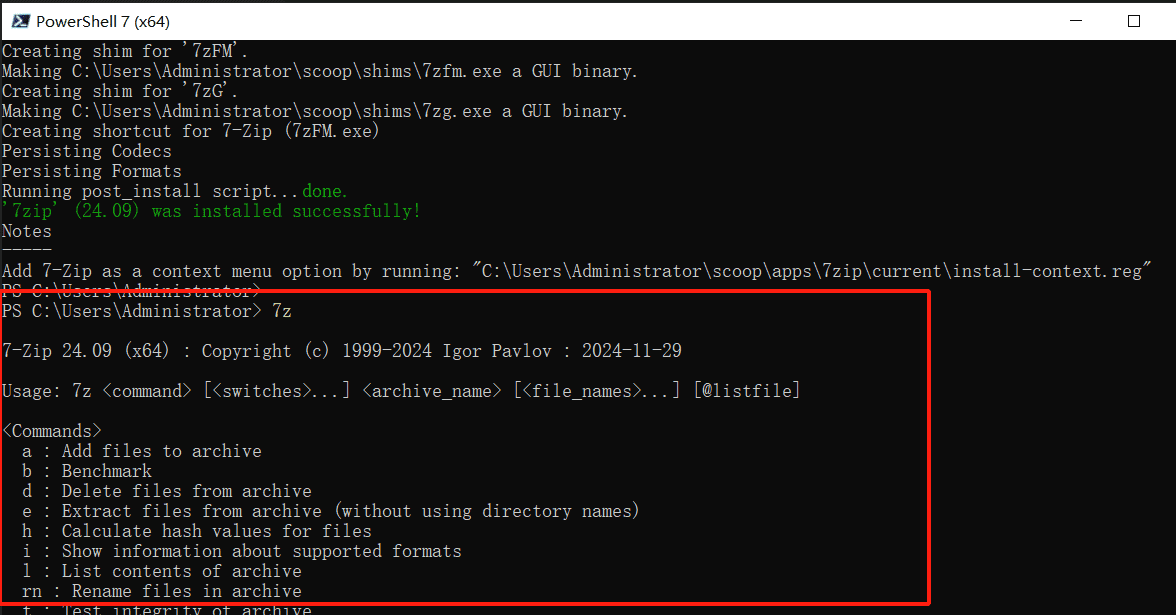
# 檢查 7-Zip 是否安裝成功
7z
使用 rbenv 安裝 ruby 版本
rbenv install -l # 列出可以安裝的版本
rbenv install 3.2.2 # 安裝特定版本
rbenv global 3.2.2   # 設置為全局默認版本
rbenv rehash         # 更新 shims
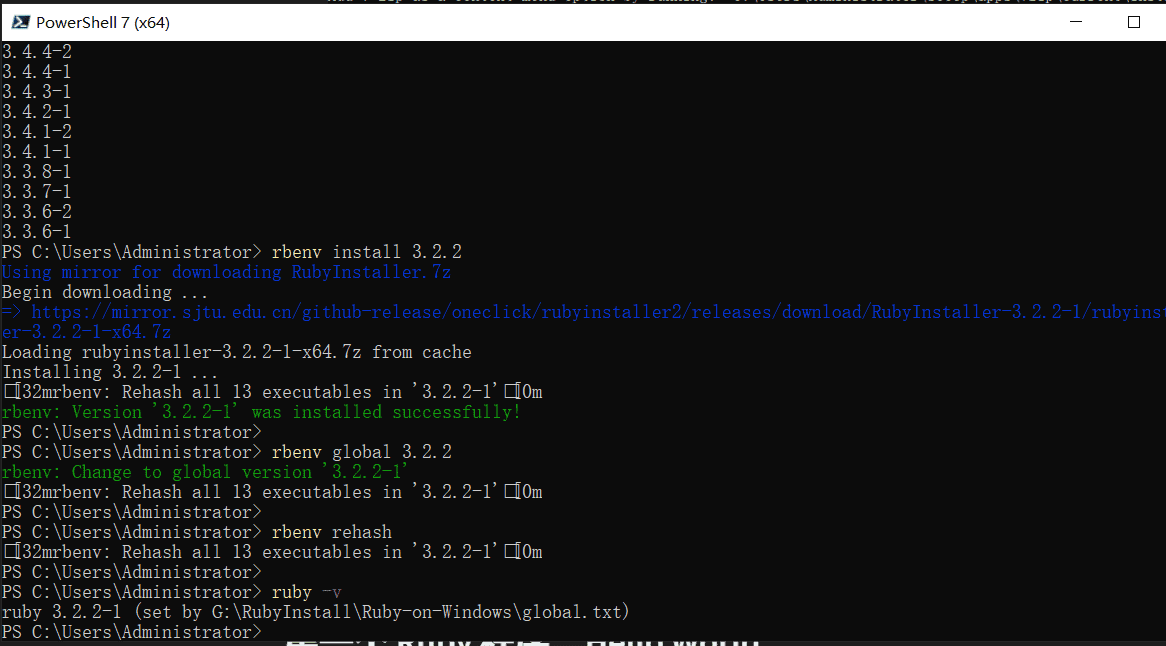
根據上圖顯示,已經成功安裝 ruby 了。也可以安裝多個版本,進行切換。
其他命令:
# 設置本地目錄特定的 Ruby 版本
rbenv local 3.1.4
設置系統環境變量
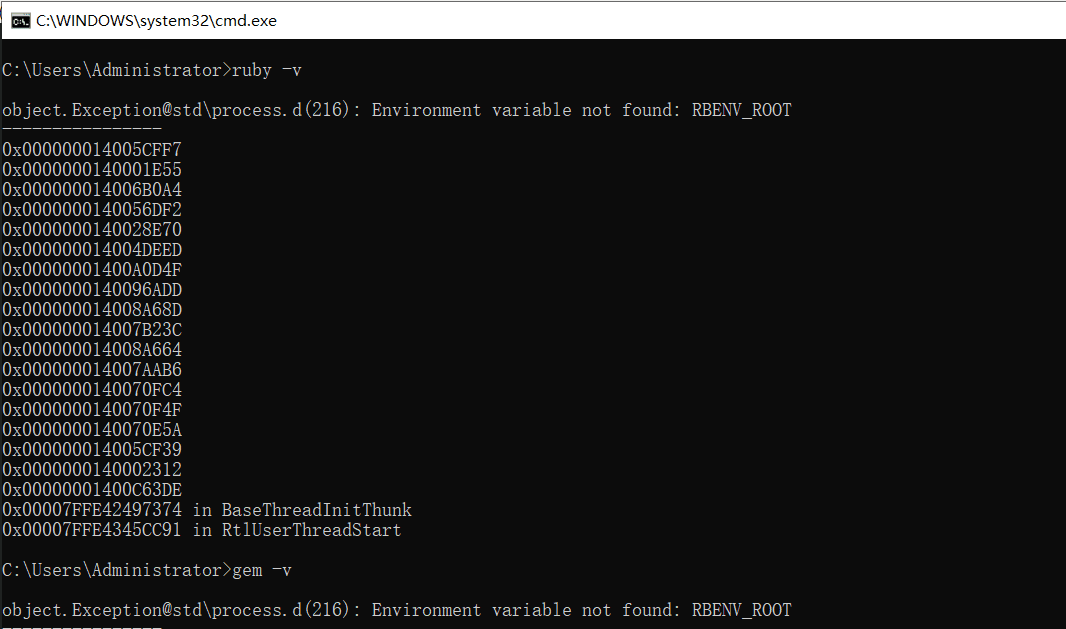
上面 PowerShell 雖然已經配置好環境變量,但是系統環境變量還需要手動配置一下,不然在CMD命令行下,則無法執行,如下:
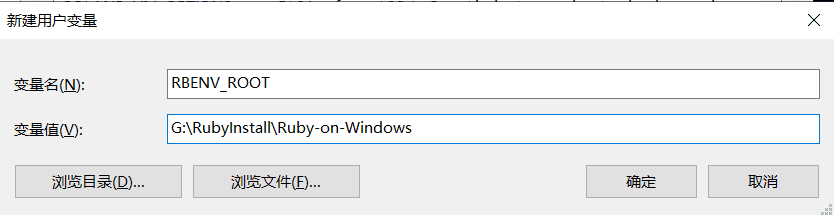
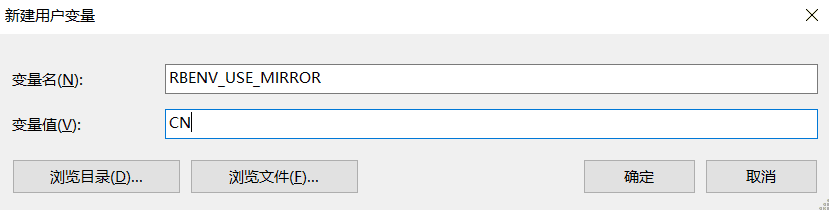
需要新增這兩個環境變量:
# rbenv for Windows
$env:RBENV_ROOT = "G:\RubyInstall\Ruby-on-Windows"# 國內用戶使用內置鏡像
# 注意,這一行必須放在init之前
$env:RBENV_USE_MIRROR = "CN"
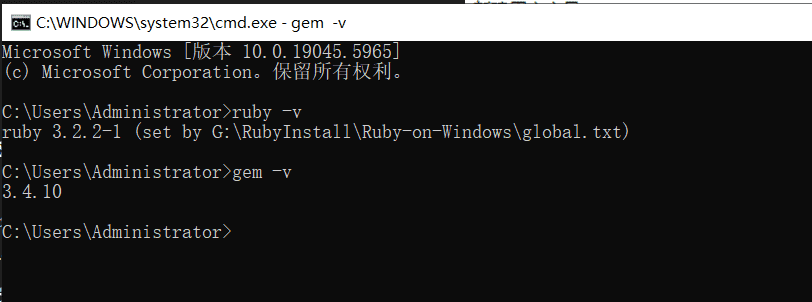
配置之后,再次 CMD 查看 ruby 版本,如下:
2.配置 gem 國內鏡像源
為了解決網絡問題,你可以使用國內的 RubyGems 鏡像,如 Ruby China 的鏡像。以下是如何配置和使用 RubyGems 鏡像的步驟:
打開命令行工具,輸入以下命令來修改 Gem 的源:
# 查看當前的鏡像源
gem sources -l
# 輸出
# *** CURRENT SOURCES ***
# https://rubygems.org/# 列出所有配置的源
gem sources --list | grep "current"# 移除默認鏡像源
gem sources --remove https://rubygems.org/
# 輸出: https://rubygems.org/ removed from sources# 添加國內鏡像源
gem sources -a https://gems.ruby-china.com/
# 輸出: https://gems.ruby-china.com/ added to sources# 再次查看當前的鏡像源
gem sources -l
# 輸出
# *** CURRENT SOURCES ***
# https://gems.ruby-china.com/
3.升級 gem 工具
# 升級至 3.6.9
gem update --system 3.6.9
第一個 Ruby 程序:Hello World
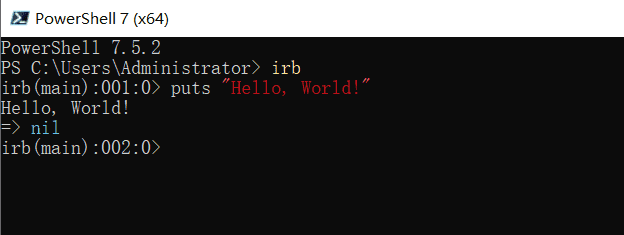
方法1:交互式 Ruby (IRB)
- 打開終端/命令行
- 輸入
irb進入交互式 Ruby 環境 - 輸入:
puts "Hello, World!"
方法2:創建 Ruby 文件
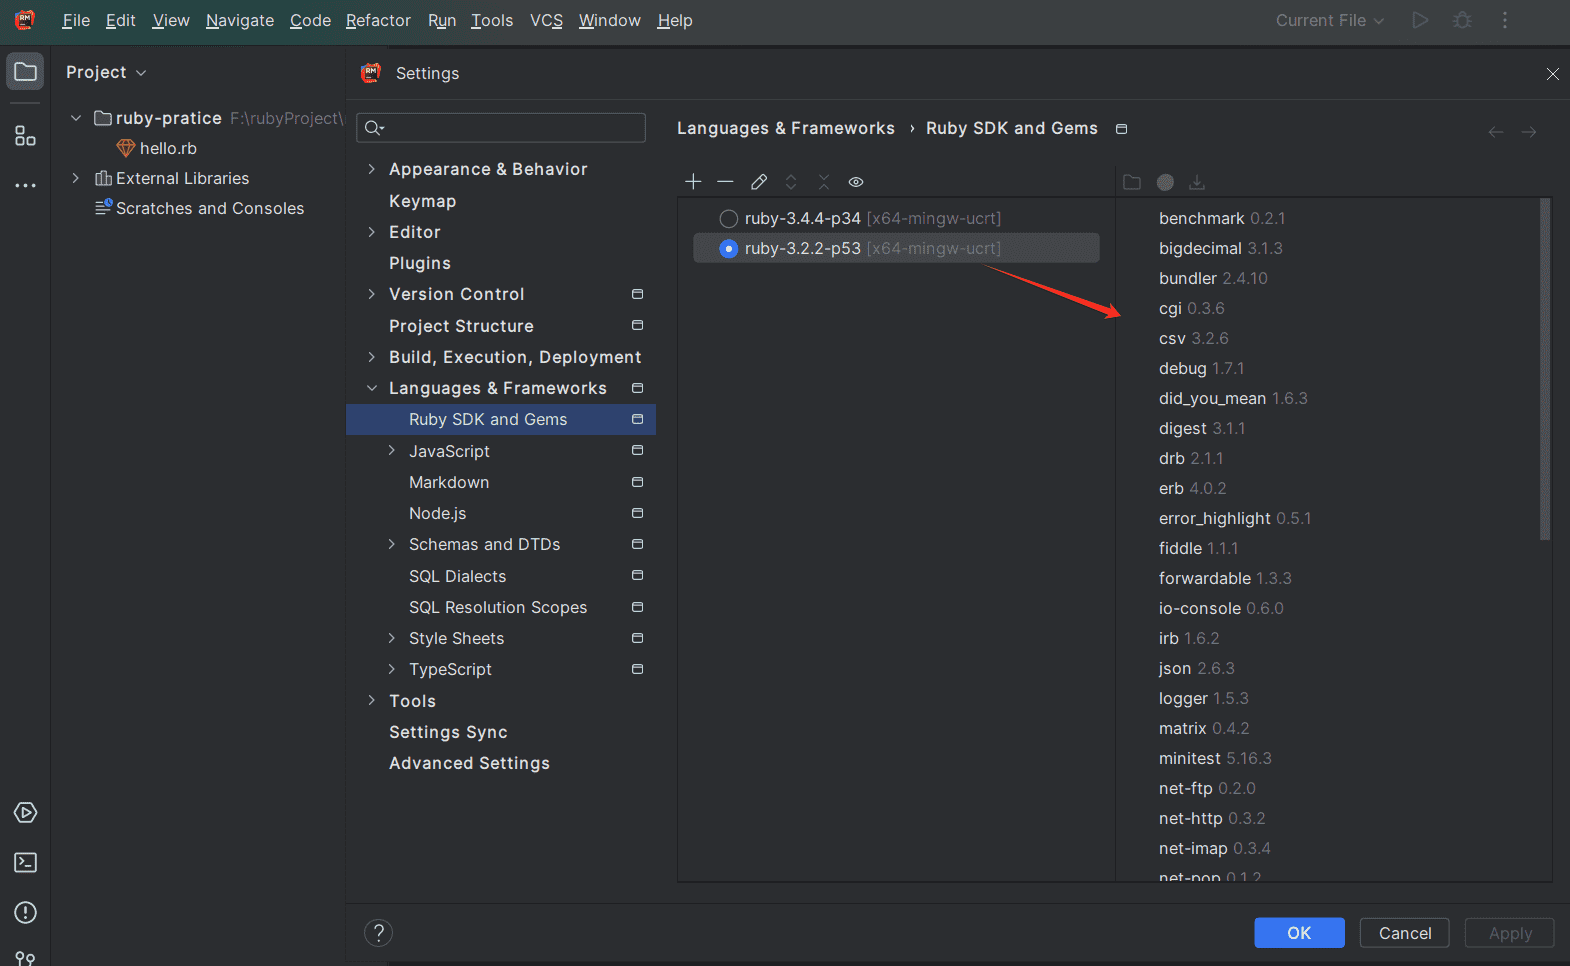
配置 rubymine 使用 ruby sdk ,如下:
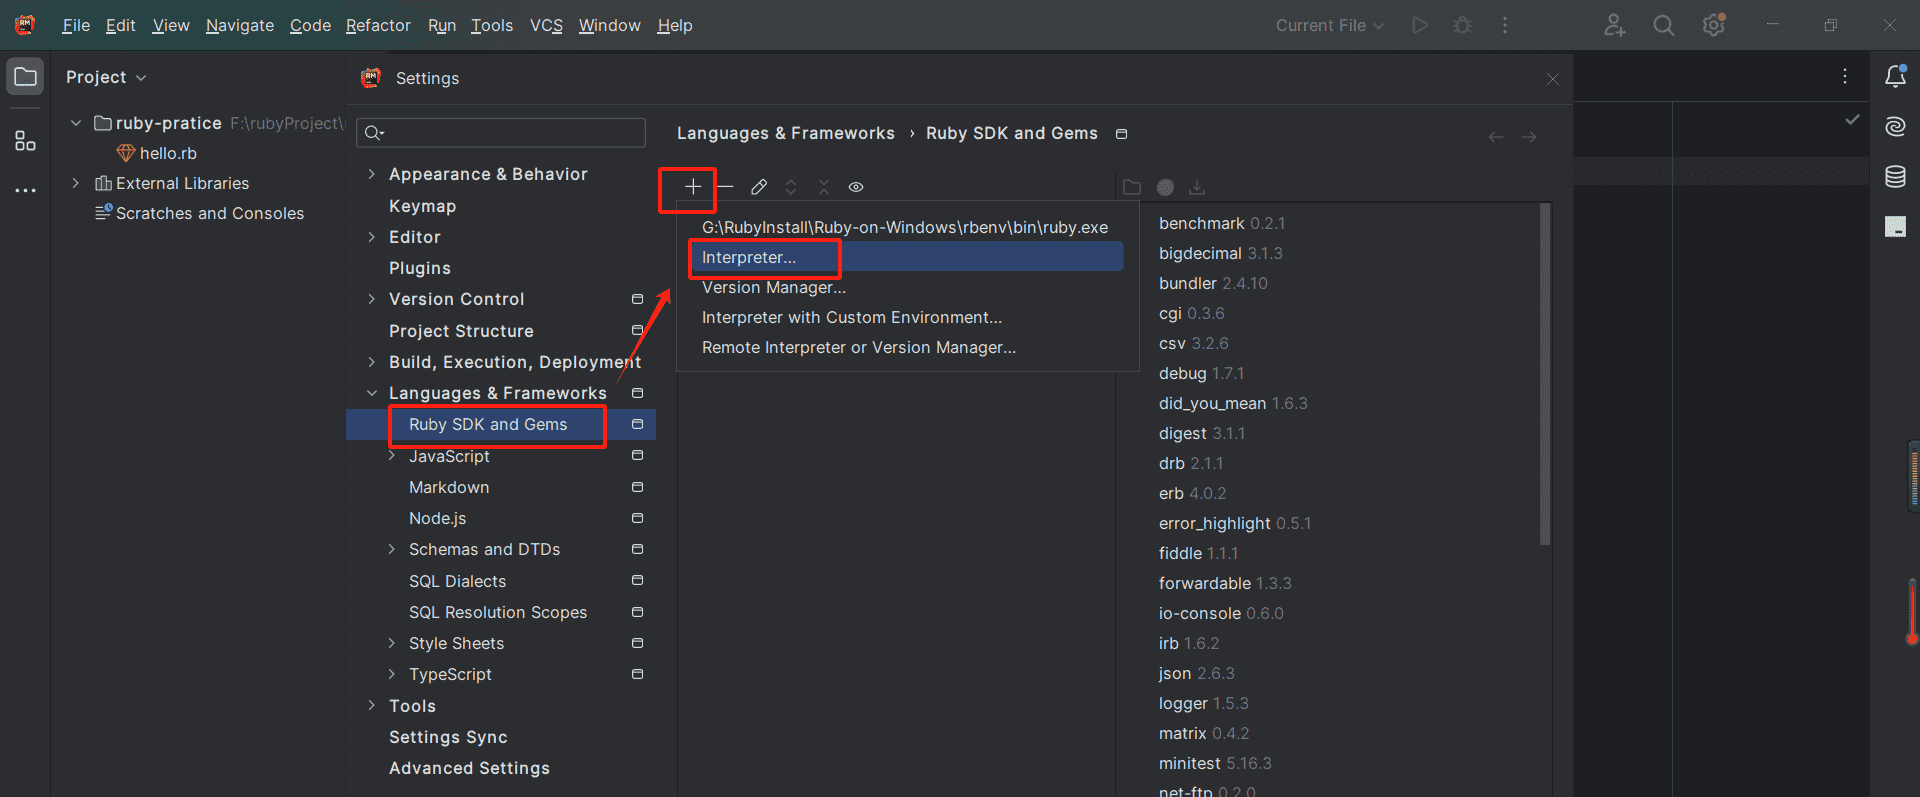
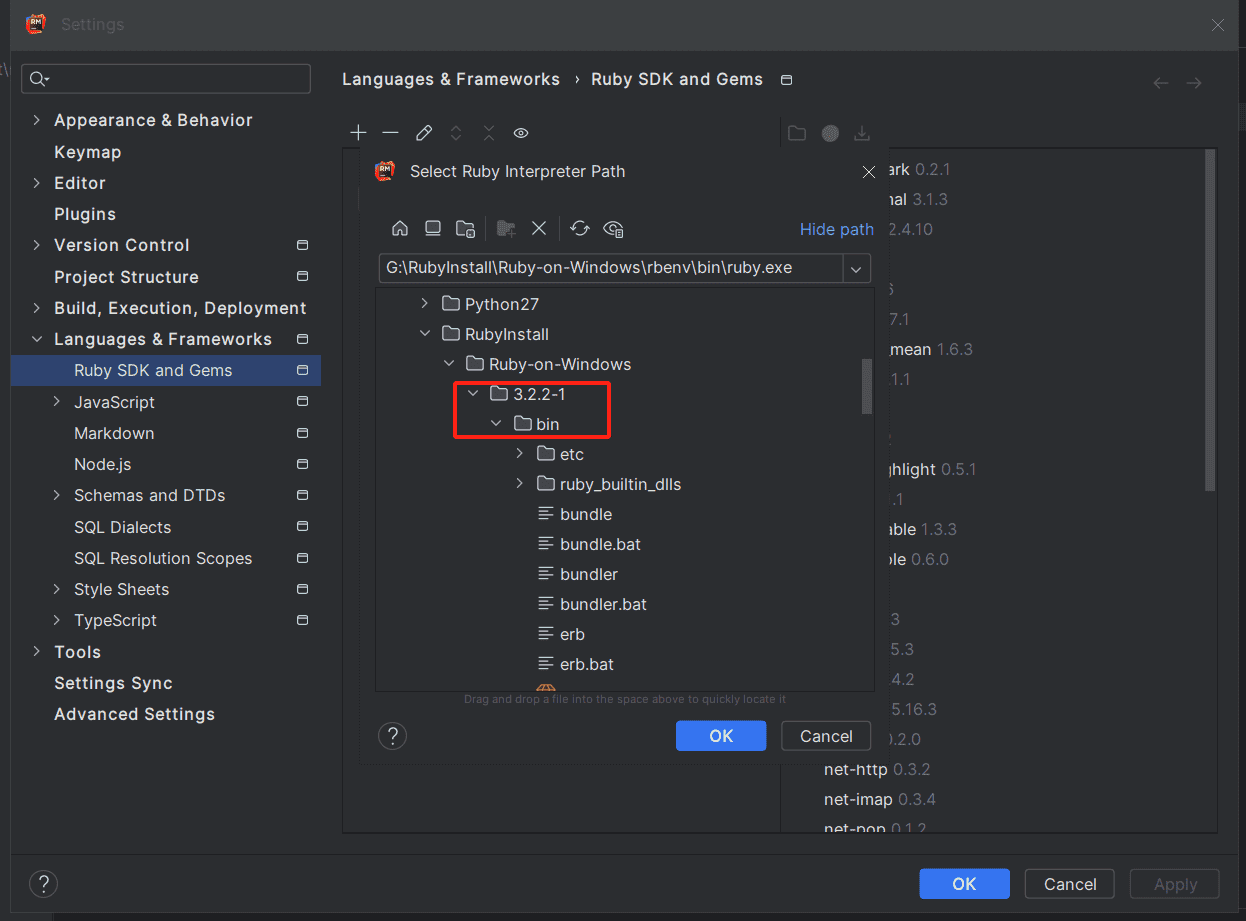
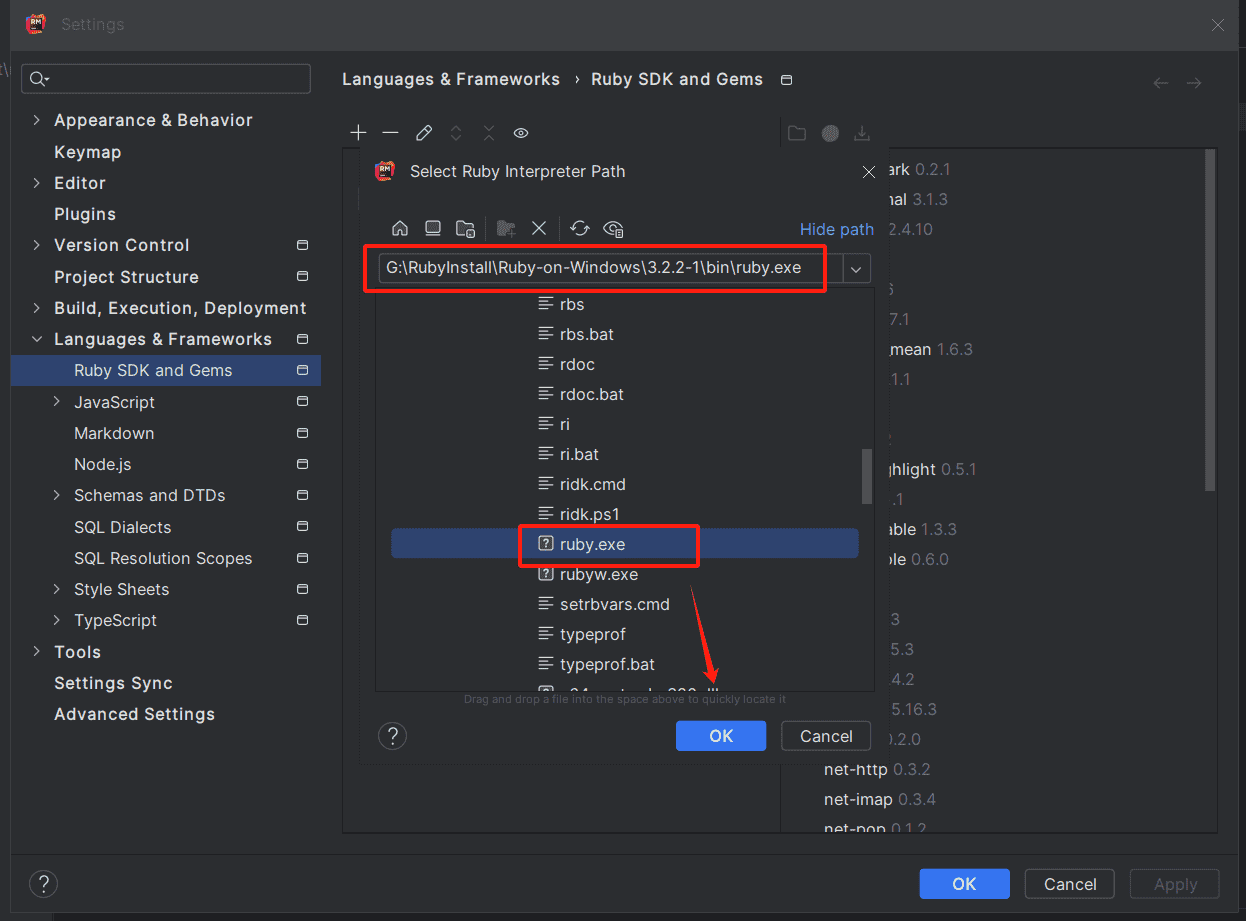
選擇 ruby 某個版本的 bin 目錄下,選擇 ruby.exe
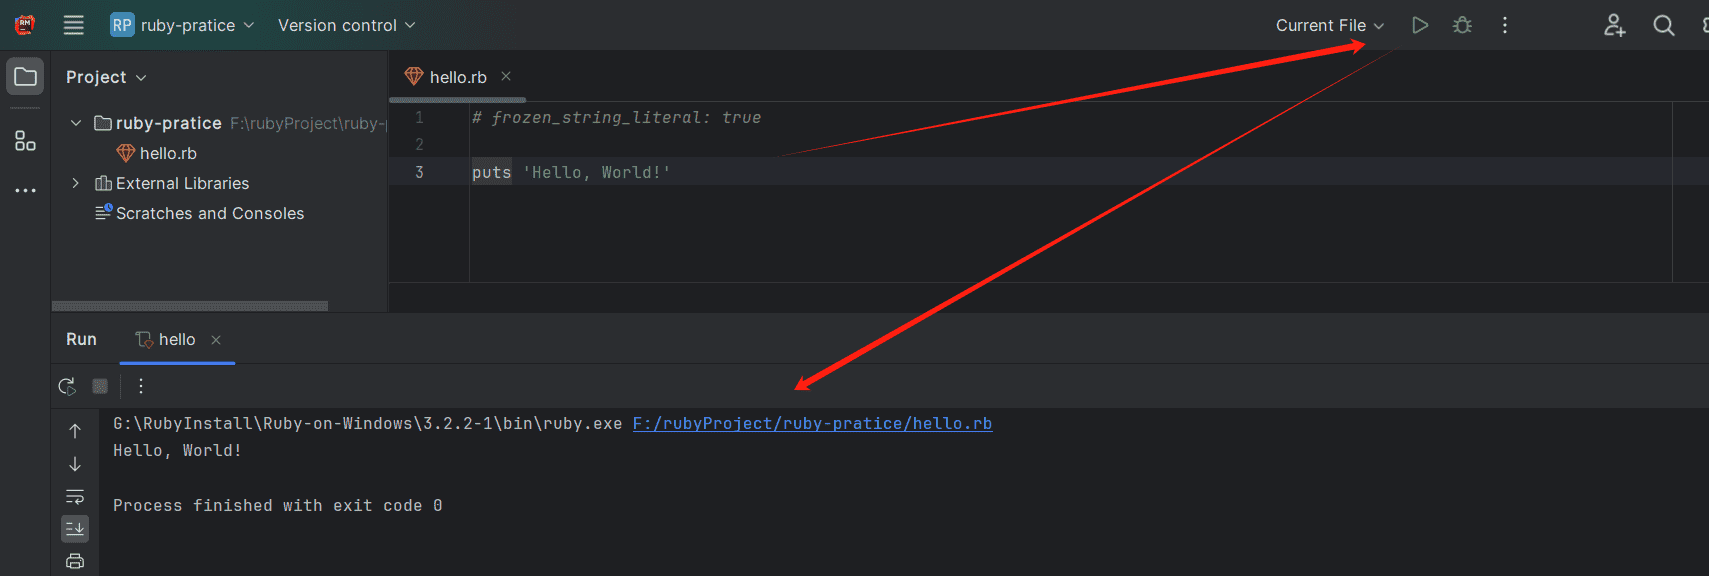
創建 hello.rb文件,輸入以下內容:
# hello.rb
puts "Hello, World!"
執行效果如下:
使用 Byebug 或 Pry 進行調試
Ruby 程序的 Debug 使用
使用 byebug 或 pry
byebug 和 pry 是兩個流行的 Ruby 調試器。它們允許你在代碼的特定位置暫停執行,檢查變量值、步進代碼等。
安裝 byebug
gem install byebug
基本用法
def some_method# 你的代碼byebug# 更多的代碼
end
運行應用,當執行到 byebug 時,Rails 會暫停執行,可以在控制臺中查看變量、步進(step)、繼續執行等。
- 基本用法:在代碼中插入
byebug語句,程序執行到該處會暫停進入調試模式 - 常用命令:
next:執行下一行代碼(跳過方法調用)step:步入方法內部continue:繼續執行直到下一個斷點
- 特點:支持斷點管理、堆棧導航和變量檢查
代碼示例
require 'byebug'def some_method# 你的代碼puts "this is some method"# 使用 byebug 進行調試byebug# 更多的代碼puts "continue to run1"# 使用 byebug 進行調試byebugputs "continue to run2"
end# 調用方法
some_method
執行如下:
[root@jd-server 01_base]# ruby byebug_example.rb
this is some method[6, 15] in /work/ruby_project/ruby-practice/01_base/byebug_example.rb6: 7:   # 使用 byebug 進行調試8:   byebug9: 10:   # 更多的代碼
=> 11:   puts "continue to run1"12: 13:   # 使用 byebug 進行調試14:   byebug15:
# 執行 next 指令:執行下一行代碼(跳過方法調用)
(byebug) next
continue to run1[9, 18] in /work/ruby_project/ruby-practice/01_base/byebug_example.rb9: 10:   # 更多的代碼11:   puts "continue to run1"12: 13:   # 使用 byebug 進行調試
=> 14:   byebug15: 16:   puts "continue to run2"17: end18:
# 繼續執行直到下一個斷點
(byebug) continue[11, 20] in /work/ruby_project/ruby-practice/01_base/byebug_example.rb11:   puts "continue to run1"12: 13:   # 使用 byebug 進行調試14:   byebug15:
=> 16:   puts "continue to run2"17: end18: 19: # 調用方法20: some_method
(byebug)
continue to run2
[root@jd-server 01_base]#
?Pry 調試工具?
安裝 pry-byebug
安裝方式:需要 pry-byebug gem(結合了 Pry 和 Byebug 功能)
gem install pry-byebug
基本用法
無論是在開發復雜的業務邏輯、調試棘手的bug,還是在優化性能時,pry-byebug都可以大展拳腳。例如,當需要追蹤一個方法的調用過程,或是檢查特定狀態下的變量值時,只需要在適當位置插入binding.pry并啟動調試會話即可。
控制執行流程:
next或n- 執行下一行(不進入方法)step或s- 進入方法調用continue或c- 繼續執行直到下一個斷點finish或f- 執行直到當前方法結束break或b- 設置斷點
查看上下文:
whereami或@- 顯示當前代碼位置backtrace或bt- 顯示調用棧up- 在調用棧中上移down- 在調用棧中下移
檢查變量:
ls- 列出當前作用域變量和方法cd- 進入對象上下文show-source- 查看方法源代碼
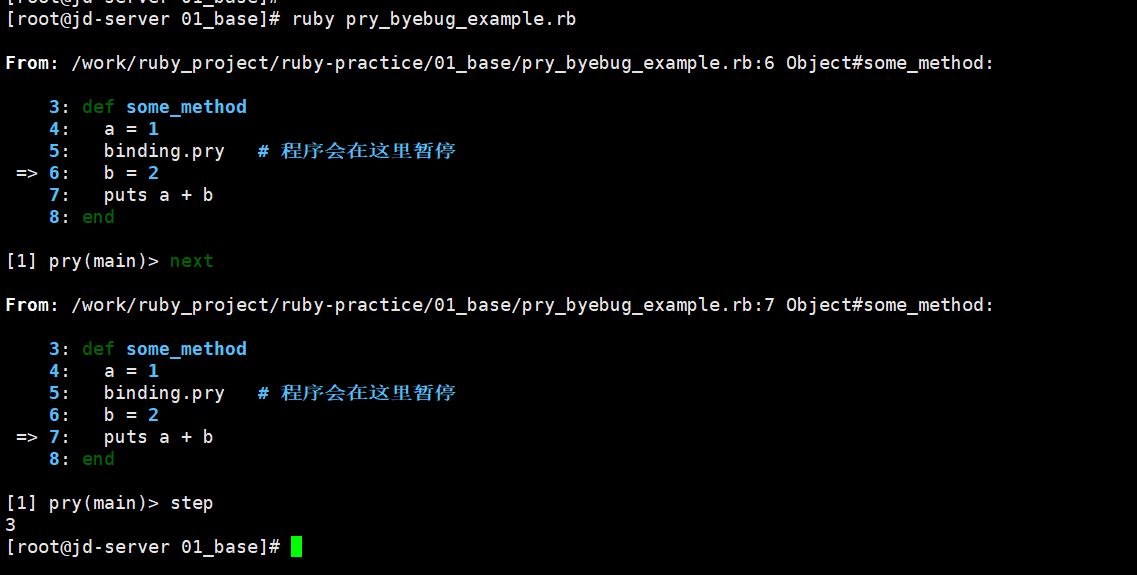
代碼示例
require "pry-byebug"def some_methoda = 1binding.pry   # 程序會在這里暫停b = 2puts a + b
end# 調用方法
some_method
執行如下:


)


)


![[吾愛原創] 千千每日計劃](http://pic.xiahunao.cn/[吾愛原創] 千千每日計劃)