https://catlikecoding.com/unity/tutorials/custom-srp/point-and-spot-lights/
Lights with Limited Influence

1 Point Lights
1.1 Other Light Data (Point )
同方向光一樣,我們支持有限數量的 Other Light.盡管場景中可能有很多 Other Lights,可能有超過光源上限的光源時可見的,但是超過支持上限的將被忽略掉,我們將只處理64個. Untiy 會根據“重要性”為光源排序,我們就根據這個排序來排除超過上限的光源.
光源重要性是相對穩定的.但是在場景有變化時,比如攝像機移動,會導致重要性更新,這時上一幀還在渲染的光源,這一幀由于重要性下降,就不渲染了,這回造成光照效果的突然改變,十分顯眼.因此我們把光源上限設置的大一點:64.
首先我們要把 Other Lights Data 收集并上傳到GPU.點光源需要顏色和位置.同時為了計算范圍衰減,將光源范圍平方的倒數,即 1/r^2 存儲到 w 中,基于

/////////////// Lighting.cspublic class Lighting
{...// Point/Spot 光源的最大數量const int maxOtherLightCount = 64;// 當前收集到了多少 Point/Spot Lightsint otherLightCount = 0;// Point/Spot 光源顏色Vector4[] otherLightColors = new Vector4[maxOtherLightCount];// xyz: Point/Spot 光源位置// w: 衰減系數Vector4[] otherLightPositions = new Vector4[maxOtherLightCount];// Point/Spot 光源 shader 常量IDint otherLightCountID = Shader.PropertyToID("_OtherLightCount");int otherLightColorsID = Shader.PropertyToID("_OtherLightColors");int otherLightPositionsID = Shader.PropertyToID("_OtherLightPositions");...public void SetupLights(){dirLightCount = 0;otherLightCount = 0;NativeArray<VisibleLight> visibleLights = cullingResults.visibleLights;for(int i = 0; i < visibleLights.Length; i++){VisibleLight light = visibleLights[i];switch(light.lightType){// 方向光case LightType.Directional:if(dirLightCount < maxDirLightCount)SetupDirectionalLight(dirLightCount++, ref light);break;// 點光源case LightType.Point:if(otherLightCount < maxOtherLightCount)SetupPointLight(otherLightCount++, ref light);break;}}buffer.BeginSample(bufferName);// 上傳方向光數據buffer.SetGlobalInt(dirLightCountID, dirLightCount);if(dirLightCount > 0){buffer.SetGlobalVectorArray(dirLightColorID, dirLightColors);buffer.SetGlobalVectorArray(dirLightDirectionID, dirLightDirections);buffer.SetGlobalVectorArray(dirLightShadowDataID, dirLightShadowData);}// 上傳Point/Spot光源數據buffer.SetGlobalInt(otherLightCountID, otherLightCount);if(otherLightCount > 0){buffer.SetGlobalVectorArray(otherLightColorsID, otherLightColors);buffer.SetGlobalVectorArray(otherLightPositionsID, otherLightPositions);}buffer.EndSample(bufferName);context.ExecuteCommandBuffer(buffer);buffer.Clear();}...// 收集 Point 光源數據private void SetupPointLight(int index, ref VisibleLight light){otherLightColors[index] = light.finalColor;otherLightPositions[index] = light.localToWorldMatrix.GetColumn(3);// 點光源衰減系數otherLightPositions[index].w = 1.0f / Mathf.Max(light.range * light.range, 0.000001f);}...
}
在 shader 中,定義相應的常量,并計算累加點光源光照
/////////////// Light.hlsl#define MAX_DIR_LIGHT_COUNT 4
#define MAX_OTHER_LIGHT_COUNT 64CBUFFER_START(_Lights)
...
// Point/Spot 光源數量
int _OtherLightCount;
float4 _OtherLightColors[MAX_OTHER_LIGHT_COUNT];
float4 _OtherLightPositions[MAX_OTHER_LIGHT_COUNT];
CBUFFER_ENDint GetOtherLightCount()
{return _OtherLightCount;
}Light GetOtherLight(int index, Surface surfaceWS, ShadowData shadowData)
{Light light;light.color = _OtherLightColors[index].rgb;float3 ray = _OtherLightPositions[index].xyz - surfaceWS.position;// 計算范圍衰減float distSqr = max(dot(ray, ray), 0.000001f);float rangeAttenuation = Square(saturate(1.0 - Square(distSqr*_OtherLightPositions[index].w)));light.attenuation = rangeAttenuation / distSqr;light.direction = normalize(ray);return light;
}/////////////// Lighting.hlslfloat3 GetLighting(Surface surfaceWS, BRDF brdf, GI gi)
{...for(int i = 0; i < GetOtherLightCount(); ++i){Light light = GetOtherLight(i, surfaceWS, shadowData);color += GetLighting(surfaceWS, brdf, light);}return color;
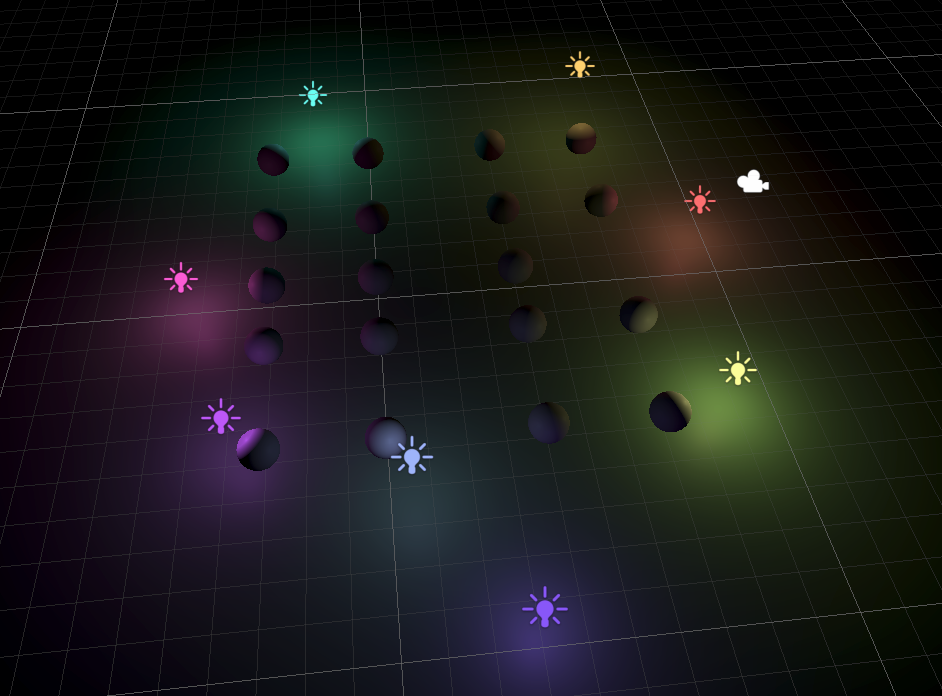
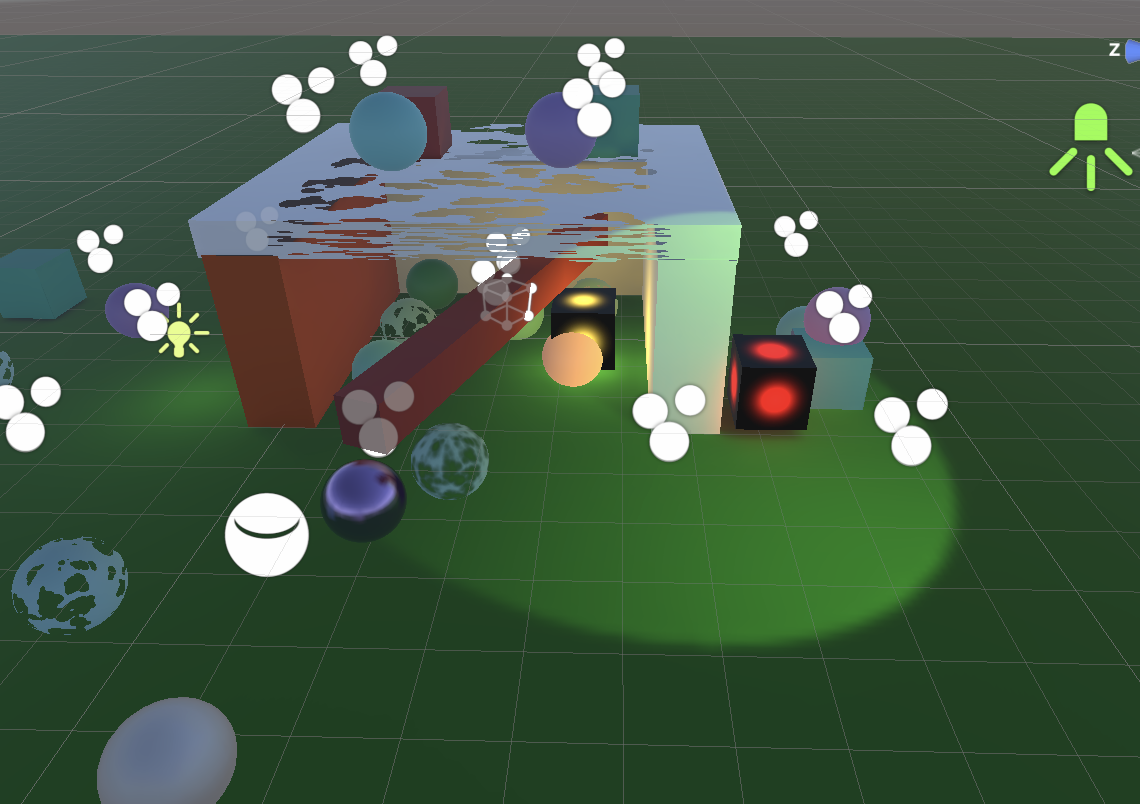
}如下圖,場景中只有點光源,并被點光源照亮
2 Spot Lights
與 Point Light 相比, Spot Light 需要額外的數據:
方向
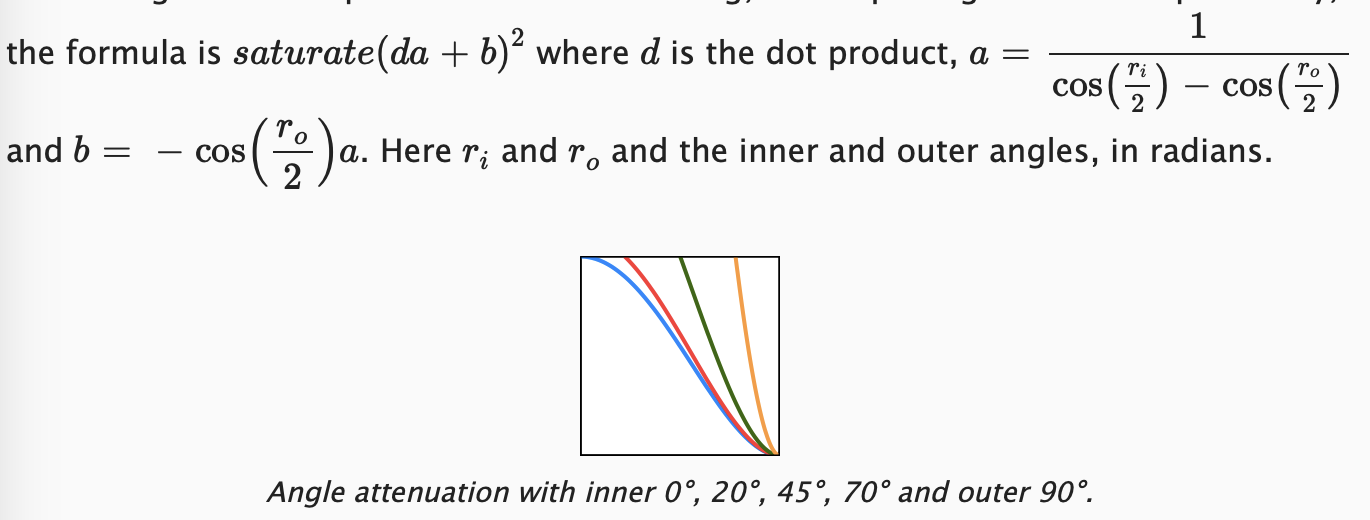
內外角衰減系數 內外角是相對于方向的角度*2.光線強度從內角開始衰減,到外角衰減為0
內外角衰減用下面公式計算:
首先,定義并收集數據,上傳到 shader
public class Lighting
{// Point/Spot 光源的最大數量const int maxOtherLightCount = 64;// 當前收集到了多少 Point/Spot Lightsint otherLightCount = 0;// Point/Spot 光源顏色Vector4[] otherLightColors = new Vector4[maxOtherLightCount];// xyz: Point/Spot 光源位置// w: 衰減系數Vector4[] otherLightPositions = new Vector4[maxOtherLightCount];Vector4[] otherLightDirections = new Vector4[maxOtherLightCount];Vector4[] otherLightSpotAngles = new Vector4[maxOtherLightCount];// Point/Spot 光源 shader 常量IDint otherLightCountID = Shader.PropertyToID("_OtherLightCount");int otherLightColorsID = Shader.PropertyToID("_OtherLightColors");int otherLightPositionsID = Shader.PropertyToID("_OtherLightPositions");int otherLightDirectionsID = Shader.PropertyToID("_OtherLightDirections");int otherLightSpotAnglesID = Shader.PropertyToID("_OtherLightSpotAngles");public void SetupLights(){dirLightCount = 0;otherLightCount = 0;NativeArray<VisibleLight> visibleLights = cullingResults.visibleLights;for(int i = 0; i < visibleLights.Length; i++){VisibleLight light = visibleLights[i];switch(light.lightType){// 方向光case LightType.Directional:if(dirLightCount < maxDirLightCount)SetupDirectionalLight(dirLightCount++, ref light);break;// 點光源case LightType.Point:if(otherLightCount < maxOtherLightCount)SetupPointLight(otherLightCount++, ref light);break;// 聚光燈case LightType.Spot:if(otherLightCount < maxOtherLightCount)SetupSpotLight(otherLightCount++, ref light);break;}}buffer.BeginSample(bufferName);...// 上傳Point/Spot光源數據buffer.SetGlobalInt(otherLightCountID, otherLightCount);if(otherLightCount > 0){buffer.SetGlobalVectorArray(otherLightColorsID, otherLightColors);buffer.SetGlobalVectorArray(otherLightPositionsID, otherLightPositions);buffer.SetGlobalVectorArray(otherLightDirectionsID, otherLightDirections);buffer.SetGlobalVectorArray(otherLightSpotAnglesID, otherLightSpotAngles);}buffer.EndSample(bufferName);context.ExecuteCommandBuffer(buffer);buffer.Clear();}// 收集 Spot 光源數據private void SetupSpotLight(int index, ref VisibleLight light){otherLightColors[index] = light.finalColor;otherLightPositions[index] = light.localToWorldMatrix.GetColumn(3);otherLightPositions[index].w = 1.0f / Mathf.Max(light.range * light.range, 0.000001f);otherLightDirections[index] = -light.localToWorldMatrix.GetColumn(2);// 內外角衰減系數float innerCos = Mathf.Cos(Mathf.Deg2Rad * 0.5f * light.light.innerSpotAngle);float outerCos = Mathf.Cos(Mathf.Deg2Rad * 0.5f * light.spotAngle);float angleRangeInv = 1f / Mathf.Max(innerCos - outerCos, 0.001f);otherLightSpotAngles[index] = new Vector4(angleRangeInv, -outerCos * angleRangeInv);}
}
在 shader 側的 Light.hlsl 中,定義 shader 常量接收數據,并計算 spot 光源數據
CBUFFER_START(_Lights)
...
// Point/Spot 光源數量
int _OtherLightCount;
float4 _OtherLightColors[MAX_OTHER_LIGHT_COUNT];
float4 _OtherLightPositions[MAX_OTHER_LIGHT_COUNT];
float4 _OtherLightDirections[MAX_OTHER_LIGHT_COUNT];
float4 _OtherLightSpotAngles[MAX_OTHER_LIGHT_COUNT];
CBUFFER_ENDLight GetOtherLight(int index, Surface surfaceWS, ShadowData shadowData)
{Light light;light.color = _OtherLightColors[index].rgb;float3 ray = _OtherLightPositions[index].xyz - surfaceWS.position;// 計算光源范圍衰減float distSqr = max(dot(ray, ray), 0.000001f);light.direction = normalize(ray);float rangeAttenuation = Square(saturate(1.0 - Square(distSqr*_OtherLightPositions[index].w)));// 計算聚光燈的內外角度衰減 (saturate(da+b))^2 float4 spotAngles = _OtherLightSpotAngles[index];float dotProduct = dot(_OtherLightDirections[index].xyz, light.direction);float spotAttenuation = Square(saturate(dotProduct * spotAngles.x +spotAngles.y));// 總衰減light.attenuation = spotAttenuation * rangeAttenuation / distSqr;return light;
}
默認情況下, Spot Light 的內角是無法編輯的,但是我們可以通過擴展編輯器來實現編輯功能
/// <summary>
/// 擴展 Light 組件面板
/// </summary>
// 允許選中多個對象進行編輯
[CanEditMultipleObjects]
// 聲明該類為 CustomRenderPipelineAsset 管線的 Light 類型對象的編輯器控制類
[CustomEditorForRenderPipeline(typeof(Light), typeof(CustomRenderPipelineAsset))]
public class CustomLightEditor : LightEditor
{public override void OnInspectorGUI(){// 依然用默認方法繪制 Light 編輯面板base.OnInspectorGUI();// 判斷選中的光源,全都是 spot 類型// 選中的 Light 的屬性會被序列化緩存,settings 提供了訪問緩存屬性的接口if (!settings.lightType.hasMultipleDifferentValues&& (LightType)settings.lightType.enumValueIndex == LightType.Spot){// 繪制 inner / outer 角編輯控件settings.DrawInnerAndOuterSpotAngle();// 應用修改后的數據settings.ApplyModifiedProperties();}}
}
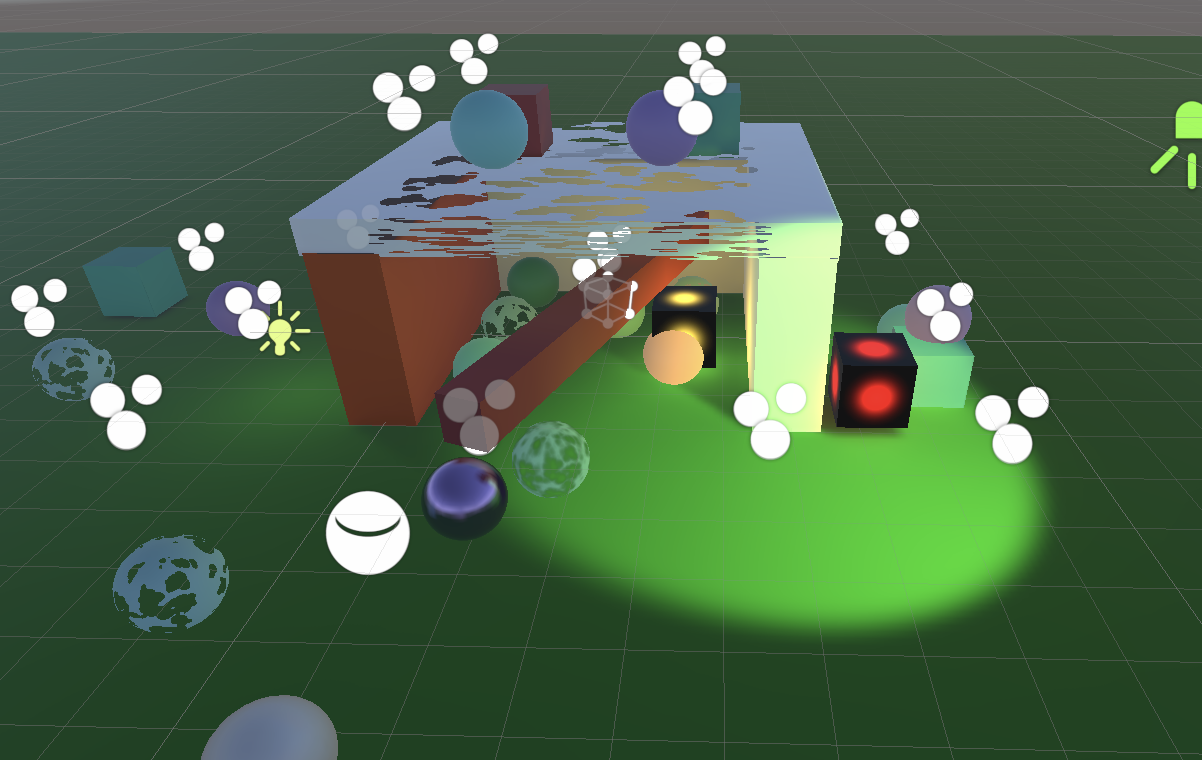
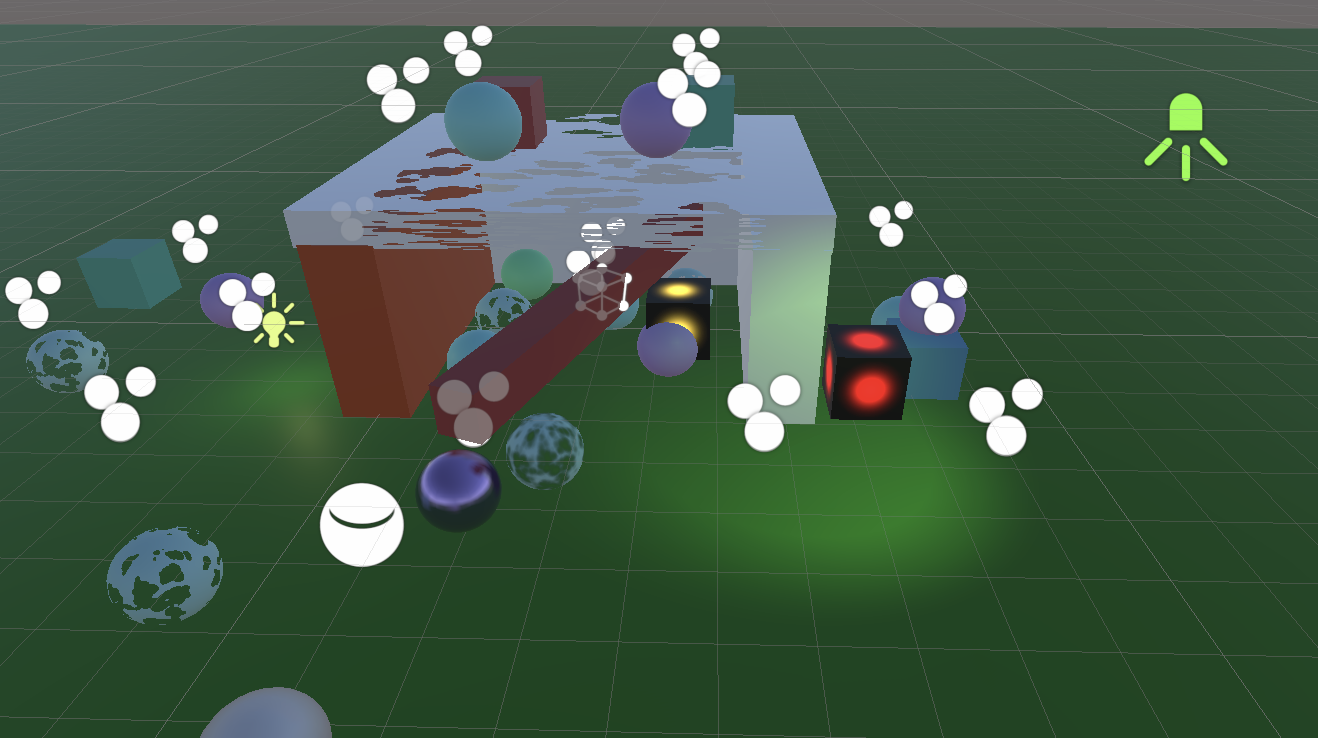
如下圖,是不同的 inner/outer angle 的效果

3 Baked Light and Shadows
這篇教程不會涉及到point/spot光源的實時陰影,僅會介紹烘焙陰影,包括烘焙光照
- 首先將光源的 Mode 改為 Baked
- Shadow Type 默認是 None,如果需要烘焙陰影,則改為其它選項
場景中只有一個點光源和一個聚光燈,可以看到烘焙后到效果
下面是實時光照效果
通過對比,可以發現,烘焙的效果,其亮度明顯高于實時效果.這是因為 unity 為了兼容舊管線,使用了錯誤的衰減算法.
3.1 Light Delegate
Unity 允許我們指定衰減算法,需要通過下面的編輯器擴展來完成.核心是指定一個委托,完成構建烘焙用的光源數據的的邏輯,并在該邏輯中,指定光源烘焙的一下參數/配置,其中就包括衰減算法.
將 CustomRenderPipeline 定義為 partial 類,在同目錄下定義新的 CustomRenderPipeline.Editor.cs 文件,以實現委托注冊
using Unity.Collections;
using UnityEngine;
using UnityEngine.Experimental.GlobalIllumination;
using LightType = UnityEngine.LightType;    // 與 Experimental 下的 LightType 類型沖突,因此需要顯式聲明用哪個public partial class CustomRenderPipeline
{partial void InitializeForEditor();#if UNITY_EDITORpartial void InitializeForEditor(){// 設置委托Lightmapping.SetDelegate(requestLightsDelegate);}protected override void Dispose(bool disposing){base.Dispose(disposing);// 清理委托Lightmapping.ResetDelegate();}private static Lightmapping.RequestLightsDelegate requestLightsDelegate =(Light[] lights, NativeArray<LightDataGI> output) =>{var lightData = new LightDataGI();for (int i = 0; i < lights.Length; i++){Light light = lights[i];switch (light.type){case LightType.Directional:var dirLight = new DirectionalLight();// 從 light 提取數據LightmapperUtils.Extract(light, ref dirLight);lightData.Init(ref dirLight);break;case LightType.Point:var pointLight = new PointLight();LightmapperUtils.Extract(light, ref pointLight);lightData.Init(ref pointLight);break;case LightType.Spot:var spotLight = new SpotLight();LightmapperUtils.Extract(light, ref spotLight);// 填充角度信息spotLight.innerConeAngle = light.innerSpotAngle * Mathf.Rad2Deg;spotLight.angularFalloff = AngularFalloffType.AnalyticAndInnerAngle;lightData.Init(ref spotLight);break;case LightType.Area:var areaLight = new RectangleLight();LightmapperUtils.Extract(light, ref areaLight);areaLight.mode = LightMode.Baked;   // 僅支持烘焙,不支持實時lightData.Init(ref areaLight);break;// 默認分支,不參與烘焙default:lightData.InitNoBake(light.GetInstanceID());break;}// 關鍵點:指定以平方的反比進行衰減lightData.falloff = FalloffType.InverseSquared;output[i] = lightData;}};
#endif
}
然后在 CustomRenderPipeline.cs 中的構造函數中,調用初始化函數,完成注冊
public CustomRenderPipeline(bool useSRPBatcher, bool useDynamicBatching, bool useGPUInstancing, ShadowSettings shadows)
{...// 在 partial for editor 中定義的方法InitializeForEditor();
}
如下圖,烘焙結果沒有那么亮了.但是可以看到,由于沒有陰影,光源會“穿過”墻壁.
3.2 Shadow Mask
Point/Spot Lights 也可以烘焙 shadow mask,只需要將它們的 mode 改為 mixed 即可.
然后,我們需要將光源的 shadow mask 參數: 陰影強度, 所在通道 上傳到 GPU.在 shader 側,獲取參數,并計算衰減.
這里要想看到明顯的效果,把 range intensity 設置的大一些
////////////////// shadow.cs
// 首先在 shadow.cs 中,加入收集 point/spot 光源數據的接口
public Vector4 ReserveOtherShadows(Light light, int visibleLightIndex)
{if (light.shadows != LightShadows.None &&light.shadowStrength > 0f){LightBakingOutput lightBaking =  light.bakingOutput;if (lightBaking.lightmapBakeType == LightmapBakeType.Mixed&& lightBaking.mixedLightingMode == MixedLightingMode.Shadowmask){useShadowMask = true;// 返回陰影強度,shadow mask 通道return new Vector4(light.shadowStrength, 0f, 0f, lightBaking.occlusionMaskChannel);}}return new Vector4(0f, 0f, 0f, -1f);
}////////////////// lighting.cs
// 定義相關 shader id 和 buffer,收集數據...
Vector4[] otherLightSpotAngles = new Vector4[maxOtherLightCount];
Vector4[] otherLightShadowData = new Vector4[maxOtherLightCount];
...
int otherLightSpotAnglesID = Shader.PropertyToID("_OtherLightSpotAngles");
int otherLightShadowDataID = Shader.PropertyToID("_OtherLightShadowData");public void SetupLights()
{dirLightCount = 0;otherLightCount = 0;NativeArray<VisibleLight> visibleLights = cullingResults.visibleLights;for(int i = 0; i < visibleLights.Length; i++){VisibleLight light = visibleLights[i];switch(light.lightType){// 方向光case LightType.Directional:if(dirLightCount < maxDirLightCount)SetupDirectionalLight(dirLightCount++, ref light);break;// 點光源case LightType.Point:if(otherLightCount < maxOtherLightCount)SetupPointLight(otherLightCount++, ref light);break;// 聚光燈case LightType.Spot:if(otherLightCount < maxOtherLightCount)SetupSpotLight(otherLightCount++, ref light);break;}}buffer.BeginSample(bufferName);// 上傳方向光數據...// 上傳Point/Spot光源數據buffer.SetGlobalInt(otherLightCountID, otherLightCount);if(otherLightCount > 0){buffer.SetGlobalVectorArray(otherLightColorsID, otherLightColors);buffer.SetGlobalVectorArray(otherLightPositionsID, otherLightPositions);buffer.SetGlobalVectorArray(otherLightDirectionsID, otherLightDirections);buffer.SetGlobalVectorArray(otherLightSpotAnglesID, otherLightSpotAngles);buffer.SetGlobalVectorArray(otherLightShadowDataID, otherLightShadowData);}buffer.EndSample(bufferName);context.ExecuteCommandBuffer(buffer);buffer.Clear();}// 收集 Point 光源數據
private void SetupPointLight(int index, ref VisibleLight light)
{otherLightColors[index] = light.finalColor;otherLightPositions[index] = light.localToWorldMatrix.GetColumn(3);// 光源距離衰減系數otherLightPositions[index].w = 1.0f / Mathf.Max(light.range * light.range, 0.000001f);// 傳入下面的數值,以避免 Point Light 受到 Spot Light 算法的影響(共用算法)otherLightSpotAngles[index] = new Vector4(0, 1);otherLightShadowData[index] = shadows.ReserveOtherShadows(light.light, index);
}// 收集 Spot 光源數據
private void SetupSpotLight(int index, ref VisibleLight light)
{otherLightColors[index] = light.finalColor;otherLightPositions[index] = light.localToWorldMatrix.GetColumn(3);otherLightPositions[index].w = 1.0f / Mathf.Max(light.range * light.range, 0.000001f);otherLightDirections[index] = -light.localToWorldMatrix.GetColumn(2);// 內外角衰減系數float innerCos = Mathf.Cos(Mathf.Deg2Rad * 0.5f * light.light.innerSpotAngle);float outerCos = Mathf.Cos(Mathf.Deg2Rad * 0.5f * light.spotAngle);float angleRangeInv = 1f / Mathf.Max(innerCos - outerCos, 0.001f);otherLightSpotAngles[index] = new Vector4(angleRangeInv, -outerCos * angleRangeInv);otherLightShadowData[index] = shadows.ReserveOtherShadows(light.light, index);
}
在 shader 側,接收常量緩沖,采樣 shadow mask
/////////////// shadow.hlsl// point / spot 光源 shadow 數據
struct OtherShadowData
{float strength;int shadowMaskChannel;
};// 獲取 point/spot 陰影衰減
float GetOtherShadowAttenuation(OtherShadowData otherShadowData, ShadowData global, Surface surfaceWS)
{// 材質不接收陰影
#if !defined(_RECEIVE_SHADOWS)return 1.0f;
#endif// 采樣 shadow maskif(otherShadowData.strength > 0.0f)return GetBakedShadow(global.shadowMask, otherShadowData.strength, otherShadowData.shadowMaskChannel);return 1.0f;
}/////////////// Light.hlsl
CBUFFER_START(_Lights)
...
float4 _OtherLightSpotAngles[MAX_OTHER_LIGHT_COUNT];
float4 _OtherLightShadowData[MAX_OTHER_LIGHT_COUNT];
CBUFFER_ENDOtherShadowData GetOtherLightShadowData(int index)
{OtherShadowData otherShadowData;otherShadowData.strength = _OtherLightShadowData[index].x;otherShadowData.shadowMaskChannel = _OtherLightShadowData[index].w;return otherShadowData;
}Light GetOtherLight(int index, Surface surfaceWS, ShadowData shadowData)
{Light light;light.color = _OtherLightColors[index].rgb;float3 ray = _OtherLightPositions[index].xyz - surfaceWS.position;// 計算光源范圍衰減float distSqr = max(dot(ray, ray), 0.000001f);light.direction = normalize(ray);float rangeAttenuation = Square(saturate(1.0 - Square(distSqr*_OtherLightPositions[index].w)));// 計算聚光燈的內外角度衰減 (saturate(da+b))^2 float4 spotAngles = _OtherLightSpotAngles[index];float dotProduct = dot(_OtherLightDirections[index].xyz, light.direction);float spotAttenuation = Square(saturate(dotProduct * spotAngles.x +spotAngles.y));// 獲取 shadow maskOtherShadowData otherShadowData = GetOtherLightShadowData(index); float shadowMaskAttenuation = GetOtherShadowAttenuation(otherShadowData, shadowData, surfaceWS);   // 總衰減light.attenuation = shadowMaskAttenuation * spotAttenuation * rangeAttenuation / distSqr;return light;
}
最后得到如下效果(關閉了間接光照)
4 Lights Per Object
現在,場景中的所有光源,每幀都會被渲染.對于方向光來說沒問題.但是對于點光和聚光燈來說,那些距離很遠,對當前畫面沒有貢獻的光,也被收集,參與計算,但是沒有效果,完全是浪費算力.為了支持更多的光源,并保證性能,需要降低每幀處理的光源的數量.有多種方法可以實現,這里使用 unity 的 per-object indices (逐對象索引).
思想是針對每個對象,僅將影響該對象的光源送到 GPU 進行計算.這種方式對于小的對象效果很好.但是對于那些很大的對象,一個光源本來只影響該對象的一部分,但是由于各種限制,忽略了同時影響該對象的其它光源,導致光照看起來不太正常.
由于該方案有時效果不好,因此將該特性作為一個選項,可以根據需要開啟或關閉.
4.1 Per-Object Light Data
是否使用(上傳) PerObject Light Data,依然是由 DrawingSettings 決定的,因此完善該方法,加入是否開啟 PerObjectLight 的參數.
///////////////////// CameraRenderer.csvoid DrawVisibleGeometry(bool useDynamicBatching, bool useGPUInstancing, bool useLightsPerObject){PerObjectData lightsPerObjectFlags = useLightsPerObject ? PerObjectData.LightData | PerObjectData.Indices : PerObjectData.None;// 渲染不透明物體var sortingSettings = new SortingSettings(camera){ criteria = SortingCriteria.CommonOpaque };var drawingSettings = new DrawingSettings(unlitShaderTagId, sortingSettings){ enableDynamicBatching = useDynamicBatching, enableInstancing = useGPUInstancing};// 索引是 1,因為索引為 0 的通過構造函數將 unlitShaderTagId 設置了drawingSettings.SetShaderPassName(1, litShaderTagId);drawingSettings.perObjectData = PerObjectData.Lightmaps | PerObjectData.LightProbe| PerObjectData.LightProbeProxyVolume| PerObjectData.ShadowMask| PerObjectData.OcclusionProbe| PerObjectData.OcclusionProbeProxyVolume| PerObjectData.ReflectionProbes| lightsPerObjectFlags;...}在 CustomRenderPipelineAsset 中定義參數,并一路傳遞到 DrawVisibleGeometry 調用.
4.2 Sanitizing Light Indices 整理索引
Unity 只是簡單地收集所有光源,并按照重要順序進行排序,然后以該順序作為每個光源的索引.當上傳每個對象的光源列表時,就使用該索引.但是我們上面在提交光 OtherLight 數據時,剔除掉了方向光,同時我們只上傳了64個其它光源,因此需要對索引進行調整.邏輯實現在 Lighting.SetupLights 函數中,調用該函數的相關邏輯也需要做調整.
////////////////// Lighting.cspublic void SetupLights(bool usePerObjectLights){dirLightCount = 0;otherLightCount = 0;// 如果開啟了 usePerObjectLights 則獲取索引表,根據我們自己收集的光源進行重新映射索引NativeArray<int> indexMap = usePerObjectLights ? cullingResults.GetLightIndexMap(Allocator.Temp) : default;NativeArray<VisibleLight> visibleLights = cullingResults.visibleLights;int i = 0;for(i = 0; i < visibleLights.Length; i++){int newIndex = -1;VisibleLight light = visibleLights[i];switch(light.lightType){// 方向光case LightType.Directional:if(dirLightCount < maxDirLightCount)SetupDirectionalLight(dirLightCount++, ref light);break;// 點光源case LightType.Point:if(otherLightCount < maxOtherLightCount){newIndex = otherLightCount;SetupPointLight(otherLightCount++, ref light);}break;// 聚光燈case LightType.Spot:if(otherLightCount < maxOtherLightCount){newIndex = otherLightCount;SetupSpotLight(otherLightCount++, ref light);}break;}// 重新映射索引if(usePerObjectLights)indexMap[i] = newIndex;}if(usePerObjectLights){// 不可見光,索引設置成 -1for(; i < indexMap.Length; ++i)indexMap[i] = -1;// 設置更新后的索引cullingResults.SetLightIndexMap(indexMap);indexMap.Dispose();Shader.EnableKeyword(lightsPerObjectKeyword);}else{Shader.DisableKeyword(lightsPerObjectKeyword);}....}在 shader 側,需要定義對應的 multi_compile keyword,并跟 per-object lights 傳進來的索引,引用正確光源進行光照
////////////////// Lit.shader
#pragma multi_compile_instancing
#pragma multi_compile _ _LIGHTS_PER_OBJECT////////////////// UnityInput.hlsl
CBUFFER_START(UnityPerDraw)
real4 unity_WorldTransformParams;
// per object lights 數據
// y 是影響該對象的光源數量
real4 unity_LightData;
// 存儲光源索引,每個通道一個,最多8個. index = unity_LightIndices[i/4][i%4]
real4 unity_LightIndices[2];
...
CBUFFER_END////////////////// Lighting.hlsl
float3 GetLighting(Surface surfaceWS, BRDF brdf, GI gi)
{ShadowData shadowData = GetShadowData(surfaceWS);shadowData.shadowMask = gi.shadowMask;// 臨時返回以查看數據//return gi.shadowMask.shadows.rgb;//return float4(gi.specular, 1.0f);float3 color = IndirectBRDF(surfaceWS, brdf, gi.diffuse, gi.specular);//color = 0;   // 顯示去掉間接光照的效果for(int i = 0; i < GetDirectionalLightCount(); ++i){Light light = GetDirectionalLight(i, surfaceWS, shadowData);color += GetLighting(surfaceWS, brdf, light);}#if defined(_LIGHTS_PER_OBJECT)// 每個對象定義了影響的光源// y 可能大于8,而我們最多支持8個,因此用 min 確保for(int i = 0; i < min(8,unity_LightData.y); ++i){int index = unity_LightIndices[(uint)i/4][(uint)i%4];Light light = GetOtherLight(index, surfaceWS, shadowData);color += GetLighting(surfaceWS, brdf, light);}
#else// 沒有每個對象光源的數據,因此處理所有for(int i = 0; i < GetOtherLightCount(); ++i){Light light = GetOtherLight(i, surfaceWS, shadowData);color += GetLighting(surfaceWS, brdf, light);}
#endifreturn color;
}
需要注意的是, Per-Object Lights 會降低 GPU Instancing 的效率,因為只有受相同光源影響的對象,才能合批(增加了條件).


)


)
:三網智能切換及配網功能)


