微前端
- 微前端
- 基本知識
- 主要的微前端框架
- iframe
- 優點:
- 缺點:
- single-spa
- 示例
- 主應用
- spa-root-config.js
- microfrontend-layout.html
- index.ejs
- 子應用
- spa-react-app2.js
- root.component.js
- 修改路由
- spa-demo/microfrontend-layout.html
- spa-demo/react-app1/webpack.config.js
- spa-demo/react-app2/webpack.config.js
- spa-demo/react-app1/src/root.component.js
- 兩個應用連接,將兩個應用展示在同一個頁面上
- spa-demo/microfrontend-layout.html
- 實現樣式隔離
- 創建styles文件,并啟動服務
- 子應用中寫入
- 主應用的css策略也要改
- JS隔離
- 子應用中
- qiankun
- 使用
- 安裝依賴
- 啟動服務
- ShadowDom 影子DOM
- 示例:
- 使用shadowDom
- proxySandbox VS snapshotSandbox
- 全局彈窗
- 路由
- 預加載
- 通信方式
- EMP - 同架構應用的微前端
- 微前端基礎知識介紹
- 常見框架
- 對比總結
微前端
基本知識
微前端,Micro-Frontends,多個前端組成的前端
后端比較早使用到微前端,和后端微服務結合
對于 Web服務 來講,后端是一個又一個的接口
前端對接口之前的關聯是不在意的
微服務,多人協作問題,版本迭代問題,服務整體穩定性問題
前端請求時候,通過在請求頭中增加東西,后端識別后,將請求引導到新的服務上去
后端通過微服務將每個服務單獨部署,給單個服務增加數量或者使用容器化的技術,將服務容量提升
將多個各自獨立的單體應用服務共同打包聚合成一個單獨應用的方式
一個web前端應用中,直接運行其他web應用
特點:
- 技術棧無關:子應用是react,vue,vue3的都是沒有關系的,各個應用之間是完全獨立(邏輯上)的
- 獨立開發、部署、倉庫都獨立
- 增量升級:復雜的站點,看起來是一個頁面,但是其中分了很多的模塊,各個模塊之前可能是完全不同部門來負責的,發布的應用可能導致整個頁面掛掉,這肯定是不允許的,因此需要將不同部分負責的頁面盡量是獨立的。
- 狀態隔離:運行時的數據狀態是獨立的,不包括子應用,主副應用通信這種情況
- 環境隔離:應用,css之間是隔離的
- 消息通信:應用之間通信降低溝通成本,有整體體驗
- 依賴復用:應用是不同部門的,但是依賴是同一個版本的,是可以復用的。一般是使用 webpack 的 external 來進行復用的
主要的微前端框架
iframe
優點:
瀏覽器層面就直接支持,不需要搞其他任何開發就可以直接使用
不同的iframe之間是完全隔離的,各個iframe之間是完全不影響的,有自己的js線程,有自己的dom樹,css樣式樹
瀏覽器對iframe本身有很多的安全限制,防止出現安全問題
缺點:
- URL 是不同步的
在瀏覽器的主應用中改變hashTak,各個iframe之間拿不到主應用的基本信息,頁面刷新以下,各個iframe中的url就會自動回到副應用設置的初始值去 - UI不同步
彈窗,抽屜只能在當前iframe中去實現,沒有辦法做整個頁面的抽屜和彈窗 - 完全隔離
各個iframe共享資源是不可能的,比如,主應用登錄后,子應用想要免登錄也是不可能的,禁止讀取cookie等 - 速度
各個應用都要跑完一遍整個生命周期,域名解析,資源加載,loading,數據請求等全部都是自己獨立的,無法實現資源復用,體驗差
single-spa
用生命周期的概念實現各個子應用之間的加載,卸載,狀態管理等等
子應用的調度,url的變化,各種事件的傳遞,各種函數的處理全都是根據生命周期來的
注冊應用 -> url變化 -> app active,app激活狀態,一個url對應著一個或多個子應用 -> 找到子應用 -> 執行子應用的生命周期鉤子,life cycle
生命周期鉤子:
bootstrap 狀態初始化
mount 加載
unmount 卸載
應用分類:
- root-config 主應用:負責注冊管理所有的子應用,還有整體的node管理
- app-parcel 子應用
示例
執行:
pnpx create-single-spa --moduleType root-config

將版本自動升級的符號去掉后安裝,并且改下 webpack-config-single-spa-react

pnpm i
cd spa-demo
創建子應用1:
pnpx create-single-spa --moduleType app-parcel
也是一樣將版本升級符號去掉

創建子應用2:react-app2,步驟和上面一樣

重新強制安裝
pnpm install --force --ignore-scripts
主應用
主應用啟動的時候是可以配置預加載的,可以將子應用加載起來,但是不展示它,當要展示的時候,就會特別快
主應用目錄:

spa-root-config.js
主應用啟動的流程
import { registerApplication, start } from "single-spa";
import {constructApplications,constructRoutes,constructLayoutEngine,
} from "single-spa-layout";
import microfrontendLayout from "./microfrontend-layout.html";// 定義程序
const routes = constructRoutes(microfrontendLayout);
// 定義主應用程序
const applications = constructApplications({routes, //路由列表// 加載app應用程序loadApp({ name }) {return import(/* webpackIgnore: true */ name);},
});
const layoutEngine = constructLayoutEngine({ routes, applications });applications.forEach(registerApplication);
layoutEngine.activate();
start();
microfrontend-layout.html
主應用路由定義文件
<single-spa-router><!--This is the single-spa Layout Definition for your microfrontends.See https://single-spa.js.org/docs/layout-definition/ for more information.--><!-- Example layouts you might find helpful:<nav><application name="@org/navbar"></application></nav><route path="settings"><application name="@org/settings"></application></route>--><main><!-- 默認路由,也就是 / 這個路由 --><route default><!-- 執行 @single-spa/welcome 子應用 --><application name="@single-spa/welcome"></application></route></main>
</single-spa-router>
index.ejs
html的模板文檔
將后續的子應用啟動地址填入這里:

<!DOCTYPE html>
<html lang="en">
<head><meta charset="UTF-8"><meta name="viewport" content="width=device-width, initial-scale=1.0"><meta http-equiv="X-UA-Compatible" content="ie=edge"><title>Root Config</title><meta http-equiv="Content-Security-Policy" content="default-src 'self' https: localhost:*; script-src 'unsafe-inline' 'unsafe-eval' https: localhost:*; connect-src https: localhost:* ws://localhost:*; style-src 'unsafe-inline' https:; object-src 'none';"><meta name="importmap-type" use-injector /><!-- If you wish to turn off import-map-overrides for specific environments (prod), uncomment the line below --><!-- More info at https://github.com/single-spa/import-map-overrides/blob/main/docs/configuration.md#domain-list --><!-- <meta name="import-map-overrides-domains" content="denylist:prod.example.com" /> --><!-- Shared dependencies go into this import map --><!-- 默認注冊這個 --><script type="injector-importmap">{"imports": {"single-spa": "https://cdn.jsdelivr.net/npm/single-spa@6.0.3/lib/es2015/esm/single-spa.min.js"}}</script><link rel="preload" href="https://cdn.jsdelivr.net/npm/single-spa@6.0.3/lib/es2015/esm/single-spa.min.js" as="module"><!-- Add your organization's prod import map URL to this script's src  --><!-- <script type="injector-importmap" src="/importmap.json"></script> --><!-- 如果是本地的話,還要注冊這個 --><!-- 子應用在這里注冊 --><% if (isLocal) { %><script type="injector-importmap">{"imports": {"@spa/root-config": "//localhost:9000/spa-root-config.js","@spa/react-app1": "http://localhost:8081/spa-react-app1.js","@spa/react-app2": "http://localhost:8080/spa-react-app2.js","@single-spa/welcome": "https://cdn.jsdelivr.net/npm/single-spa-welcome/dist/single-spa-welcome.min.js"}}</script><% } %><script src="https://cdn.jsdelivr.net/npm/import-map-overrides@5.1.1/dist/import-map-overrides.js"></script><script src="https://cdn.jsdelivr.net/npm/@single-spa/import-map-injector@2.0.1/lib/import-map-injector.js"></script>
</head>
<body><noscript>You need to enable JavaScript to run this app.</noscript><main></main><script>window.importMapInjector.initPromise.then(() => {import('@spa/root-config');});</script><import-map-overrides-full show-when-local-storage="devtools" dev-libs></import-map-overrides-full>
</body>
</html>
啟動主應用:


顯示的是 默認路由:@single-spa/welcome 這個頁面
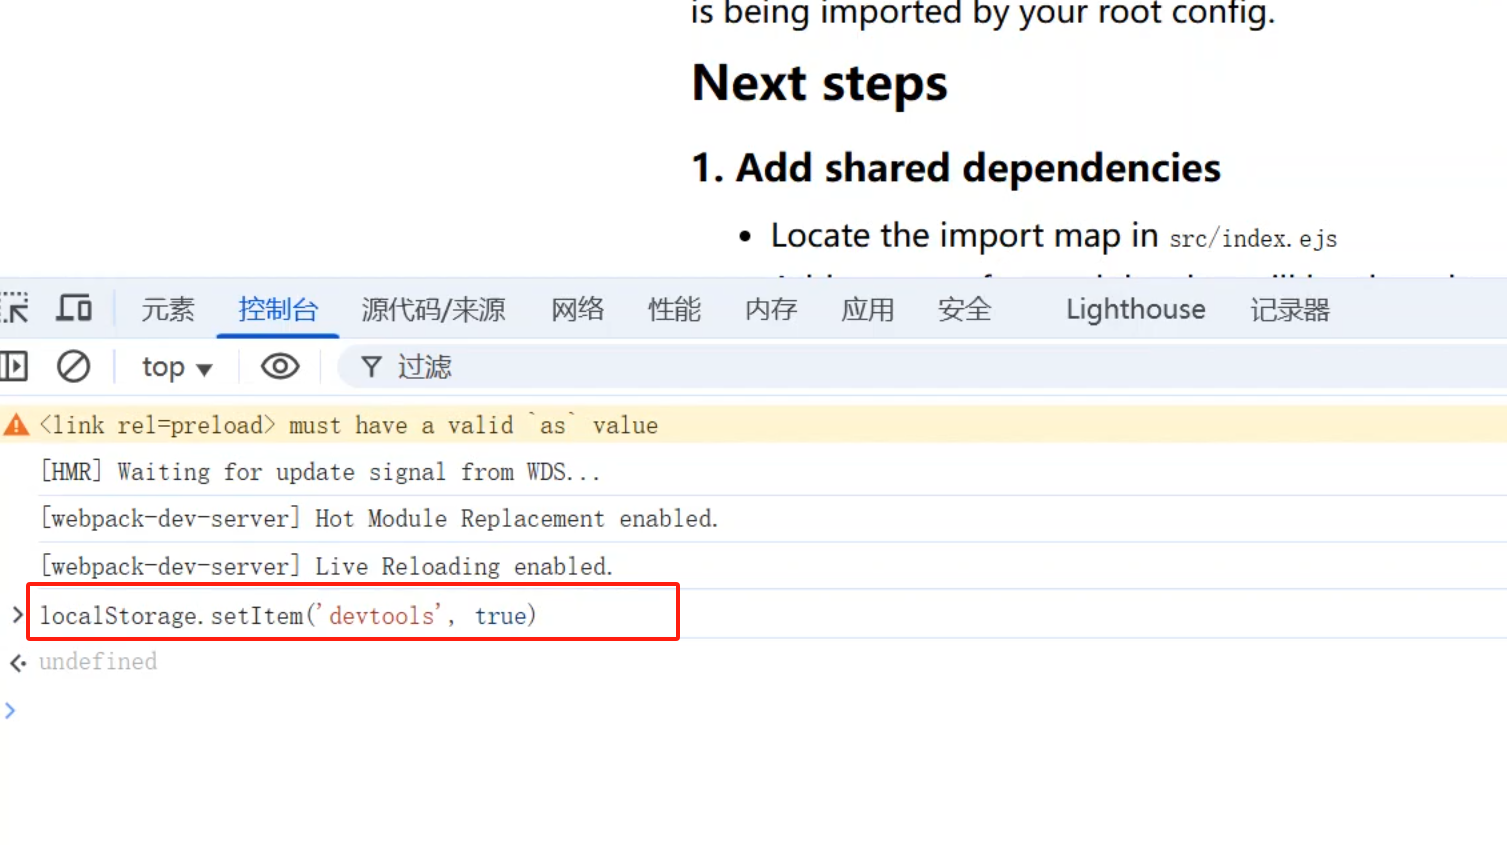
添加開發工具:
在控制臺執行:
localStorage.setItem(‘devtools’,true)

子應用
子應用是不去自己啟動自己的,只是告訴主應用有 bootstrap,mount,unmount 三個鉤子,讓主應用在合適的時機觸發這三個鉤子就行了
子應用代碼:

spa-react-app2.js
向主應用提供的鉤子
import React from "react";
import ReactDOMClient from "react-dom/client";
import singleSpaReact from "single-spa-react";
import Root from "./root.component";// singleSpaReact 創建整個應用
const lifecycles = singleSpaReact({React,ReactDOMClient,rootComponent: Root, //根組件// 捕獲react錯誤errorBoundary(err, info, props) {// Customize the root error boundary for your microfrontend here.return null;},
});// 子應用入口導出這三個生命周期鉤子,主應用調用mount方法,則會進入到rootComponent
export const { bootstrap, mount, unmount } = lifecycles;
子應用往外導出是導出 根組件 還是 這三個生命周期鉤子?
single-spa 子應用來說,不會去主動啟動自己的,只會告訴主應用是子應用有這三個生命周期鉤子,你在合適的時機,觸發這三個生命周期鉤子就行了
主應用啟動的時候,是可以配置預加載的,可以將子應用加載起來,但是不展示它,預加載的時候,會執行 bootstrap 方法
如果當前頁面url變化了,發現 react-app1處于激活狀態,那么主應用就會調用mount方法,將當前頁面的控制權交給你
當前頁面url又變化了,react-app1已經從激活狀態變到非激活狀態了,會留一個清理現場的時間,則會調用 unmount,清理js,全局變量等
root.component.js
實際業務代碼
// 指定了一個組件
export default function Root(props) {return <section>{props.name} is mounted!</section>;
}
啟動子應用:
pnpm start:standalone 主應用可不啟動,想要單獨啟動子應用,自己做調試開發時候可以使用這個命令
正常啟動
pnpm start


修改路由
spa-demo/microfrontend-layout.html

<single-spa-router><!--This is the single-spa Layout Definition for your microfrontends.See https://single-spa.js.org/docs/layout-definition/ for more information.--><!-- Example layouts you might find helpful:<nav><application name="@org/navbar"></application></nav><route path="settings"><application name="@org/settings"></application></route>--><main><route default><!-- <application name="@single-spa/welcome"></application> --><div>main app</div></route><route path="react-app1"><application name="@spa/react-app1"></application></route><route path="react-app2"><application name="@spa/react-app1"></application></route></main>
</single-spa-router>
spa-demo/react-app1/webpack.config.js

const { merge } = require("webpack-merge");
const singleSpaDefaults = require("webpack-config-single-spa-react");module.exports = (webpackConfigEnv, argv) => {const defaultConfig = singleSpaDefaults({orgName: "spa",projectName: "react-app1",webpackConfigEnv,argv,outputSystemJS: false,});// 去掉共享依賴delete defaultConfig.externals;return merge(defaultConfig, {// modify the webpack config however you'd like to by adding to this object});
};
同理,在 react-app2 的 webpack.config.js 中 也加上 刪除共享依賴這句:
spa-demo/react-app2/webpack.config.js
const { merge } = require("webpack-merge");
const singleSpaDefaults = require("webpack-config-single-spa-react");module.exports = (webpackConfigEnv, argv) => {const defaultConfig = singleSpaDefaults({orgName: "spa",projectName: "react-app2",webpackConfigEnv,argv,outputSystemJS: false,});// 去掉共享依賴delete defaultConfig.externals;return merge(defaultConfig, {// modify the webpack config however you'd like to by adding to this object});
};
spa-demo/react-app1/src/root.component.js
export default function Root(props) {return <section>hello,{props.name} is mounted!</section>;
}
重啟 react-app1,react-app2:


兩個應用連接,將兩個應用展示在同一個頁面上
spa-demo/microfrontend-layout.html

<single-spa-router><!--This is the single-spa Layout Definition for your microfrontends.See https://single-spa.js.org/docs/layout-definition/ for more information.--><!-- Example layouts you might find helpful:<nav><application name="@org/navbar"></application></nav><route path="settings"><application name="@org/settings"></application></route>--><main><div style="display:flex;gap:20px;margin:10px 20px"><a href="/">main app</a><a href="/react-app1">react-app1</a><a href="/react-app2">react-app2</a><a href="/all">All MicroFrontends Apps</a></div><route default><!-- <application name="@single-spa/welcome"></application> --><div>main app</div></route><route path="react-app1"><application name="@spa/react-app1"></application></route><route path="react-app2"><application name="@spa/react-app1"></application></route><route path="all"><div style="border: 1px solid green;"><application name="@spa/react-app1"></application></div><div style="border: 1px solid cyan;margin-top: 50px;"><application name="@spa/react-app2"></application></div></route></main>
</single-spa-router>


實現樣式隔離
添加依賴 single-spa-css,這個依賴能夠幫助我們管理css
在react-app1中安裝:
pnpm add single-spa-css

創建styles文件,并啟動服務

body {background-color: #aaa;
}
http-server啟動一個服務
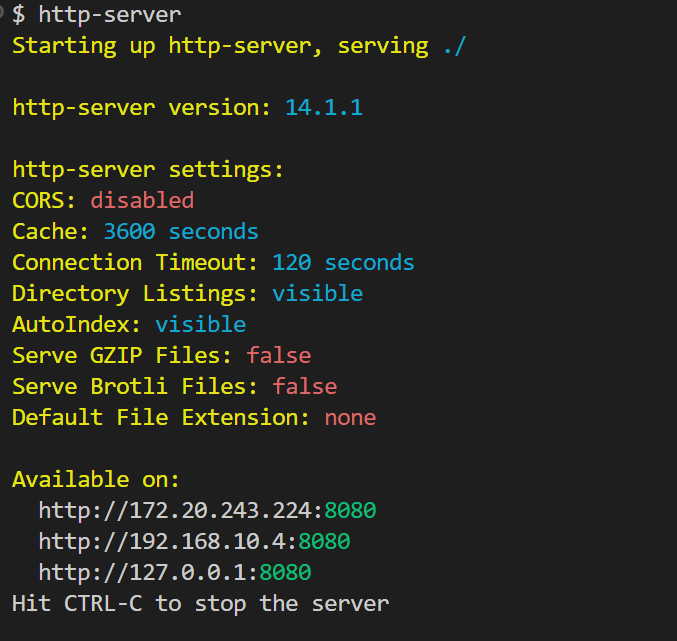
當前目錄下所有靜態資源的訪問:


子應用中寫入
spa-demo/react-app1/src/spa-react-app1.js:
在入口中,一般是:
掛載的時候做某個事情
卸載的時候做某個事情
先啟動子應用,主應用,再啟動樣式服務,免得子應用的8080端口被占用然后報錯
啟動8888端口服務


import React from "react";
import ReactDOMClient from "react-dom/client";
import singleSpaReact from "single-spa-react";
import Root from "./root.component";
import singleSpaCss from 'single-spa-css';const lifecycles = singleSpaReact({React,ReactDOMClient,rootComponent: Root,errorBoundary(err, info, props) {// Customize the root error boundary for your microfrontend here.return null;},
});const styleLifeCycles = singleSpaCss({// 剛剛啟動的樣式服務地址cssUrls: ["http://192.168.10.4:8888/style.css"],// 是否在webpack打包中去除掉css文件webpackExtractedCss: false,// 子應用切換的時候就看不到樣式了shouldUnmount: true
});// export const { bootstrap, mount, unmount } = lifecycles;// 數組的順序就是在主應用調用的時候執行的順序
// 先啟動樣式的bootstrap,再啟動應用的bootstrap
export const bootstrap = [styleLifeCycles.bootstrap,lifecycles.bootstrap,
];export const mount = [styleLifeCycles.mount,lifecycles.mount,
];// 卸載的時候要先卸載主應用,再卸載樣式
export const unmount = [lifecycles.unmount,styleLifeCycles.unmount,
];
主應用的css策略也要改
spa-demo/src/index.ejs:

<!DOCTYPE html>
<html lang="en">
<head><meta charset="UTF-8"><meta name="viewport" content="width=device-width, initial-scale=1.0"><meta http-equiv="X-UA-Compatible" content="ie=edge"><title>Root Config</title><meta http-equiv="Content-Security-Policy" content="content-src * ws: wss:;"><meta name="importmap-type" use-injector /><!-- If you wish to turn off import-map-overrides for specific environments (prod), uncomment the line below --><!-- More info at https://github.com/single-spa/import-map-overrides/blob/main/docs/configuration.md#domain-list --><!-- <meta name="import-map-overrides-domains" content="denylist:prod.example.com" /> --><!-- Shared dependencies go into this import map --><script type="injector-importmap">{"imports": {"single-spa": "https://cdn.jsdelivr.net/npm/single-spa@6.0.3/lib/es2015/esm/single-spa.min.js"}}</script><link rel="preload" href="https://cdn.jsdelivr.net/npm/single-spa@6.0.3/lib/es2015/esm/single-spa.min.js" as="module"><!-- Add your organization's prod import map URL to this script's src  --><!-- <script type="injector-importmap" src="/importmap.json"></script> --><% if (isLocal) { %><script type="injector-importmap">{"imports": {"@spa/root-config": "//localhost:9000/spa-root-config.js","@spa/react-app1": "http://localhost:8080/spa-react-app1.js","@spa/react-app2": "http://localhost:8081/spa-react-app2.js","@single-spa/welcome": "https://cdn.jsdelivr.net/npm/single-spa-welcome/dist/single-spa-welcome.min.js"}}</script><% } %><script src="https://cdn.jsdelivr.net/npm/import-map-overrides@5.1.1/dist/import-map-overrides.js"></script><script src="https://cdn.jsdelivr.net/npm/@single-spa/import-map-injector@2.0.1/lib/import-map-injector.js"></script>
</head>
<body><noscript>You need to enable JavaScript to run this app.</noscript><main></main><script>window.importMapInjector.initPromise.then(() => {import('@spa/root-config');});</script><import-map-overrides-full show-when-local-storage="devtools" dev-libs></import-map-overrides-full>
</body>
</html>
這樣就修改了子應用的樣式


添加了兩個link,
preload:只是想要資源加載一下,但是不想展示它,或者不想應用它的時候,就使用preload,一般是在性能優化的時候會用到這個東西
沒有preload修飾的:會直接將元素渲染出來
單獨的 react-app2 是沒有樣式的:

react-app1,react-app2應用都在的情況:

樣式也會被渲染,因為是用到了body上
樣式隔離還有
- scopedCss,在樣式上加一些特定的名字,確保css只影響應用中的方式
- shadowDOM
例子中這兩種都沒有用到,只是用了全局的css來演示了一下
JS隔離
做兩個事情:
single-spa沒有提供JS隔離,只是提供了一個擴展,讓應用在卸載的時候可以將全局的,變量的影響給它移除掉
qiankun中會使用 sandbox 的方式,讓每個應用之間,有自己完全隔離的全局變量/window變量,每個子應用都是自己的window,自己怎么改都不會影響到主應用的,但是在代碼實踐上其實和single-spa實現方式是一樣的。
qiankun中的 sandbox 分兩種:
- ProxySandbox
- LegacySandbox
子應用中
- 安裝依賴
pnpm add single-spa-leaked-globals

- react-app1中應用

spa-demo/react-app1/src/spa-react-app1.js
import React from "react";
import ReactDOMClient from "react-dom/client";
import singleSpaReact from "single-spa-react";
import Root from "./root.component";
import singleSpaCss from 'single-spa-css';
import singleSpaLeakedGlobals from 'single-spa-leaked-globals';// getLinkedGlobals:深層次對比前后兩個對象是否發生變化
// restoreGlobals:應用啟動之前,緩存的全局變量全部恢復過來
const {getLinkedGlobals,restoreGlobals} = singleSpaLeakedGlobals();const lifecycles = singleSpaReact({React,ReactDOMClient,rootComponent: Root,errorBoundary(err, info, props) {// Customize the root error boundary for your microfrontend here.return null;},
});const styleLifeCycles = singleSpaCss({// 剛剛啟動的樣式服務地址cssUrls: ["http://192.168.10.4:8888/style.css"],// 是否在webpack打包中去除掉css文件webpackExtractedCss: false,// 子應用切換的時候就看不到樣式了shouldUnmount: true
});const jsLifeCycles = singleSpaLeakedGlobals({globalVariableNames: ['_','$','jQuery','mode','type']
})// export const { bootstrap, mount, unmount } = lifecycles;// 數組的順序就是在主應用調用的時候執行的順序
// 先啟動樣式的bootstrap,再啟動應用的bootstrap
export const bootstrap = [styleLifeCycles.bootstrap,jsLifeCycles.bootstrap,lifecycles.bootstrap,
];export const mount = [styleLifeCycles.mount,jsLifeCycles.mount,lifecycles.mount,
];// 卸載的時候要先卸載主應用,再卸載樣式
export const unmount = [lifecycles.unmount,jsLifeCycles.unmount,styleLifeCycles.unmount,
];
qiankun
qiankun github
-
在 single-spa 基礎上去做的
-
qiankun主要是運用原生的
fetch 方法,像剛剛spa中js,css應用的還是瀏覽器的能力,但是qiankun不一樣,運用原生的 fetch 方法,來請求微應用的各種資源,將返回的內容再轉換成對于的各種各樣的字符串 -
single-spa 與HTML文檔是沒有關系的,是直接導出的React組件去做這個事情,通過生命周期鉤子來完成的
qiankun會獲取html文檔,解析了后再做一個子應用
- fetch:獲取資源文件
- processTpl:解析html做子應用,將所有的js文件,css文件,內斂的css文件全部解析出來
- style 收集的所有的styles,通過 fetch方法
- script 收集的所有的script對象,url,也會通過fetch方法拉回來
- requestIdleCallback 瀏覽器在空閑時候會執行的回調,并且還會告訴剩余時間,然后做各種各樣的事情,一般情況,只有低優先級的時候才會使用這個方法,因為有可能這個方法不執行,在高優先級的時候,使用 requestAnimationFrame 方法,這個方法是必定會執行的。
- 匿名自執行函數:包裹住所有的JS,使用閉包來對JS做了限制,通過evl做了執行,定了上下文,通過傳入的proxy來改變window的指向,
沙箱機制 - 渲染子應用
基于Single-spa封裝的,也支持各種框架,通過解析html的方式兼容一整套的,類似 iframe,qiankun在iframe思路上實現功能的。
樣式,使用 shadowDOM 做樣式隔離的
js,通過 沙箱機制,將js代碼拉回來后,通過evl/自執行函數,執行JS,限制上行文,包括window的訪問的操作等,通過 proxy 代理
資源預加載,通過解析html搞定的
使用
安裝依賴
-
安裝qiankun主依賴
pnpm i

-
安裝主應用main依賴
pnpm i

-
安裝子應用react16依賴

-
安裝子應用vue依賴

啟動服務
-
啟動vue服務
pnpm start
-
啟動react16服務
pnpm start
報錯:

openssl 不支持
使用cross-env加個環境變量將它忽略掉pnpm add --save-dev cross-env

修改啟動代碼:
qiankun/examples/react16/package.json:cross-env NODE_OPTIONS=–openssl-legacy-provider rescripts start

-
構建qiankun
pnpm build
報錯:

isConstDestructAssignmentSupported 類型推導有問題
這里改一下:

成功了:

-
啟動主應用
pnpm start

react16-home頁面:

react16-about頁面:

react16-彈窗:

Vue3的頁面:

vue用的組件是elementUI,react用的是組件AntD
ShadowDom 影子DOM
qiankun的樣式使用shadowDom來做隔離的,shadowDom不是真實的能看到的dom
示例:
- 創建html頁面
video.html:
<htmkl><body><video width="300" height="100" controls></video></body>
</htmkl>
- 啟動一個httpServer端


只寫了一個video標簽,但是video上面有很多可操作的東西

可以看到這里就是shadowDom
shadowDom里面全部都是這樣一個個dom元素,像上面各種控制的組件在里面都能找得到,本身在dom樹里是沒有單獨存在的,它是在某一個元素上有一個完整的dom樹這樣
shadowDom對當前組件的dom和css都提供了封裝,實際上在瀏覽器預覽文檔的時候就會指定dom寫好這個元素,外部的配置不影響內部,內部的配置也不影響外部
在查看源代碼的時候還是看不到shadowDom
shadowDOM有兩種模式:1. open 2. close
就比如,這樣:

open的時候,外部就可以訪問shadowDom里面的元素,如果是close,那么對外部則是完全不可見的
使用shadowDom
<htmkl><body><!-- <video width="300" height="100" controls></video> --><script>// 給div掛載一個shadowDomconst ele = document.createElement("div");const shadow = ele.attachShadow({mode: "open",});shadow.innerHTML = "<div>hello world</div>";document.body.appendChild(ele);</script></body>
</htmkl>

proxySandbox VS snapshotSandbox
- qiankun
- src
- sandbox
- proxySandbox.ts
- snapshotSandbox.ts 兩個文件
- sandbox
- src
- proxySandbox 使用代理的方式來為每一個子應用創建一個完全獨立的環境,與window全局變量是沒有任何關系的
- snapshotSandbox 通過single-spa-link-global的方式來做的,解決兼容問題,用于不支持proxy的低版本瀏覽器

兩個都是基于SandBox基礎上實現
snapshotSandbox.ts
/*** @author Hydrogen* @since 2020-3-8*/
import type { SandBox } from '../interfaces';
import { SandBoxType } from '../interfaces';function iter(obj: typeof window | Record<any, any>, callbackFn: (prop: any) => void) {// eslint-disable-next-line guard-for-in, no-restricted-syntaxfor (const prop in obj) {// patch for clearInterval for compatible reason, see #1490if (obj.hasOwnProperty(prop) || prop === 'clearInterval') {callbackFn(prop);}}
}/*** 基于 diff 方式實現的沙箱,用于不支持 Proxy 的低版本瀏覽器*/
export default class SnapshotSandbox implements SandBox {proxy: WindowProxy;name: string;type: SandBoxType;sandboxRunning = true;private windowSnapshot!: Window;private modifyPropsMap: Record<any, any> = {};private deletePropsSet: Set<any> = new Set();constructor(name: string) {this.name = name; //名稱this.proxy = window; //proxy就是windowthis.type = SandBoxType.Snapshot; //類型是Snapshot}// 激活的時候active() {// 記錄當前快照this.windowSnapshot = {} as Window;// 迭代器對window進行迭代iter(window, (prop) => {// 將window上的屬性給到windowSnapshot快照上this.windowSnapshot[prop] = window[prop];});// 恢復之前的變更Object.keys(this.modifyPropsMap).forEach((p: any) => {window[p] = this.modifyPropsMap[p];});// 刪除之前刪除的屬性this.deletePropsSet.forEach((p: any) => {delete window[p];});this.sandboxRunning = true;}inactive() {this.modifyPropsMap = {};// 清理這個環境this.deletePropsSet.clear();// 然后迭代當前的windowiter(window, (prop) => {if (window[prop] !== this.windowSnapshot[prop]) {// 記錄變更,恢復環境this.modifyPropsMap[prop] = window[prop];window[prop] = this.windowSnapshot[prop];}});iter(this.windowSnapshot, (prop) => {if (!window.hasOwnProperty(prop)) {// 記錄被刪除的屬性,恢復環境this.deletePropsSet.add(prop);window[prop] = this.windowSnapshot[prop];}});if (process.env.NODE_ENV === 'development') {console.info(`[qiankun:sandbox] ${this.name} origin window restore...`,Object.keys(this.modifyPropsMap),this.deletePropsSet.keys(),);}this.sandboxRunning = false;}patchDocument(): void {}
}
proxySandbox.ts
/*** 基于 Proxy 實現的沙箱*/
export default class ProxySandbox implements SandBox {/** window 值變更記錄 */private updatedValueSet = new Set<PropertyKey>();private document = document;name: string;type: SandBoxType;proxy: WindowProxy;sandboxRunning = true;latestSetProp: PropertyKey | null = null;active() {// proxy的sandbox是可以有多個實例的,也就是說,一個子應用是可以有多個sandbox的// 而snapshot的sandbox只有一個實例,每個子應用都只有一個上下文if (!this.sandboxRunning) activeSandboxCount++;this.sandboxRunning = true;}inactive() {if (process.env.NODE_ENV === 'development') {console.info(`[qiankun:sandbox] ${this.name} modified global properties restore...`, [...this.updatedValueSet.keys(),]);}// 恢復現場的// 如果在測試環境或者 activeSandboxCount === 0 時,需要恢復現場if (inTest || --activeSandboxCount === 0) {// reset the global value to the prev value// 遍歷 globalWhitelistPrevDescriptor這個對象Object.keys(this.globalWhitelistPrevDescriptor).forEach((p) => {const descriptor = this.globalWhitelistPrevDescriptor[p];if (descriptor) {// 恢復了globalContext的代理Object.defineProperty(this.globalContext, p, descriptor);} else {// @ts-ignore// 清理環境delete this.globalContext[p];}});}this.sandboxRunning = false;}......constructor(name: string, globalContext = window, opts?: { speedy: boolean }) {......// 生成proxy,給fakeWindow添加getter/setterconst proxy = new Proxy(fakeWindow, {// 更改fakeWindow變量的值,而所有的更改都是改到globalWhitelistPrevDescriptor上去了,而不是改到fakeWindow上去set: (target: FakeWindow, p: PropertyKey, value: any): boolean => {if (this.sandboxRunning) {this.registerRunningApp(name, proxy);// sync the property to globalContext 同步到全局上下文// 定義了globalWhitelistPrevDescriptor對象if (typeof p === 'string' && globalVariableWhiteList.indexOf(p) !== -1) {this.globalWhitelistPrevDescriptor[p] = Object.getOwnPropertyDescriptor(globalContext, p);// @ts-ignoreglobalContext[p] = value;} else {......}......}},// get返回的是rebindTarget2Fn函數的返回值// 而rebindTarget2Fn(boundTarget, value)的傳參boundTarget有可能是nativeGlobal(原始global)和globalContext(虛擬的proxy代理的上下文)get: (target: FakeWindow, p: PropertyKey): any => {.......const boundTarget = useNativeWindowForBindingsProps.get(p) ? nativeGlobal : globalContext;return rebindTarget2Fn(boundTarget, value);},});
.......}
.......
}
這兩個整體操作是類似的,只不過一個操作的是真的window對象,一個操作的是代理過的window對象,而且proxy支持不同激活的實例是單獨的對象環境
全局彈窗
微前端在處理全局彈窗的時候,一般都是在body下面掛一個新的dom來處理的,就會有個問題,這里每個子應用都有自己的dom元素,而新的這個dom是不受子元素控制的,本身樣式隔離,就比如qiankun,qiankun是用shadowDOM的方式將子應用樣式做隔離的,而現在在子元素shadowDOM之外,也就是body下面創建一個新的全局彈窗,而這時全局彈窗的樣式要怎么辦呢?
那么這時候需要將樣式能夠達到實現一個全局的效果
qiankun是做了特殊處理的,可以將一些特定的樣式掛載到主應用上去 qiankun的每個子應用是有一個單獨的節點的
無界的shadowDOM本身就是掛載在主應用上的,因此它這時的全局彈窗就是真正的全局彈窗 無界直接將這個應用掛載到主應用上去了
路由
qiankun中,如果定義一個路徑是給到子應用的,在頁面刷新的開始時候需要一下子就進入到子應用的話,并且如果這個子應用根本就沒有加載完成的話,那么就可能會匹配到主應用的404的問題。
因此,qiankun這里會有一個特殊的變動,與single-spa類似的,將url嵌入直接劫持掉了,只是qiankun的劫持稍微有點不同,這里可以參考源代碼
預加載
qiankun里有一個預加載,比如
- qiankun
- examples
- main
- index.js
- main
- examples

當啟動主應用的時候,不管是否打開了react16,它都會加載react16所有的資源
通信方式
參考 globalState.ts的代碼
- qiankun
- src
- globalState.ts
- src
/*** @author dbkillerf6* @since 2020-04-10*/import { cloneDeep } from 'lodash';
import type { OnGlobalStateChangeCallback, MicroAppStateActions } from './interfaces';let globalState: Record<string, any> = {};const deps: Record<string, OnGlobalStateChangeCallback> = {};// 觸發全局監聽
function emitGlobal(state: Record<string, any>, prevState: Record<string, any>) {Object.keys(deps).forEach((id: string) => {if (deps[id] instanceof Function) {deps[id](cloneDeep(state), cloneDeep(prevState));}});
}export function initGlobalState(state: Record<string, any> = {}) {if (process.env.NODE_ENV === 'development') {console.warn(`[qiankun] globalState tools will be removed in 3.0, pls don't use it!`);}if (state === globalState) {console.warn('[qiankun] state has not changed!');} else {const prevGlobalState = cloneDeep(globalState);globalState = cloneDeep(state);emitGlobal(globalState, prevGlobalState);}return getMicroAppStateActions(`global-${+new Date()}`, true);
}export function getMicroAppStateActions(id: string, isMaster?: boolean): MicroAppStateActions {return {/*** onGlobalStateChange 全局依賴監聽** 收集 setState 時所需要觸發的依賴** 限制條件:每個子應用只有一個激活狀態的全局監聽,新監聽覆蓋舊監聽,若只是監聽部分屬性,請使用 onGlobalStateChange** 這么設計是為了減少全局監聽濫用導致的內存爆炸** 依賴數據結構為:* {*   {id}: callback* }** @param callback* @param fireImmediately*/onGlobalStateChange(callback: OnGlobalStateChangeCallback, fireImmediately?: boolean) {if (!(callback instanceof Function)) {console.error('[qiankun] callback must be function!');return;}if (deps[id]) {console.warn(`[qiankun] '${id}' global listener already exists before this, new listener will overwrite it.`);}deps[id] = callback;if (fireImmediately) {const cloneState = cloneDeep(globalState);callback(cloneState, cloneState);}},/*** setGlobalState 更新 store 數據** 1. 對輸入 state 的第一層屬性做校驗,只有初始化時聲明過的第一層(bucket)屬性才會被更改* 2. 修改 store 并觸發全局監聽** @param state*/setGlobalState(state: Record<string, any> = {}) {if (state === globalState) {console.warn('[qiankun] state has not changed!');return false;}const changeKeys: string[] = [];const prevGlobalState = cloneDeep(globalState);globalState = cloneDeep(Object.keys(state).reduce((_globalState, changeKey) => {if (isMaster || _globalState.hasOwnProperty(changeKey)) {changeKeys.push(changeKey);return Object.assign(_globalState, { [changeKey]: state[changeKey] });}console.warn(`[qiankun] '${changeKey}' not declared when init state!`);return _globalState;}, globalState),);if (changeKeys.length === 0) {console.warn('[qiankun] state has not changed!');return false;}emitGlobal(globalState, prevGlobalState);return true;},// 注銷該應用下的依賴offGlobalStateChange() {delete deps[id];return true;},};
}
EMP - 同架構應用的微前端
EMP也是一個微組件的解決方案,借助的是webpack Module Federation,webpack的模塊邦聯
類似external,但是具體實現是不一樣的
它可以將一個組件分成兩種,一種叫remote,一種叫host
host應用是可以引用remote的應用的
將應用分成remote和host兩種,但是我們每個應用是如果是由別人繼承的話,就作為remote的狀態,而真正的host應用是可以引用我,大家都在一個webpack里,但是都是獨立的,因為打包都是獨立的,每個子應用都作為remote的方式,每個remote之間都是獨立的,打包,發布,部署也全是獨立的
除了微前端之外還有一個微組件
微組件在業內不是很流行,但是在很多公司有很多的實踐
module federation對于大部分公司來說是比較雞肋的,由于都是同一套webpack配置,無需再分過多
module federation 針對一些應用比較復雜,或者說負責某一應用的部門特別多,做的東西被很多部門使用才會考慮這種模式
而做的東西被很多部門使用為什么不用npm包,是由于npm包是有一些問題的,因為它的版本號是鎖定的,只有npm包的使用方才能決定用哪個版本,而發布方是沒有辦法控制別人用哪個包的,但是通過module federation就可以由開發方自己來控制
module federation使用場景有限,因為導出的是什么,別人就要用什么
而微前端是在一個應用中集成不同框架的東西,不管是vue還是react,最大特點是這個,但是module federation只能是一個框架里的,如果組件是react,那么使用方也得是react
而且module federation這個導出來的東西,導出的是一個組件,不是真正的單體應用。


)
)


)
![[C#] Winform - 進程間通信(SendMessage篇)](http://pic.xiahunao.cn/[C#] Winform - 進程間通信(SendMessage篇))

