場景、相機、渲染器
一、創建3D場景
// 引入threejs
import * as THREE from 'three'// 創建一個三維場景scene
const scene = new THREE.Scene();// 給三維場景添加物品
const geometry = new THREE.BoxGeometry(100,100,100)   // 形狀
const meterial = new THREE.MeshBasicMaterial({color:0x00ff00})   // 材質const mesh = new THREE.Mesh(geometry, meterial)  // 網格模型(形狀,材質)
mesh.position.set(0,10,0)  // 網格模型的位置scene.add(mesh)
// console.log(scene)
二、透視投影相機
// 引入threejs
import * as THREE from 'three'// 創建一個三維場景scene
const scene = new THREE.Scene();// 給三維場景添加物品
const geometry = new THREE.BoxGeometry(100,100,100)   // 形狀
const meterial = new THREE.MeshBasicMaterial({color:0x00ff00})   // 材質const mesh = new THREE.Mesh(geometry, meterial)  // 網格模型(形狀,材質)
mesh.position.set(0,10,0)  // 網格模型的位置scene.add(mesh)
// console.log(scene)// 定義相機輸出畫布的尺寸(單位:像素px)
const width = 800
const height = 500// 創建一個透視圖投影相機對象
const camera = new THREE.PerspectiveCamera(30,width/height, 0.1,2000)  // 視野角度、寬高比、近端面、遠端面
camera.position.set(200,200,200)  // 設置相機位置// 相機的視線,觀察目標點的坐標
// camera.lookAt(0,0,0)
// camera.lookAt(0,10,0)  // y軸上一點
camera.lookAt(mesh.position)  // 指向網格模型mesh
三、渲染
// 引入threejs
import * as THREE from 'three'// 創建一個三維場景scene
const scene = new THREE.Scene();// 給三維場景添加物品
const geometry = new THREE.BoxGeometry(50,50,50)   // 形狀
const meterial = new THREE.MeshBasicMaterial({color:0x00ff00})   // 材質const mesh = new THREE.Mesh(geometry, meterial)  // 網格模型(形狀,材質)
mesh.position.set(0,10,0)  // 網格模型的位置scene.add(mesh)
// console.log(scene)// 定義相機輸出畫布的尺寸(單位:像素px)
const width = 800
const height = 500// 創建一個透視圖投影相機對象
const camera = new THREE.PerspectiveCamera(30,width/height, 0.1,2000)  // 視野角度、寬高比、近端面、遠端面
camera.position.set(200,200,200)  // 設置相機位置// 相機的視線,觀察目標點的坐標
// camera.lookAt(0,0,0)
// camera.lookAt(0,10,0)  // y軸上一點
camera.lookAt(mesh.position)  // 指向網格模型mesh// 創建渲染器對象
const renderer = new THREE.WebGLRenderer();
renderer.setSize(width, height)   // canvas畫布的寬度和高度
renderer.render(scene, camera)  // 拍照;執行一個渲染操作// 把渲染結果,添加到網頁頁面上
document.body.appendChild(renderer.domElement)
四、結果展示
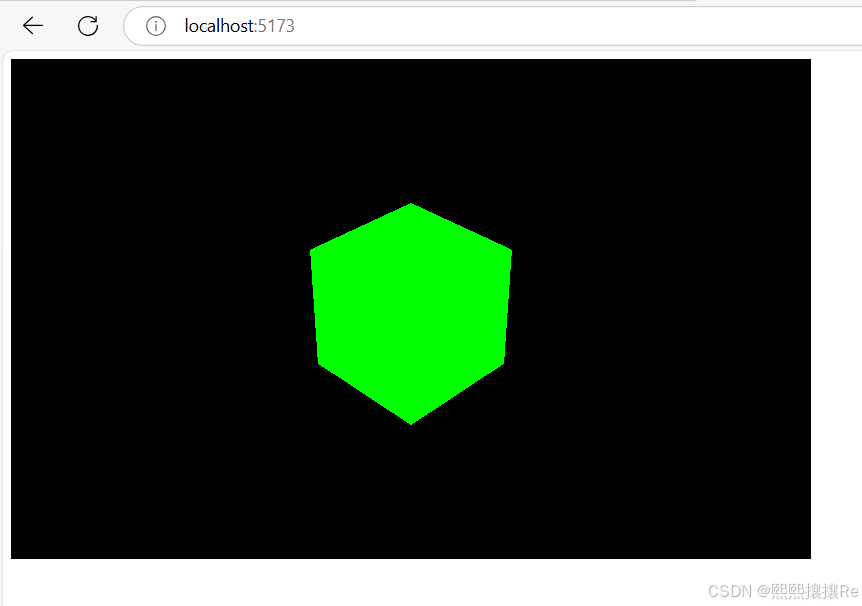
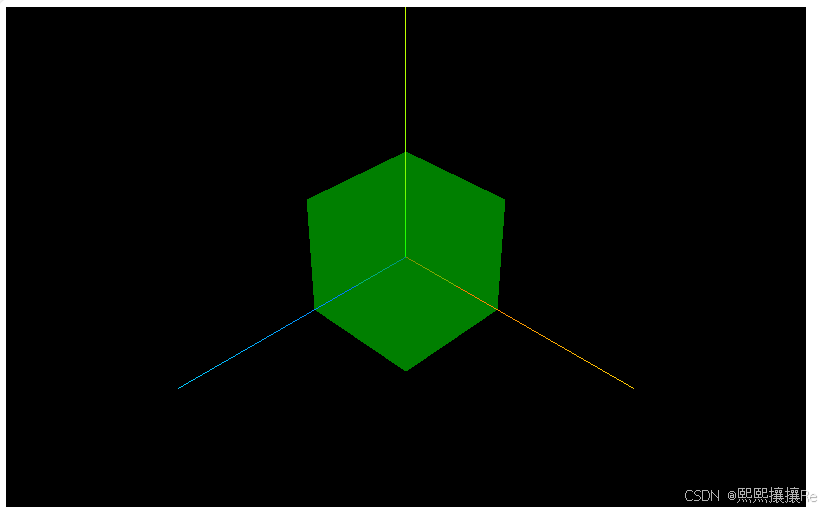
五、三維坐標系
顯示x,y,z三個坐標軸
六、光源對物體表面的影響
// 引入threejs
import * as THREE from 'three'// 創建一個三維場景scene
const scene = new THREE.Scene();// 給三維場景添加物品
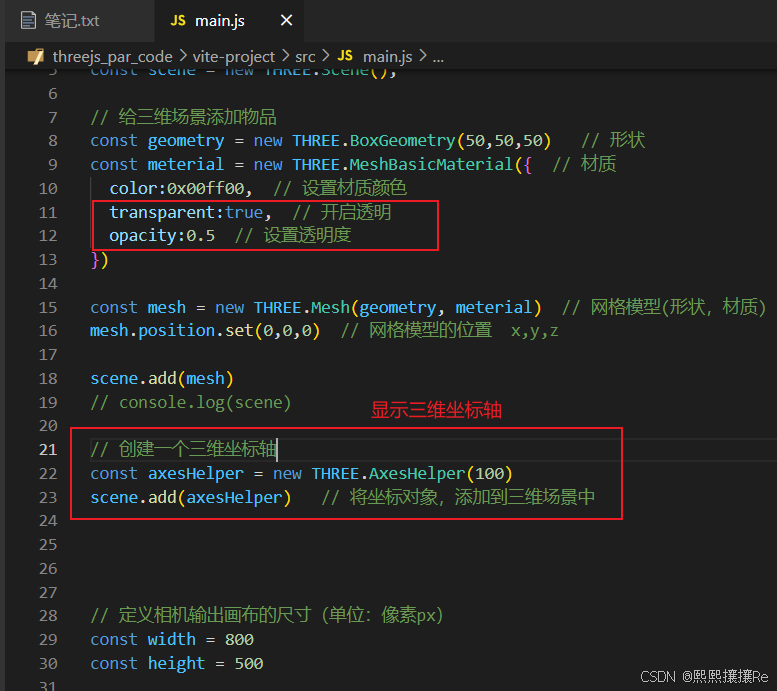
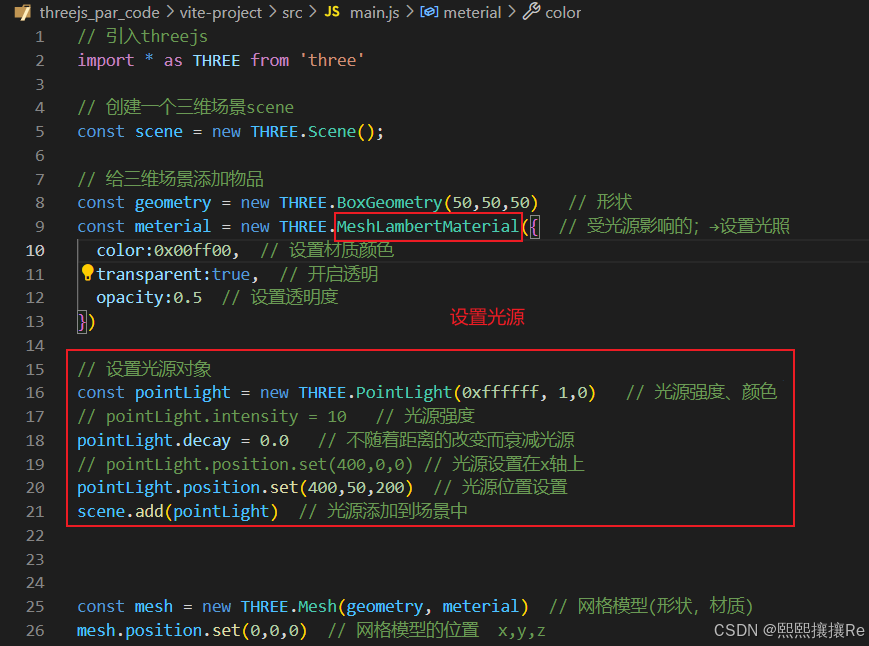
const geometry = new THREE.BoxGeometry(50,50,50) // 形狀
const meterial = new THREE.MeshLambertMaterial({ // 受光源影響的;→設置光照color:0x00ff00, // 設置材質顏色transparent:true, // 開啟透明opacity:0.5 // 設置透明度
}) // 設置光源對象
const pointLight = new THREE.PointLight(0xffffff, 1,0) // 光源強度、顏色
// pointLight.intensity = 10 // 光源強度
pointLight.decay = 0.0 // 不隨著距離的改變而衰減光源
// pointLight.position.set(400,0,0) // 光源設置在x軸上
pointLight.position.set(400,50,200) // 光源位置設置
scene.add(pointLight) // 光源添加到場景中const mesh = new THREE.Mesh(geometry, meterial) // 網格模型(形狀,材質)
mesh.position.set(0,0,0) // 網格模型的位置 x,y,zscene.add(mesh)
// console.log(scene)// 創建一個三維坐標軸
const axesHelper = new THREE.AxesHelper(100)
scene.add(axesHelper) // 將坐標對象,添加到三維場景中// 定義相機輸出畫布的尺寸(單位:像素px)
const width = 800
const height = 500// 創建一個透視圖投影相機對象
const camera = new THREE.PerspectiveCamera(30,width/height, 0.1,2000) // 視野角度、寬高比、近端面、遠端面
camera.position.set(200,200,200) // 設置相機位置
// camera.position.set(-1000,0,0)// 相機的視線,觀察目標點的坐標
camera.lookAt(0,0,0) // 指向坐標原點
// camera.lookAt(0,10,0) // y軸上一點
// camera.lookAt(mesh.position) // 指向網格模型mesh// 創建渲染器對象
const renderer = new THREE.WebGLRenderer();
renderer.setSize(width, height) // canvas畫布的寬度和高度
renderer.render(scene, camera) // 拍照;執行一個渲染操作// 把渲染結果,添加到網頁頁面上
document.body.appendChild(renderer.domElement)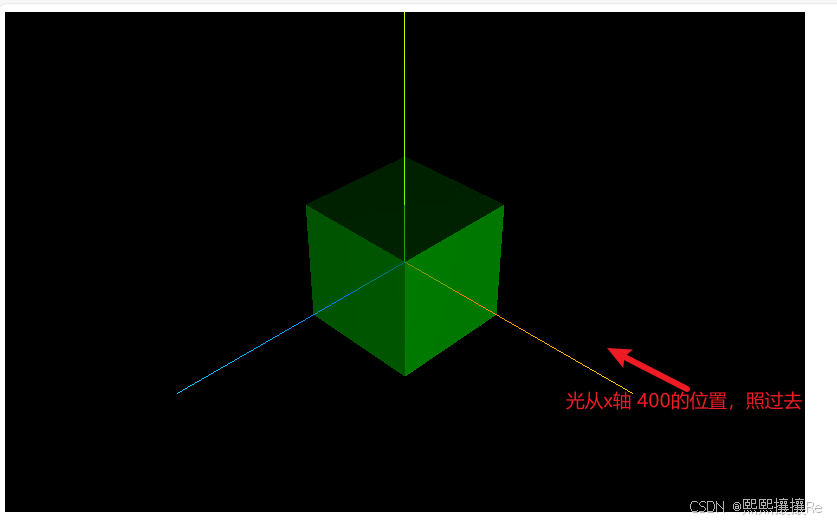
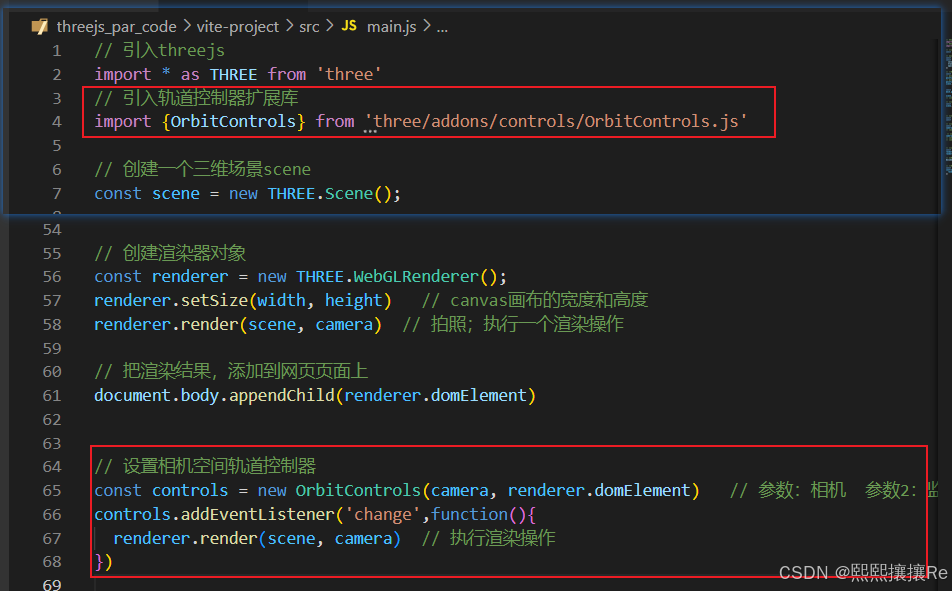
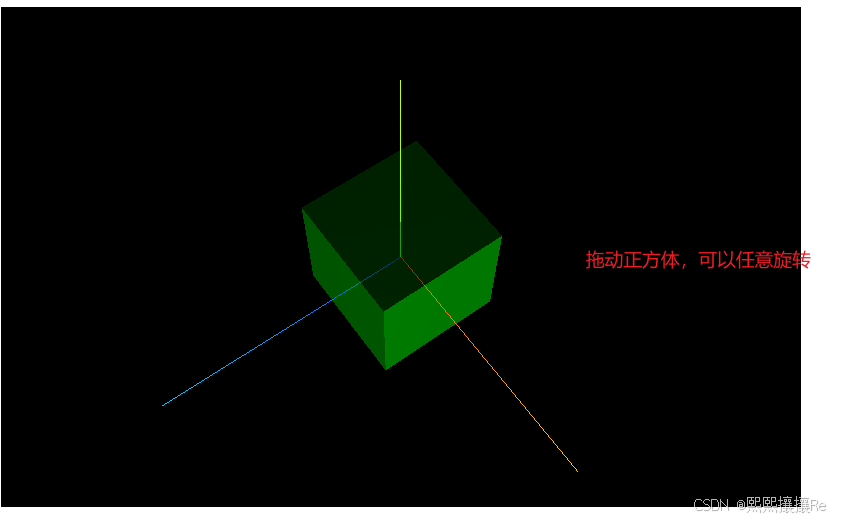
七、相機軌道控件
// 引入threejs
import * as THREE from 'three'
// 引入軌道控制器擴展庫
import {OrbitControls} from 'three/addons/controls/OrbitControls.js'// 創建一個三維場景scene
const scene = new THREE.Scene();// 給三維場景添加物品
const geometry = new THREE.BoxGeometry(50,50,50)   // 形狀
const meterial = new THREE.MeshLambertMaterial({  // 受光源影響的;→設置光照color:0x00ff00,  // 設置材質顏色transparent:true,  // 開啟透明opacity:0.5  // 設置透明度
})   // 設置光源對象
const pointLight = new THREE.PointLight(0xffffff, 1,0)   // 光源強度、顏色
// pointLight.intensity = 10   // 光源強度
pointLight.decay = 0.0   // 不隨著距離的改變而衰減光源
// pointLight.position.set(400,0,0) // 光源設置在x軸上
pointLight.position.set(400,50,200)  // 光源位置設置
scene.add(pointLight)  // 光源添加到場景中const mesh = new THREE.Mesh(geometry, meterial)  // 網格模型(形狀,材質)
mesh.position.set(0,0,0)  // 網格模型的位置  x,y,zscene.add(mesh)
// console.log(scene)// 創建一個三維坐標軸
const axesHelper = new THREE.AxesHelper(100)
scene.add(axesHelper)   // 將坐標對象,添加到三維場景中// 定義相機輸出畫布的尺寸(單位:像素px)
const width = 800
const height = 500// 創建一個透視圖投影相機對象
const camera = new THREE.PerspectiveCamera(30,width/height, 0.1,2000)  // 視野角度、寬高比、近端面、遠端面
camera.position.set(200,200,200)  // 設置相機位置
// camera.position.set(-1000,0,0)// 相機的視線,觀察目標點的坐標
camera.lookAt(0,0,0)   // 指向坐標原點
// camera.lookAt(0,10,0)  // y軸上一點
// camera.lookAt(mesh.position)  // 指向網格模型mesh// 創建渲染器對象
const renderer = new THREE.WebGLRenderer();
renderer.setSize(width, height)   // canvas畫布的寬度和高度
renderer.render(scene, camera)  // 拍照;執行一個渲染操作// 把渲染結果,添加到網頁頁面上
document.body.appendChild(renderer.domElement)// 設置相機空間軌道控制器
const controls = new OrbitControls(camera, renderer.domElement)   // 參數:相機  參數2:監控范圍
controls.addEventListener('change',function(){renderer.render(scene, camera)  // 執行渲染操作
})
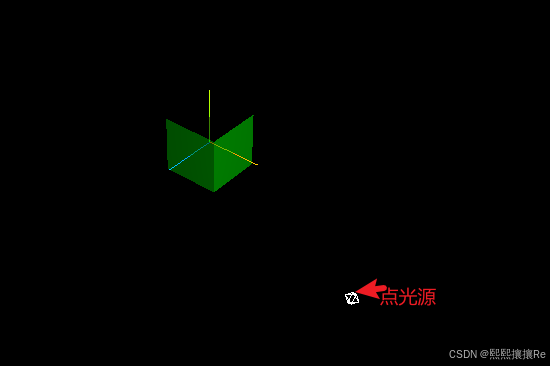
八、光源
// 引入threejs
import * as THREE from 'three'
// 引入軌道控制器擴展庫
import {OrbitControls} from 'three/addons/controls/OrbitControls.js'// 創建一個三維場景scene
const scene = new THREE.Scene();// 給三維場景添加物品
const geometry = new THREE.BoxGeometry(100,100,100) // 形狀
const meterial = new THREE.MeshLambertMaterial({ // 受光源影響的;→設置光照color:0x00ff00, // 設置材質顏色transparent:true, // 開啟透明opacity:0.5 // 設置透明度
}) /*** 光源設置*/
// 設置光源對象
const pointLight = new THREE.PointLight(0xffffff, 1,0) // 光源強度、顏色
// pointLight.intensity = 10 // 光源強度
pointLight.decay = 0.0 // 不隨著距離的改變而衰減光源
// pointLight.position.set(400,0,0) // 光源設置在x軸上
pointLight.position.set(400,50,200) // 光源位置設置
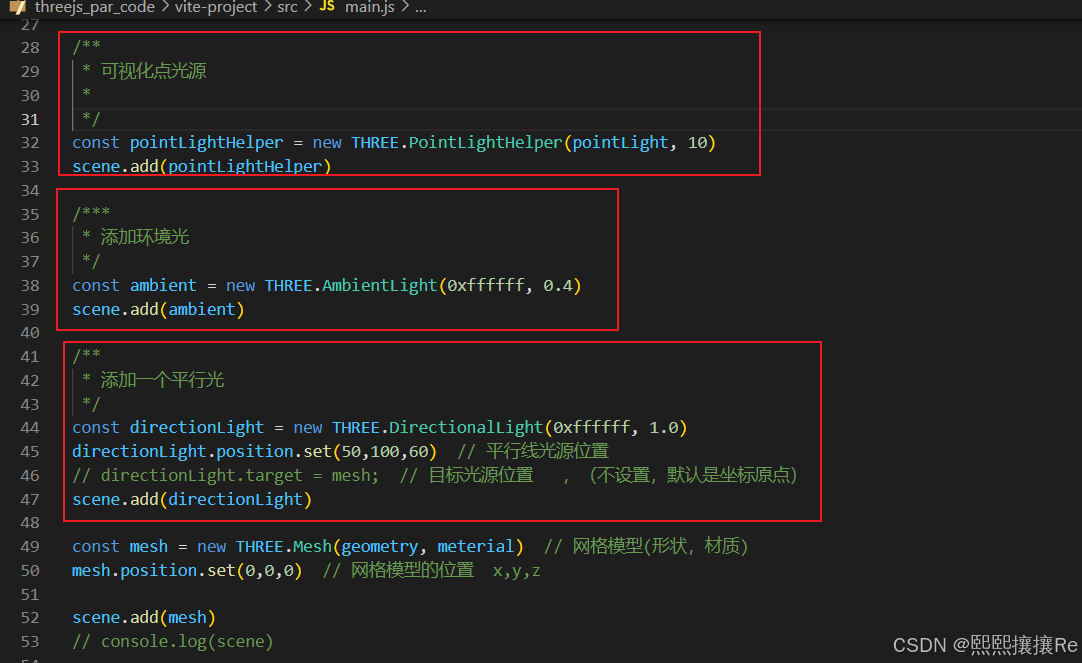
scene.add(pointLight) // 光源添加到場景中/*** 可視化點光源* */
const pointLightHelper = new THREE.PointLightHelper(pointLight, 10)
scene.add(pointLightHelper)/**** 添加環境光*/
const ambient = new THREE.AmbientLight(0xffffff, 0.4)
scene.add(ambient)/*** 添加一個平行光*/
const directionLight = new THREE.DirectionalLight(0xffffff, 1.0)
directionLight.position.set(50,100,60) // 平行線光源位置
// directionLight.target = mesh; // 目標光源位置 ,(不設置,默認是坐標原點)
scene.add(directionLight)const mesh = new THREE.Mesh(geometry, meterial) // 網格模型(形狀,材質)
mesh.position.set(0,0,0) // 網格模型的位置 x,y,zscene.add(mesh)
// console.log(scene)// 創建一個三維坐標軸
const axesHelper = new THREE.AxesHelper(100)
scene.add(axesHelper) // 將坐標對象,添加到三維場景中// 定義相機輸出畫布的尺寸(單位:像素px)
const width = 800
const height = 500// 創建一個透視圖投影相機對象
const camera = new THREE.PerspectiveCamera(30,width/height, 0.1,2000) // 視野角度、寬高比、近端面、遠端面
camera.position.set(200,200,200) // 設置相機位置
// camera.position.set(-1000,0,0)// 相機的視線,觀察目標點的坐標
camera.lookAt(0,0,0) // 指向坐標原點
// camera.lookAt(0,10,0) // y軸上一點
// camera.lookAt(mesh.position) // 指向網格模型mesh// 創建渲染器對象
const renderer = new THREE.WebGLRenderer();
renderer.setSize(width, height) // canvas畫布的寬度和高度
renderer.render(scene, camera) // 拍照;執行一個渲染操作// 把渲染結果,添加到網頁頁面上
document.body.appendChild(renderer.domElement)// 設置相機空間軌道控制器
const controls = new OrbitControls(camera, renderer.domElement) // 參數:相機 參數2:監控范圍
controls.addEventListener('change',function(){renderer.render(scene, camera) // 執行渲染操作
})
九、動畫渲染 循環
// 引入threejs
import * as THREE from 'three'
// 引入軌道控制器擴展庫
import {OrbitControls} from 'three/addons/controls/OrbitControls.js'// 創建一個三維場景scene
const scene = new THREE.Scene();// 給三維場景添加物品
const geometry = new THREE.BoxGeometry(100,100,100) // 形狀
const meterial = new THREE.MeshLambertMaterial({ // 受光源影響的;→設置光照color:0x00ff00, // 設置材質顏色transparent:true, // 開啟透明opacity:0.5 // 設置透明度
}) /*** 光源設置*/
// 設置光源對象
const pointLight = new THREE.PointLight(0xffffff, 1,0) // 光源強度、顏色
// pointLight.intensity = 10 // 光源強度
pointLight.decay = 0.0 // 不隨著距離的改變而衰減光源
// pointLight.position.set(400,0,0) // 光源設置在x軸上
pointLight.position.set(400,50,200) // 光源位置設置
scene.add(pointLight) // 光源添加到場景中/*** 可視化點光源* */
const pointLightHelper = new THREE.PointLightHelper(pointLight, 10)
scene.add(pointLightHelper)/**** 添加環境光*/
const ambient = new THREE.AmbientLight(0xffffff, 0.4)
scene.add(ambient)/*** 添加一個平行光*/
const directionLight = new THREE.DirectionalLight(0xffffff, 1.0)
directionLight.position.set(50,100,60) // 平行線光源位置
// directionLight.target = mesh; // 目標光源位置 ,(不設置,默認是坐標原點)
scene.add(directionLight)const mesh = new THREE.Mesh(geometry, meterial) // 網格模型(形狀,材質)
mesh.position.set(0,0,0) // 網格模型的位置 x,y,zscene.add(mesh)
// console.log(scene)// 創建一個三維坐標軸
const axesHelper = new THREE.AxesHelper(100)
scene.add(axesHelper) // 將坐標對象,添加到三維場景中// 定義相機輸出畫布的尺寸(單位:像素px)
const width = 800
const height = 500// 創建一個透視圖投影相機對象
const camera = new THREE.PerspectiveCamera(30,width/height, 0.1,2000) // 視野角度、寬高比、近端面、遠端面
camera.position.set(200,200,200) // 設置相機位置
// camera.position.set(-1000,0,0)// 相機的視線,觀察目標點的坐標
camera.lookAt(0,0,0) // 指向坐標原點
// camera.lookAt(0,10,0) // y軸上一點
// camera.lookAt(mesh.position) // 指向網格模型mesh// 創建渲染器對象
const renderer = new THREE.WebGLRenderer();
renderer.setSize(width, height) // canvas畫布的寬度和高度
// renderer.render(scene, camera) // 拍照;執行一個渲染操作// 把渲染結果,添加到網頁頁面上
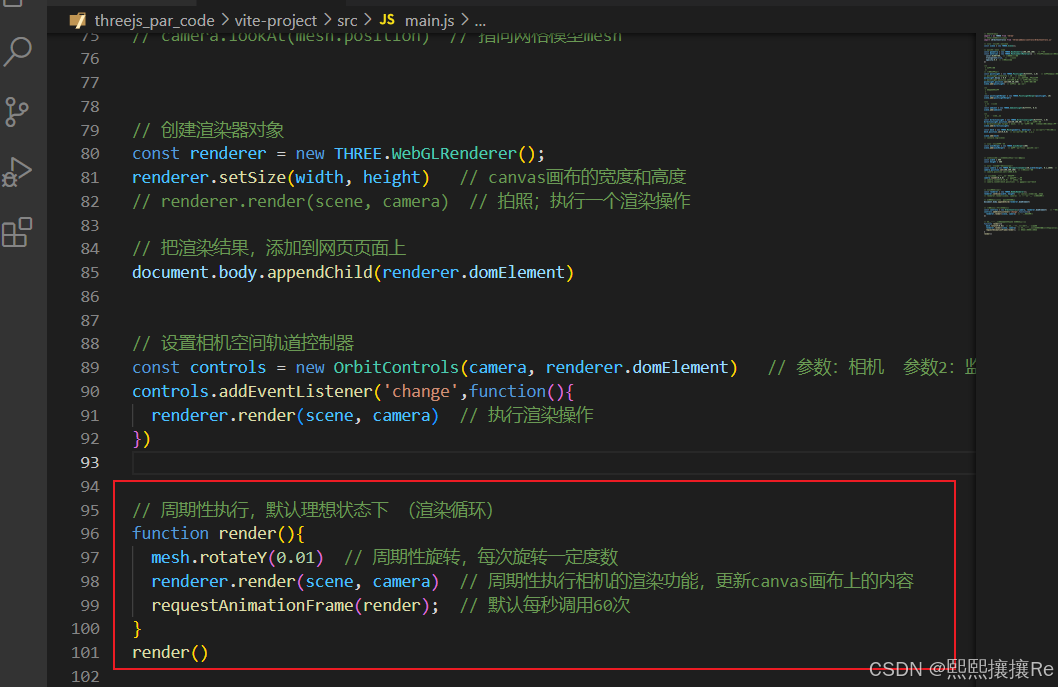
document.body.appendChild(renderer.domElement)// 設置相機空間軌道控制器
const controls = new OrbitControls(camera, renderer.domElement) // 參數:相機 參數2:監控范圍
controls.addEventListener('change',function(){renderer.render(scene, camera) // 執行渲染操作
})// 周期性執行,默認理想狀態下 (渲染循環)
function render(){mesh.rotateY(0.01) // 周期性旋轉,每次旋轉一定度數renderer.render(scene, camera) // 周期性執行相機的渲染功能,更新canvas畫布上的內容requestAnimationFrame(render); // 默認每秒調用60次
}
render()十、canvas畫布布局和全屏
// 引入threejs
import * as THREE from 'three'
// 引入軌道控制器擴展庫
import {OrbitControls} from 'three/addons/controls/OrbitControls.js'// 創建一個三維場景scene
const scene = new THREE.Scene();// 給三維場景添加物品
const geometry = new THREE.BoxGeometry(100,100,100) // 形狀
const meterial = new THREE.MeshLambertMaterial({ // 受光源影響的;→設置光照color:0x00ff00, // 設置材質顏色transparent:true, // 開啟透明opacity:0.5 // 設置透明度
}) /*** 光源設置*/
// 設置光源對象
const pointLight = new THREE.PointLight(0xffffff, 1,0) // 光源強度、顏色
// pointLight.intensity = 10 // 光源強度
pointLight.decay = 0.0 // 不隨著距離的改變而衰減光源
// pointLight.position.set(400,0,0) // 光源設置在x軸上
pointLight.position.set(400,50,200) // 光源位置設置
scene.add(pointLight) // 光源添加到場景中/*** 可視化點光源* */
const pointLightHelper = new THREE.PointLightHelper(pointLight, 10)
scene.add(pointLightHelper)/**** 添加環境光*/
const ambient = new THREE.AmbientLight(0xffffff, 0.4)
scene.add(ambient)/*** 添加一個平行光*/
const directionLight = new THREE.DirectionalLight(0xffffff, 1.0)
directionLight.position.set(50,100,60) // 平行線光源位置
// directionLight.target = mesh; // 目標光源位置 ,(不設置,默認是坐標原點)
scene.add(directionLight)const mesh = new THREE.Mesh(geometry, meterial) // 網格模型(形狀,材質)
mesh.position.set(0,0,0) // 網格模型的位置 x,y,zscene.add(mesh)
// console.log(scene)// 創建一個三維坐標軸
const axesHelper = new THREE.AxesHelper(100)
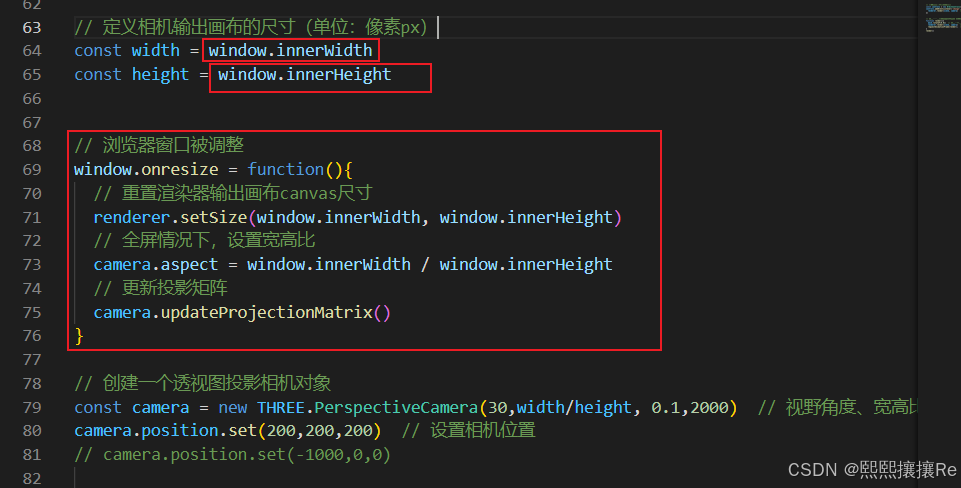
scene.add(axesHelper) // 將坐標對象,添加到三維場景中// 定義相機輸出畫布的尺寸(單位:像素px)
const width = window.innerWidth
const height = window.innerHeight// 瀏覽器窗口被調整
window.onresize = function(){// 重置渲染器輸出畫布canvas尺寸renderer.setSize(window.innerWidth, window.innerHeight)// 全屏情況下,設置寬高比camera.aspect = window.innerWidth / window.innerHeight // 更新投影矩陣camera.updateProjectionMatrix()
}// 創建一個透視圖投影相機對象
const camera = new THREE.PerspectiveCamera(30,width/height, 0.1,2000) // 視野角度、寬高比、近端面、遠端面
camera.position.set(200,200,200) // 設置相機位置
// camera.position.set(-1000,0,0)// 相機的視線,觀察目標點的坐標
camera.lookAt(0,0,0) // 指向坐標原點
// camera.lookAt(0,10,0) // y軸上一點
// camera.lookAt(mesh.position) // 指向網格模型mesh// 創建渲染器對象
const renderer = new THREE.WebGLRenderer();
renderer.setSize(width, height) // canvas畫布的寬度和高度
// renderer.render(scene, camera) // 拍照;執行一個渲染操作// 把渲染結果,添加到網頁頁面上
document.body.appendChild(renderer.domElement)// 設置相機空間軌道控制器
const controls = new OrbitControls(camera, renderer.domElement) // 參數:相機 參數2:監控范圍
controls.addEventListener('change',function(){renderer.render(scene, camera) // 執行渲染操作
})// 周期性執行,默認理想狀態下 (渲染循環)
function render(){mesh.rotateY(0.01) // 周期性旋轉,每次旋轉一定度數renderer.render(scene, camera) // 周期性執行相機的渲染功能,更新canvas畫布上的內容requestAnimationFrame(render); // 默認每秒調用60次
}
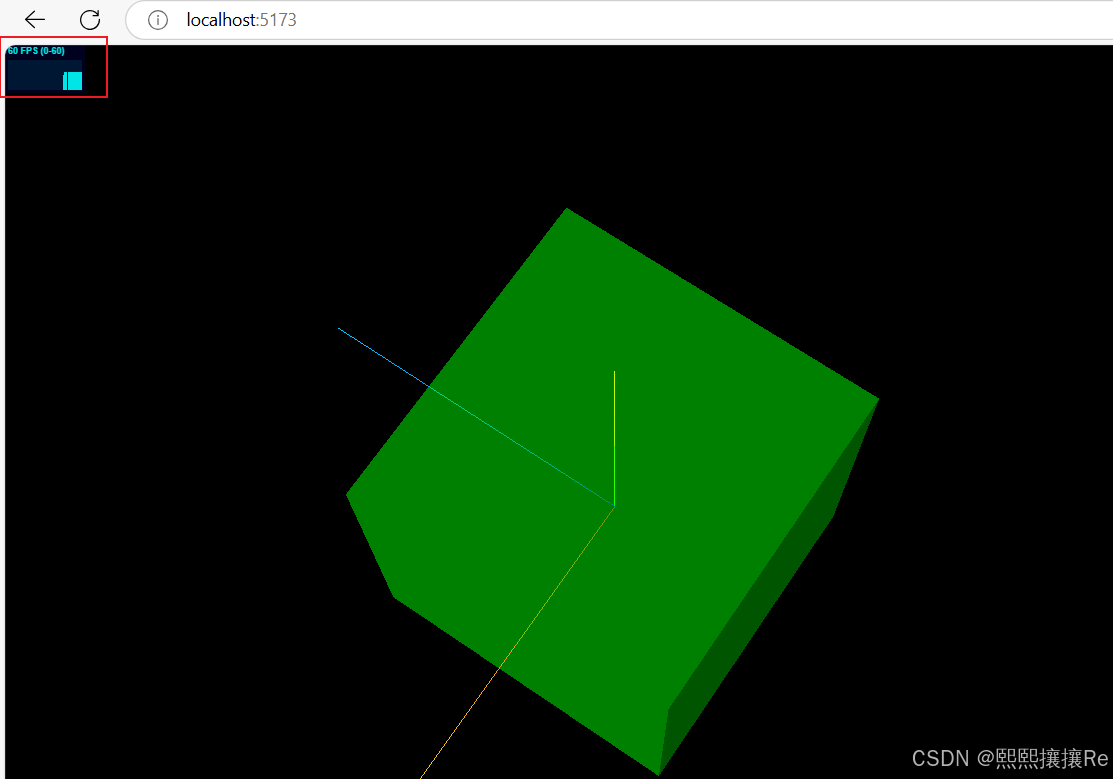
render()十一、Stats查看渲染幀率
// 引入threejs
import * as THREE from 'three'
// 引入軌道控制器擴展庫
import {OrbitControls} from 'three/addons/controls/OrbitControls.js'
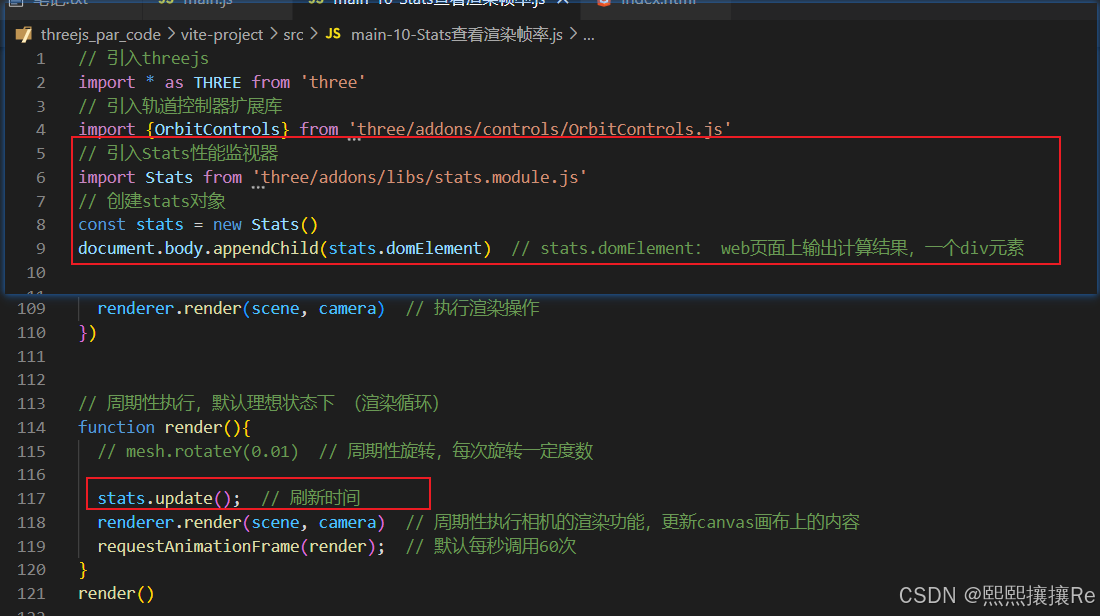
// 引入Stats性能監視器
import Stats from 'three/addons/libs/stats.module.js'
// 創建stats對象
const stats = new Stats()
document.body.appendChild(stats.domElement) // stats.domElement: web頁面上輸出計算結果,一個div元素// 創建一個三維場景scene
const scene = new THREE.Scene();// 給三維場景添加物品
const geometry = new THREE.BoxGeometry(100,100,100) // 形狀
const meterial = new THREE.MeshLambertMaterial({ // 受光源影響的;→設置光照color:0x00ff00, // 設置材質顏色transparent:true, // 開啟透明opacity:0.5 // 設置透明度
}) /*** 光源設置*/
// 設置光源對象
const pointLight = new THREE.PointLight(0xffffff, 1,0) // 光源強度、顏色
// pointLight.intensity = 10 // 光源強度
pointLight.decay = 0.0 // 不隨著距離的改變而衰減光源
// pointLight.position.set(400,0,0) // 光源設置在x軸上
pointLight.position.set(400,50,200) // 光源位置設置
scene.add(pointLight) // 光源添加到場景中/*** 可視化點光源* */
const pointLightHelper = new THREE.PointLightHelper(pointLight, 10)
scene.add(pointLightHelper)/**** 添加環境光*/
const ambient = new THREE.AmbientLight(0xffffff, 0.4)
scene.add(ambient)/*** 添加一個平行光*/
const directionLight = new THREE.DirectionalLight(0xffffff, 1.0)
directionLight.position.set(50,100,60) // 平行線光源位置
// directionLight.target = mesh; // 目標光源位置 ,(不設置,默認是坐標原點)
scene.add(directionLight)const mesh = new THREE.Mesh(geometry, meterial) // 網格模型(形狀,材質)
mesh.position.set(0,0,0) // 網格模型的位置 x,y,zscene.add(mesh)
// console.log(scene)// 創建一個三維坐標軸
const axesHelper = new THREE.AxesHelper(100)
scene.add(axesHelper) // 將坐標對象,添加到三維場景中// 定義相機輸出畫布的尺寸(單位:像素px)
const width = window.innerWidth
const height = window.innerHeight// 瀏覽器窗口被調整
window.onresize = function(){// 重置渲染器輸出畫布canvas尺寸renderer.setSize(window.innerWidth, window.innerHeight)// 全屏情況下,設置寬高比camera.aspect = window.innerWidth / window.innerHeight // 更新投影矩陣camera.updateProjectionMatrix()
}// 創建一個透視圖投影相機對象
const camera = new THREE.PerspectiveCamera(30,width/height, 0.1,2000) // 視野角度、寬高比、近端面、遠端面
camera.position.set(200,200,200) // 設置相機位置
// camera.position.set(-1000,0,0)// 相機的視線,觀察目標點的坐標
camera.lookAt(0,0,0) // 指向坐標原點
// camera.lookAt(0,10,0) // y軸上一點
// camera.lookAt(mesh.position) // 指向網格模型mesh// 創建渲染器對象
const renderer = new THREE.WebGLRenderer();
renderer.setSize(width, height) // canvas畫布的寬度和高度
// renderer.render(scene, camera) // 拍照;執行一個渲染操作// 把渲染結果,添加到網頁頁面上
document.body.appendChild(renderer.domElement)// 設置相機空間軌道控制器
const controls = new OrbitControls(camera, renderer.domElement) // 參數:相機 參數2:監控范圍
controls.addEventListener('change',function(){renderer.render(scene, camera) // 執行渲染操作
})// 周期性執行,默認理想狀態下 (渲染循環)
function render(){// mesh.rotateY(0.01) // 周期性旋轉,每次旋轉一定度數stats.update(); // 刷新時間renderer.render(scene, camera) // 周期性執行相機的渲染功能,更新canvas畫布上的內容requestAnimationFrame(render); // 默認每秒調用60次
}
render()

)

)


—— 默認成員函數與運算符重載的深度解析:構造函數,析構函數,拷貝構造函數,賦值運算符重載,普通取地址重載,const取地址重載)
)

)


——DateTimePicker?控件解析)

)

