文章目錄
- 前言
- 導包
- 基本說明
- 請求參數
- 響應參數
- 創建請求和響應的VO類
- 代碼編寫
- 使用
- 最后說明
前言
今天突然突發奇想,就想要用java來調用chatget的接口,實現自己的聊天機器人,但是網上找文章,屬實是少的可憐(可能是不讓發吧)。找到了一些文章,但是基本都是通過調用別人的庫來完成的,導入其他的jar還有不低的學習成本,于是就自己使用HttpClient5寫了一個,在這里講解一下思路。
導包
對于http調用,我使用的是比較流行的httpclient5,然后直接創建了一個springboot項目,方便以后對外提供接口。
<parent><artifactId>spring-boot-starter-parent</artifactId><groupId>org.springframework.boot</groupId><version>2.5.3</version></parent><dependencies><dependency><groupId>org.springframework.boot</groupId><artifactId>spring-boot-starter-web</artifactId></dependency><dependency><groupId>org.springframework.boot</groupId><artifactId>spring-boot-starter-test</artifactId></dependency><dependency><groupId>org.projectlombok</groupId><artifactId>lombok</artifactId></dependency><!-- https://mvnrepository.com/artifact/org.apache.httpcomponents.client5/httpclient5 --><dependency><groupId>org.apache.httpcomponents.client5</groupId><artifactId>httpclient5</artifactId><version>5.2.1</version></dependency></dependencies>
基本說明
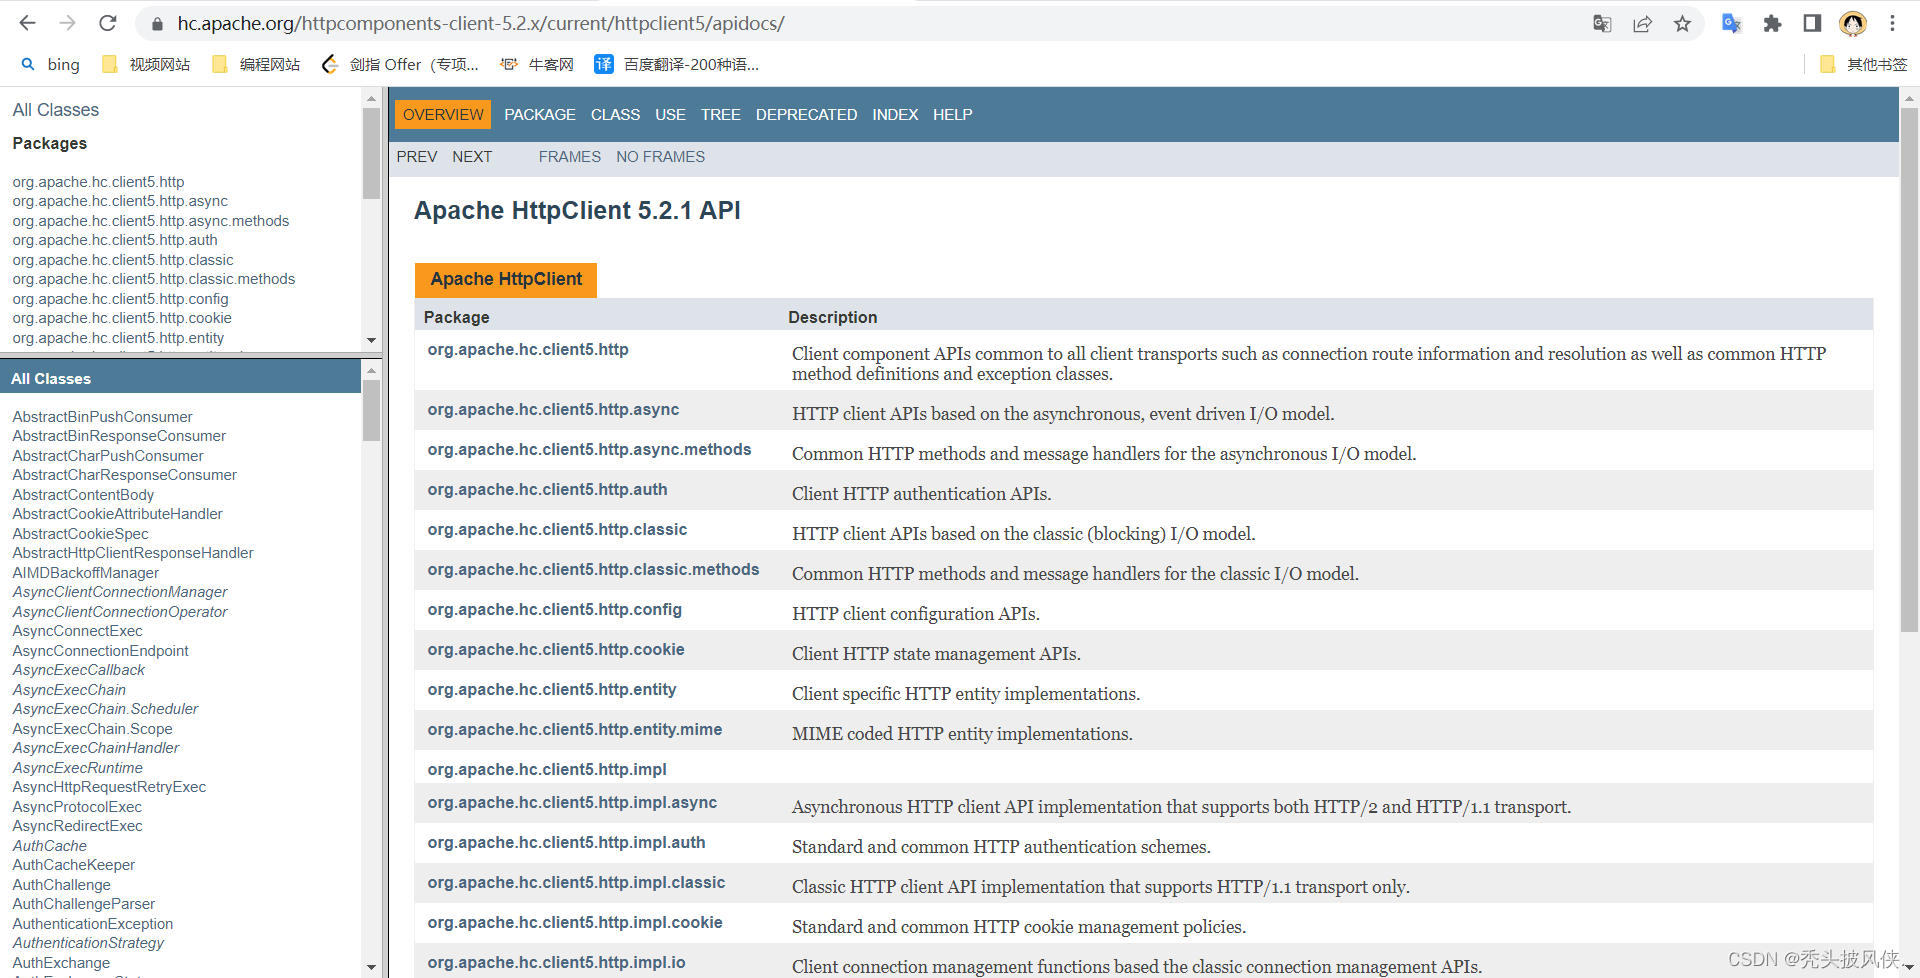
在編寫代碼之前,這個先給出HttpClient的Api文檔 api文檔
我們在編寫代碼之前需要了解官方提供的接口如何進行訪問以及返回的結果是什么
請求參數
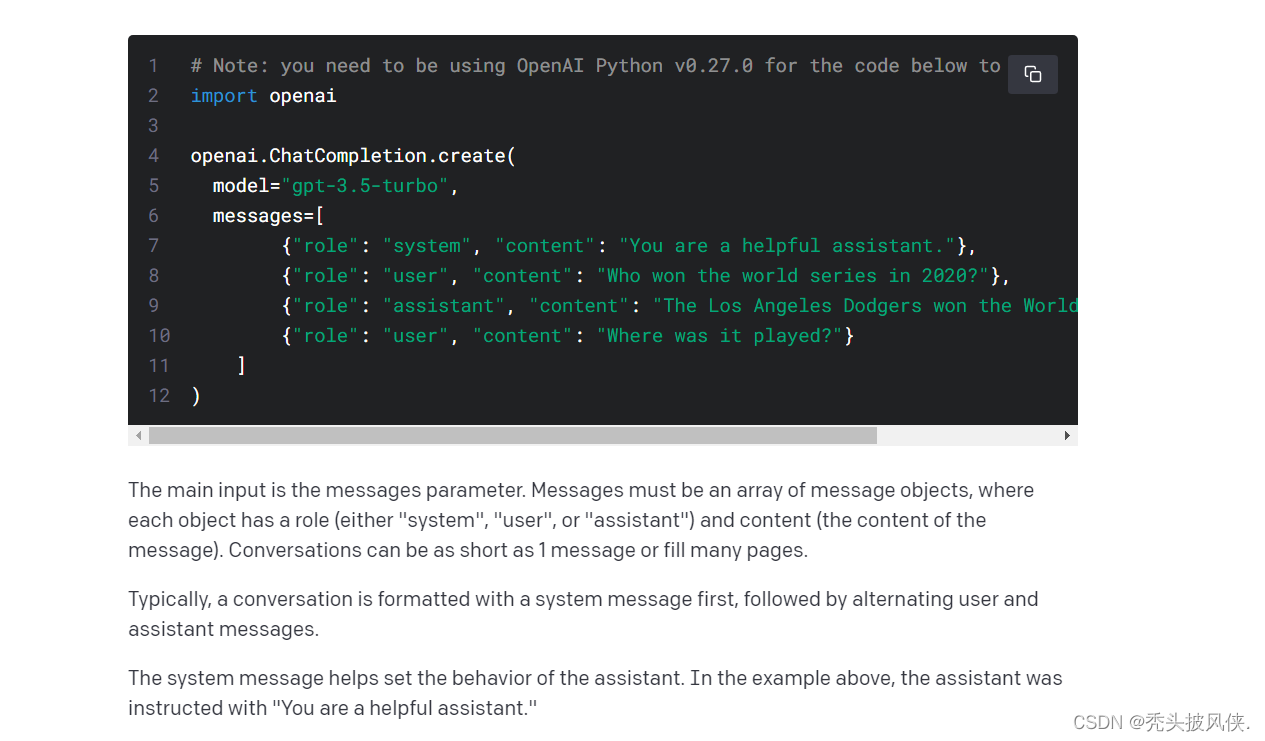
官方文檔地址為 文檔,請求參數必須填寫的內容如下
{"model": "gpt-3.5-turbo","messages": [{"role": "user", "content": "Hello!"}]
}
一個是model,一個是messages。model根據自己的情況來選擇,聊天的話就是gpt-3.5-turbo,下面的messages里面包含n個對象,每個對象有role和content,role表示角色,content表示內容。
下面為官方文檔中的解釋
簡單理解就是我們要問問題,role就是user。如果要實現連續對話,那么就將返回的返回內容設置到messages中,role設置為返回的role。
響應參數
下面直接給出響應的內容
{'id': 'chatcmpl-6p9XYPYSTTRi0xEviKjjilqrWU2Ve','object': 'chat.completion','created': 1677649420,'model': 'gpt-3.5-turbo','usage': {'prompt_tokens': 56, 'completion_tokens': 31, 'total_tokens': 87},'choices': [{'message': {'role': 'assistant','content': 'The 2020 World Series was played in Arlington, Texas at the Globe Life Field, which was the new home stadium for the Texas Rangers.'},'finish_reason': 'stop','index': 0}]
}
我們問問題的答案就在choices.message下的content中,而role就代表了chatGpt扮演的角色。看到這我們就應該知道該干嘛了吧肯定是創建對應的VO類啊。
創建請求和響應的VO類
下面5個類就對應了我們發送和接收的各種信息
ChatGptMessage類
@Data
@NoArgsConstructor
@AllArgsConstructor
public class ChatGptMessage {String role;String content;
}
ChatGptRequestParameter 類
@Data
@NoArgsConstructor
@AllArgsConstructor
public class ChatGptRequestParameter {String model = "gpt-3.5-turbo";List<ChatGptMessage> messages = new ArrayList<>();public void addMessages(ChatGptMessage message) {this.messages.add(message);}}
ChatGptResponseParameter 類
@Data
@NoArgsConstructor
@AllArgsConstructor
public class ChatGptResponseParameter {String id;String object;String created;String model;Usage usage;List<Choices> choices;
}
Choices 類
@Data
@NoArgsConstructor
@AllArgsConstructor
public class Choices {ChatGptMessage message;String finish_reason;Integer index;
}
Usage 類
@Data
@NoArgsConstructor
@AllArgsConstructor
public class Usage {String prompt_tokens;String completion_tokens;String total_tokens;
}
代碼編寫
不說廢話,首先創建一個CustomChatGpt類
public class CustomChatGpt {}
然后定義一些成員屬性
/*** 自己chatGpt的ApiKey*/private String apiKey;/*** 使用的模型*/private String model = "gpt-3.5-turbo-0301";/*** 對應的請求接口*/private String url = "https://api.openai.com/v1/chat/completions";/*** 默認編碼*/private Charset charset = StandardCharsets.UTF_8;/*** 創建一個ChatGptRequestParameter,用于攜帶請求參數*/private ChatGptRequestParameter chatGptRequestParameter = new ChatGptRequestParameter();
提供一個ApiKey的構造器,創建該對象必須要傳入ApiKey
public CustomChatGpt(String apiKey) {this.apiKey = apiKey;}
定義一個響應超時時間
/*** 響應超時時間,毫秒*/private int responseTimeout = 10000;public void setResponseTimeout(int responseTimeout) {this.responseTimeout = responseTimeout;}
編寫一個getAnswer方法,要求傳入一個CloseableHttpClient和一個問題
public String getAnswer(CloseableHttpClient client, String question) {}
繼續實現方法,下面會完成一些參數的創建和設置
// 創建一個HttpPostHttpPost httpPost = new HttpPost(url);// 創建一個ObjectMapper,用于解析和創建jsonObjectMapper objectMapper = new ObjectMapper();// 設置請求參數chatGptRequestParameter.addMessages(new ChatGptMessage("user", question));HttpEntity httpEntity = null;try {// 對象轉換為json字符串httpEntity = new StringEntity(objectMapper.writeValueAsString(chatGptRequestParameter), charset);} catch (JsonProcessingException e) {System.out.println(question + "->json轉換異常");return null;}httpPost.setEntity(httpEntity);
下面會完成一些配置的設置
// 設置請求頭httpPost.setHeader(HttpHeaders.CONTENT_TYPE, "application/json");// 設置登錄憑證httpPost.setHeader(HttpHeaders.AUTHORIZATION, "Bearer " + apiKey);// 用于設置超時時間RequestConfig config = RequestConfig.custom().setResponseTimeout(responseTimeout, TimeUnit.MILLISECONDS).build();httpPost.setConfig(config);
下面代碼會提交請求,解析響應,最后返回對應問題的答案
try {// 提交請求return client.execute(httpPost, response -> {// 得到返回的內容String resStr = EntityUtils.toString(response.getEntity(), charset);// 轉換為對象ChatGptResponseParameter responseParameter = objectMapper.readValue(resStr, ChatGptResponseParameter.class);String ans = "";// 遍歷所有的Choices(一般都只有一個)for (Choices choice : responseParameter.getChoices()) {ChatGptMessage message = choice.getMessage();chatGptRequestParameter.addMessages(new ChatGptMessage(message.getRole(), message.getContent()));String s = message.getContent().replaceAll("\n+", "\n");ans += s;}// 返回信息return ans;});} catch (IOException e) {e.printStackTrace();}// 發生異常,移除剛剛添加的ChatGptMessagechatGptRequestParameter.getMessages().remove(chatGptRequestParameter.getMessages().size()-1);return "您當前的網絡無法訪問";
下面給出這個類的完整代碼
import com.fasterxml.jackson.core.JsonProcessingException;
import com.fasterxml.jackson.databind.ObjectMapper;
import com.ttpfx.vo.ChatGptMessage;
import com.ttpfx.vo.ChatGptRequestParameter;
import com.ttpfx.vo.ChatGptResponseParameter;
import com.ttpfx.vo.Choices;
import org.apache.hc.client5.http.classic.methods.HttpPost;
import org.apache.hc.client5.http.config.RequestConfig;
import org.apache.hc.client5.http.impl.classic.CloseableHttpClient;
import org.apache.hc.core5.http.HttpEntity;
import org.apache.hc.core5.http.HttpHeaders;
import org.apache.hc.core5.http.io.entity.EntityUtils;
import org.apache.hc.core5.http.io.entity.StringEntity;import java.io.IOException;
import java.nio.charset.Charset;
import java.nio.charset.StandardCharsets;
import java.util.concurrent.TimeUnit;/*** @author ttpfx* @date 2023/3/23*/
public class CustomChatGpt {/*** 自己chatGpt的ApiKey*/private String apiKey;/*** 使用的模型*/private String model = "gpt-3.5-turbo-0301";/*** 對應的請求接口*/private String url = "https://api.openai.com/v1/chat/completions";/*** 默認編碼*/private Charset charset = StandardCharsets.UTF_8;/*** 創建一個ChatGptRequestParameter,用于攜帶請求參數*/private ChatGptRequestParameter chatGptRequestParameter = new ChatGptRequestParameter();/*** 相應超時時間,毫秒*/private int responseTimeout = 1000;public void setResponseTimeout(int responseTimeout) {this.responseTimeout = responseTimeout;}public CustomChatGpt(String apiKey) {this.apiKey = apiKey;}public String getAnswer(CloseableHttpClient client, String question) {// 創建一個HttpPostHttpPost httpPost = new HttpPost(url);// 創建一個ObjectMapper,用于解析和創建jsonObjectMapper objectMapper = new ObjectMapper();// 設置請求參數chatGptRequestParameter.addMessages(new ChatGptMessage("user", question));HttpEntity httpEntity = null;try {// 對象轉換為json字符串httpEntity = new StringEntity(objectMapper.writeValueAsString(chatGptRequestParameter), charset);} catch (JsonProcessingException e) {System.out.println(question + "->json轉換異常");return null;}httpPost.setEntity(httpEntity);// 設置請求頭httpPost.setHeader(HttpHeaders.CONTENT_TYPE, "application/json");// 設置登錄憑證httpPost.setHeader(HttpHeaders.AUTHORIZATION, "Bearer " + apiKey);// 用于設置超時時間RequestConfig config = RequestConfig.custom().setResponseTimeout(responseTimeout, TimeUnit.MILLISECONDS).build();httpPost.setConfig(config);try {// 提交請求return client.execute(httpPost, response -> {// 得到返回的內容String resStr = EntityUtils.toString(response.getEntity(), charset);// 轉換為對象ChatGptResponseParameter responseParameter = objectMapper.readValue(resStr, ChatGptResponseParameter.class);String ans = "";// 遍歷所有的Choices(一般都只有一個)for (Choices choice : responseParameter.getChoices()) {ChatGptMessage message = choice.getMessage();chatGptRequestParameter.addMessages(new ChatGptMessage(message.getRole(), message.getContent()));String s = message.getContent().replaceAll("\n+", "\n");ans += s;}// 返回信息return ans;});} catch (IOException e) {e.printStackTrace();}// 發生異常,移除剛剛添加的ChatGptMessagechatGptRequestParameter.getMessages().remove(chatGptRequestParameter.getMessages().size()-1);return "您當前的網絡無法訪問";}
}
使用
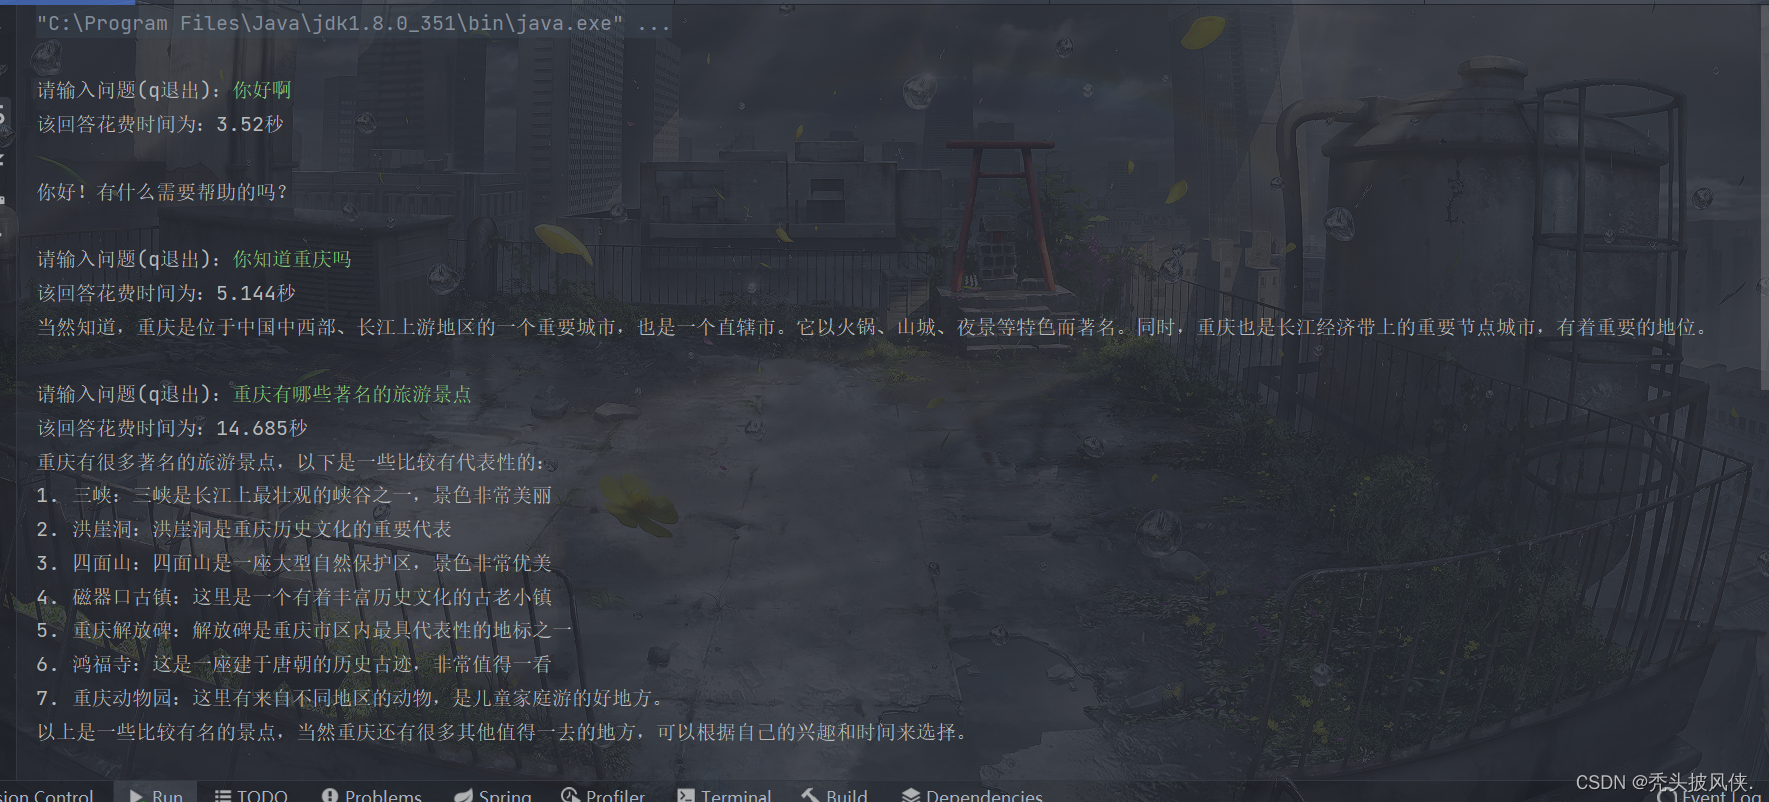
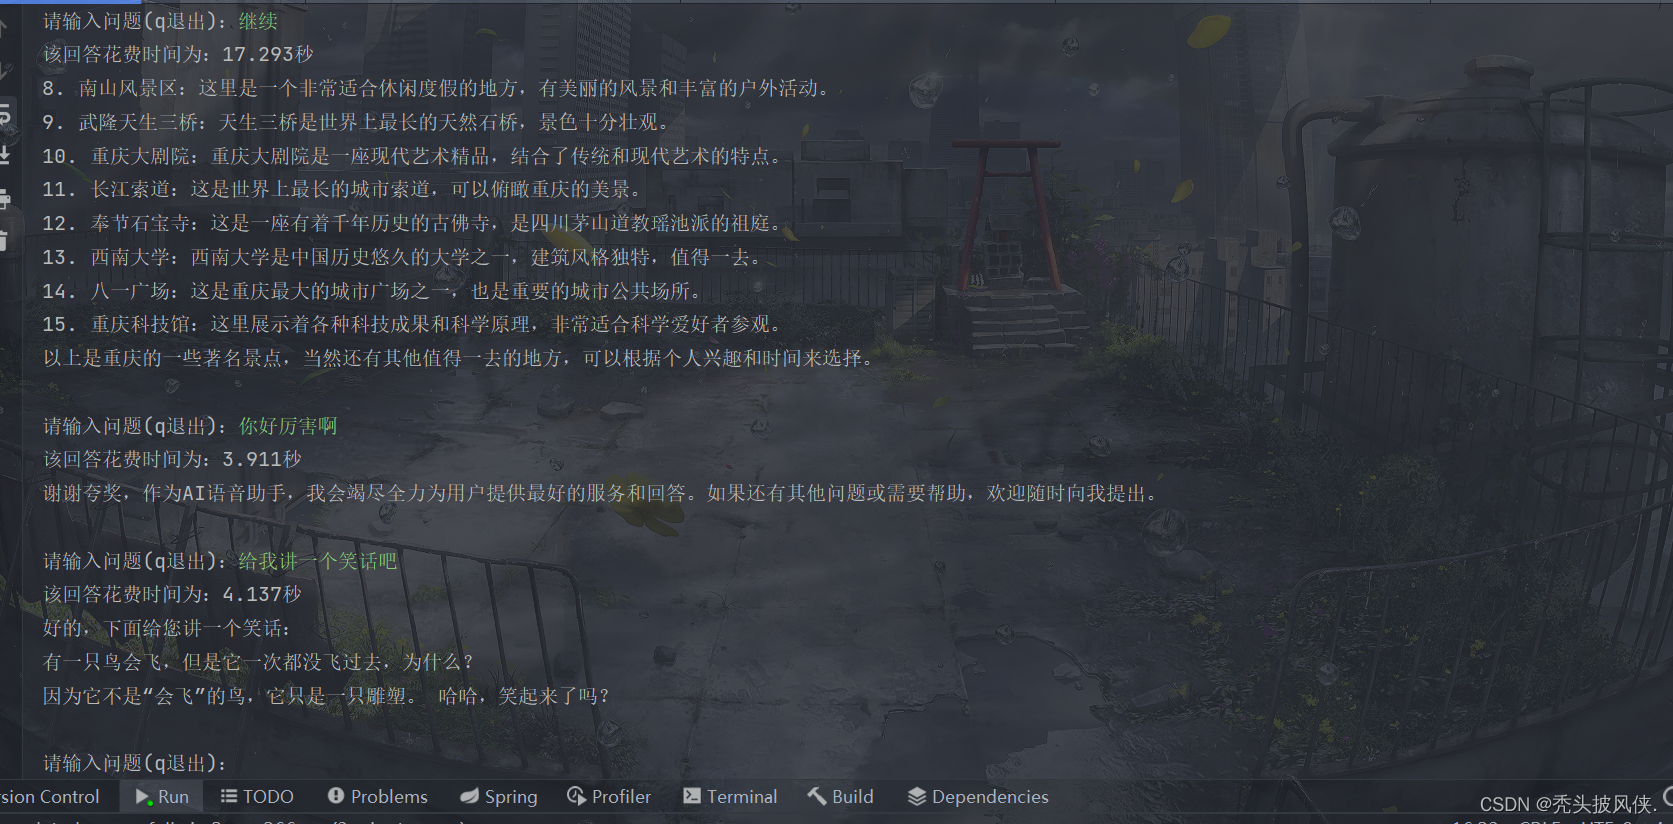
下面就是測試代碼,我們只需要傳入一個CloseableHttpClient 和 question 即可
public class Test {public static void main(String[] args) throws IOException {CloseableHttpClient httpClient = HttpClients.createDefault();String apiKey = "自己的ApiKey";CustomChatGpt customChatGpt = new CustomChatGpt(apiKey);// 根據自己的網絡設置吧customChatGpt.setResponseTimeout(20000);while (true) {System.out.print("\n請輸入問題(q退出):");String question = new Scanner(System.in).nextLine();if ("q".equals(question)) break;long start = System.currentTimeMillis();String answer = customChatGpt.getAnswer(httpClient, question);long end = System.currentTimeMillis();System.out.println("該回答花費時間為:" + (end - start) / 1000.0 + "秒");System.out.println(answer);}httpClient.close();}
}
下面為運行圖片
最后說明
對于ApiKey,只能說難者不會,會者不難,這個沒辦法教。
如果代碼無法運行,或者運行速度及其緩慢,請使用代理,在HttpClient里面可以很輕松的使用代理
String proxyIp = "127.0.0.1";int proxyPort = 7890;HttpHost httpHost = new HttpHost(proxyIp, proxyPort);
上面就是一個示例,對于代理,這里也就無法繼續進行說明了。
如果我們完成了上面的功能,是不是就能夠對外提供接口,然后寫一個自己的網頁端的ChatGpt或者弄一個聊天機器人呢?當然沒問題啊
2023/3/27 23:27更新
很多人找我要這個小程序的demo,其實源代碼上面都已經給出了。既然有人問,那么就給出這個demo的github地址 git地址
使用指令 git clone https://github.com/c-ttpfx/chatGPT.git 可以輕松的下載到本地
2023/3/31 19:54更新
上面這個代碼大家應該發現了問題,就是返回很慢,原因就是我們請求不是異步的,是等待所有答案都給出了再返回,所以速度很慢,并且容易出現超時。
解決方法就是使用異步請求,大家請參照 使用chatgpt實現微信聊天小程序(秒回復),github開源(附帶鏈接) ,基本可以實現秒回復
2023/3/31 14:40更新
最新的代碼已經支持代理,參考使用chatgpt實現微信聊天小程序(秒回復),github開源(附帶鏈接)

(線上圖片))

)


)


