準備一個純凈環境10.0.0.99
首先修改yum源,修改為zabbix清華源,清華源玉zabbix官方源都是同步的,下載速度更快!
zabbix官方
Download Zabbix?www.zabbix.com
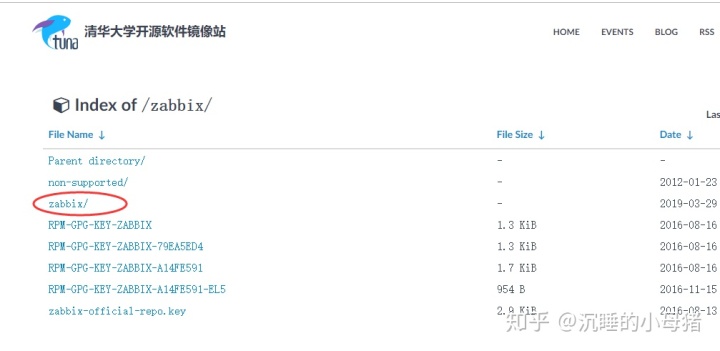
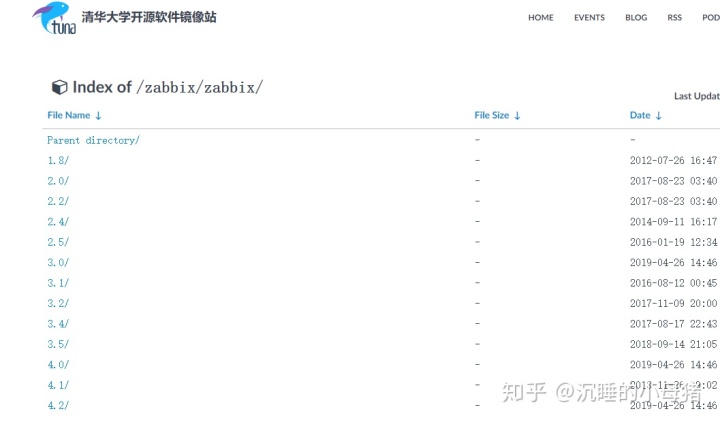
清華源
Tsinghua Open Source Mirror?mirrors.tuna.tsinghua.edu.cn
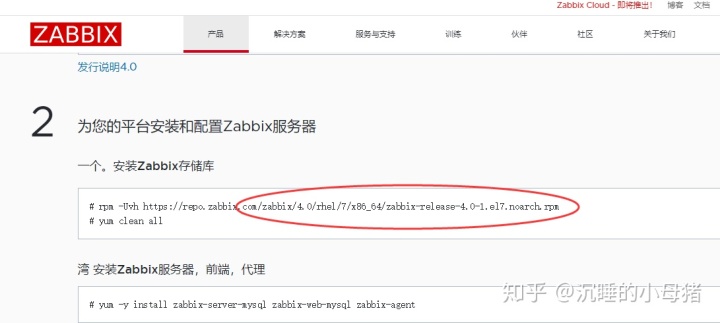
rpm -ivh rpm -ivh https://mirrors.tuna.tsinghua.edu.cn/zabbix/zabbix/4.0/rhel/7/x86_64/zabbix-release-4.0-1.el7.noarch.rpm
配置zabbix的yum源
[root@hb-99 ~]# ll /etc/yum.repos.d/
total 40
-rw-r--r--. 1 root root 2523 Jun 16  2018 CentOS-Base.repo
-rw-r--r--. 1 root root 1309 Nov 23  2018 CentOS-CR.repo
-rw-r--r--. 1 root root  649 Nov 23  2018 CentOS-Debuginfo.repo
-rw-r--r--. 1 root root  314 Nov 23  2018 CentOS-fasttrack.repo
-rw-r--r--. 1 root root  630 Nov 23  2018 CentOS-Media.repo
-rw-r--r--. 1 root root 1331 Nov 23  2018 CentOS-Sources.repo
-rw-r--r--. 1 root root 5701 Nov 23  2018 CentOS-Vault.repo
-rw-r--r--  1 root root  664 May 11  2018 epel.repo
-rw-r--r--  1 root root  451 Jul 11 18:35 zabbix.repo    #這個屌炸天得清華源修改/etc/yum.repos.d/zabbix.repo文件
[zabbix]
name=Zabbix Official Repository - $basearch
baseurl=https://mirrors.tuna.tsinghua.edu.cn/zabbix/zabbix/4.0/rhel/7/$basearch/
enabled=1
gpgcheck=0
gpgkey=file:///etc/pki/rpm-gpg/RPM-GPG-KEY-ZABBIX-A14FE591[zabbix-non-supported]
name=Zabbix Official Repository non-supported - $basearch
baseurl=https://mirrors.tuna.tsinghua.edu.cn/zabbix/non-supported/rhel/7/$basearch/
enabled=1
gpgkey=file:///etc/pki/rpm-gpg/RPM-GPG-KEY-ZABBIX
gpgcheck=0下載zabbix
# yum install zabbix-server-mysql zabbix-web-mysql -y
安裝數據庫mariadb
[root@hb-99 ~]# yum install mariadb-server.x86_64  -y
[root@hb-99 ~]# systemctl start mariadb.service
[root@hb-99 ~]# systemctl enable mariadb.service 優化數據庫
[root@hb-99 ~]# mysql_secure_installation
回車   n   y   y    y    yNOTE: RUNNING ALL PARTS OF THIS SCRIPT IS RECOMMENDED FOR ALL MariaDBSERVERS IN PRODUCTION USE!  PLEASE READ EACH STEP CAREFULLY!In order to log into MariaDB to secure it, we'll need the current
password for the root user.  If you've just installed MariaDB, and
you haven't set the root password yet, the password will be blank,
so you should just press enter here.Enter current password for root (enter for none):   # 輸入當前root用戶密碼當前密碼為空   ----> 回車即可
OK, successfully used password, moving on...Setting the root password ensures that nobody can log into the MariaDB
root user without the proper authorisation.Set root password? [Y/n] n   # 是否給root用戶設置密碼... skipping.By default, a MariaDB installation has an anonymous user, allowing anyone
to log into MariaDB without having to have a user account created for
them.  This is intended only for testing, and to make the installation
go a bit smoother.  You should remove them before moving into a
production environment.Remove anonymous users? [Y/n] y       # 是否刪除空用戶... Success!Normally, root should only be allowed to connect from 'localhost'.  This
ensures that someone cannot guess at the root password from the network.Disallow root login remotely? [Y/n] y    # 是否禁止root遠程登陸... Success!By default, MariaDB comes with a database named 'test' that anyone can
access.  This is also intended only for testing, and should be removed
before moving into a production environment.Remove test database and access to it? [Y/n] y    # 是否刪除test測試庫  - Dropping test database...... Success!- Removing privileges on test database...... Success!Reloading the privilege tables will ensure that all changes made so far
will take effect immediately.Reload privilege tables now? [Y/n] y   # 是否刷新數據庫... Success!Cleaning up...All done!  If you've completed all of the above steps, your MariaDB
installation should now be secure.
創建數據庫+授權
mysql
create database zabbix character set utf8 collate utf8_bin; (修改字符集,指定好符集,以后不會亂碼)
grant all privileges on zabbix.* to zabbix@localhost identified by 'zabbix';
將zabbix初始數據導入庫
zcat /usr/share/doc/zabbix-server-mysql*/create.sql.gz | mysql -uzabbix -pzabbix zabbix修改zabbix配置文件
[root@98 ~]# egrep  '^DB' /etc/zabbix/zabbix_server.conf
DBHost=localhost
DBName=zabbix
DBUser=zabbix
DBPassword=zabbix
zabbix日志文件(記錄錯誤)
[root@zabbix-server ~]# ll /var/log/zabbix/zabbix_server.log
-rw-rw-r-- 1 zabbix zabbix 4223 Jul  8 10:52 /var/log/zabbix/zabbix_server.log
啟動服務檢查進程
[root@98 ~]# systemctl start zabbix-server.service
[root@98 ~]# systemctl enable zabbix-server.service
Created symlink from /etc/systemd/system/multi-user.target.wants/zabbix-server.service to /usr/lib/systemd/system/zabbix-server.service.
[root@98 ~]# systemctl is-active zabbix-server.service
active
[root@98 ~]# netstat -luntp|grep 10051   #檢查端口開啟,服務才是真正得開啟
tcp        0      0 0.0.0.0:10051           0.0.0.0:*               LISTEN      9719/zabbix_server
tcp6       0      0 :::10051                :::*                    LISTEN      9719/zabbix_server
修改時區
[root@98 ~]# grep Asia/Shanghai /etc/httpd/conf.d/zabbix.confphp_value date.timezone Asia/Shanghai啟動httpd
[root@zabbix-server ~]# systemctl start httpd.service
[root@zabbix-server ~]# systemctl enable httpd.serviceweb
配置zabbix網站
http://10.0.0.98/zabbix/setup.php
用戶名:Admin 密碼:zabbix
壓力測試(用于測試高并發數量)利于監控
ab -n 200000  -c 300 http://10.0.0.98/zabbix/zabbix.php
-n 數量
-c 次數
zabbix客戶端部署
安裝客戶端軟件
yum install zabbix-agent -y
[root@zabbix-server ~]# egrep "^Server=" /etc/zabbix/zabbix_agentd.conf
Server=127.0.0.1	#改成服務端IP即可
systemctl start zabbix-agent.service
systemctl enable zabbix-agent.service
修改配置文件:/etc/zabbix/zabbix_agentd.conf
UserParameter=tcp.estab,netstat -antp|grep -c ESTABLISHEDweb界面配置
配置---主機---創建主機---*號的必填---點擊主機名----配置模板----重啟服務端
創建監控項---配置觸發器
查看yum下載的歷史命令
201 yum history 202 yum history info 4203 yum history info 5錯誤案例
# 更改用戶權限或者命令權限4755

服務端收集信息慢,導致超時解絕方法
[root@web01 ~]# grep '# Timeout' /etc/zabbix/zabbix_agentd.conf
# Timeout=3		#設置超時時間zabbix_get命令執行時間
[root@web01 ~]#
常見的linux監控命令
free		   #查看內存
df    		   #查看磁盤大小
top		   #查看內存磁盤負載等
uptime	   #當前時間,運行時間,用戶數量,負載
who		   #查看登陸用戶數量及其負載
iostat	   #查看磁盤的讀寫效率及其壓力
[root@web01 ~]# top
top - 20:21:37 up  4:43,  4 users,  load average: 0.00, 0.06, 0.06
當前系統時間     系統運行時間   系統登陸用戶    負載信息
Tasks: 134 total,   1 running, 133 sleeping,   0 stopped,   0 zombie
總進程數量           運行的數量  休眠的數量       停止的進程   僵尸進程
%Cpu(s):  2.0 us,  1.7 sy,  0.0 ni, 96.3 id,  0.0 wa,  0.0 hi,  0.0 si,  0.0 st
us	#用戶進程占用cpu資源百分比
sy	#內核態進程占用的cpu資源百分比
ni	#用戶進程空間內改變過優先級的進程cpu百分比
改變進程優先級的命令:renice   -10  -p  pid
進程優先級排序 -1 ....20 數字越小執行越優先
wa	#等待輸入輸出(io)進程占用的百分比
hi	#硬中斷
si	#軟中端
st	#虛擬機占用內存的百分比(真實的服務器可見)
KiB Mem :   997956 total,   624784 free,   173148 used,   200024 buff/cache
內存信息
KiB Swap:  1048572 total,  1048572 free,        0 used.   629432 avail Mem
swap分區信息PID USER      PR  NI    VIRT    RES    SHR S %CPU %MEM     TIME+ COMMAND 775 root      20   0  298708   6104   4776 S  0.3  0.6   0:26.33 vmtoolsd 1277 root      20   0  590168  15012   4904 S  0.3  1.5   1:04.17 glusterd
PID	#進程號
PR	#進程優先級
NI	#優先級的值(負數表示優先級很高,正數表示優先級比較低)
VIRT	#虛擬內存
虛擬內存=物理內存+swap
1、進程"需要的"虛擬內存大小,包括進程使用的庫、代碼、數據等
2、假如進程申請100m的內存,但實際只使用了10m,那么它會增長100m,而不是實際的使用量
RES		#常駐內存
1、進程當前使用的內存大小,但不包括swap out
2、包含其他進程的共享
3、如果申請100m的內存,實際使用10m,它只增長10m,與VIRT相反
4、關于庫占用內存的情況,它只統計加載的庫文件所占內存大小
SHR	#共享內存
1、除了自身進程的共享內存,也包括其他進程的共享內存
2、雖然進程只使用了幾個共享庫的函數,但它包含了整個共享庫的大小
3、計算某個進程所占的物理內存大小公式:RES – SHR
4、swap out后,它將會降下來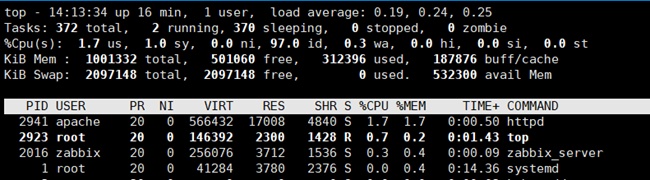
![拓展歐幾里得 [Noi2002]Savage](http://pic.xiahunao.cn/拓展歐幾里得 [Noi2002]Savage)
)


)


![html 縮略圖點擊預覽,[每天進步一點點~] uni-app 點擊圖片實現預覽圖片列表](http://pic.xiahunao.cn/html 縮略圖點擊預覽,[每天進步一點點~] uni-app 點擊圖片實現預覽圖片列表)


 最基本語法)


