?一、數據增強的方法介紹
增加訓練數據, 則能夠提升算法的準確率, 因為這樣可以避免過擬合, 而避免了過擬合你就可以增大你的網絡結構了。 當訓練數據有限的時候, 可以通過一些變換來從已有的訓練數據集中生成一些新的數據, 來擴大訓練數據。?數據增強的方法有:
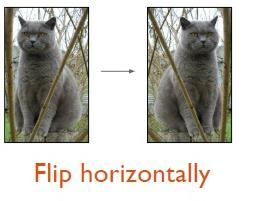
1) 圖片的水平翻轉(主要包括對稱處理, 度數旋轉等)
2) 隨機裁剪(可以裁剪成不同大小的數據)
如原始圖像大小為256*256,隨機裁剪出一些圖像224*224的圖像。如下圖,紅色方框內為隨機裁剪出的224*224的圖片。 AlexNet 訓練時,對左上、右上、左下、右下、中間做了5次裁剪,然后翻轉,得到一些剪切圖片。防止大網絡過擬合(under ubstantial overfitting)。

3)?fancy PCA?(就是從像素的角度變化, 形成新的圖片)
在訓練集像素值的RGB顏色空間進行PCA, 得到RGB空間的3個主方向向量,3個特征值, p1,p2, p3, λ1, λ2, λ3. 對每幅圖像的每個像素加上如下的變化:
 其中:α i 是滿足均值為0,方差為0.1的隨機變量.
4)?樣本不均衡( 解決方案: 增加小眾類別的圖像數據)
樣本數據的不均衡的問題是日常中較多遇到的問題, 在機器學習中我們對于數據不平衡有上采樣和下采樣等處理方法, 在這里我們一般使用的是小眾類別增強的方法處理.
一般根據數據集中的圖像最多的種類的數量進行隨機采樣, 使得每個樣本的數量均相等.然后將這些樣本圖片混合打亂形成新的數據集.

5)其它方法
- 如平移變換;
- 旋轉/仿射變換;
- 高斯噪聲、 模糊處理、?
- 對顏色的數據增強: 圖像亮度、 飽和度、 對比度變化.
6)訓練和測試要協調
在訓練的時候,我們通常都需要做數據增強,在測試的時候,我們通常很少去做數據增強。這其中似乎有些不協調,因為你訓練和測試之間有些不一致。實驗發現,訓練的最后幾個迭代,移除數據增強,和傳統一樣測試,可以提升一點性能。
如果訓練的時候一直使用尺度和長寬比增強數據增強,在測試的時候也同樣做這個變化,隨機取32個裁剪圖片來測試,也可以在最后的模型上提升一點性能。就是多尺度的訓練,多尺度的測試。
二、數據增強的TensorFlow實現
# -- encoding:utf-8 --
"""
圖像處理的Python庫:OpenCV、PIL、matplotlib、tensorflow等
"""import numpy as np
import matplotlib.pyplot as plt
import tensorflow as tf# 打印numpy的數組對象的時候,中間不省略
np.set_printoptions(threshold=np.inf)def show_image_tensor(image_tensor):# 要求:使用交互式會話# 獲取圖像tensor對象對應的image對象,image對象時一個[h,w,c]# print(image_tensor)image = image_tensor.eval()# print(image)print("圖像大小為:{}".format(image.shape))if len(image.shape) == 3 and image.shape[2] == 1:# 黑白圖像plt.imshow(image[:, :, 0], cmap='Greys_r')plt.show()elif len(image.shape) == 3:# 彩色圖像plt.imshow(image)plt.show()# 1. 交互式會話啟動
sess = tf.InteractiveSession()image_path = 'data/xiaoren.png'
# image_path = 'data/gray.png'
# image_path = 'data/black_white.jpg'# 一、圖像格式的轉換
# 讀取數據
file_contents = tf.read_file(image_path)
# 將圖像數據轉換為像素點的數據格式,返回對象為: [height, width, num_channels], 如果是gif的圖像返回[num_frames, height, width, num_channels]
# height: 圖片的高度的像素大小
# width: 圖片的水平寬度的像素大小
# num_channels: 圖像的通道數,也就是API中的channels的值
# num_frames: 因為gif的圖像是一個動態圖像,可以將每一個動的畫面看成一個靜態圖像,num_frames相當于在這個gif圖像中有多少個靜態圖像
# 參數channels:可選值:0 1 3 4,默認為0, 一般使用0 1 3,不建議使用4
# 0:使用圖像的默認通道,也就是圖像是幾通道的就使用幾通道
# 1:使用灰度級別的圖像數據作為返回值(只有一個通道:黑白)
# 3:使用RGB三通道讀取數據
# 4:使用RGBA四通道讀取數據(R:紅色,G:綠色,B:藍色,A:透明度)
image_tensor = tf.image.decode_png(contents=file_contents, channels=3)
# show_image_tensor(image_tensor)# 二、圖像大小重置
"""
BILINEAR = 0 線性插值,默認
NEAREST_NEIGHBOR = 1 最近鄰插值,失真最小
BICUBIC = 2 三次插值
AREA = 3 面積插值
"""
# images: 給定需要進行大小轉換的圖像對應的tensor對象,格式為:[height, width, num_channels]或者[batch, height, width, num_channels]
# API返回值和images格式一樣,唯一區別是height和width變化為給定的值
resize_image_tensor = tf.image.resize_images(images=image_tensor, size=(200, 200),method=tf.image.ResizeMethod.NEAREST_NEIGHBOR)
# show_image_tensor(resize_image_tensor)# 三、圖片的剪切&填充
# 圖片重置大小,通過圖片的剪切或者填充(從中間開始計算新圖片的大小)
crop_or_pad_image_tensor = tf.image.resize_image_with_crop_or_pad(image_tensor, 200, 200)
# show_image_tensor(crop_or_pad_image_tensor)# 中間等比例剪切
central_crop_image_tensor = tf.image.central_crop(image_tensor, central_fraction=0.2)
# show_image_tensor(central_crop_image_tensor)# 填充數據(給定位置開始填充)
pad_to_bounding_box_image_tensor = tf.image.pad_to_bounding_box(image_tensor, offset_height=400, offset_width=490,target_height=1000,target_width=1000)
# show_image_tensor(pad_to_bounding_box_image_tensor)# 剪切數據(給定位置開始剪切)
crop_to_bounding_box_image_tensor = tf.image.crop_to_bounding_box(image_tensor, offset_height=10, offset_width=40,target_height=200, target_width=300)
# show_image_tensor(crop_to_bounding_box_image_tensor)# 四、旋轉
# 上下交換
flip_up_down_image_tensor = tf.image.flip_up_down(image_tensor)
# show_image_tensor(flip_up_down_image_tensor)# 左右交換
flip_left_right_image_tensor = tf.image.flip_left_right(image_tensor)
# show_image_tensor(flip_left_right_image_tensor)# 轉置
transpose_image_tensor = tf.image.transpose_image(image_tensor)
# show_image_tensor(transpose_image_tensor)# 旋轉(90度、180度、270度....)
# k*90度旋轉,逆時針旋轉
k_rot90_image_tensor = tf.image.rot90(image_tensor, k=4)
# show_image_tensor(k_rot90_image_tensor)#  五、顏色空間的轉換(rgb、hsv、gray)
# 顏色空間的轉換必須講image的值轉換為float32類型,不能使用unit8類型
float32_image_tensor = tf.image.convert_image_dtype(image_tensor, dtype=tf.float32)
# show_image_tensor(float32_image_tensor)# rgb -> hsv(h: 圖像的色彩/色度,s:圖像的飽和度,v:圖像的亮度)
hsv_image_tensor = tf.image.rgb_to_hsv(float32_image_tensor)
# show_image_tensor(hsv_image_tensor)# hsv -> rgb
rgb_image_tensor = tf.image.hsv_to_rgb(hsv_image_tensor)
# show_image_tensor(rgb_image_tensor)# rgb -> gray
gray_image_tensor = tf.image.rgb_to_grayscale(rgb_image_tensor)
# show_image_tensor(gray_image_tensor)# 可以從顏色空間中提取圖像的輪廓信息(圖像的二值化)
a = gray_image_tensor
b = tf.less_equal(a, 0.9)
# 0是黑,1是白
# condition?true:false
# condition、x、y格式必須一模一樣,當condition中的值為true的之后,返回x對應位置的值,否則返回y對應位置的值
# 對于a中所有大于0.9的像素值,設置為0
c = tf.where(condition=b, x=a, y=a - a)
# 對于a中所有小于等于0.9的像素值,設置為1
d = tf.where(condition=b, x=c - c + 1, y=c)
# show_image_tensor(d)# 六、圖像的調整
# 亮度調整
# image: RGB圖像信息,設置為float類型和unit8類型的效果不一樣,一般建議設置為float類型
# delta: 取值范圍(-1,1)之間的float類型的值,表示對于亮度的減弱或者增強的系數值
# 底層執行:rgb -> hsv -> h,s,v*delta -> rgb
adjust_brightness_image_tensor = tf.image.adjust_brightness(image=image_tensor, delta=0.8)
# show_image_tensor(adjust_brightness_image_tensor)# 色調調整
# image: RGB圖像信息,設置為float類型和unit8類型的效果不一樣,一般建議設置為float類型
# delta: 取值范圍(-1,1)之間的float類型的值,表示對于色調的減弱或者增強的系數值
# 底層執行:rgb -> hsv -> h*delta,s,v -> rgb
adjust_hue_image_tensor = tf.image.adjust_hue(image_tensor, delta=-0.8)
# show_image_tensor(adjust_hue_image_tensor)# 飽和度調整
# image: RGB圖像信息,設置為float類型和unit8類型的效果不一樣,一般建議設置為float類型
# saturation_factor: 一個float類型的值,表示對于飽和度的減弱或者增強的系數值,飽和因子
# 底層執行:rgb -> hsv -> h,s*saturation_factor,v -> rgb
adjust_saturation_image_tensor = tf.image.adjust_saturation(image_tensor, saturation_factor=20)
# show_image_tensor(adjust_saturation_image_tensor)# 對比度調整,公式:(x-mean) * contrast_factor + mean
adjust_contrast_image_tensor = tf.image.adjust_contrast(image_tensor, contrast_factor=10)
# show_image_tensor(adjust_contrast_image_tensor)# 圖像的gamma校正
# images: 要求必須是float類型的數據
# gamma:任意值,Oup = In * Gamma
adjust_gamma_image_tensor = tf.image.adjust_gamma(float32_image_tensor, gamma=100)
# show_image_tensor(adjust_gamma_image_tensor)# 圖像的歸一化(x-mean)/adjusted_sttdev, adjusted_sttdev=max(stddev, 1.0/sqrt(image.NumElements()))
per_image_standardization_image_tensor = tf.image.per_image_standardization(image_tensor)
# show_image_tensor(per_image_standardization_image_tensor)# 七、噪音數據的加入
noisy_image_tensor = image_tensor + tf.cast(5 * tf.random_normal(shape=[600, 510, 3], mean=0, stddev=0.1), tf.uint8)
show_image_tensor(noisy_image_tensor)
)


