存款驚人
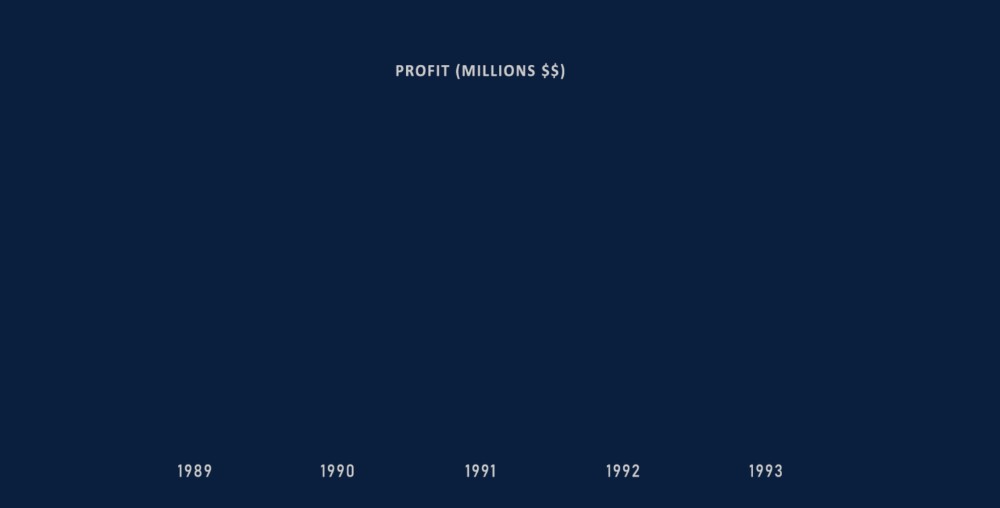
So, you just finished retrieving, processing, and analyzing your data. You grab your data and you decide to graph it so you can show others your findings. You click ‘graph’ and……
因此,您剛剛完成了數據的檢索,處理和分析。 您獲取數據并決定對其進行圖形繪制,以便向他人展示您的發現。 您單擊“圖形”,然后……
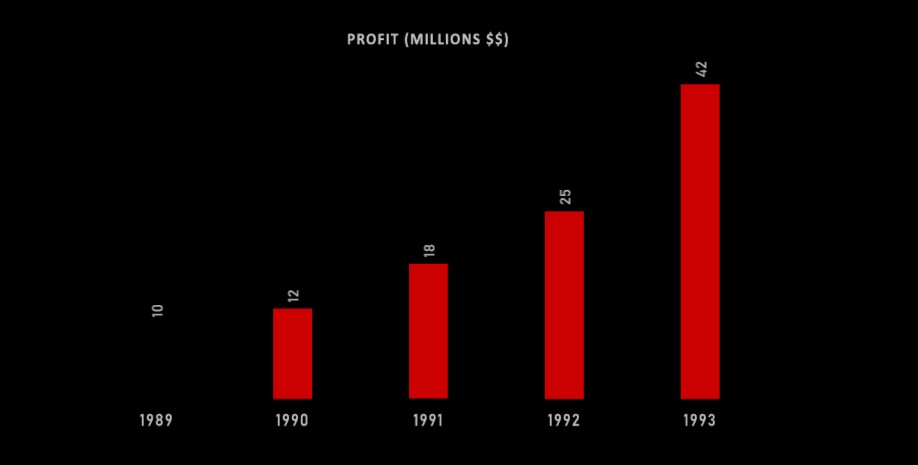
Ya looks kinda boring. What we want is something a little more fun and dynamic. Something like… this:
雅看起來有點無聊 。 我們想要的是更多有趣和動態的東西。 像這樣的東西:
Yes! Now that looks awesome! So let’s see how we can do quickly get this animation going.
是! 現在看起來棒極了! 因此,讓我們看看如何快速制作動畫。
先決條件 (Prerequisites)
Okay here’s what you’ll need to get started:
好的,這是您開始需要的:
- Data for a bar graph (duh!) 條形圖的數據(du!)
Adobe Illustrator (Don’t worry we don’t need it for anything complicated)
Adobe Illustrator (不用擔心,我們不需要它來處理任何復雜的事情)
Adobe After Effects
Adobe After Effects
步驟1:使您的Excel圖看起來更好 (Step 1: Make Your Excel Graph Look Better)
So, let’s just do a few things to make our graph look better. We can start by making the text a bit larger and let’s change the graph style while we’re at it.
因此,讓我們做一些事情來使我們的圖形看起來更好。 我們可以先使文本稍大一些,然后在使用時更改圖形樣式。
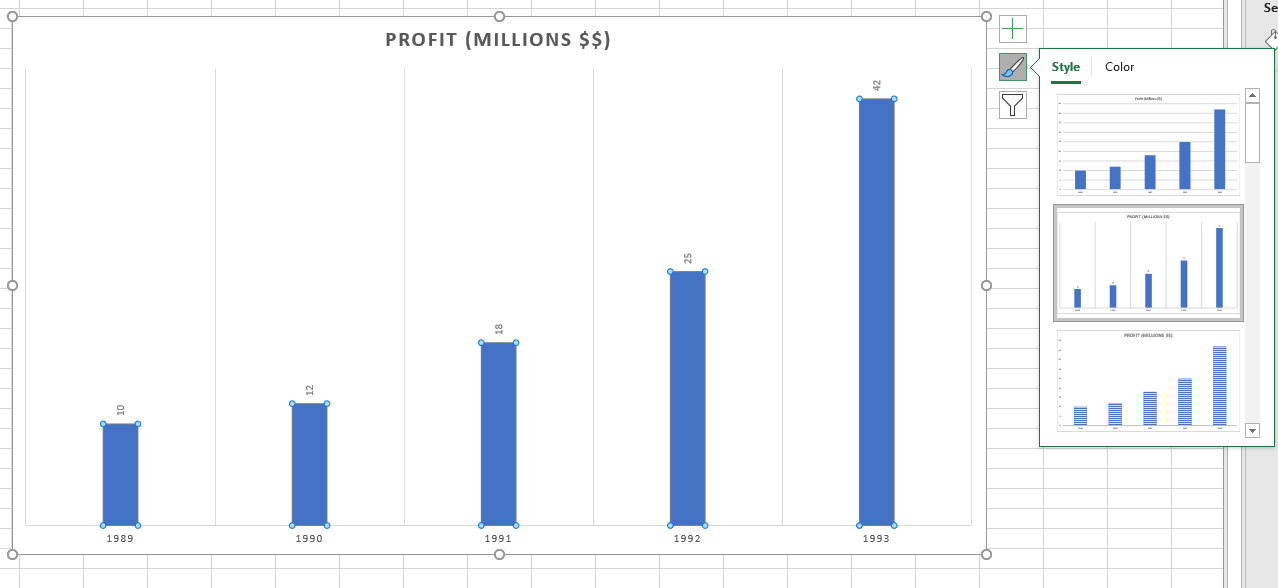
Now for the style, I don’t want the y-axis and instead, I just want the total numeric value at the top of each bar in our graph. We can do it in excel pretty easily,
現在,對于樣式,我不需要y軸,而只希望圖形中每個條形頂部的總數值。 我們可以很容易地在excel中做到這一點,
- Select the graph 選擇圖
Click on the ‘brush icon’
點擊“ 畫筆圖標”
Under ‘Style’ we can find the graph style we’re looking for. For me, it was the second one but it may be different for you.
在“ 樣式 ”下,我們可以找到所需的圖形樣式。 對我來說,這是第二個,但對您來說可能有所不同。
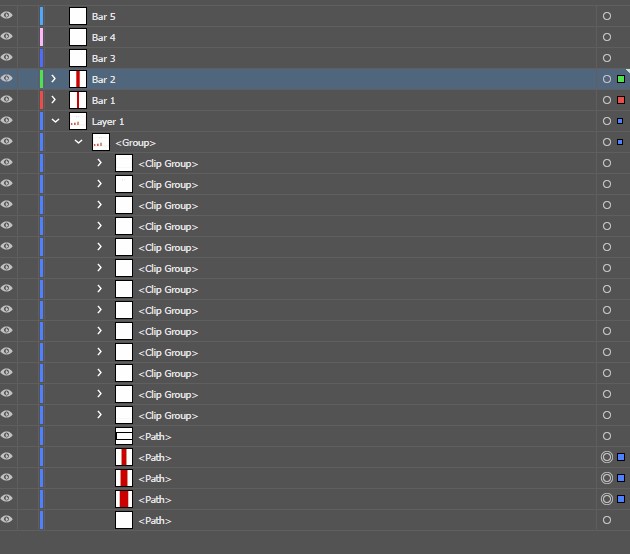
Next just make the font size larger and change the font to whatever tickles your fancy. Remove any background lines (you can just select and delete them). And maybe make the bar wider. After I was done editing my graph looked like this.
接下來,只需增大字體大小,然后將字體更改為您喜歡的字體即可。 刪除所有背景線(您可以選擇并刪除它們)。 也許將標準擴大。 完成編輯后,我的圖形如下所示。
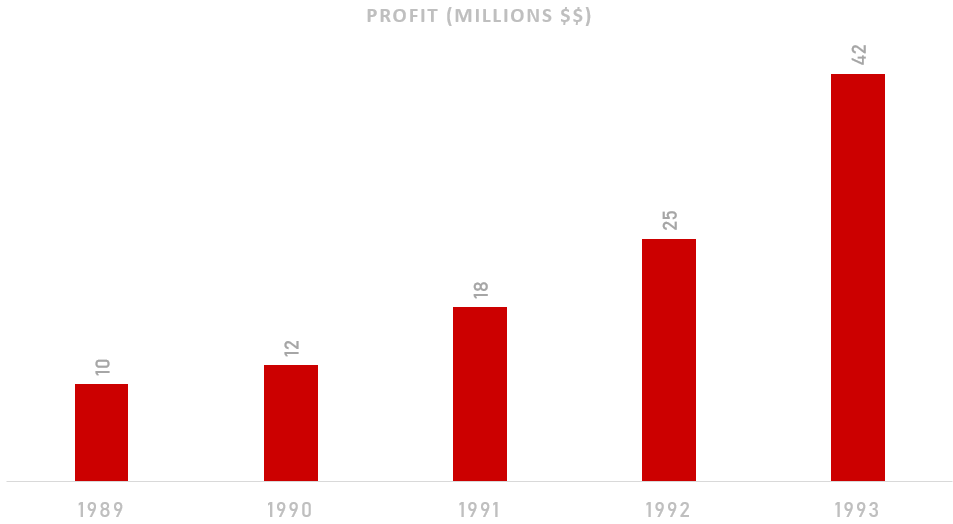
Don’t worry about the text being too light right now, later on, I’ll be adding a darker background color to make things pop more.
不必擔心文本現在太淺,以后,我將添加較深的背景顏色以使內容流行更多。
Experiment, and play with the kind of design you want to have, feel free to be as creative as you want.
嘗試并嘗試您想要的設計,隨意發揮自己想要的創意。
步驟2:將Excel圖表分解為Adobe Illustrator中的組件 (Step 2: Break the Excel Chart Into Components in Adobe Illustrator)
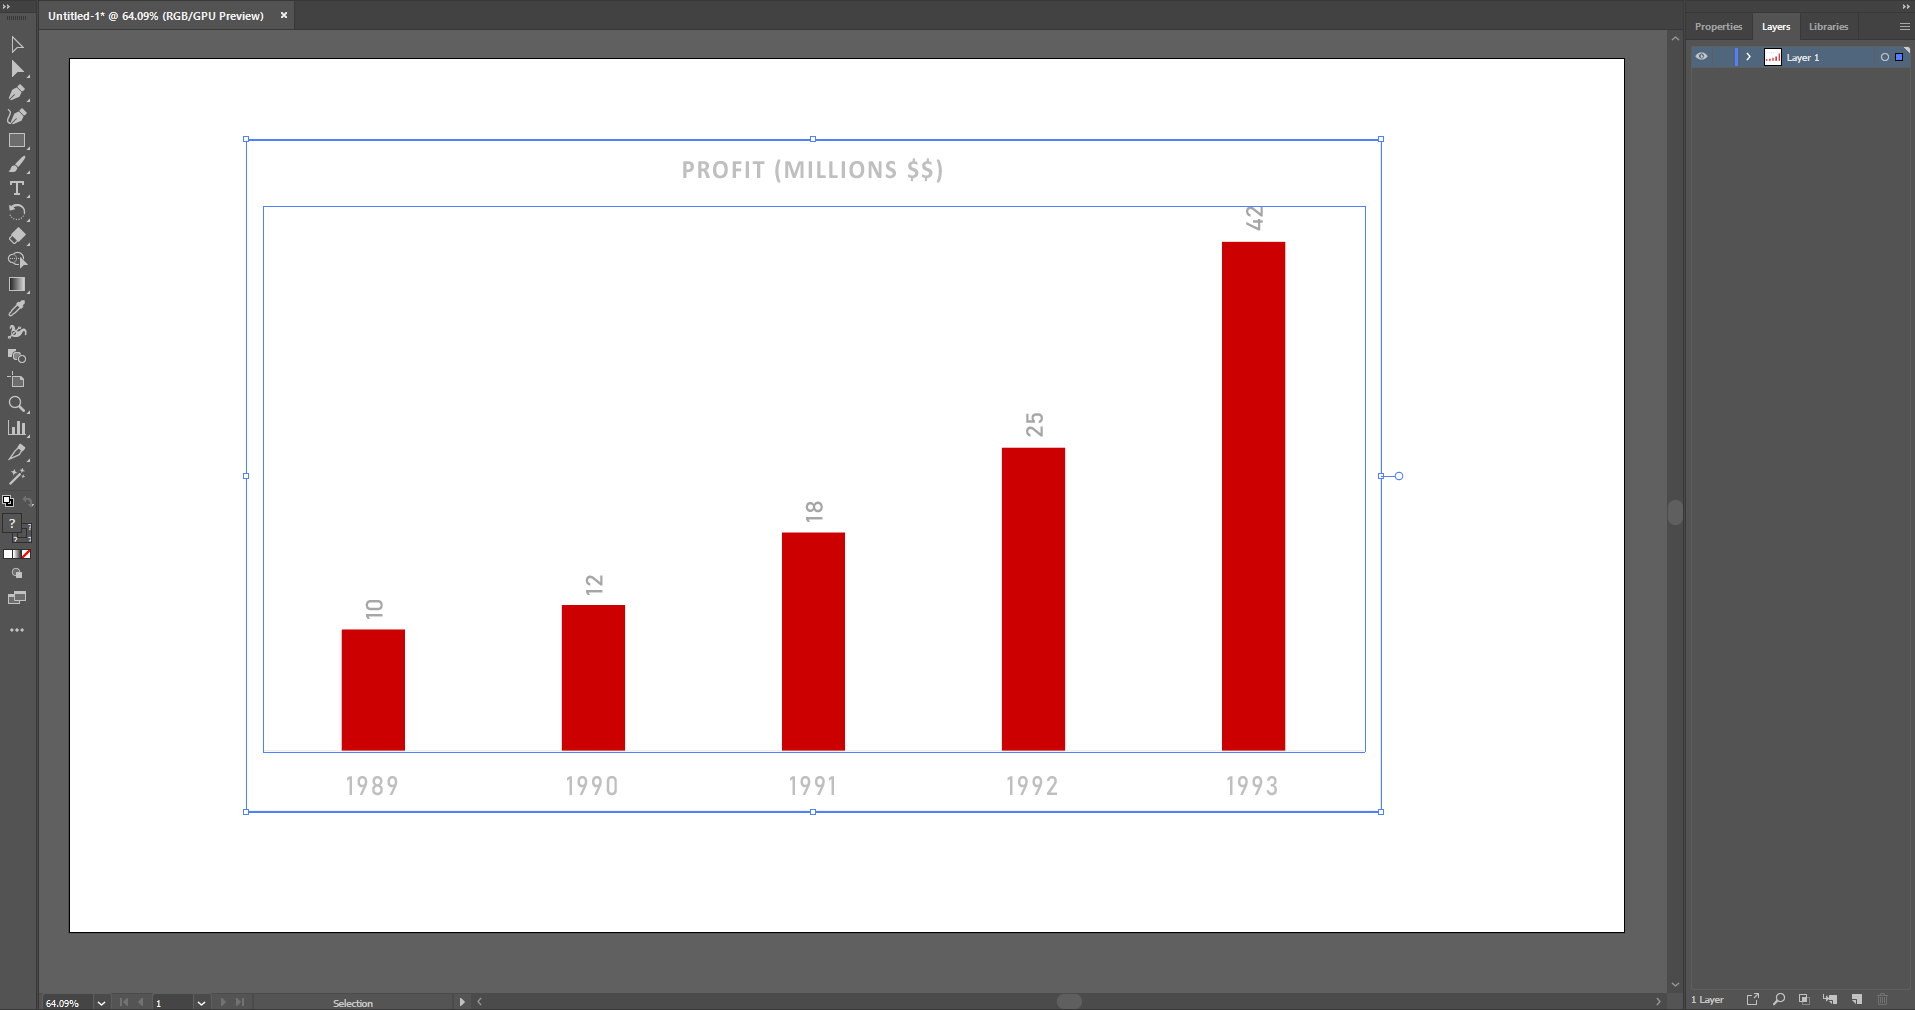
Create a new project in Adobe Illustrator and set the size to 1920 by 1080. Then simply copy-paste the graph you just made from Excel into Illustrator.
在Adobe Illustrator中創建一個新項目,并將大小設置為1920 x1080。然后將您剛剛從Excel制作的圖形復制粘貼到Illustrator中。
The image will copy in as a vector image meaning you can resize it without having to worry about quality loss. Resize your image until it fits the way you want it to on your canvas. See below for reference on how it’s been sized.
該圖像將作為矢量圖像復制,這意味著您可以調整其大小而不必擔心質量損失。 調整圖像大小,直至適合您在畫布上的顯示方式。 有關如何調整尺寸的信息,請參見下文。
將每個條分成自己的層 (Split Each Bar Into Their Own Layer)
If you open the ‘Layers’ panel (you can click f7 or Window -> Layers to open it up) you should see ‘Layer 1’. If we open it up, we should see a Layer called ‘<Clip Group>’ with all the bars that we need.
如果打開“ 圖層 ”面板(可以單擊f7或“窗口”->“圖層”將其打開),則應該看到“ 圖層1 ”。 如果打開它,我們應該看到一個名為' <Clip Group> '的圖層,其中包含我們需要的所有條形圖。
Right now they’re all stuck together.
現在他們都粘在一起了。
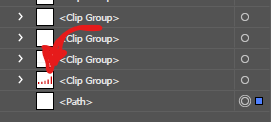
1. Select that ‘<Clip group>’ -> Right-click on the bar -> Select ‘Release Clipping Mask’. That will create a ‘Compound Path’ Layer.
1.選擇“ <Clip group> ”->右鍵單擊欄->選擇“ Release Clipping Mask ”。 這將創建一個“ 復合路徑 ”層。
2. Select this layer and again right-click on the bar and select ‘Release Compound Path’. Now we have all the bars separated.
2.選擇該層,然后再次右鍵單擊該欄,然后選擇“ Release Compound Path ”。 現在,我們將所有條形分開。
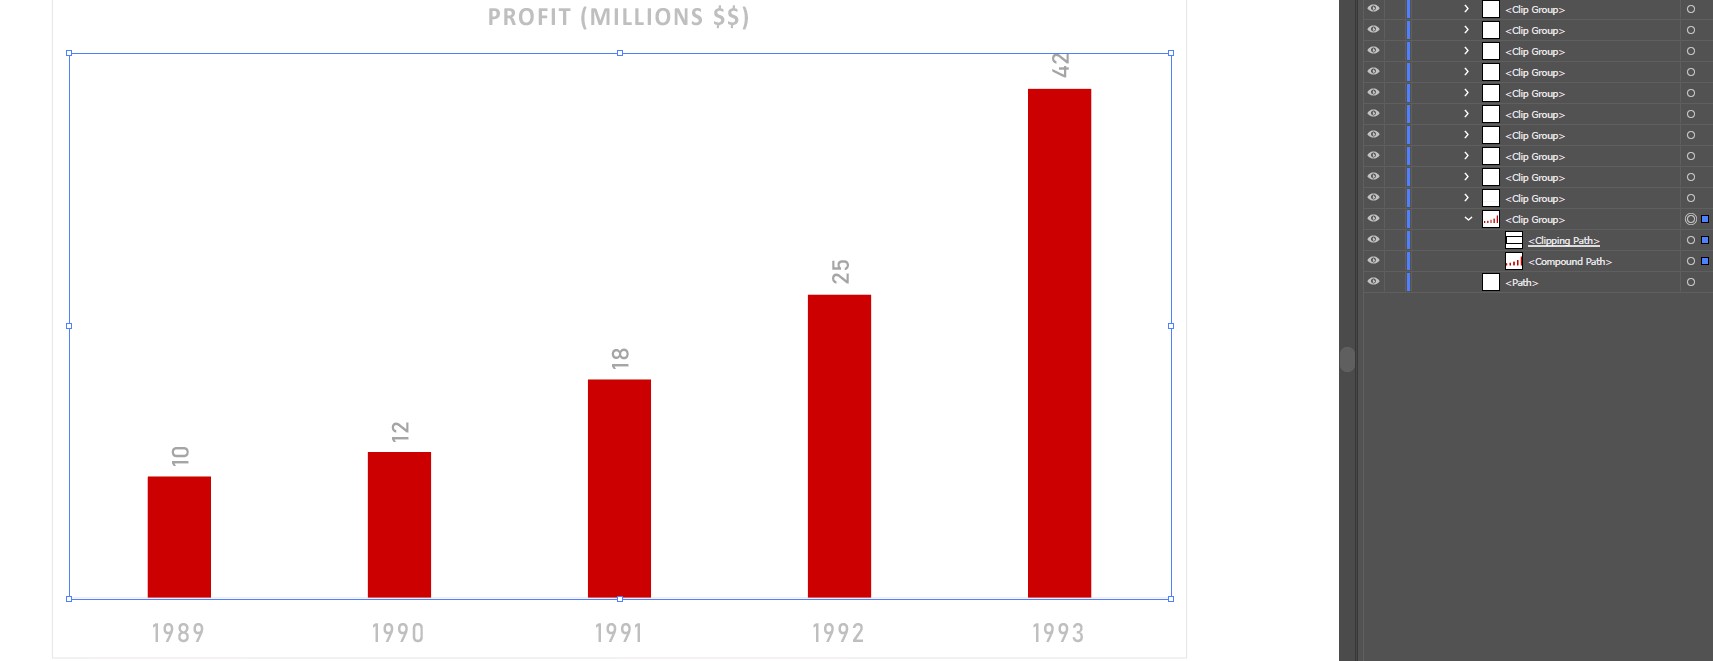
Create five new layers (one for each bar) and drag each bar layer into the new layer. Rename the new bar layers to make it easier to use in After Effects later.
創建五個新層(每個條形一個),并將每個條形層拖動到新層中。 重命名新的條形圖層,以便以后在After Effects中更容易使用。
將條形值拆分為新層 (Split the Bar Values Into a New Layer)
Create one more layer called ‘Values’ and just move all the numeric bar values into that layer. Make sure not to move any of the Year values, we just want the bar values there.
再創建一個稱為“值”的層,然后將所有數字條值移動到該層中。 確保不要移動任何Year值,我們只想在其中輸入柱形值。
刪除不必要的層 (Remove Unnecessary Layers)
Now we’re basically done. The last thing we’ll need to do is remove any sub-layers in Layer 1 that we don’t need.
現在我們基本上完成了。 我們需要做的最后一件事是刪除不需要的第1層中的所有子層。
An easy way to do this is to click on the little ‘eye’ icon next to the layer. If something disappears from Illustrator then we want to keep that. If it looks like nothing disappeared then we can remove it. The point of this is to delete the white background so we can add on our own later in After Effects. If you want to keep the white background feel free to move on to the next step.
一種簡單的方法是單擊圖層旁邊的小“ 眼睛 ”圖標。 如果Illustrator中消失了,那么我們要保留該內容 。 如果看起來什么都沒有消失,那么我們可以將其刪除 。 這樣做的目的是刪除白色背景,以便稍后在After Effects中添加自己的背景。 如果要保留白色背景,請繼續進行下一步。
Once that’s done rename ‘Layer 1’ to ‘Axis’ so it’s easier to identify in After Effects.
完成后,將“ Layer 1 ”重命名為“ Axis ”,以便在After Effects中更容易識別。
步驟3:在After Effects中制作動畫 (Step 3: Animating In After Effects)
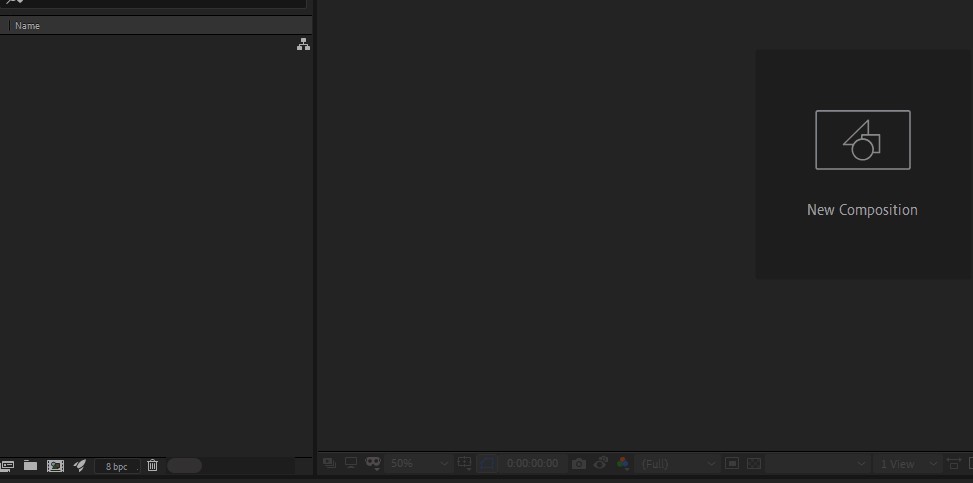
Create a new After Effects project and set the size to 1920 by 1080. My duration was set to 5 seconds but you can set it 3 seconds if you want to. Next, we need to import the Illustrator file that we just created. We can do this by double-clicking the Project Panel and selecting our AI file.
創建一個新的After Effects項目,并將大小設置為1920 x1080。我的持續時間設置為5秒,但您可以將其設置為3秒。 接下來,我們需要導入剛剛創建的Illustrator文件。 我們可以通過雙擊“項目面板”并選擇我們的AI文件來實現。
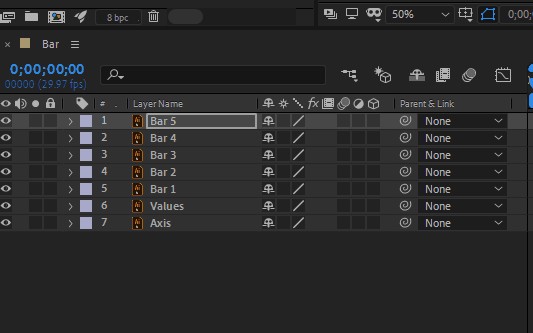
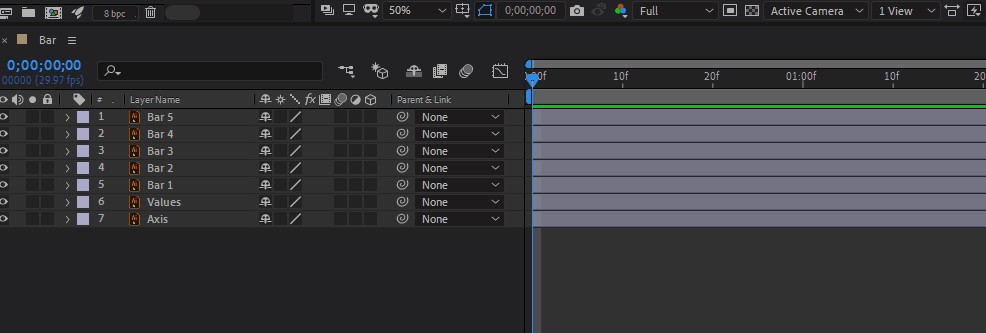
Make sure that Import Kind is set to Composition and Footage Dimension is set to Layer Size. We can then just click on the new composition that after-effects automatically created for us and start working on it. You should also see all our layers in the Composition Panel.
確保將“ 導入種類”設置為“ 合成”,并將“ 影片尺寸”設置為“ 圖層大小” 。 然后,我們只需單擊后效果自動為我們創建的新構圖,然后開始進行處理。 您還應該在“合成面板”中看到我們所有的圖層。
Each layer has an anchor point. These anchor points are the points at which the effects we apply take place. We’ll need to move these anchor points to the bottom of each bar so that the animation starts from that point.
每層都有一個錨點。 這些錨點是我們應用效果發生的點。 我們需要將這些錨點移動到每個欄的底部,以便動畫從該點開始。
To do this
去做這個
- Select a specific bar object (example: bar 1) 選擇特定的條對象(例如:條1)
- In the toolbar select the anchor tool. 在工具欄中,選擇錨點工具。
- Then just move the anchor to the center bottom of the bar. Repeat this for each bar. You can see an example below for how I did it. 然后只需將錨點移動到鋼筋的中央底部即可。 對每個欄重復此操作。 您可以在下面查看我的操作示例。
將范圍從0%擴展到100% (Scaling the Bar From 0% to 100%)
Once we have our anchors set at the correct position we can start animating. This part is really simple.
一旦將錨點設置在正確的位置,就可以開始制作動畫了。 這部分非常簡單。
In the Composition Panel: Bar Layer (ex: Bar 1) > Transform > Scale.
在“合成”面板中:條形圖層(例如:條形1)>變換>縮放。
Unlink the scale by clicking the chain icon on the scale option. This unlinks the width from the height.
通過單擊比例選項上的鏈圖標取消比例的鏈接。 這將寬度與高度斷開。
Click on the stopwatch icon next to the Scale option. This creates a keyframe for our animations.
單擊“縮放”選項旁邊的秒表圖標。 這將為我們的動畫創建關鍵幀。
- Set the height to 0%. On the Scale options, the height is the second value. 將高度設置為0%。 在“比例”選項上,高度是第二個值。
- Move the scrubber on the timeline to 7 Frames (or however long you want the animation to last) and adjust the height back to 100%. This will automatically create a new keyframe for us and animate our growing bar from 0% to 100% of its original height, over 7 frames. 將時間軸上的洗滌器移動到7幀(或希望動畫持續多長時間),然后將高度調整回100%。 這將自動為我們創建一個新的關鍵幀,并在7幀的范圍內,將不斷增長的條形從其原始高度的0%設置為100%進行動畫處理。
添加彈跳動畫 (Add The Bounce Animation)
The bounce animation makes it so that when our bar reaches the top it will overshoot and then go back down. This makes the animation look a lot smoother and more lively.
跳動動畫使之變得如此,以便當我們的酒吧到達頂部時,它會過沖,然后回落。 這使動畫看起來更加流暢和生動。
To do this click on the stopwatch icon next to Scale while holding down the ALT key. A text area will open on the timeline. Copy-paste the following there.
為此,請在按住ALT鍵的同時單擊“縮放”旁邊的秒表圖標。 時間線上將打開一個文本區域。 復制以下內容。
// Inertial Bounce - Created by Animoplex: www.animoplex.com
// Original Version: http://www.graymachine.com/top-5-effects-expressions/
// Modified expression for a smoother bounce effect and easier editing. Use this on any property with two keyframes to get a nice bounce effect that is based on velocity of the value change. Perfect for a scale from 0 to 100 or a speedy rotation that needs some extra life. Adjust amp, freq and decay values to tweak the effect. Amp is intensity, freq is bounces per second, and decay is the speed of decay, slow to fast.// Variation Aamp = 5.0; freq = 2.0; decay = 4.0;n = 0;
if (numKeys > 0) {
  n = nearestKey(time).index;
  if (key(n).time > time) { n--; }
}
if (n == 0) { t = 0; }
else { t = time - key(n).time; }
if (n > 0 && t < 1) {
  v = velocityAtTime(key(n).time - thisComp.frameDuration/10);
  value + v*(amp/100)*Math.sin(freq*t*2*Math.PI)/Math.exp(decay*t);
}
else { value; }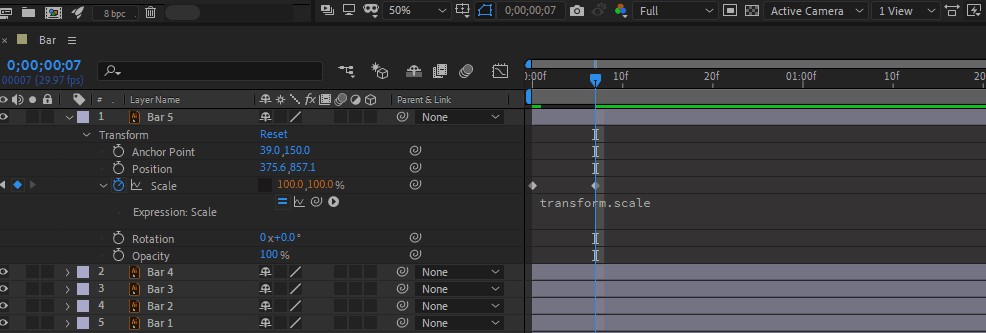
Congratulations! The hard part is over, now we just need to do some copy-pasting and fix up a few things. You should now have something that looks like this:
恭喜你! 困難的部分已經過去,現在我們只需要進行一些復制粘貼并修復一些問題即可。 您現在應該具有如下所示的內容:
將粘貼動作效果復制到其他欄 (Copy Paste Motion Effect to Other Bars)
If you close the dropdown menu for the component we were just working on and select it again you can type the letter ‘U’ on your keyboard to just view properties you’ve changed.
如果關閉我們正在處理的組件的下拉菜單,然后再次選擇它,則可以在鍵盤上鍵入字母“ U”以僅查看已更改的屬性。
- Do that and select the two keyframes we just made. 這樣做,然后選擇我們剛剛制作的兩個關鍵幀。
- Ctrl+C or Cmd+C to copy them. Ctrl + C或Cmd + C復制它們。
- Select each of the other bar components and paste them to each one. 選擇其他每個條形組件并將它們粘貼到每個。
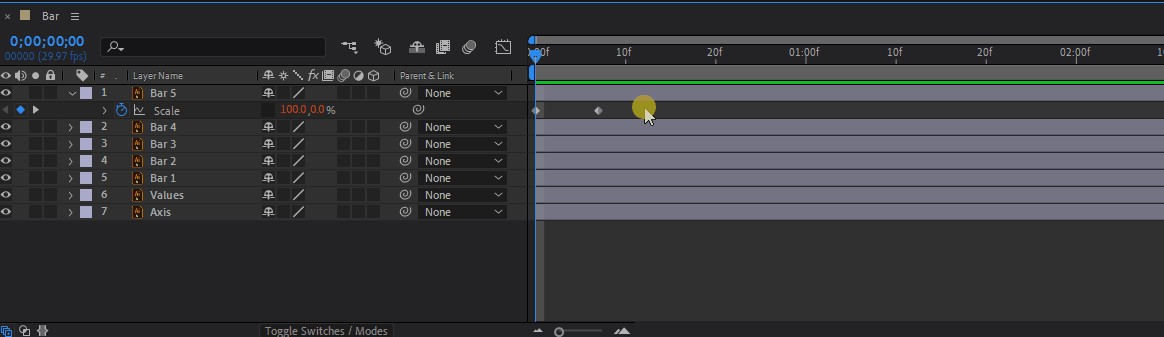
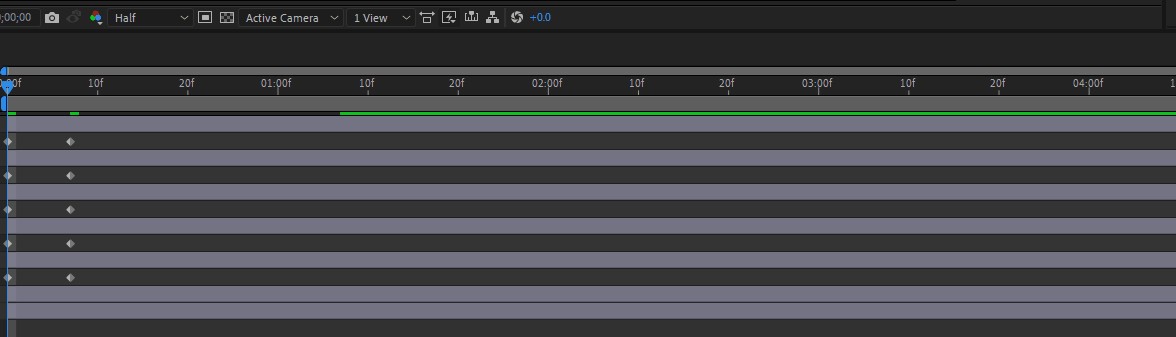
排檔時間 (Shift Timing of Bars)
Having all the properties open for all the bars we just animated. We see that the animation for each bar takes place at the same time. To fix this we just need to shift the keyframe animation for each bar to start when the last one animation ended.
為所有我們剛剛設置動畫的條打開所有屬性。 我們看到每個條的動畫是同時發生的。 為了解決這個問題,我們只需要移動每個小節的關鍵幀動畫就可以在最后一個動畫結束時開始。
‘Bar 5’ for me was my first bar on the graph and ‘Bar 1’ was my last. So for me, I just need to shift them like shown below but you may need to shift them differently.
對我來說,“ Bar 5 ”是我在圖表上的第一個酒吧,“ Bar 1 ”是我的最后一個。 因此,對我來說,我只需要像下面顯示的那樣移動它們,但是您可能需要以不同的方式移動它們。
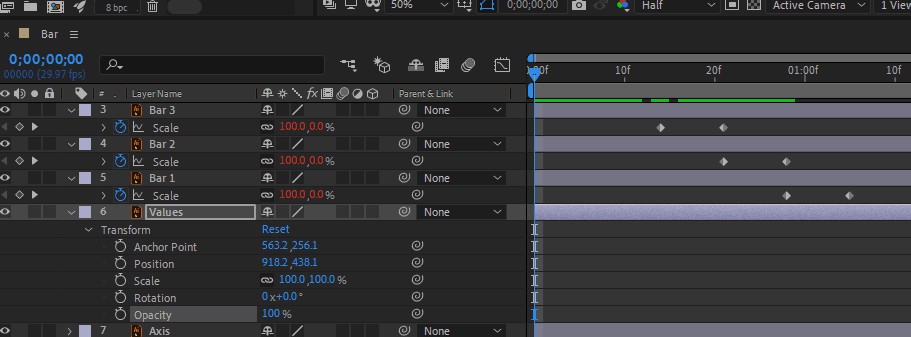
動畫酒吧價值觀 (Animate The Bar Values)
The values being there at the beginning of the animation is pretty weird. Instead, a better look would be for them to appear near the end of the animation.
動畫開始處的值很奇怪。 取而代之的是,更好的外觀是使它們出現在動畫的結尾附近。
- Click on the ‘Values’ component > Transform > Opacity 單擊“值”組件>“變換”>“不透明度”
- Click the stopwatch and set the keyframe to 0% 單擊秒表并將關鍵幀設置為0%
We want to not start animating until near the end of the animation so position your time scrubber halfway between the start and end of the last bar animation. You can manually create a keyframe by selecting the diamond icon on the far right of the Opacity property.
我們希望不啟動動畫,直到接近動畫所以一開始和最后一棒動畫結束之間的中間位置的時間進度條的末端。 您可以通過選擇“不透明度”屬性最右邊的菱形圖標來手動創建關鍵幀。
- Move the scrubber to the end of the last bar animation and set the opacity to back to 100%. Now the values will appear near the end of the animation. 將洗滌器移動到最后一個小節動畫的末尾,并將不透明度設置回100%。 現在,這些值將出現在動畫的結尾附近。
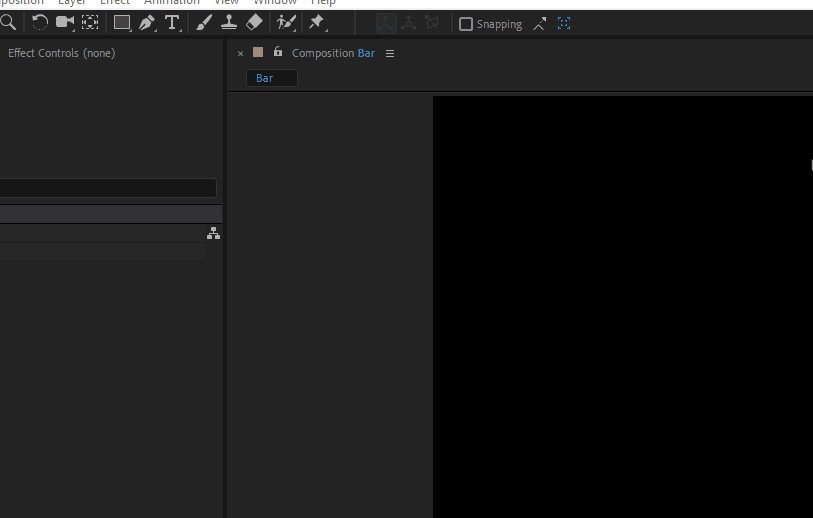
添加背景色 (Add Background Color)
- Layer > New > Solid… 圖層>新建>實體…
- Pick your favorite color. 選擇您喜歡的顏色。
- In the Composition Panel drag your background to the bottom to see your graph again. 在“合成面板”中,將背景拖到底部以再次查看圖形。
你完成了! (You’re Done!)
Marvel at your beautiful creation.
驚嘆于您的美麗創作。
翻譯自: https://towardsdatascience.com/data-visualization-animate-bar-graphs-df9ca03a09f2
存款驚人
本文來自互聯網用戶投稿,該文觀點僅代表作者本人,不代表本站立場。本站僅提供信息存儲空間服務,不擁有所有權,不承擔相關法律責任。 如若轉載,請注明出處:http://www.pswp.cn/news/388066.shtml 繁體地址,請注明出處:http://hk.pswp.cn/news/388066.shtml 英文地址,請注明出處:http://en.pswp.cn/news/388066.shtml
如若內容造成侵權/違法違規/事實不符,請聯系多彩編程網進行投訴反饋email:809451989@qq.com,一經查實,立即刪除!相關文章

pytest自動化6:pytest.mark.parametrize裝飾器--測試用例參數化
——Draw2d詳解(二))
基于easyui開發Web版Activiti流程定制器詳解(六)——Draw2d詳解(二)

c#中ReadLine,Read,ReadKey的區別

Ubuntu16.04 開啟多個終端,一個終端多個小窗口

敏捷 橄欖球運動_澳大利亞橄欖球迷的研究聲稱南非裁判的偏見被證明是錯誤的

activiti 部署流程圖后中文亂碼

Luogu 4755 Beautiful Pair

網絡傳播動力學_通過簡單的規則傳播動力
![【左偏樹】【P3261】 [JLOI2015]城池攻占](http://pic.xiahunao.cn/【左偏樹】【P3261】 [JLOI2015]城池攻占)
【左偏樹】【P3261】 [JLOI2015]城池攻占

【原創】數據庫中為什么不推薦使用外鍵約束

初識Activiti

開源軟件 安全風險_3開源安全風險及其解決方法

React-Router 源碼分析1

linux安裝日志切割程序

自助分析_為什么自助服務分析真的不是一回事

BPMN2.0-概要

如何用Phaser實現一個全家福拼圖H5

angularjs 默認跳轉

錯誤錄入 算法_如何使用驗證錯誤率確定算法輸出之間的關系
