實用案例
? ? ?驗證碼與驗證
? KindEditor
? ? ?組合搜索的實現
? 單例模式
? ? ?beautifulsoup4
? ? ?
驗證碼與驗證
需要安裝Pillow模塊
pip stall pillow
1、首先需要借助pillow模塊用來畫一個驗證碼圖形,這里單獨封裝了一個py文件,調用一個方法就好了


 1 #!/user/bin/env python
 2 # -*-coding: utf-8-*-
 3 import random
 4 from PIL import ImageDraw,ImageFont,Image,ImageFilter
 5
 6
 7 def random_check_code(width=120, height=30, char_length=5, font_file='wryh.ttf', font_size=28):
 8     code = []
 9     img = Image.new(mode='RGB', size=(width, height), color=(255, 255, 255))
10     draw = ImageDraw.Draw(img, mode='RGB')
11
12     def rndChar():
13         """
14         生成隨機字母
15         :return:
16         """
17         return chr(random.randint(65, 90))
18
19     def rndColor():
20         """
21         生成隨機顏色
22         :return:
23         """
24         return (random.randint(0, 255), random.randint(10, 255), random.randint(64, 255))
25
26     # 寫文字
27     font = ImageFont.truetype(font_file, font_size)
28     for i in range(char_length):
29         char = rndChar()
30         code.append(char)
31         h = random.randint(0, 4)
32         draw.text([i * width / char_length, h], char, font=font, fill=rndColor())
33
34     # 寫干擾點
35     for i in range(40):
36         draw.point([random.randint(0, width), random.randint(0, height)], fill=rndColor())
37
38     # 寫干擾圓圈
39     for i in range(40):
40         draw.point([random.randint(0, width), random.randint(0, height)], fill=rndColor())
41         x = random.randint(0, width)
42         y = random.randint(0, height)
43         draw.arc((x, y, x + 4, y + 4), 0, 90, fill=rndColor())
44
45     # 畫干擾線
46     for i in range(5):
47         x1 = random.randint(0, width)
48         y1 = random.randint(0, height)
49         x2 = random.randint(0, width)
50         y2 = random.randint(0, height)
51         draw.line((x1, y1, x2, y2), fill=rndColor())
52
53     img = img.filter(ImageFilter.EDGE_ENHANCE_MORE) #加濾鏡,可以增加顏色的不同
54     return img, ''.join(code)
函數的參數都已在調用的時候修改。
2、登陸界面設計
假設驗證碼跟登錄頁面在同一函數一起生成,那么每次刷新驗證碼都需要整個頁面一起重新加載;顯然,這是不合理的。所以可以確定驗證碼跟登錄界面是2個視圖函數控制的。
 1 <!DOCTYPE html>
 2 <html lang="en">
 3 <head>
 4     <meta charset="UTF-8">
 5     <title>Title</title>
 6 </head>
 7 <body style="margin: 0 auto;">
 8     <div id="main">
 9         <form method="post" action="/login/">
10             {% csrf_token %}
11             <p><label>用戶名:</label><input type="text" name="user" /></p>
12             <p><label>密碼:</label><input type="password" name="pwd" /></p>
13             <p><label>驗證碼:</label><input type="text" name="checkcode" /><img src="/check_code.html" /></p>
14             <p><input type="submit" /></p>
15         </form>
16     </div>
17 </body>
18 </html>
1 def login(request):
2     if request.method == 'GET':
3         return  render(request, 'login.html')
3、驗證碼
將驗證碼圖片對象返回到模板
1 def check_code(request):
2     stream = BytesIO()  # 申請一段內存
3     img, code = random_check_code()  # 獲取隨機碼跟隨機碼圖片對象
4     img.save(stream, 'PNG')  # 將隨機碼對象保存到內存對象中
5     request.session['CheckCode'] = code  # 將隨機字符串保存到session
6     return HttpResponse(stream.getvalue())  # 返回內存中的隨機碼圖片對象
4、如何刷新驗證碼呢
直接將原路由系統通過點擊事件賦值給src,瀏覽器默認是不會進行刷新的;所以這里有一個小技巧,我們可以獲取src的值,在末尾加上一個?,這樣就可以實現點擊刷新了。
 1 <!DOCTYPE html>
 2 <html lang="en">
 3 <head>
 4     <meta charset="UTF-8">
 5     <title>Title</title>
 6 </head>
 7 <body style="margin: 0 auto;">
 8     <div id="main">
 9         <form method="post" action="/login/">
10             {% csrf_token %}
11             <p><label>用戶名:</label><input type="text" name="user" /></p>
12             <p><label>密碼:</label><input type="password" name="pwd" /></p>
13             <p><label>驗證碼:</label><input type="text" name="checkcode" /><img src="/check_code.html" οnclick="ImgChange(this);"/></p>
14             <p><input type="submit" /></p>
15         </form>
16     </div>
17 </body>
18 <script>
19     function ImgChange(ths) {
20         ths.src = ths.src + '?'
21     }
22 </script>
23 </html>
開啟驗證碼驗證功能
 1 def login(request):
 2     if request.method == 'GET':
 3         return  render(request, 'login.html')
 4     elif request.method == 'POST':
 5         checkcode = request.POST.get('checkcode')
 6         code_session = request.session['CheckCode']
 7         print(checkcode)
 8         print(code_session)
 9         if checkcode.upper() == request.session['CheckCode'].upper():
10             return HttpResponse('驗證成功')
11         else:
12             return render(request, 'login.html')
?
?
KindEditor
1、官網下載
http://kindeditor.net/demo.php
2、文件夾解壓文件說明
├── asp                          asp示例
├── asp.net                    asp.net示例
├── attached                  空文件夾,放置關聯文件attached
├── examples                 HTML示例
├── jsp                          java示例
├── kindeditor-all-min.js 全部JS(壓縮)
├── kindeditor-all.js        全部JS(未壓縮)
├── kindeditor-min.js      僅KindEditor JS(壓縮)
├── kindeditor.js            僅KindEditor JS(未壓縮)
├── lang                        支持語言
├── license.txt               License
├── php                        PHP示例
├── plugins                    KindEditor內部使用的插件
└── themes                   KindEditor主題
3、基本使用
 1 <!DOCTYPE html>
 2 <html lang="en">
 3 <head>
 4     <meta charset="UTF-8">
 5     <title>Title</title>
 6 </head>
 7 <body>
 8     <div style="margin: 0 auto; width: 500px;height: 300px;">
 9         <textarea id="content"></textarea>
10     </div>
11
12     <script src="/static/jquery-3.2.1.js"></script>
13     <script src="/static/kindeditor/kindeditor-all-min.js"></script>
14     <script>
15         $(function() {
16             KindEditor.create("#content", {
17                 width: '400px',
18                 height: '200px'
19
20             })
21         })
22     </script>
23 </body>
24 </html>
4、詳細參數
http://kindeditor.net/docs/option.html
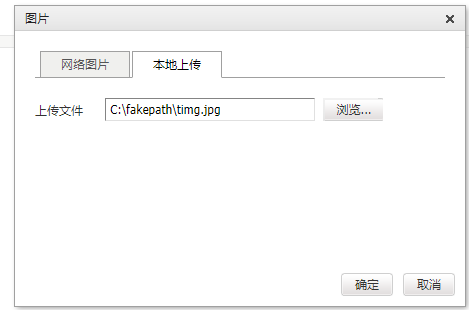
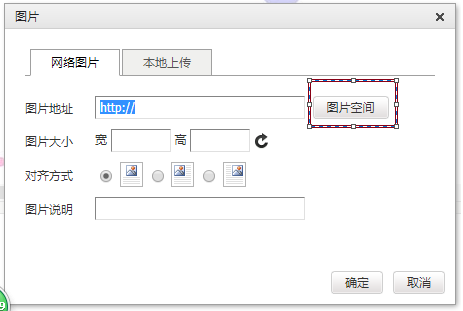
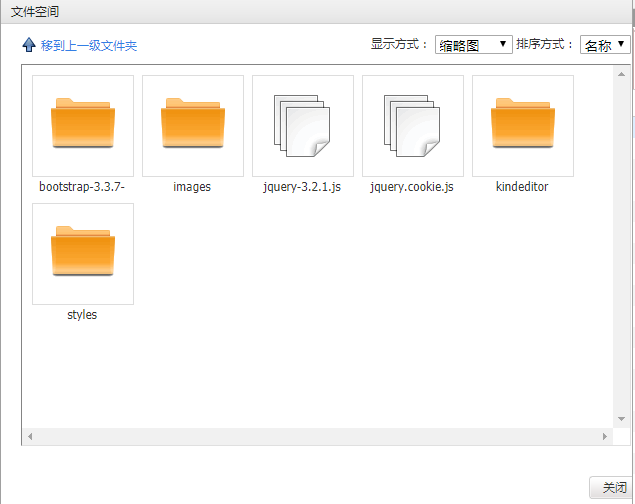
5、上傳文件示例
 1 <!DOCTYPE html>
 2 <html lang="en">
 3 <head>
 4     <meta charset="UTF-8">
 5     <title>Title</title>
 6 </head>
 7 <body>
 8     <form action="/upload_kind/" method="post">
 9
10         <div style="margin: 0 auto; width: 500px;height: 300px;">
11             <textarea id="content"></textarea>
12         </div>
13     </form>
14     <script src="/static/jquery-3.2.1.js"></script>
15     <script src="/static/kindeditor/kindeditor-all-min.js"></script>
16     <script>
17         $(function() {
18             KindEditor.create("#content", {
19                 width: '400px',
20                 height: '200px',
21                 extraFileUploadParams:{'csrfmiddlewaretoken':"{{ csrf_token }}"},
22                 uploadJson:'/upload_img/',
23                 fileManagerJson: '/upload_file_manage/',
24                 allowImageUpload: true,
25                 allowFileManager:true
26             })
27         })
28     </script>
29 </body>
30 </html>
 1 def upload_img(request):
 2     f = request.FILES.get('imgFile')
 3     import os
 4     path = os.path.join("static/images", f.name)
 5     with open(path, 'wb') as file_obj:
 6         for chunck in f.chunks():
 7             file_obj.write(chunck)
 8     import json
 9     dic = {
10         'error': 0,
11         'url': '/' + path,
12         'message': '錯誤了...'
13     }
14     return HttpResponse(json.dumps(dic))
15
16 def upload_file_manage(request):
17     import os,time,json
18     dic = {}
19     root_path = 'C:/Users/Administrator/Desktop/DownTimeAnalysis/static/'
20     static_root_path = '/static/'
21     request_path = request.GET.get('path')
22     if request_path:
23         abs_current_dir_path = os.path.join(root_path, request_path)
24         move_up_dir_path = os.path.dirname(request_path.rstrip('/'))
25         dic['moveup_dir_path'] = move_up_dir_path + '/' if move_up_dir_path else move_up_dir_path
26
27     else:
28         abs_current_dir_path = root_path
29         dic['moveup_dir_path'] = ''
30
31     dic['current_dir_path'] = request_path
32     dic['current_url'] = os.path.join(static_root_path, request_path)
33
34     file_list = []
35     for item in os.listdir(abs_current_dir_path):
36         abs_item_path = os.path.join(abs_current_dir_path, item)
37         a, exts = os.path.splitext(item)
38         is_dir = os.path.isdir(abs_item_path)
39         if is_dir:
40             temp = {
41                 'is_dir': True,
42                 'has_file': True,
43                 'filesize': 0,
44                 'dir_path': '',
45                 'is_photo': False,
46                 'filetype': '',
47                 'filename': item,
48                 'datetime': time.strftime('%Y-%m-%d %H:%M:%S', time.gmtime(os.path.getctime(abs_item_path)))
49             }
50         else:
51             temp = {
52                 'is_dir': False,
53                 'has_file': False,
54                 'filesize': os.stat(abs_item_path).st_size,
55                 'dir_path': '',
56                 'is_photo': True if exts.lower() in ['.jpg', '.png', '.jpeg'] else False,
57                 'filetype': exts.lower().strip('.'),
58                 'filename': item,
59                 'datetime': time.strftime('%Y-%m-%d %H:%M:%S', time.gmtime(os.path.getctime(abs_item_path)))
60             }
61
62         file_list.append(temp)
63     dic['file_list'] = file_list
64     return HttpResponse(json.dumps(dic))
路由系統
url(r'^kind/$', views.kind),url(r'^upload_img/', views.upload_img), # 前面有一個kind,視圖函數可以獲取參數dir來區分是文件還是其他。url(r'^upload_file_manage/', views.upload_file_manage),

?
?
6、XSS過濾特殊標簽
處理依賴
pip3 install beautifulsoup4
 1 #!/usr/bin/env python
 2 # -*- coding:utf-8 -*-
 3 from bs4 import BeautifulSoup
 4
 5
 6 class XSSFilter(object):
 7     __instance = None
 8
 9     def __init__(self):
10         # XSS白名單
11         self.valid_tags = {
12             "font": ['color', 'size', 'face', 'style'],
13             'b': [],
14             'div': [],
15             "span": [],
16             "table": [
17                 'border', 'cellspacing', 'cellpadding'
18             ],
19             'th': [
20                 'colspan', 'rowspan'
21             ],
22             'td': [
23                 'colspan', 'rowspan'
24             ],
25             "a": ['href', 'target', 'name'],
26             "img": ['src', 'alt', 'title'],
27             'p': [
28                 'align'
29             ],
30             "pre": ['class'],
31             "hr": ['class'],
32             'strong': []
33         }
34
35     @classmethod
36     def instance(cls):
37         if not cls.__instance:
38             obj = cls()
39             cls.__instance = obj
40         return cls.__instance
41
42     def process(self, content):
43         soup = BeautifulSoup(content, 'lxml')
44         # 遍歷所有HTML標簽
45         for tag in soup.find_all(recursive=True):
46             # 判斷標簽名是否在白名單中
47             if tag.name not in self.valid_tags:
48                 tag.hidden = True
49                 if tag.name not in ['html', 'body']:
50                     tag.hidden = True
51                     tag.clear()
52                 continue
53             # 當前標簽的所有屬性白名單
54             attr_rules = self.valid_tags[tag.name]
55             keys = list(tag.attrs.keys())
56             for key in keys:
57                 if key not in attr_rules:
58                     del tag[key]
59
60         return soup.renderContents()
61
62
63 if __name__ == '__main__':
64     html = """<p class="title">
65                         <b>The Dormouse's story</b>
66                     </p>
67                     <p class="story">
68                         <div name='root'>
69                             Once upon a time there were three little sisters; and their names were
70                             <a href="http://example.com/elsie" class="sister c1" style='color:red;background-color:green;' id="link1"><!-- Elsie --></a>
71                             <a href="http://example.com/lacie" class="sister" id="link2">Lacie</a> and
72                             <a href="http://example.com/tillie" class="sister" id="link3">Tilffffffffffffflie</a>;
73                             and they lived at the bottom of a well.
74                             <script>alert(123)</script>
75                         </div>
76                     </p>
77                     <p class="story">...</p>"""
78
79     v = XSSFilter.instance().process(html)
80     print(v)
 1 #!/usr/bin/env python
 2 # -*- coding:utf-8 -*-
 3 from bs4 import BeautifulSoup
 4
 5
 6 class XSSFilter(object):
 7     __instance = None
 8
 9     def __init__(self):
10         # XSS白名單
11         self.valid_tags = {
12             "font": ['color', 'size', 'face', 'style'],
13             'b': [],
14             'div': [],
15             "span": [],
16             "table": [
17                 'border', 'cellspacing', 'cellpadding'
18             ],
19             'th': [
20                 'colspan', 'rowspan'
21             ],
22             'td': [
23                 'colspan', 'rowspan'
24             ],
25             "a": ['href', 'target', 'name'],
26             "img": ['src', 'alt', 'title'],
27             'p': [
28                 'align'
29             ],
30             "pre": ['class'],
31             "hr": ['class'],
32             'strong': []
33         }
34
35     def __new__(cls, *args, **kwargs):
36         """
37         單例模式
38         :param cls:
39         :param args:
40         :param kwargs:
41         :return:
42         """
43         if not cls.__instance:
44             obj = object.__new__(cls, *args, **kwargs)
45             cls.__instance = obj
46         return cls.__instance
47
48     def process(self, content):
49         soup = BeautifulSoup(content, 'lxml')
50         # 遍歷所有HTML標簽
51         for tag in soup.find_all(recursive=True):
52             # 判斷標簽名是否在白名單中
53             if tag.name not in self.valid_tags:
54                 tag.hidden = True
55                 if tag.name not in ['html', 'body']:
56                     tag.hidden = True
57                     tag.clear()
58                 continue
59             # 當前標簽的所有屬性白名單
60             attr_rules = self.valid_tags[tag.name]
61             keys = list(tag.attrs.keys())
62             for key in keys:
63                 if key not in attr_rules:
64                     del tag[key]
65
66         return soup.renderContents()
67
68
69 if __name__ == '__main__':
70     html = """<p class="title">
71                         <b>The Dormouse's story</b>
72                     </p>
73                     <p class="story">
74                         <div name='root'>
75                             Once upon a time there were three little sisters; and their names were
76                             <a href="http://example.com/elsie" class="sister c1" style='color:red;background-color:green;' id="link1"><!-- Elsie --></a>
77                             <a href="http://example.com/lacie" class="sister" id="link2">Lacie</a> and
78                             <a href="http://example.com/tillie" class="sister" id="link3">Tilffffffffffffflie</a>;
79                             and they lived at the bottom of a well.
80                             <script>alert(123)</script>
81                         </div>
82                     </p>
83                     <p class="story">...</p>"""
84
85     obj = XSSFilter()
86     v = obj.process(html)
87     print(v)
7、保存
直接form提交,視圖函數接收對應的textarea的name就好了。
1 def upload_kind(request):
2     print(request.POST.get('content'))
3     return HttpResponse('ok')

?
?
組合搜索
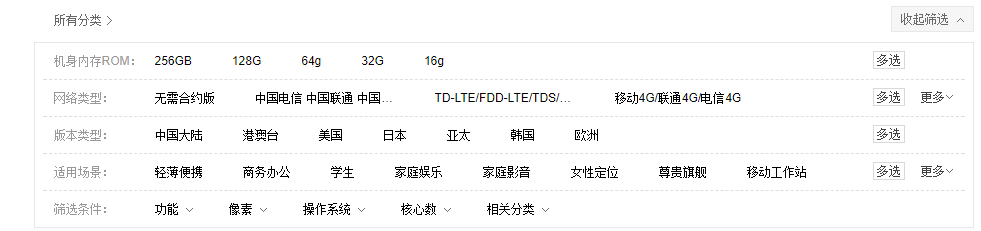
大家一定對上面這張圖不陌生,這就是一個很經典的組合搜索。
下面我們來做一個簡單的搜索。
 1 class ArticleType(models.Model):
 2     caption = models.CharField(max_length=32)
 3
 4
 5 class Category(models.Model):
 6     name = models.CharField(max_length=32)
 7
 8
 9 class Article(models.Model):
10     title = models.CharField(max_length=32)
11     content = models.CharField(max_length=255)
12     category = models.ForeignKey(to='Category')
13     article_type = models.ForeignKey(to='ArticleType')
HTML1 def article(request, *args, **kwargs): 2 result = models.Article.objects.all() 3 return render(request, 'article.html', {'result':result})
去數據庫補充點數據,然后就可以運行了。
先把所有的選擇項列出來。
 1 <h1>過濾條件</h1>
 2 <div class="condition-div">
 3     <div><a>全部</a>
 4     {% for row in article_type %}#}
 5     <a>{{ row.caption }}</a>
 6     {% endfor %}#}
 7     </div>
 8     <div><a>全部</a>
 9     {% for row in category%}#}
10     <a>{{ row.name}}</a>
11     {% endfor %}#}
12     </div>
13 </div>
 1 def article(request, *args, **kwargs):
 2     article_type_list = models.ArticleType.objects.all()
 3     category = models.Category.objects.all()
 4     result = models.Article.objects.all()
 5     return render(
 6         request,
 7         "article.html",
 8         {
 9             "result": result,
10             "article_type": article_type_list,
11             "category": category
12         }
13     )
這時候再來好好研究一下網頁的邏輯
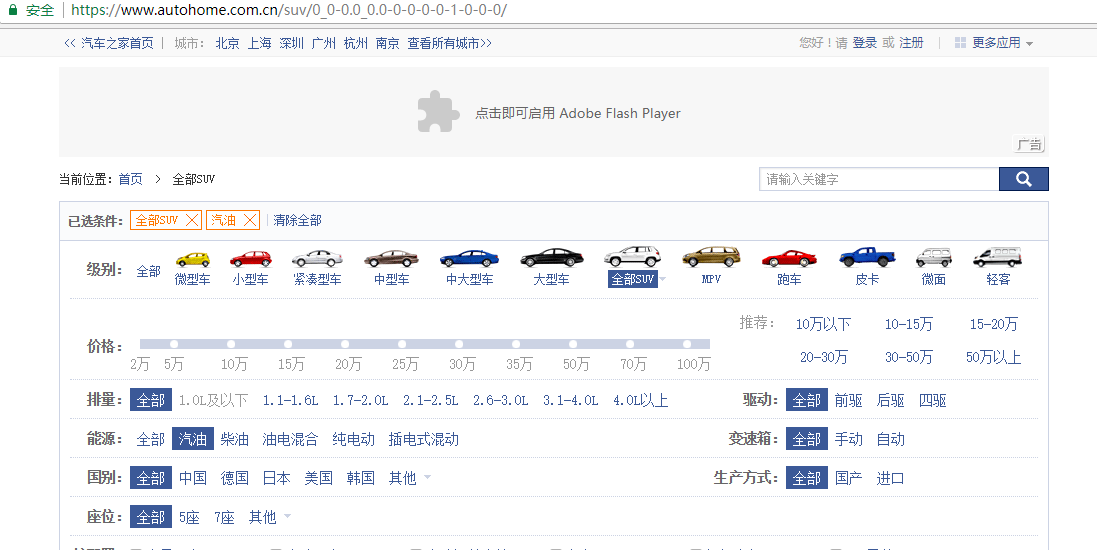
點完SUV,跳到了SUV的頁面,對SUV進行刪選,但是后面還有一串字符,-0-1-1等等,不難發現這是用正則做的路由參數,加上p可以固定不同的類型對應不同的位置參數。
url(r'^article-(?P<article_type_id>\d+)-(?P<category_id>\d+).html', views.article),但是,還有一個問題,比如選擇了能源為汽油,又要選擇座位來組合怎么做呢?
首先,需要先記錄下當前的篩選參數,當然,url已經做到了,所以我們修改下URL
url(r'^article-(?P<article_type_id>\d+)-(?P<category_id>\d+).html', views.article, name='article'),
看到name,大家一定記起來了,這里運用到了反轉,記錄動態URL。先記錄下url里面的參數,再把參數傳遞給前臺,告訴前臺,那么做能源篩選的時候,是不是可以直接生成一個url,記錄下所有其他選擇的標簽的參數,再加入自身的id。上代碼:
 1 def article(request, *args, **kwargs):
 2     # from django.urls import reverse
 3     # url = reverse('article', kwargs=kwargs)
 4     # print(url)  # 強行帶了波url的節奏,其實并不需要用到,因為url傳過來的id已經被處理成字典形式了,可以區分開的。我們拿到**kwargs
 5     condition = {}
 6     for k, v in kwargs.items():
 7         kwargs[k] = int(v)
 8         if v == '0':
 9             pass
10         else:
11             condition[k] = v  #這里的邏輯是因為全部這個標簽,數據庫的類別ID是自增的,所以設置0是最保險的。在后臺把所有為0的全部過濾掉,不然會查詢不到數據的。
12     article_type_list = models.ArticleType.objects.all()
13     category = models.Category.objects.all()
14     # result = models.Article.objects.filter(article_type_id=1, category_id=2)
15     result = models.Article.objects.filter(**condition)
16     return render(
17         request,
18         "article.html",
19         {
20             "result": result,
21             "article_type": article_type_list,
22             "category": category,
23             "arg_dict": kwargs,
24         }
25     )
 1 <!DOCTYPE html>
 2 <html lang="en">
 3 <head>
 4     <meta charset="UTF-8">
 5     <title>Title</title>
 6     <style>
 7         .condition-div a{
 8             display: inline-block;
 9             padding: 2px 3px;
10             margin: 3px 5px;
11             border: 1px solid slategrey;
12         }
13         .condition-div a.active{
14             background-color: lightslategrey;
15         }
16     </style>
17 </head>
18 <body>
19     <h1>過濾條件</h1>
20     <div class="condition-div">
21         <div>
22             {% if arg_dict.article_type_id == 0 %}
23                 <a class="active" href="/app01/article-0-{{ arg_dict.category_id }}.html">全部</a>
24             {% else %}
25                 <a href="/app01/article-0-{{ arg_dict.category_id }}.html">全部</a>
26             {% endif %}
27             {% for row in article_type %}
28                 {% if row.id == arg_dict.article_type_id %}
29                     <a class="active" href="/app01/article-{{ row.id }}-{{ arg_dict.category_id }}.html">{{ row.caption }}</a>
30                 {% else %}
31                        <a href="/app01/article-{{ row.id }}-{{ arg_dict.category_id }}.html">{{ row.caption }}</a>
32                 {% endif %}
33             {% endfor %}
34 {#            {% filter_article_type article_type arg_dict %}#}
35         </div>
36         <div>
37
38             {% if arg_dict.category_id == 0 %}
39                 <a class="active" href="/app01/article-{{ arg_dict.article_type_id }}-0.html">全部</a>
40             {% else %}
41                 <a href="/app01/article-{{ arg_dict.article_type_id }}-0.html">全部</a>
42             {% endif %}
43             {% for row in category %}
44                 {% if row.id == arg_dict.category_id %}
45                     <a class="active" href="/app01/article-{{ arg_dict.article_type_id }}-{{ row.id }}.html">{{ row.name }}</a>
46                 {% else %}
47                     <a href="/app01/article-{{ arg_dict.article_type_id }}-{{ row.id }}.html">{{ row.name }}</a>
48                 {% endif %}
49             {% endfor %}
50         </div>
51     </div>
52
53     <h1>查詢結果</h1>
54     <ul>
55         {% for row in result %}
56             <li>{{ row.od }} - {{ row.title }}</li>
57         {% endfor %}
58     </ul>
59
60 </body>
61 </html>
這時候基本上就已經做好了,前臺html里面的if else就不具體說了,主要就是加一個active class.
現在這個前臺看著太亂了,就是要強行少代碼,怎么辦?大家一定覺得很夸張。。。怎么減代碼??一臉懵逼,二臉懵逼,三臉懵逼。。。。。。
給大家體個醒,simple_tag,你一定會激動地叫起來,喔~~
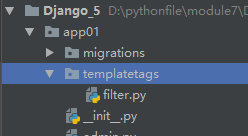
剛好復習一下simple_tag 的制作思路,首先項目里面建一個templatetags文件夾,里面新建任意一個py文件。
 1 #!/user/bin/env python
 2 # -*-coding: utf-8-*-
 3 from django import template
 4 from django.utils.safestring import mark_safe
 5 register = template.Library()
 6
 7
 8
 9 @register.simple_tag
10 def filter_all(arg_dict, k):
11     if k == 'article_type_id':
12         n1 = arg_dict['article_type_id']
13         n2 = arg_dict['category_id']
14         if  n1 == 0:
15             ret = '<a class="active" href="/app01/article-0-%s.html">全部</a>' % n2
16         else:
17             ret = '<a href="/app01/article-0-%s.html">全部</a>' % n2
18     else:
19         n1 = arg_dict['category_id']
20         n2 = arg_dict['article_type_id']
21         if  n1 == 0:
22             ret = '<a class="active" href="/app01/article-%s-0.html">全部</a>' % n2
23         else:
24             ret = '<a href="/app01/article-%s-0.html">全部</a>' % n2
25     return mark_safe(ret)
26
27 @register.simple_tag
28 def filter_article_type(article_type, arg_dict):
29     '''
30     {% for row in article_type %}
31                 {% if row.id == arg_dict.article_type_id %}
32                     <a class="active" href="/app01/article-{{ row.id }}-{{ arg_dict.category_id }}.html">{{ row.caption }}</a>
33                 {% else %}
34                        <a href="/app01/article-{{ row.id }}-{{ arg_dict.category_id }}.html">{{ row.caption }}</a>
35                 {% endif %}
36             {% endfor %}
37     :return:
38     '''
39     ret = []
40     for row in article_type:
41         if row.id == arg_dict['article_type_id']:
42             temp = '<a class="active" href="/app01/article-%s-%s.html">%s</a>' % \
43                    (row.id, arg_dict['category_id'], row.caption)
44         else:
45             temp = '<a href="/app01/article-%s-%s.html">%s</a>' % (row.id, arg_dict['category_id'], row.caption)
46         ret.append(temp)
47     return mark_safe(''.join(ret))
48
49
50 @register.simple_tag
51 def filter_category(category, arg_dict):
52     '''
53     {% for row in category %}
54         {% if row.id == arg_dict.category_id %}
55             <a class="active" href="/app01/article-{{ arg_dict.article_type_id }}-{{ row.id }}.html">{{ row.name }}</a>
56         {% else %}
57             <a href="/app01/article-{{ arg_dict.article_type_id }}-{{ row.id }}.html">{{ row.name }}</a>
58         {% endif %}
59     {% endfor %}
60     :return:
61     '''
62     ret = []
63     for row in category:
64         if row.id == arg_dict['category_id']:
65             temp = '<a class="active" href="/app01/article-%s-%s.html">%s</a>' % \
66                    (arg_dict['article_type_id'], row.id, row.name)
67         else:
68             temp = '<a href="/app01/article-%s-%s.html">%s</a>' % \
69                    (arg_dict['article_type_id'], row.id, row.name)
70         ret.append(temp)
71     return mark_safe(''.join(ret))
 1 {% load filter %}
 2 <!DOCTYPE html>
 3 <html lang="en">
 4 <head>
 5     <meta charset="UTF-8">
 6     <title>Title</title>
 7     <style>
 8         .condition-div a{
 9             display: inline-block;
10             padding: 2px 3px;
11             margin: 3px 5px;
12             border: 1px solid slategrey;
13         }
14         .condition-div a.active{
15             background-color: lightslategrey;
16         }
17     </style>
18 </head>
19 <body>
20     <h1>過濾條件</h1>
21     <div class="condition-div">
22         <div>
23             {% filter_all arg_dict 'article_type_id' %}
24             {% filter_article_type article_type arg_dict %}
25         </div>
26         <div>
27             {% filter_all arg_dict 'category_id' %}
28             {% filter_category category arg_dict %}
29         </div>
30     </div>
31
32     <h1>查詢結果</h1>
33     <ul>
34         {% for row in result %}
35             <li>{{ row.od }} - {{ row.title }}</li>
36         {% endfor %}
37     </ul>
38
39 </body>
40 </html>
這樣才看著高端嘛。。。給一個不會Django的看到這個模板,直接瘋了,什么鬼。。。我還是回家種田吧。。。
?
?
?
單例模式
單例模式其實算是對于面向對象的基礎,類的一次補充。按照之前的思路,每次對于類的方法的調用,都需要實例化,這樣就會產生多個實例化對象。
看下面這個示例
 1 class Foo:
 2     instance = None
 3     def __init__(self):
 4         pass
 5
 6     def process(self):
 7         print(123)
 8
 9 obj1 = Foo()
10 obj2 = Foo()
11 print(id(obj1), id(obj2))
輸出結果:
1892383886976 1892383887032
對于上面這種情況,根本不需要實例化多個對象來處理,某種意義上是一種浪費。。。所以我們可以簡單修改下。
 1 class Foo:
 2     instance = None
 3     def __init__(self):
 4         pass
 5
 6     @classmethod
 7     def get_instance(cls):
 8         if Foo.instance:
 9             return Foo.instance
10         else:
11             Foo.instance = Foo()
12             return Foo.instance
13
14     def process(self):
15         print(123)
16
17
18 obj1 = Foo.get_instance()
19 obj2 = Foo.get_instance()
20 print(id(obj1), id(obj2))
結果
2694976409216 2694976409216
這里判斷了已經有一個實例化對象,就返回了實例化對象內存地址給后面的實例化過程。
單例模式(Singleton Pattern)是一種常用的軟件設計模式,該模式的主要目的是確保某一個類只有一個實例存在。當你希望在整個系統中,某個類只能出現一個實例時,單例對象就能派上用場。
比如,某個服務器程序的配置信息存放在一個文件中,客戶端通過一個 AppConfig 的類來讀取配置文件的信息。如果在程序運行期間,有很多地方都需要使用配置文件的內容,也就是說,很多地方都需要創建 AppConfig 對象的實例,這就導致系統中存在多個 AppConfig 的實例對象,而這樣會嚴重浪費內存資源,尤其是在配置文件內容很多的情況下。事實上,類似 AppConfig 這樣的類,我們希望在程序運行期間只存在一個實例對象。
?
使用模塊
其實,Python 的模塊就是天然的單例模式,因為模塊在第一次導入時,會生成?.pyc?文件,當第二次導入時,就會直接加載?.pyc?文件,而不會再次執行模塊代碼。因此,我們只需把相關的函數和數據定義在一個模塊中,就可以獲得一個單例對象了。如果我們真的想要一個單例類,可以考慮這樣做:
1 # mysingleton.py
2 class My_Singleton(object):
3     def foo(self):
4         pass
5
6 my_singleton = My_Singleton()
將上面的代碼保存在文件?mysingleton.py?中,然后這樣使用:
from mysingleton import my_singletonmy_singleton.foo()
?
使用__new__
這里還是用最先引入話題的實例來講解。其實上面的那個類方法算是低級的單例模式,因為我們改變了類的實例化方法了。
 1 class Foo(object):
 2     instance = None
 3     def __init__(self):
 4         self.name = 'dandy'
 5
 6     def __new__(cls, *args, **kwargs):
 7         if not Foo.instance:
 8             Foo.instance = object.__new__(cls, *args, **kwargs)
 9         return Foo.instance
10
11     def process(self):
12         print(123)
13
14 obj1 = Foo()
15 obj2 = Foo()
16 print(obj1, obj2)
<__main__.Foo object at 0x000001F599138EB8> <__main__.Foo object at 0x000001F599138EB8>
?
?
beautifulsoup4
快速開始
 1 html_doc = """
 2 <html><head><title>The Dormouse's story</title></head>
 3 <body>
 4 <p class="title"><b>The Dormouse's story</b></p>
 5
 6 <p class="story">Once upon a time there were three little sisters; and their names were
 7 <a href="http://example.com/elsie" class="sister" id="link1">Elsie</a>,
 8 <a href="http://example.com/lacie" class="sister" id="link2">Lacie</a> and
 9 <a href="http://example.com/tillie" class="sister" id="link3">Tillie</a>;
10 and they lived at the bottom of a well.</p>
11
12 <p class="story">...</p>
13 """
14
15 from bs4 import BeautifulSoup
16 soup = BeautifulSoup(html_doc)
17
18 print(soup.prettify())
# <html>
#  <head>
#   <title>
#    The Dormouse's story
#   </title>
#  </head>
#  <body>
#   <p class="title">
#    <b>
#     The Dormouse's story
#    </b>
#   </p>
#   <p class="story">
#    Once upon a time there were three little sisters; and their names were
#    <a class="sister" href="http://example.com/elsie" id="link1">
#     Elsie
#    </a>
#    ,
#    <a class="sister" href="http://example.com/lacie" id="link2">
#     Lacie
#    </a>
#    and
#    <a class="sister" href="http://example.com/tillie" id="link2">
#     Tillie
#    </a>
#    ; and they lived at the bottom of a well.
#   </p>
#   <p class="story">
#    ...
#   </p>
#  </body>
# </html>
?
幾個簡單的瀏覽結構化數據的方法:
soup.title
# <title>The Dormouse's story</title>soup.title.name
# u'title'soup.title.string
# u'The Dormouse's story'soup.title.parent.name
# u'head'soup.p
# <p class="title"><b>The Dormouse's story</b></p>soup.p['class']
# u'title'soup.a
# <a class="sister" href="http://example.com/elsie" id="link1">Elsie</a>soup.find_all('a')
# [<a class="sister" href="http://example.com/elsie" id="link1">Elsie</a>,
#  <a class="sister" href="http://example.com/lacie" id="link2">Lacie</a>,
#  <a class="sister" href="http://example.com/tillie" id="link3">Tillie</a>]soup.find(id="link3")
# <a class="sister" href="http://example.com/tillie" id="link3">Tillie</a>
?
遍歷尋找<a>標簽的鏈接:
for link in soup.find_all('a'):print(link.get('href'))# http://example.com/elsie# http://example.com/lacie# http://example.com/tillie
獲取文檔中所有文字內容:
print(soup.get_text())# The Dormouse's story
#
# The Dormouse's story
#
# Once upon a time there were three little sisters; and their names were
# Elsie,
# Lacie and
# Tillie;
# and they lived at the bottom of a well.
#
# ...
主要解析器,優缺點:
| 解析器 | 使用方法 | 優勢 | 劣勢 |
|---|---|---|---|
| Python標準庫 | BeautifulSoup(markup,?"html.parser") |
|
|
| lxml HTML 解析器 | BeautifulSoup(markup,?"lxml") |
|
|
| lxml XML 解析器 | BeautifulSoup(markup,?["lxml",?"xml"]) BeautifulSoup(markup,?"xml") |
|
|
| html5lib | BeautifulSoup(markup,?"html5lib") |
|
|
?
推薦使用lxml作為解析器,因為效率更高. 在Python2.7.3之前的版本和Python3中3.2.2之前的版本,必須安裝lxml或html5lib, 因為那些Python版本的標準庫中內置的HTML解析方法不夠穩定.
提示: 如果一段HTML或XML文檔格式不正確的話,那么在不同的解析器中返回的結果可能是不一樣的,查看?解析器之間的區別?了解更多細節
將一段文檔傳入BeautifulSoup 的構造方法,就能得到一個文檔的對象, 可以傳入一段字符串或一個文件句柄.
from bs4 import BeautifulSoupsoup = BeautifulSoup(open("index.html"))soup = BeautifulSoup("<html>data</html>")
首先,文檔被轉換成Unicode,并且HTML的實例都被轉換成Unicode編碼
BeautifulSoup("Sacré bleu!")
<html><head></head><body>Sacré bleu!</body></html>
然后,Beautiful Soup選擇最合適的解析器來解析這段文檔,如果手動指定解析器那么Beautiful Soup會選擇指定的解析器來解析文檔
?
對象的種類
Beautiful Soup將復雜HTML文檔轉換成一個復雜的樹形結構,每個節點都是Python對象,所有對象可以歸納為4種:?Tag?,?NavigableString?,?BeautifulSoup?,?Comment?.
Tag
Tag?對象與XML或HTML原生文檔中的tag相同:
soup = BeautifulSoup('<b class="boldest">Extremely bold</b>')
tag = soup.b
type(tag)
# <class 'bs4.element.Tag'>
Name & Attributes
每個tag都有自己的名字,通過 .name 來獲取:
tag.name
# u'b'如果改變了tag的name,那將影響所有通過當前Beautiful Soup對象生成的HTML文檔:
tag.name = "blockquote"
tag
# <blockquote class="boldest">Extremely bold</blockquote>一個tag可能有很多個屬性. tag <b class="boldest"> 有一個 “class” 的屬性,值為 “boldest” . tag的屬性的操作方法與字典相同:
tag['class']
# u'boldest'也可以直接”點”取屬性, 比如: .attrs :
tag.attrs
# {u'class': u'boldest'}tag的屬性可以被添加,刪除或修改. 再說一次, tag的屬性操作方法與字典一樣
tag['class'] = 'verybold'
tag['id'] = 1
tag
# <blockquote class="verybold" id="1">Extremely bold</blockquote>del tag['class']
del tag['id']
tag
# <blockquote>Extremely bold</blockquote>tag['class']
# KeyError: 'class'
print(tag.get('class'))
# None
?
多值屬性
HTML 4定義了一系列可以包含多個值的屬性.在HTML5中移除了一些,卻增加更多.最常見的多值的屬性是 class (一個tag可以有多個CSS的class). 還有一些屬性?rel?,?rev?,?accept-charset?,?headers?,?accesskey?. 在Beautiful Soup中多值屬性的返回類型是list:
css_soup = BeautifulSoup('<p class="body strikeout"></p>')
css_soup.p['class']
# ["body", "strikeout"]css_soup = BeautifulSoup('<p class="body"></p>')
css_soup.p['class']
# ["body"]
如果某個屬性看起來好像有多個值,但在任何版本的HTML定義中都沒有被定義為多值屬性,那么Beautiful Soup會將這個屬性作為字符串返回
id_soup = BeautifulSoup('<p id="my id"></p>')
id_soup.p['id']
# 'my id'
將tag轉換成字符串時,多值屬性會合并為一個值
rel_soup = BeautifulSoup('<p>Back to the <a rel="index">homepage</a></p>')
rel_soup.a['rel']
# ['index']
rel_soup.a['rel'] = ['index', 'contents']
print(rel_soup.p)
# <p>Back to the <a rel="index contents">homepage</a></p>
如果轉換的文檔是XML格式,那么tag中不包含多值屬性
xml_soup = BeautifulSoup('<p class="body strikeout"></p>', 'xml')
xml_soup.p['class']
# u'body strikeout'
遍歷字符串
字符串常被包含在tag內.Beautiful Soup用?NavigableString?類來包裝tag中的字符串:
tag.string
# u'Extremely bold'
type(tag.string)
# <class 'bs4.element.NavigableString'>
一個?NavigableString?字符串與Python中的Unicode字符串相同,并且還支持包含在?遍歷文檔樹?和?搜索文檔樹?中的一些特性. 通過?unicode()?方法可以直接將?NavigableString?對象轉換成Unicode字符串:
unicode_string = unicode(tag.string)
unicode_string
# u'Extremely bold'
type(unicode_string)
# <type 'unicode'>
tag中包含的字符串不能編輯,但是可以被替換成其它的字符串,用?replace_with()?方法:
tag.string.replace_with("No longer bold")
tag
# <blockquote>No longer bold</blockquote>
NavigableString?對象支持?遍歷文檔樹?和?搜索文檔樹?中定義的大部分屬性, 并非全部.尤其是,一個字符串不能包含其它內容(tag能夠包含字符串或是其它tag),字符串不支持?.contents?或?.string?屬性或?find()?方法.
如果想在Beautiful Soup之外使用?NavigableString?對象,需要調用?unicode()?方法,將該對象轉換成普通的Unicode字符串,否則就算Beautiful Soup已方法已經執行結束,該對象的輸出也會帶有對象的引用地址.這樣會浪費內存.
更多請參考:https://www.crummy.com/software/BeautifulSoup/bs4/doc/index.zh.html
 1 result = '''<p>千萬人<strong>較</strong>去年我</p>
 2 <p>請問千萬人<span style="color: #ff6600;">群若群感通片沒人</span>呢 而非狗肉<span style="font-family: 'Microsoft YaHei';">人GV奇</span>偶偶陪<span style="font-family: 仿宋;">你圍毆</span>既然v</p>
 3 <p>我打完分配人</p>
 4 <script>alert(123)</script>'''
 5
 6 from bs4 import BeautifulSoup
 7 soup = BeautifulSoup(result, 'html.parser')
 8 tag = soup.find('script')  # 查詢script標簽
 9 tag.clear()  # 清除掉標簽,2個script:<script></script>
10 tag.hidden = True  # 隱藏標簽中的內容
11
12 span = soup.find('span')  # 找到span標簽
13 del span.attrs['style']  # 刪除所有屬性
14 content = soup.decode()  #
15 print(content)
16
17 ########
18 <p>千萬人<strong>較</strong>去年我</p>
19 <p>請問千萬人<span>群若群感通片沒人</span>呢 而非狗肉<span style="font-family: 'Microsoft YaHei';">人GV奇</span>偶偶陪<span style="font-family: 仿宋;">你圍毆</span>既然v</p>
20 <p>我打完分配人</p>
對于標簽的白名單
 1 result = '''<p>千萬人<strong>較</strong>去年我</p>
 2 <p>請問千萬人<span style="color: #ff6600;">群若群感通片沒人</span>呢 而非狗肉<span style="font-family: 'Microsoft YaHei';">人GV奇</span>偶偶陪<span style="font-family: 仿宋;">你圍毆</span>既然v</p>
 3 <p>我打完分配人</p>
 4 <script>alert(123)</script>'''
 5
 6 from bs4 import BeautifulSoup
 7 soup = BeautifulSoup(result, 'html.parser')
 8 tags = ['p', 'span']
 9
10 for tag in soup.find_all():
11     if tag.name in tags:
12         pass
13     else:
14         tag.hidden = True
15         tag.clear()
16
17 content = soup.decode()
18 print(content)
19 ##################
20 <p>千萬人去年我</p>
21 <p>請問千萬人<span style="color: #ff6600;">群若群感通片沒人</span>呢 而非狗肉<span style="font-family: 'Microsoft YaHei';">人GV奇</span>偶偶陪<span style="font-family: 仿宋;">你圍毆</span>既然v</p>
22 <p>我打完分配人</p>
 1 result = '''<p class='c1' id='p1'>千萬人<strong>較</strong>去年我</p>
 2 <p>請問千萬人<span id='span11' class='span-class' style="color: #ff6600;">群若群感通片沒人</span>呢 而非狗肉<span style="font-family: 'Microsoft YaHei';">人GV奇</span>偶偶陪<span style="font-family: 仿宋;">你圍毆</span>既然v</p>
 3 <p>我打完分配人</p>
 4 <script>alert(123)</script>'''
 5
 6 from bs4 import BeautifulSoup
 7 soup = BeautifulSoup(result, 'html.parser')
 8 tags = {
 9     'p': ['class'],
10     'span': ['id',]
11 }
12
13 for tag in soup.find_all():
14     if tag.name in tags:
15         pass
16     else:
17         tag.hidden = True
18         tag.clear()
19         continue
20     input_attrs = tag.attrs
21     valid_attrs = tags[tag.name]
22     for key in list(input_attrs.keys()):
23         if key in valid_attrs:
24             pass
25         else:
26             del tag.attrs[key]
27 content = soup.decode()
28 print(content)
?
說明)


)


實現萬年歷)

)
 tree shaking與不同mode)

代碼分割 Code Splitting)
)

