安裝Nexus
官網下載
https://www.sonatype.com/products/sonatype-nexus-oss-download
進入官網下載,最新下載方式需要輸入個人信息才能下載了
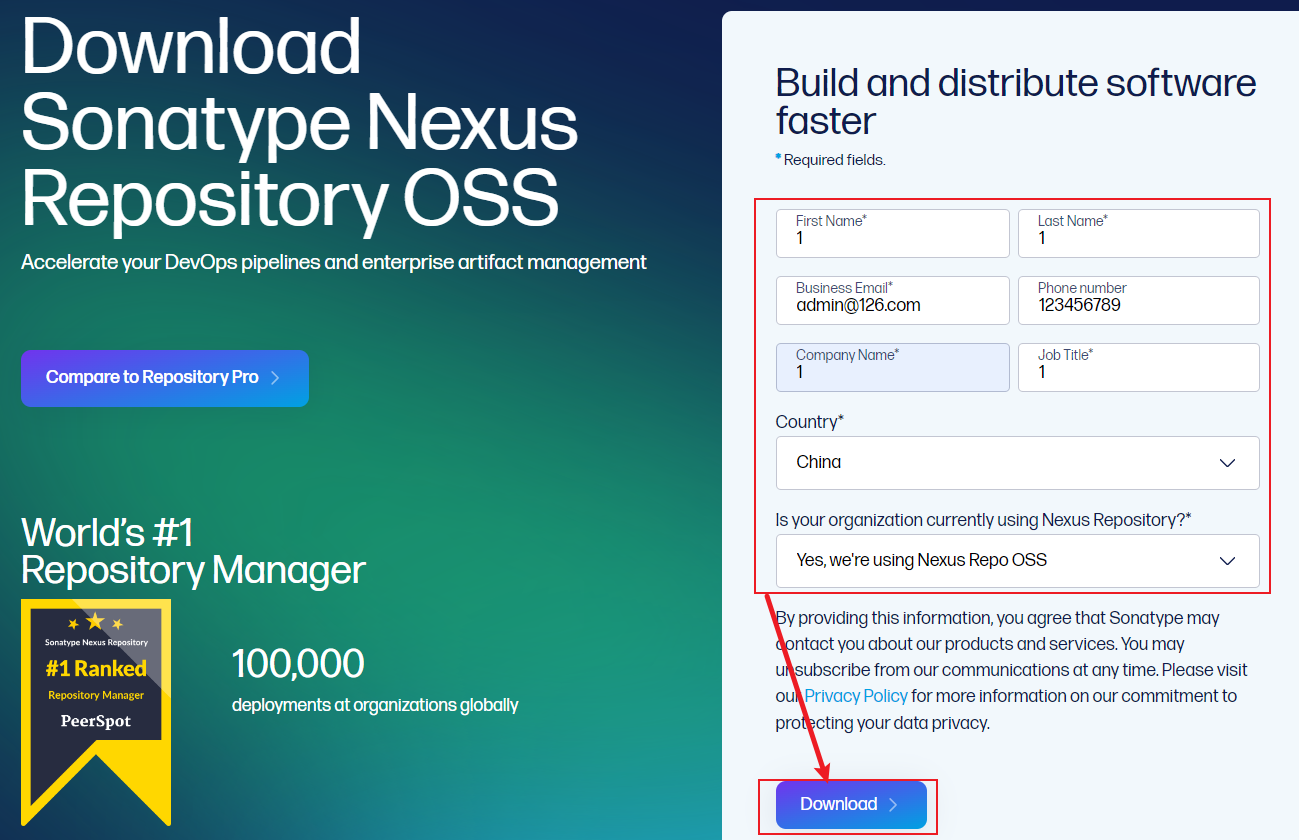
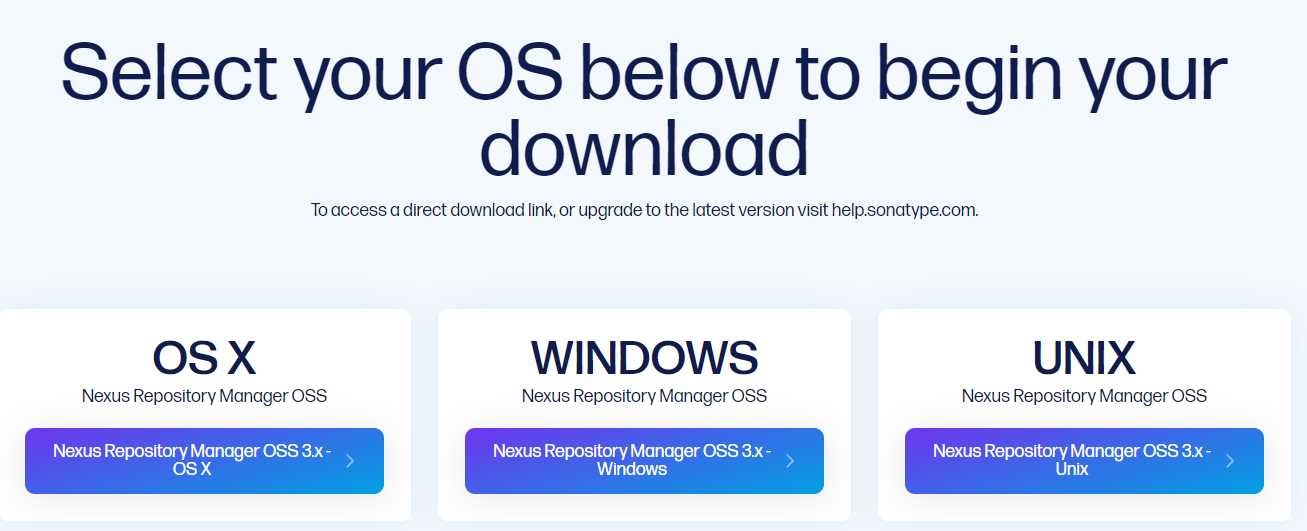
選擇對應的系統進行下載
- Windows 推薦也下載 UNIX 版本(Windows 版本配置比較難改)
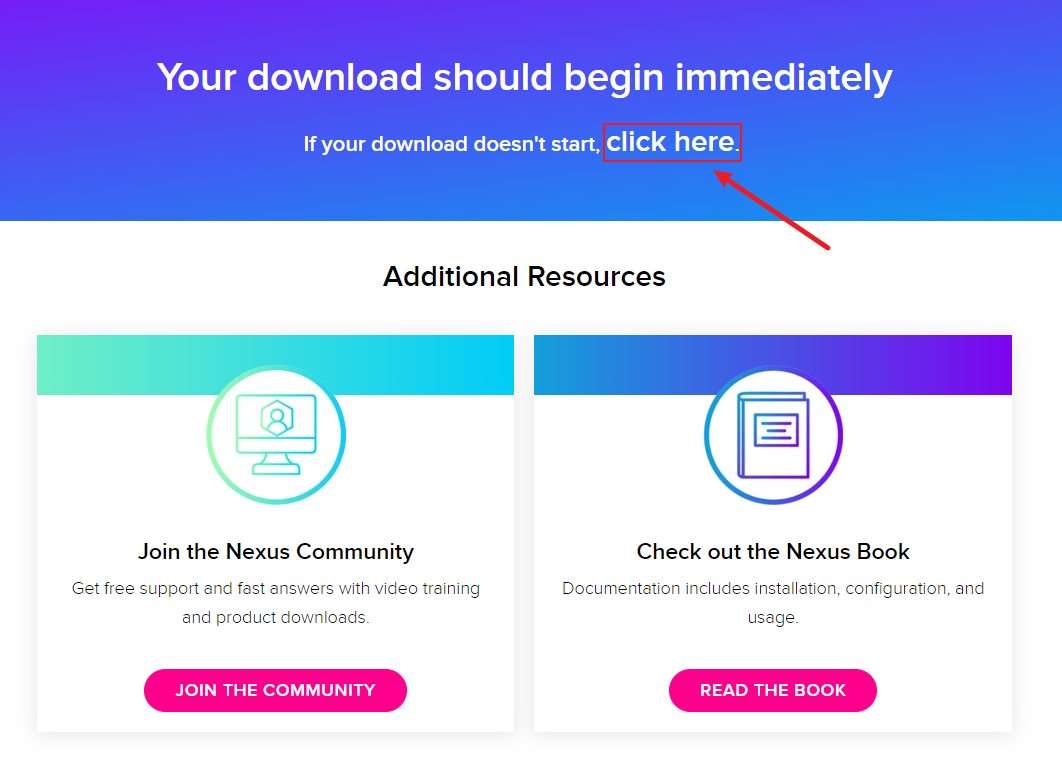
如果沒有下載,點一下 click here 重新下載,下載還是很快的
Windows安裝
linux 安裝步驟與啟動方式跟 windows 是一樣的,解壓后如下圖
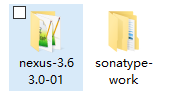
$ tar -zxvf nexus-3.63.0-01-unix.tar.gz
$ cd nexus-3.63.0-01/bin
$ ./nexus /run
注意:nexus 必須使用 Java1.8,我現在用的是 Java17,提示信息讓咱們配置 INSTALL4J_JAVA_HOME

$ vim nexus
INSTALL4J_JAVA_HOME_OVERRIDE=/d/Develop/Java/jdk1.8.0_161
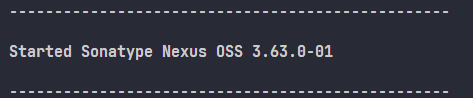
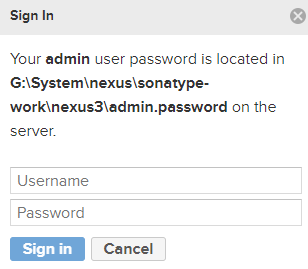
顯示這個之后訪問:http://localhost:8081/,點擊 Sign In
- 賬號為 admin,密碼粘貼
sonatype-work/nexus3/admin.password里面的密碼,登錄成功會提示你改密碼
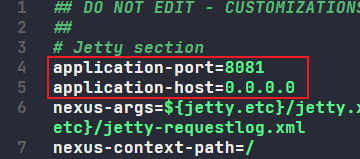
如果想更改啟動端口,可以修改 etc/nexus-default.properties 文件
docker安裝nexus
nexus3 安裝參考:
- docker-nexus3 GitHub
鏡像說明:
sonatype/nexus是 nexus2 版本sonatype/nexus3是 nexus3 版本
$ docker pull sonatype/nexus3
$ docker run -d -p 8081:8081 --name nexus sonatype/nexus# 查看 nexus 日志
$ docker logs -f nexus
注意:已經有的容器,直接 docker start 即可
-d:在 docker 守護線程運行這個鏡像-p:綁定端口,前面的端口表示宿主機端口,后面的表示容器端口--restart=always:指定 docker 重啟啟動容器,當服務器或者 docker 進程重啟之后,nexus 容器會在 docker 守護進程啟動后由 docker 守護進程啟動容器--name <container-name>:這里是指定了容器建立后的名稱sonatype/nexus3是鏡像名
查看是否啟動成功
docker ps
報內存不夠的話輸入這個
Memory: 4k page, physical 1006968k(877280k free), swap 0k(0k free)$ docker run -d -p 8081:8081 --name nexus3 --restart=always --platform linux/amd64 -e INSTALL4J_ADD_VM_PARAMS="-Xms256M -Xmx256M -XX:MaxDirectMemorySize=2048M" sonatype/nexus3
用戶權限不夠的話輸入如下內容,之后即可啟動成功
WARNING: ************************************************************
WARNING: Detected execution as "root" user.  This is NOT recommended!
WARNING: ************************************************************
$ cd /opt/sonatype/nexus/bin
$ vi nexus.rc
run_as_user=root
$ vi /etc/profile
export RUN_AS_USER=root
$ vi nexus
run_as_root=true -> run_as_root=false
創建倉庫
倉庫管理
Nexus 倉庫類型分為如下幾種
- hosted:本地倉庫,通常我們會部署自己的構件到這一類型的倉庫,如公司的第二方庫
- proxy:代理倉庫,它們被用來代理遠程的公共倉庫,如 Maven 中央倉庫
- group:倉庫組,用來合并多個 hosted/proxy 倉庫,當你的項目希望在多個 repository 使用資源時就不需要多次引用了,只需要引用一個 group 即可
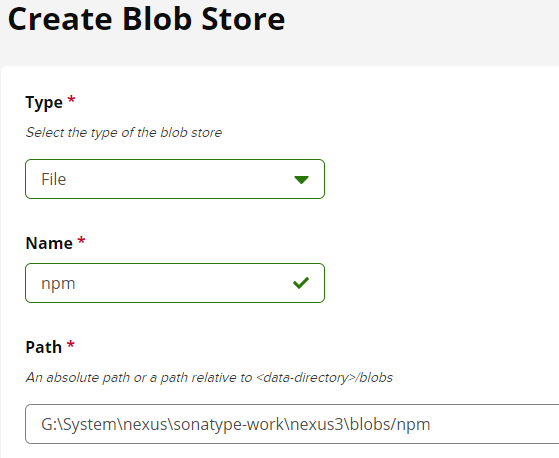
在創建 repository 之前,最好再創建 Blob Stores 便于統一管理,默認的是 default
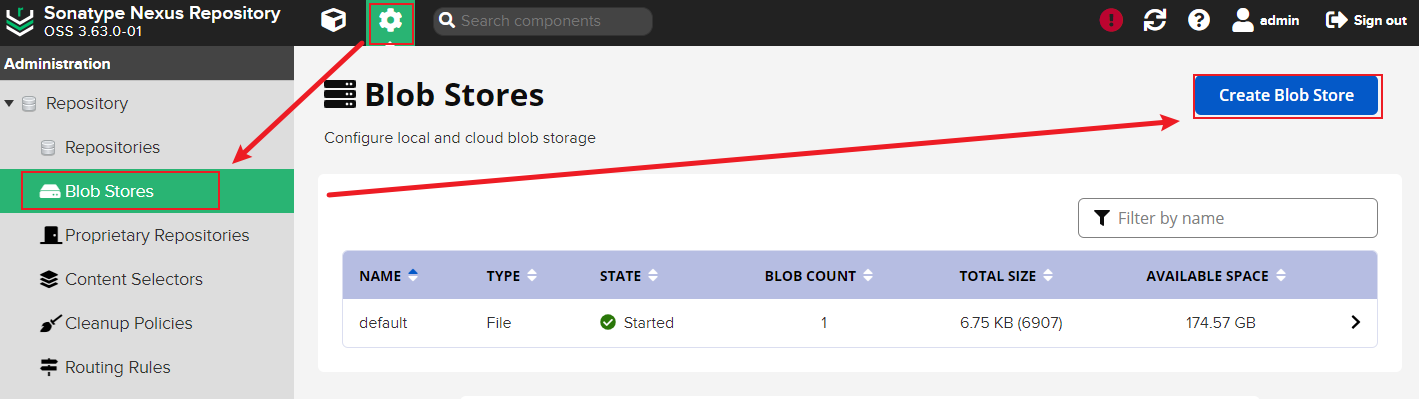
選擇 File,名字填寫為 npm
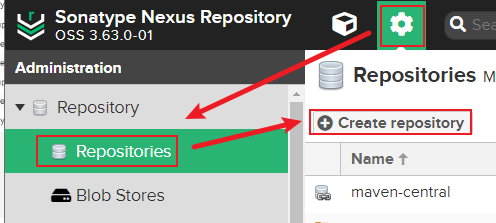
創建倉庫
之后即可創建倉庫
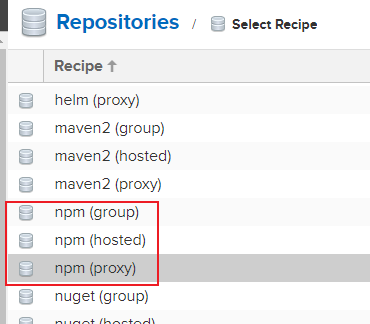
一會兒會創建 npm(group)、npm(hosted)、npm(proxy) 這幾個倉庫
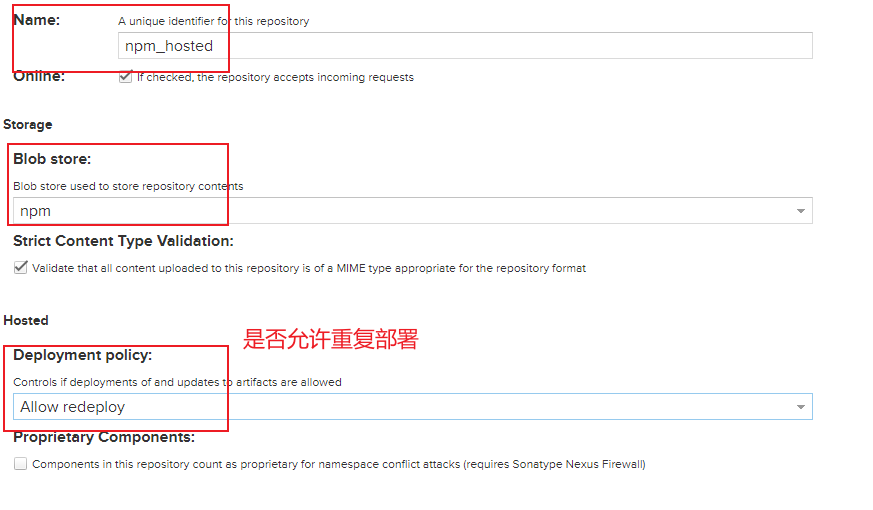
創建npm(hosted)
hosted 宿主倉庫:主要用于部署無法從公共倉庫獲取的構件以及自己或第三方的項目構件
- 如果是內網情況(無法訪問互聯網)即可當 npm 總倉庫
- 是否允許重復推送可以根據自己項目情況來考慮
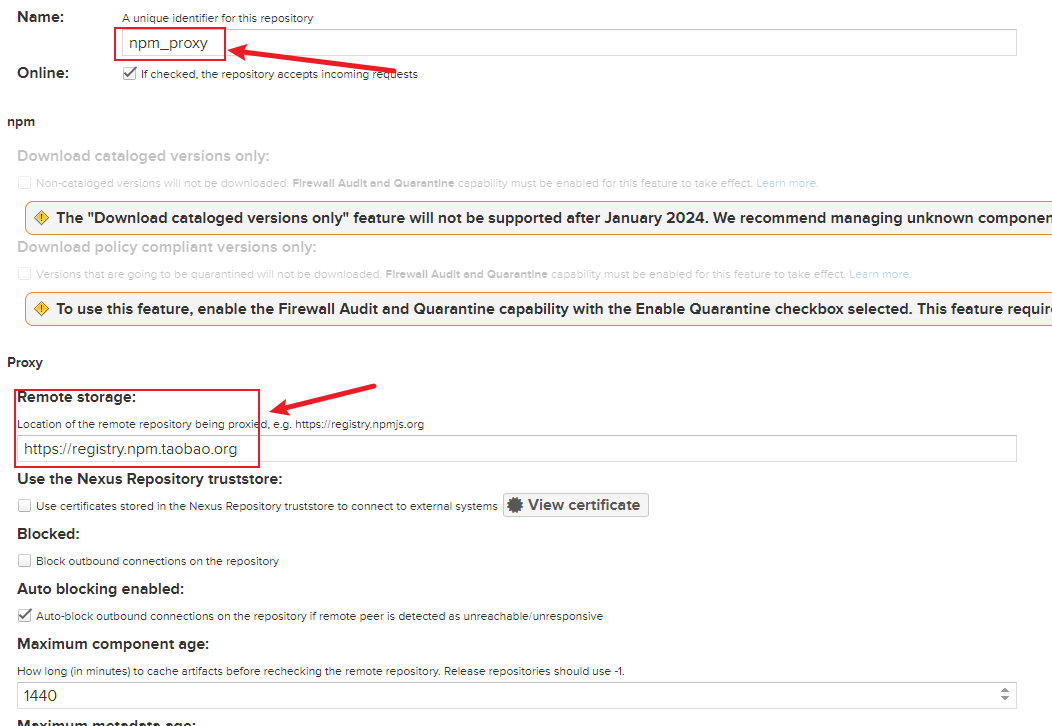
創建npm(proxy)
proxy 代理倉庫:代理公共的遠程倉庫
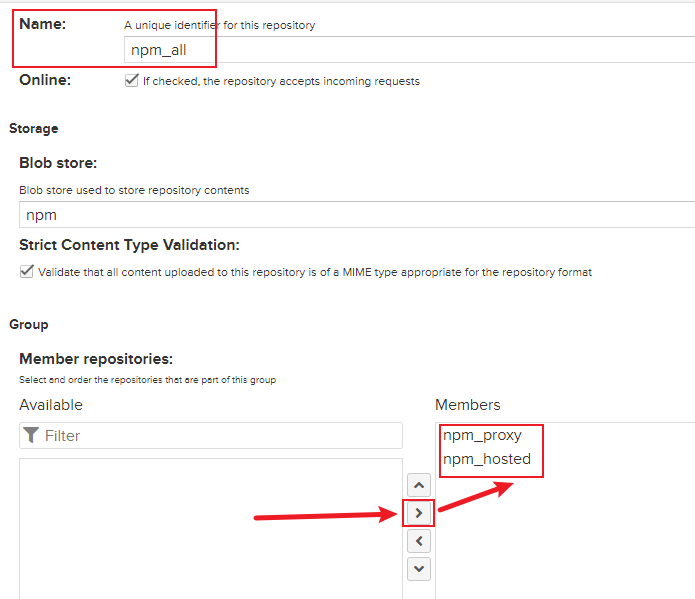
創建npm(group)
group 倉庫組:通過倉庫組統一管理多個倉庫,這樣我們在項目中直接請求倉庫組即可請求到倉庫組管理的多個倉庫
- hosted 和 proxy 這兩個都弄好了之后,在通過 group 聚合提供統一的訪問地址
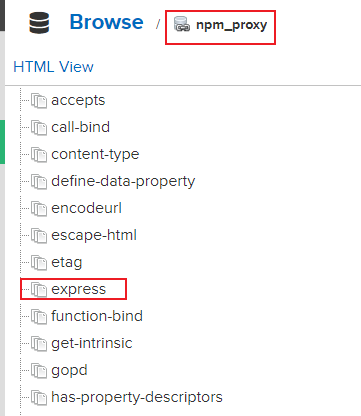
測試
指定 npm 的 registry 為自己的 group 地址,安裝 express 依賴

proxy 地址由于沒有對應依賴會去鏡像源地址下載,之后 proxy 倉庫就有對應依賴了
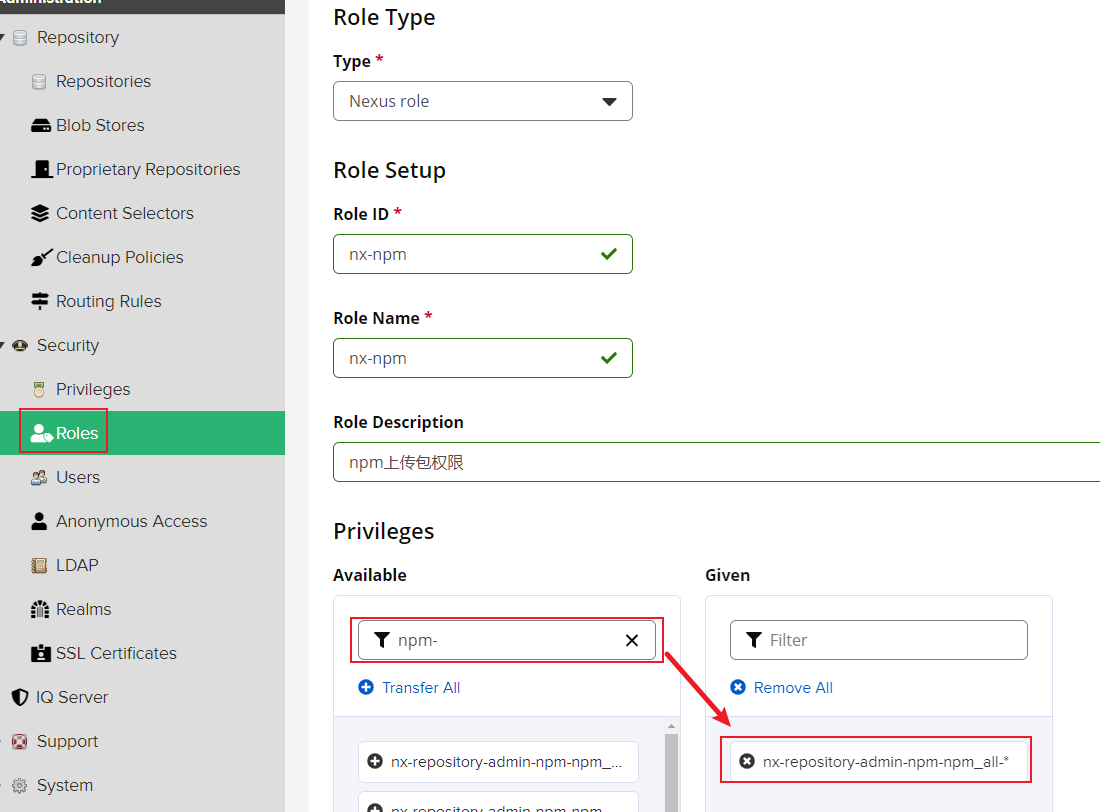
創建推送包角色
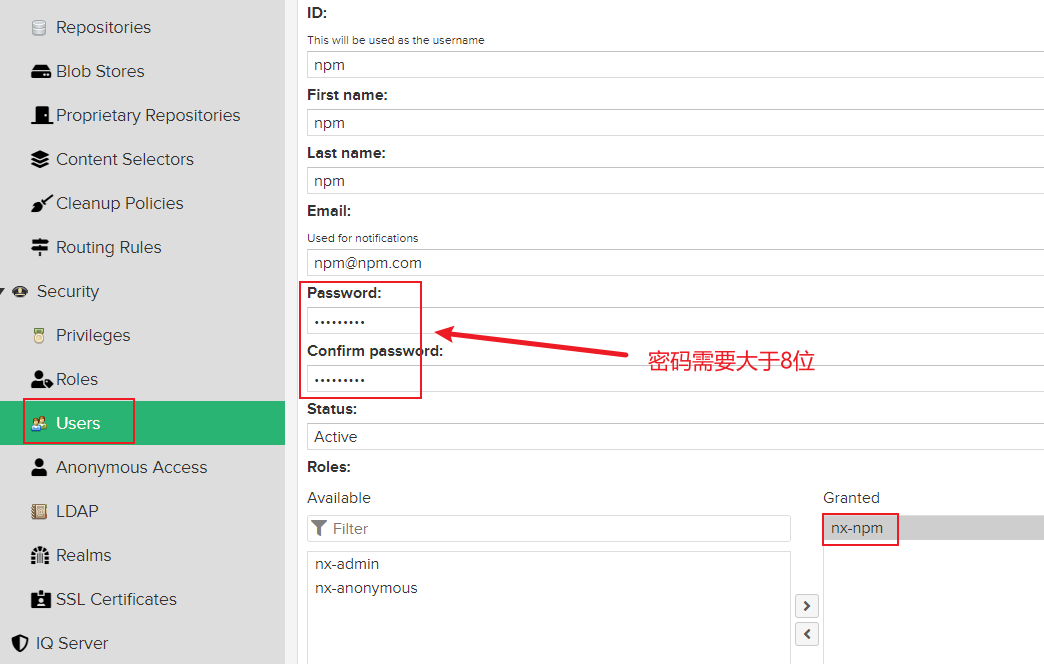
添加角色用戶
點擊 Roles,添加角色權限,搜索 npm- 之后點擊 Transfer All 把所有權限都附上即可
- 可以根據對應需求賦對應權限,比如只讓上傳不讓修改只賦 edit 即可
之后創建對應用戶,并設置對應權限
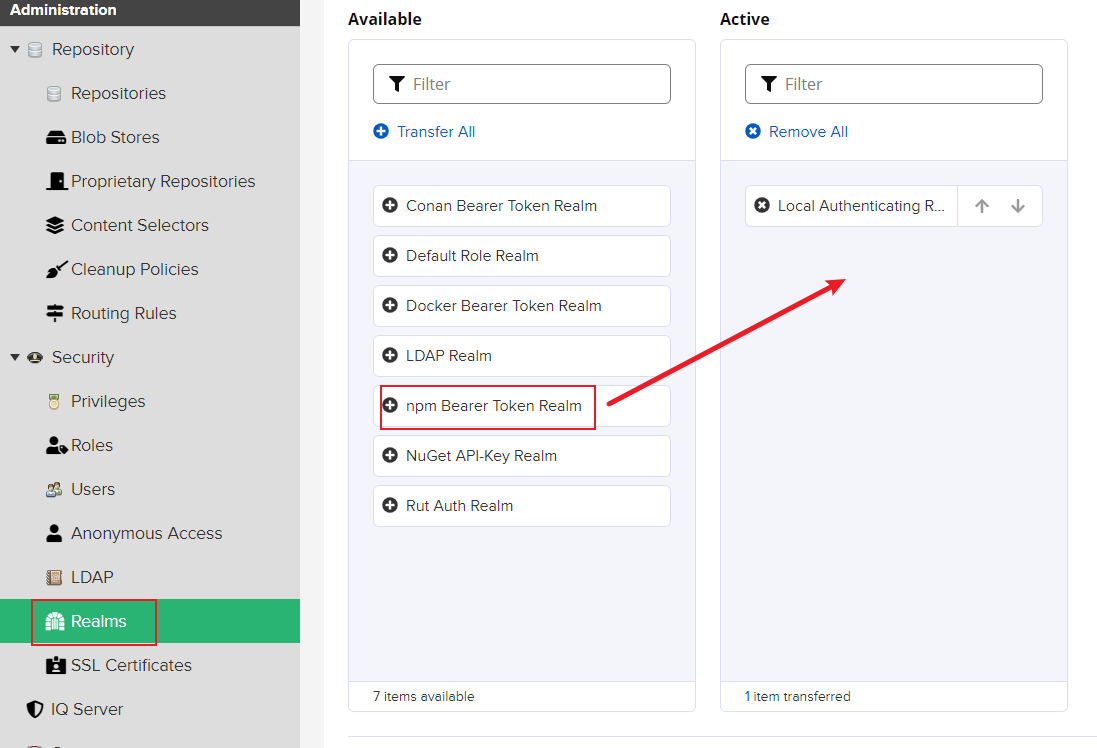
點擊 Realms,添加 npm Bearer Token Realm,不然 npm publish 會報 401
添加推送賬號
https://blog.sonatype.com/using-sonatype-nexus-repository-3-part-2-npm-packages
添加推送賬號,常用如下兩種方法
npm adduser
示例:使用 npm adduser 方法
$ npm adduser
Username: admin
Password: admin123
Email: (this IS public): any@email.com
推薦:加 --scope 限制作用域,加 --registry 限制倉庫地址
$ npm adduser --registry=http://localhost:8081/repository/npm_hosted/ --scope=@mynpm
npm notice Log in on http://localhost:8081/repository/npm_hosted/
Username: npm
Email: (this IS public) ll@123.com
Logged in to scope @mynpm on http://localhost:8081/repository/npm_hosted/.
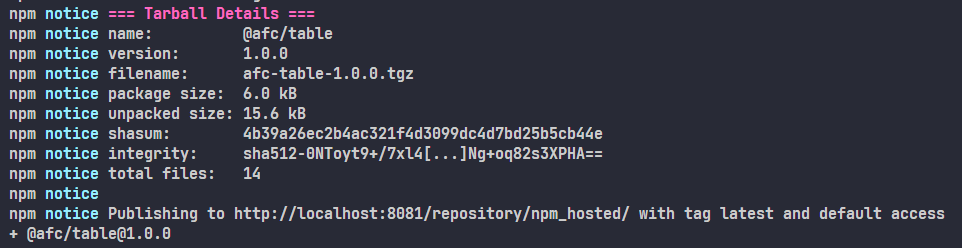
$ npm publish --scope=@mynpm
使用.npmrc
不添加推送賬號也可以使用 .npmrc,創建 .npmrc 文件,將私庫地址粘貼過來
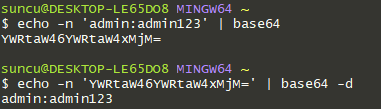
- 如果想免密登陸推送可以加上 _auth,加密規則:
user:password -> base64
registry=http://localhost:8081/repository/npm_hosted/
# 只是舉例,不推薦使用 admin 用戶
_auth=YWRtaW46YWRtaW4xMjM=
email=any@email.com
_auth 加密方式:
-
可以使用瀏覽器自帶的方法
window.btoa或window.atob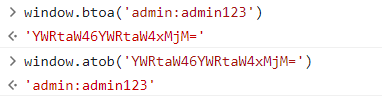
-
還可以使用 linux base64 命令
registry 也可以通過配置 package.json 來實現
{"publishConfig": {"registry": "http://localhost:8081/repository/npm_hosted/"}
}
下載依賴包
python下載
- 根據
resolved字段進行下載
# -*-coding:utf-8-*-
import json
import os
import urllib.request
from pathlib import Pathdef node_modules(file_dir):# 通過遞歸遍歷 node_modules 每個子包的 package.json 解析下載鏈接links = []for root, dirs, files in os.walk(file_dir):if 'package.json' in files:package_json_file = os.path.join(root, 'package.json')try:with open(package_json_file, 'r', encoding='UTF-8') as load_f:load_dict = json.load(load_f)if '_resolved' in load_dict.keys():links.append(load_dict['_resolved'])except Exception as e:print(package_json_file)print('Error:', e)return linksdef package_lock(package_lock_path):# 通過遞歸遍歷 package-lock.json 解析下載鏈接links = []with open(package_lock_path, 'r', encoding='UTF-8') as load_f:load_dict = json.load(load_f)search(load_dict, "resolved", links)return linksdef search(json_object, key, links):# 遍歷查找指定的keyfor k in json_object:if k == key:links.append(json_object[k])if isinstance(json_object[k], dict):search(json_object[k], key, links)if isinstance(json_object[k], list):for item in json_object[k]:if isinstance(item, dict):search(item, key, links)def download_file(path, store_path, flag):# 根據下載鏈接下載if not Path(store_path).exists():os.makedirs(store_path, int('0755'))links = []if path.endswith("package-lock.json"):links = package_lock(path)else:links = node_modules(path)print("link resolved number:" + str(len(links)))for url in links:try:filename = url.split('/')[-1]index = filename.find('?')# 去掉 ? 參數和 # 哈希if index > 0:filename = filename[:index]index = filename.find('#')if index > 0:filename = filename[:index]filepath = os.path.join(store_path, filename)if not Path(filepath).exists():print("download:" + url)# 以防以后對請求頭做限制opener = urllib.request.build_opener()opener.addheaders = [('User-agent', 'Mozilla/5.0')]urllib.request.install_opener(opener)if flag:new_path = os.path.join(os.getcwd(), 'nodes')if not Path(new_path).exists():os.makedirs(new_path, int('0755'))filepath = os.path.join(new_path, filename)urllib.request.urlretrieve(url, filepath)# else:# print("file already exists:", filename)except Exception as e:print('Error Url:' + url)print('Error:', e)if __name__ == '__main__':# 通過 xxx 文件解析對應依賴樹download_link = os.path.join(os.getcwd(), 'package-lock.json')# 下載文件存放的路徑download_path = os.path.join(os.getcwd(), 'node')# 下載文件是否存放到一個新的路徑里,默認存放到 nodes 里download_flag = Truedownload_file(download_link, download_path, download_flag)print("ok")
node下載
- 使用
npm pack命令,下載.tgz文件
const shell = require('shelljs')
const fs = require('fs')function download(fileNames = []) {shell.cd('download')let count = 0fileNames.forEach(fileName => {const fileExec = shell.exec(`npm pack ${fileName}`, { async: true, silent: true })fileExec.stdout.on('data', () => {++countshell.echo(`>>> ${fileName} 下載完成...`)if (count === fileNames.length) {shell.cd('..')shell.exit(0)}}).on('err', () => {++countshell.echo(`>>> ${fileName} 下載失敗!!!...`)if (count === fileNames.length) {shell.cd('..')shell.exit(0)}})})
}function downloadByPackageJsonLockFile(depLockJsonFile = {}) {const nMap = new Map()const NotMap = new Map()// 總的nodes文件夾,方便下次避免重復下載const downloadedDir = './nodes'const downloadedArr = fs.readdirSync(downloadedDir)function getAllList(depJson) {if (depJson) {Object.keys(depJson).forEach(dep => {const depWithVersion = `${dep}@${depJson[dep].version}`let tgzFormat = `${dep}-${depJson[dep].version}.tgz`// eg: @babel/code-frame-7.14.5.tgz -> babel-code-frame-7.14.5.tgztgzFormat = dep.startsWith('@')? tgzFormat.split('/').join('-').slice(1): tgzFormatif (!nMap.has(depWithVersion) && !downloadedArr.includes(tgzFormat)) {nMap.set(depWithVersion, true)getAllList(depJson[dep].dependencies)} else if (downloadedArr.includes(tgzFormat) && !NotMap.has(tgzFormat)) {NotMap.set(tgzFormat, true)}})}}getAllList(depLockJsonFile.dependencies)shell.echo(`一共${Array.from(NotMap.keys()).length}個依賴包已在${downloadedDir}目錄下存在,不需要重復下載:\n`)shell.echo(`>>> 無需下載列表: \n - ${Array.from(NotMap.keys()).join('\n - ')}...\n`)shell.echo(`一共${Array.from(nMap.keys()).length}個依賴包待下載\n`)shell.echo(`>>> 待下載列表: \n - ${Array.from(nMap.keys()).join('\n - ')}...`)download(Array.from(nMap.keys()))
}const pkgLock = require('./package-lock')
downloadByPackageJsonLockFile(pkgLock)
推送依賴包
shell單線程推送
- 只使用一個線程推送,我比較常用,一般推送的包不會很多
#!/bin/bash
# 待publish文件夾地址
PACKAGE_PATH=./download
# 前端私庫地址
REPOSITORY=http://localhost:8081/repository/npm_hosted/
npm login --registry=$REPOSITORY
for file in $PACKAGE_PATH/*.tgz; donpm publish --registry=$REPOSITORY $file
done
node多線程推送
多線程推送,上傳包較多可以使用,如果包過多可能會導致電腦卡死
let fs = require('fs')
let path = require('path')
const { exec } = require('child_process')// 前端私庫地址
const registry = 'http://localhost:8081/repository/npm_hosted/'
const publishPosition = `npm publish --registry=${registry}`
// 待publish文件夾地址
const filesDir = './download'fs.readdir(filesDir, (errs, files) => {files.forEach(file => {fs.stat(filesDir + file, function (err, stats) {if (stats.isFile()) {const fullFilePath = path.resolve(__dirname, filesDir + file)console.log(fullFilePath + ' publish 開始')exec(publishPosition + ' ' + fullFilePath, function (error, stdout, stderr) {if (error) {console.error(fullFilePath + ' publish 失敗')} else {console.error(fullFilePath + ' publish 成功')}})}})})
})
nexus API上傳
官網信息見: https://help.sonatype.com/repomanager3/rest-and-integration-api/components-api
#!/bin/bash
# 待publish文件夾地址
PACKAGE_PATH=./download
# 前端私庫服務地址
PUBLISH_RESTFUL=http://localhost:8081/service/rest/v1/components?repository=npm_hostedecho ">>> 文件所在目錄:$PACKAGE_PATH <<<"
dir=$(ls -l $PACKAGE_PATH | awk '/.tgz$/ {print $NF}')
cd $PACKAGE_PATHfor file in $dir
doecho ">>> $PACKAGE_PATH/$file 上傳開始 \n"ret=`curl -u admin:admin123 -X POST "$PUBLISH_RESTFUL" -H "Accept: application/json" -H "Content-Type: multipart/form-data" -F "npm.asset=@$file;type=application/x-compressed"`echo $retecho ">>> $PACKAGE_PATH/$file 上傳完成 \n"
done
問題
內網上傳問題
-
分析依賴鎖時,有些包命名重復,導致下載錯誤
比如:下載
parse-json@4.0.0鏈接,既有可能下載的是@types/parse-json也有可能下載就是parse-json,如果按文件名進行覆蓋則會導致少傳包 -
上傳包時,有些包的
package.json里面配置publishConfig
- 比如:
archiver-5.0.0里面配置了如上 publishConfig。在內網情況下,使用npm i --registry=xx,是會報錯的,內網無法訪問到https://registry.npmjs.org/- 目前我想到的解決方案是:把
archiver-5.0.0.tgz解壓,之后解壓archiver-5.0.0.tar,修改package.json里面的 publishConfig,之后執行 npm publish
- 目前我想到的解決方案是:把
- 比如:
builtins@1.0.3里面也配置了 publishConfig - 比如:
ahooks@3.7.8、ahooks-v3-count-1.0.0、hoist-non-react-statics@3.3.2(react-redux@8 的依賴)
特殊
- 比如:
simple-update-notifier@2.0.0也是里面配置了 publishConfig,這個包里 scripts 命令里還會有 prepare 鉤子,需要先把它去掉 - 比如:
@ant-design/icons@4.8.1這個比較有特殊性,它依賴了@ant-design/icons-svg@4.3.1,這兩個包都配置了 publishConfig,所以需要單獨推送,但是這個包里 scripts 命令里配置了 prepublishOnly 鉤子,需要先把它去掉 - 比如:
antd@5.8.4、antd@4.24.13同時配置了 prepare、prepublishOnly、postpublish 鉤子,需要先把它們去掉
- 比如:
-
分析依賴鎖時,包下載不下來,這個就只能用笨方法(缺什么依賴,npm i 之后把對應包 tgz 包下載下來)
比如:
@vue/cli需要@types/inquirer@8.1.3、@types/accepts@1.3.5、body-parser@1.19.2、qs@6.9.7、@vitejs/plugin-react@4.0.3、@types/html-minifier-terser@6.0.0、serve-index@1.9.1- 其實這個是和第一個原因是一樣的都是名重復了,導致下載不下來
其他問題
E400
倉庫不允許重復推送會報 400,改為 allow redeploy

E401
沒有權限涉及情況較多:
- 賬號密碼不對
- 檢查對應角色是否有對應權限
- 比如 npm 推送以什么方式校驗,
npm Bearer Token Realm - token 是否過期,去根目錄修改
.npmrc文件,將過期 token 刪除

E403
禁止上傳,group 倉庫禁止上傳,上傳到 hosted 即可

E503
倉庫離線,改為在線即可


