文章目錄
- 前言
- 實現行高自適應
- 實現評論展開效果
- 解決cell中的buttom的復用問題
前言
在知乎日報的評論區中,用到了Masonry行高自適應來實現評論的展開,這里設計許多控件的約束問題,當時困擾了筆者許久,特此撰寫博客記錄
實現行高自適應
步驟1:
設置tableView.rowHeight = UITableViewAutomaticDimension。
步驟2:
設置tableView.estimatedRowHeight = 100。
解釋:設置一個預估的行高,為了代碼的易讀性,還是盡量要設置一個跟cell的高差不多的值。
步驟3:
到了此步,就涉及到了我們行高自適應的核心思想:根據內容長短將我們的控件撐開從而實現tableviewcell撐開
方法便是對控件設置上下約束但是不設置其高度,這里需要注意我們的bottom的約束一定要與contentview的bottom有關,否則無法撐開我們的contentview
我們以一段小demo為例來講解
    [_name mas_makeConstraints:^(MASConstraintMaker *make) {make.left.equalTo(@30);make.top.equalTo(@30);make.height.equalTo(@40);make.width.equalTo(@100);}];//    [_time mas_makeConstraints:^(MASConstraintMaker *make) {
//        make.left.equalTo(@30);
//            make.height.equalTo(@40);
//            make.width.equalTo(@100);
//        make.bottom.equalTo(self.contentView.mas_bottom).offset(-20);
//    }];[_content mas_makeConstraints:^(MASConstraintMaker *make) {make.left.equalTo(@30);make.top.equalTo(self->_name.mas_bottom).offset(10);
//            make.bottom.equalTo(self->_reply.mas_top).offset(-20);make.bottom.equalTo(self.contentView.mas_bottom).offset(-20);make.right.equalTo(self.contentView.mas_right).offset(-20);}];
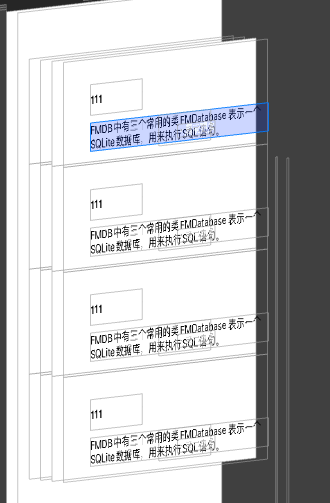
當我們沒有給_content的文本進行賦值時,視圖層級是這樣的
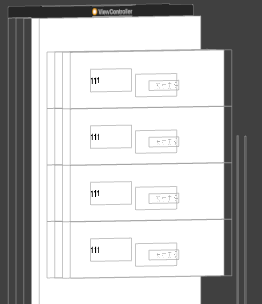
同時我們的_content控件甚至沒有在層級圖上出現,但是一旦我們對其進行賦值,就會自動撐開cell的高度
cell.content.text = @"FMDB中有三個常用的類FMDatabase 表示一個SQLite數據庫,用來執行SQL語句。";
實現評論展開效果
現在我們已經實現用Masonry實現行高自適應,接下來我們講講我們知乎日報評論區中評論的展開。
思路:
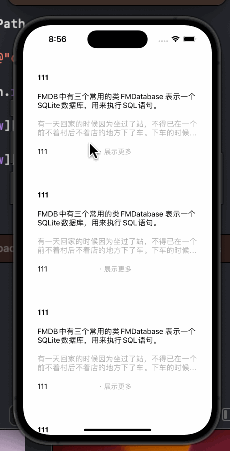
1.首先我們可以得到回復的一段文本,我們需要根據文本的長短來判斷我們的評論是否需要展開,也就是說我們的展開效果是否需要實現是與我們評論的長短有關的。
-(CGSize)textHeightFromTextString:(NSString *)text width:(CGFloat)textWidth fontSize:(CGFloat)size {// 計算 label 需要的寬度和高度NSDictionary *dict = @{NSFontAttributeName:[UIFont systemFontOfSize:size]};CGRect rect = [text boundingRectWithSize:CGSizeMake(textWidth, MAXFLOAT) options:NSStringDrawingTruncatesLastVisibleLine|NSStringDrawingUsesFontLeading|NSStringDrawingUsesLineFragmentOrigin attributes:dict context:nil];CGSize size1 = [text sizeWithAttributes:@{NSFontAttributeName: [UIFont systemFontOfSize:size]}];return CGSizeMake(size1.width, rect.size.height);
}NSInteger count = [self textHeightFromTextString:reply width:303.667 fontSize:15.5].height /cell.replyLabel.font.lineHeight;if (count <= 2) {cell.foldButton.hidden = YES;} else {cell.foldButton.hidden = NO;}
這里需要注意,我們的回復label也需要實現行高自適應的效果,與content的代碼結合起來便是
[_name mas_makeConstraints:^(MASConstraintMaker *make) {make.left.equalTo(@30);make.top.equalTo(@30);make.height.equalTo(@40);make.width.equalTo(@100);}];[_time mas_makeConstraints:^(MASConstraintMaker *make) {make.left.equalTo(@30);make.height.equalTo(@40);make.width.equalTo(@100);make.bottom.equalTo(self.contentView.mas_bottom).offset(-20);}];[_content mas_makeConstraints:^(MASConstraintMaker *make) {make.left.equalTo(@30);make.top.equalTo(self->_name.mas_bottom).offset(10);make.bottom.equalTo(self->_reply.mas_top).offset(-20);make.right.equalTo(self.contentView.mas_right).offset(-20);}];[_reply mas_makeConstraints:^(MASConstraintMaker *make) {make.top.equalTo(self->_content.mas_bottom).offset(20);make.bottom.equalTo(self.time.mas_top).offset(-10);make.right.equalTo(self.contentView.mas_right).offset(-20);make.left.equalTo(@30);}];[_foldButton mas_makeConstraints:^(MASConstraintMaker *make) {make.left.equalTo(@140);make.height.equalTo(@40);make.bottom.equalTo(self.contentView.mas_bottom).offset(-20);make.width.equalTo(@100);}];
這樣我們的content與reply就都與我們的contentView的底部又了約束關系,從而實現了行高自適應
解決cell中的buttom的復用問題
我們可以通過上面的動畫看到,我們的評論區確實實現了評論展開,但是出現了buttom的復用問題,這里筆者將一下解決方案
- 首先為每一個
buttom設置一個tag值,并且我們需要通過我們的buttom得到我們的cell
筆者使用的方法是- (nullable __kindof UITableViewCell *)cellForRowAtIndexPath:(NSIndexPath *)indexPath;
通過buttom的tag來確定我們的row,從而定位到我們選擇的cell
replyTableViewCell *cell = (replyTableViewCell *)[_commentTableView cellForRowAtIndexPath:[NSIndexPath indexPathForRow:buttom.tag inSection:0]];
當然還有另外的辦法,就是通過查找父視圖的方法來得到對應的cell
1.button.superView = cell.contentView; 2.button.superView.superView = cell; 3.button.superView.superView.superView = UITableviewWrapperView; 4.button.superView.superView.superView.superView = UITableView;
這樣一來就實現了得到對應buttom的cell
replyTableViewCell *cell = (replyTableViewCell *)[_commentTableView cellForRowAtIndexPath:[NSIndexPath indexPathForRow:buttom.tag inSection:0]];
replyTableViewCell *cell = (replyTableViewCell *)buttom.superview.superview;
- 然后我們對對應的
cell的reply.numberOfLines進行修改
if (cell.reply.numberOfLines == 0) {NSLog(@"1");cell.reply.numberOfLines = 2;[buttom setTitle:@" · 展示更多" forState:UIControlStateNormal];} else {NSLog(@"2");cell.reply.numberOfLines = 0;[buttom setTitle:@" · 收起" forState:UIControlStateNormal];}
- 最后使用
[_commentTableView beginUpdates]; [_commentTableView endUpdates];這兩個方式刷新我們的tabelView
注意這里必須使用[_commentTableView beginUpdates];[_commentTableView endUpdates];,否則仍然會發生按鈕的復用,原因是:
[_commentTableView reloadData]:
重新加載整個表格視圖的數據。 此方法會重新調用數據源和代理方法,并刷新所有的行和部分。
[_commentTableView beginUpdates] 和 [_commentTableView endUpdates]:
用于執行一系列的插入、刪除、選擇和重新加載的動畫,而不需要調用 reloadData。 通常與
insertRowsAtIndexPaths:withRowAnimation:、deleteRowsAtIndexPaths:withRowAnimation:、reloadRowsAtIndexPaths:withRowAnimation:
等方法一起使用。
UITableView 的 reloadData 方法會重新加載整個表格視圖的數據,包括所有的行和部分。這會導致表格的重繪,所有的可見單元格都會被重新加載,也就是會調用 cellForRowAtIndexPath: 方法獲取新的單元格。
如果在 cellForRowAtIndexPath: 方法中沒有正確處理單元格的重用標識符和狀態,就會導致按鈕等子視圖的狀態混亂,因為這些子視圖的狀態沒有被正確更新。
而使用 beginUpdates 和 endUpdates 方法執行一系列的插入、刪除、選擇和重新加載的操作時,系統會盡量保持現有單元格的狀態,而不是重新加載整個單元格。這樣,單元格的復用機制仍然有效,減少了對整個表格的重繪,從而減小了混亂的可能性。
同時使用[_commentTableView beginUpdates];[_commentTableView endUpdates];還優化了tableview的cell加載與刷新的性能開銷


 迭代器與生成器)


| 進程管理下 經典進程問題分析 線程 死鎖)
