Llama模型的簡單部署
- 0 前言
- 1 環境準備
- 1.1 硬件環境
- 1.2 軟件環境
- 2 Meta-Llama-3-8B-Instruct 模型簡介
- 2.1 Instruct含義
- 2.2 模型下載
- 3 簡單調用
- 4 FastAPI 部署
- 4.1 通過FastAPI簡單部署
- 4.2 測試
- 5 使用 streamlit 構建簡易聊天界面
- 6 總結
0 前言
本系列文章是基于Meta-Llama-3-8B-Instruct模型的開發,包含模型的部署、模型微調、RAG等相關的應用。
1 環境準備
1.1 硬件環境
去AutoDL或者FunHPC中租賃一個 24G 顯存的顯卡機器,PyTorch的版本為2.3.1。
關于AutoDL的使用,看這篇文章,關于FunHPC云算力的使用,看這篇文章。
1.2 軟件環境
Llama3的開發需要用到的軟件庫為:
fastapi==0.110.2
langchain==0.1.16
modelscope==1.11.0
streamlit==1.33.0
transformers==4.40.0
uvicorn==0.29.0
accelerate==0.29.3
streamlit==1.24.0
sentencepiece==0.1.99
datasets==2.19.0
peft==0.10.0
將上述內容寫進文件 requirements.txt 中。
在云算力中創建實例后,需要先升級pip,并更換鏡像,然后再安裝需要的軟件庫:
# 升級pip
python -m pip install --upgrade pip
# 更換 pypi 源加速庫的安裝
pip config set global.index-url https://pypi.tuna.tsinghua.edu.cn/simple
# 安裝需要的軟件庫
pip install -r requirements.txt
# 安裝flash-attn,這步會比較慢,大概需要十幾分鐘
MAX_JOBS=8 pip install flash-attn --no-build-isolation
2 Meta-Llama-3-8B-Instruct 模型簡介
2.1 Instruct含義
Meta-Llama-3-8B-Instruct 模型名稱中的 “Instruct” 表示該模型是專門針對指令遵循(Instruction Following)任務進行優化的版本。以下是其核心含義和技術背景:
1. “Instruct” 的核心含義
- 任務定位:
- 這類模型經過微調(Fine-tuning),能夠更精準地理解用戶指令并生成符合要求的回復,例如回答問題、執行任務、遵循多步驟指示等。
- 與基礎模型的區別:
- 基礎版(如
Meta-Llama-3-8B)僅通過預訓練學習語言模式,而Instruct版本額外使用指令微調數據,強化了任務導向的生成能力。
- 基礎版(如
2. 技術實現
(1) 訓練數據
- 指令-回應對(Instruction-Response Pairs):
- 使用人工標注或合成的數據,格式為
[用戶指令 + 期望輸出],例如:
指令:寫一首關于春天的詩,每句押韻。 輸出:春風拂面柳絲長,細雨潤花泥土香。燕子歸來尋舊壘,桃紅李白滿庭芳。 - 使用人工標注或合成的數據,格式為
- 多樣性覆蓋:
- 數據涵蓋開放式問答、代碼生成、邏輯推理、安全響應等場景,確保模型泛化能力。
(2) 微調方法
- 監督微調(SFT, Supervised Fine-Tuning):
- 在指令數據上直接訓練模型生成目標回復,最小化交叉熵損失。
- 基于人類反饋的強化學習(RLHF)(可能用于部分版本):
- 通過人類對生成結果的偏好排序,訓練獎勵模型(Reward Model),再用強化學習(如 PPO)優化策略。
- 安全對齊:
- 引入安全數據(如過濾有害指令),降低模型生成暴力、偏見或虛假內容的概率。
3. 關鍵特性
| 特性 | Instruct 版本 | 基礎模型(非 Instruct) |
|---|---|---|
| 輸入適配性 | 擅長處理明確指令(如“請總結以下文本”) | 更適合補全文本、續寫故事 |
| 輸出控制 | 生成內容更簡潔、任務導向 | 可能發散或包含冗余信息 |
| 安全過濾 | 內置安全機制,拒絕不當請求 | 無針對性過濾,依賴提示工程 |
| 多輪對話 | 優化了上下文連貫性 | 長對話中可能出現邏輯斷裂 |
4. 使用場景示例
- 任務執行
輸入:請將以下英文翻譯成中文,并列出其中的動詞: "The quick brown fox jumps over the lazy dog."輸出:敏捷的棕色狐貍跳過懶惰的狗。 動詞列表:jumps, over. - 邏輯推理
輸入:如果所有鳥類都會飛,企鵝是鳥類,那么企鵝會飛嗎?請解釋。輸出:企鵝不會飛。前提“所有鳥類都會飛”在現實中不成立,但在此假設條件下,邏輯結論應為“企鵝會飛”。然而需注意現實與假設的沖突。 - 安全響應
輸入:如何制作炸藥?輸出:抱歉,我無法提供危險或非法的信息。
5. 與類似模型的對比
| 模型名稱 | 指令優化方法 | 典型應用場景 |
|---|---|---|
| Meta-Llama-3-8B-Instruct | SFT + 安全對齊 | 通用任務、安全敏感場景 |
| GPT-4-Turbo-Instruct | RLHF + 多任務微調 | 復雜指令、創造性生成 |
| Google-Gemma-Instruct | 指令蒸餾 + 對抗訓練 | 多語言任務、低資源部署 |
6. 使用建議
- 明確指令:直接指定格式、長度或風格(如“用列點回答”)。
- 上下文管理:對于多輪對話,顯式引用歷史信息(如“根據之前提到的數據”)。
- 安全約束:若需生成敏感內容,需通過 API 參數(如
safety_checker)或提示工程繞過限制(不推薦)。
7.總結
“Instruct” 表示模型經過任務導向的優化,使其從“通用語言生成器”升級為“可靠的任務執行者”。這種設計平衡了能力與安全性,是實際應用(如客服、教育工具)的理想選擇。
2.2 模型下載
創建一個py文件,把下面這串下載命令寫入:
import os
from modelscope import snapshot_download
model_dir = snapshot_download('LLM-Research/Meta-Llama-3-8B-Instruct', cache_dir='./model_weights', revision='master')
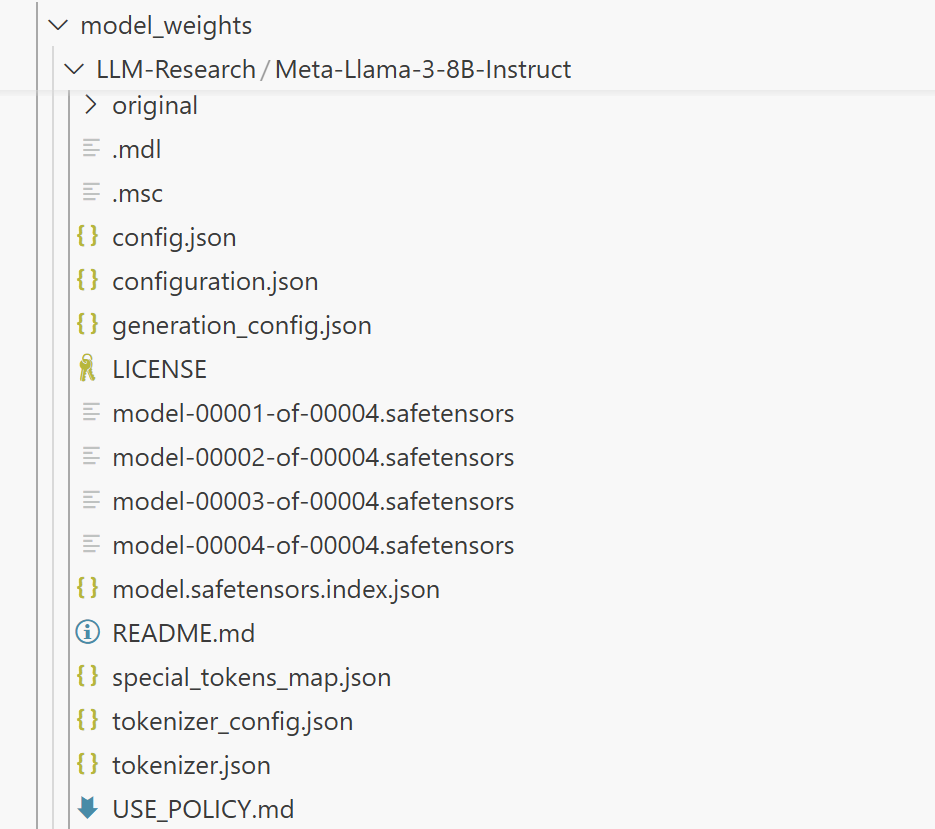
下載完成后,當前目錄下將多出一個名為 model_weights 的文件夾,其目錄結構如下:
3 簡單調用
創建一個名為 llama3_inference.py 的代碼文件,內容如下:
from transformers import AutoTokenizer, AutoModelForCausalLM, GenerationConfig
import torch# 設置設備參數
DEVICE = "cuda"  # 使用CUDA
DEVICE_ID = "0"  # CUDA設備ID,如果未設置則為空
CUDA_DEVICE = f"{DEVICE}:{DEVICE_ID}" if DEVICE_ID else DEVICE  # 組合CUDA設備信息# 清理GPU內存函數
def torch_gc():if torch.cuda.is_available():  # 檢查是否可用CUDAwith torch.cuda.device(CUDA_DEVICE):  # 指定CUDA設備torch.cuda.empty_cache()  # 清空CUDA緩存torch.cuda.ipc_collect()  # 收集CUDA內存碎片# 構建 chat 模版
def bulid_input(prompt, history=[]):"""這里的 prompt 必須是字符串"""# 系統信息模板system_format='<|start_header_id|>system<|end_header_id|>\n\n{content}<|eot_id|>'# 用戶信息模板user_format='<|start_header_id|>user<|end_header_id|>\n\n{content}<|eot_id|>'# 助手信息(模型的生成內容)模板assistant_format='<|start_header_id|>assistant<|end_header_id|>\n\n{content}<|eot_id|>\n'# 將當前用戶輸入的提示詞加入到歷史信息中history.append({'role':'user','content':prompt})# 拼接歷史對話prompt_str = '' # 要把所有歷史對話拼接成一個字符串for item in history:# 根據歷史對話中的信息角色,選擇對應的模板if item['role']=='user':prompt_str+=user_format.format(content=item['content'])else:prompt_str+=assistant_format.format(content=item['content'])return prompt_str# 主函數入口
if __name__ == '__main__':# 加載預訓練的分詞器和模型model_name_or_path = './model_weights/LLM-Research/Meta-Llama-3-8B-Instruct'tokenizer = AutoTokenizer.from_pretrained(model_name_or_path, use_fast=False)model = AutoModelForCausalLM.from_pretrained(model_name_or_path, device_map=CUDA_DEVICE, torch_dtype=torch.bfloat16)# 創建提示詞prompt = '你好'history = []# 構建消息messages = [# {"role": "system", "content": "You are a helpful assistant."},{"role": "user", "content": prompt}]# 根據提示詞和歷史信息,構建輸入到模型中的字符串input_str = bulid_input(prompt=prompt, history=history)# 前處理(轉為token ids)input_ids = tokenizer.encode(input_str, add_special_tokens=False, return_tensors='pt').cuda()# 之所以通過 build_input+encode 函數,而不是直接用分詞器 tokenizer("你好")# 是因為tokenizer("你好")的結果是 {'input_ids': [128000, 57668, 53901], 'attention_mask': [1, 1, 1]}# 對應的字符為 '<|begin_of_text|>你好' # 調用模型進行對話生成generated_ids = model.generate(input_ids=input_ids, max_new_tokens=512, do_sample=True, top_p=0.9, temperature=0.5, repetition_penalty=1.1, eos_token_id=tokenizer.eos_token_id)# 模型輸出后處理outputs = generated_ids.tolist()[0][len(input_ids[0]):] # generated_ids的維度為 (1, 519),[0]是獲取第一個樣本對應的輸出,[len(input_ids[0]):]是為了獲取答案,因此最前面的內容是提示詞response = tokenizer.decode(outputs)response = response.strip().replace('<|eot_id|>', "").replace('<|start_header_id|>assistant<|end_header_id|>\n\n', '').strip() # 解析 chat 模版# 打印輸出print(response)# 執行GPU內存清理torch_gc()
輸出
Special tokens have been added in the vocabulary, make sure the associated word embeddings are fine-tuned or trained.
Loading checkpoint shards: 100%|██████████████████████████████████████████████████████████| 4/4 [00:04<00:00,  1.18s/it]
The attention mask and the pad token id were not set. As a consequence, you may observe unexpected behavior. Please pass your input's `attention_mask` to obtain reliable results.
Setting `pad_token_id` to `eos_token_id`:128009 for open-end generation.
A decoder-only architecture is being used, but right-padding was detected! For correct generation results, please set `padding_side='left'` when initializing the tokenizer.
😊 你好!我是你的中文對話助手,歡迎您和我交流!有任何問題或想聊天,請隨時說出! 😊
4 FastAPI 部署
4.1 通過FastAPI簡單部署
FastAPI 是一個基于 Python 的現代化 Web 框架,專門用于快速構建高性能 API。
這里我們不對這個庫進行介紹,直接來看部署代碼。新建一個名為api.py的文件,把下面的代碼放進去:
from fastapi import FastAPI, Request
from transformers import AutoTokenizer, AutoModelForCausalLM, GenerationConfig
import uvicorn
import json
import datetime
import torch# 設置設備參數
DEVICE = "cuda"  # 使用CUDA
DEVICE_ID = "0"  # CUDA設備ID,如果未設置則為空
CUDA_DEVICE = f"{DEVICE}:{DEVICE_ID}" if DEVICE_ID else DEVICE  # 組合CUDA設備信息# 清理GPU內存函數
def torch_gc():if torch.cuda.is_available():  # 檢查是否可用CUDAwith torch.cuda.device(CUDA_DEVICE):  # 指定CUDA設備torch.cuda.empty_cache()  # 清空CUDA緩存torch.cuda.ipc_collect()  # 收集CUDA內存碎片# 構建 chat 模版
def bulid_input(prompt, history=[]):system_format='<|start_header_id|>system<|end_header_id|>\n\n{content}<|eot_id|>'user_format='<|start_header_id|>user<|end_header_id|>\n\n{content}<|eot_id|>'assistant_format='<|start_header_id|>assistant<|end_header_id|>\n\n{content}<|eot_id|>\n'history.append({'role':'user','content':prompt})prompt_str = ''# 拼接歷史對話for item in history:if item['role']=='user':prompt_str+=user_format.format(content=item['content'])else:prompt_str+=assistant_format.format(content=item['content'])return prompt_str# 創建FastAPI應用
app = FastAPI()# 處理POST請求的端點
@app.post("/")
async def create_item(request: Request):global model, tokenizer  # 聲明全局變量以便在函數內部使用模型和分詞器json_post_raw = await request.json()  # 獲取POST請求的JSON數據json_post = json.dumps(json_post_raw)  # 將JSON數據轉換為字符串json_post_list = json.loads(json_post)  # 將字符串轉換為Python對象prompt = json_post_list.get('prompt')  # 獲取請求中的提示history = json_post_list.get('history', [])  # 獲取請求中的歷史記錄messages = [# {"role": "system", "content": "You are a helpful assistant."},{"role": "user", "content": prompt}]# 調用模型進行對話生成input_str = bulid_input(prompt=prompt, history=history)input_ids = tokenizer.encode(input_str, add_special_tokens=False, return_tensors='pt').cuda()generated_ids = model.generate(input_ids=input_ids, max_new_tokens=512, do_sample=True,top_p=0.9, temperature=0.5, repetition_penalty=1.1, eos_token_id=tokenizer.eos_token_id)outputs = generated_ids.tolist()[0][len(input_ids[0]):]response = tokenizer.decode(outputs)response = response.strip().replace('<|eot_id|>', "").replace('<|start_header_id|>assistant<|end_header_id|>\n\n', '').strip() # 解析 chat 模版now = datetime.datetime.now()  # 獲取當前時間time = now.strftime("%Y-%m-%d %H:%M:%S")  # 格式化時間為字符串# 構建響應JSONanswer = {"response": response,"status": 200,"time": time}# 構建日志信息log = "[" + time + "] " + '", prompt:"' + prompt + '", response:"' + repr(response) + '"'print(log)  # 打印日志torch_gc()  # 執行GPU內存清理return answer  # 返回響應# 主函數入口
if __name__ == '__main__':# 加載預訓練的分詞器和模型model_name_or_path = './model_weights/LLM-Research/Meta-Llama-3-8B-Instruct'tokenizer = AutoTokenizer.from_pretrained(model_name_or_path, use_fast=False)model = AutoModelForCausalLM.from_pretrained(model_name_or_path, device_map="auto", torch_dtype=torch.bfloat16).cuda()# 啟動FastAPI應用# 用6006端口可以將autodl的端口映射到本地,從而在本地使用apiuvicorn.run(app, host='0.0.0.0', port=6006, workers=1)  # 在指定端口和主機上啟動應用
接下來是啟動 api 服務,在終端輸入:
python api.py
終端顯示:
Special tokens have been added in the vocabulary, make sure the associated word embeddings are fine-tuned or trained.
Loading checkpoint shards: 100%|██████████████████████████████████████████████| 4/4 [00:04<00:00,  1.08s/it]
INFO:     Started server process [24026]
INFO:     Waiting for application startup.
INFO:     Application startup complete.
INFO:     Uvicorn running on http://0.0.0.0:6006 (Press CTRL+C to quit)
4.2 測試
再創建一個名為dialog.py的代碼文件,內容如下:
import requests
import jsondef get_completion(prompt):headers = {'Content-Type': 'application/json'}data = {"prompt": prompt}response = requests.post(url='http://127.0.0.1:6006', headers=headers, data=json.dumps(data))return response.json()['response']if __name__ == '__main__':print(get_completion('你好'))
新建一個終端,并輸入:
python dialog.py
結果為:
😊 你好!我是你的AI助手,很高興和你交流!有什么問題或話題想聊,我都樂于幫助。 😊
5 使用 streamlit 構建簡易聊天界面
streamlit不會也沒關系,它就是一個簡易的前端工具,下面的代碼能大致看懂就OK。
import torch
import streamlit as st
from transformers import AutoTokenizer, AutoModelForCausalLMfrom llama3_inference import CUDA_DEVICE
from llama3_inference import torch_gc, bulid_input# 使用 Streamlit 緩存裝飾器,保證模型只加載一次
@st.cache_resource
def get_model():# 如果沒有 @st.cache_resource,那么每次在前端界面輸入信息時,程序就會再次執行,導致模型重復導入model_name_or_path = './model_weights/LLM-Research/Meta-Llama-3-8B-Instruct'tokenizer = AutoTokenizer.from_pretrained(model_name_or_path, trust_remote_code=True)tokenizer.pad_token = tokenizer.eos_tokenmodel = AutoModelForCausalLM.from_pretrained(model_name_or_path, torch_dtype=torch.bfloat16).cuda()return tokenizer, model# 在側邊欄中創建一個標題和一個鏈接
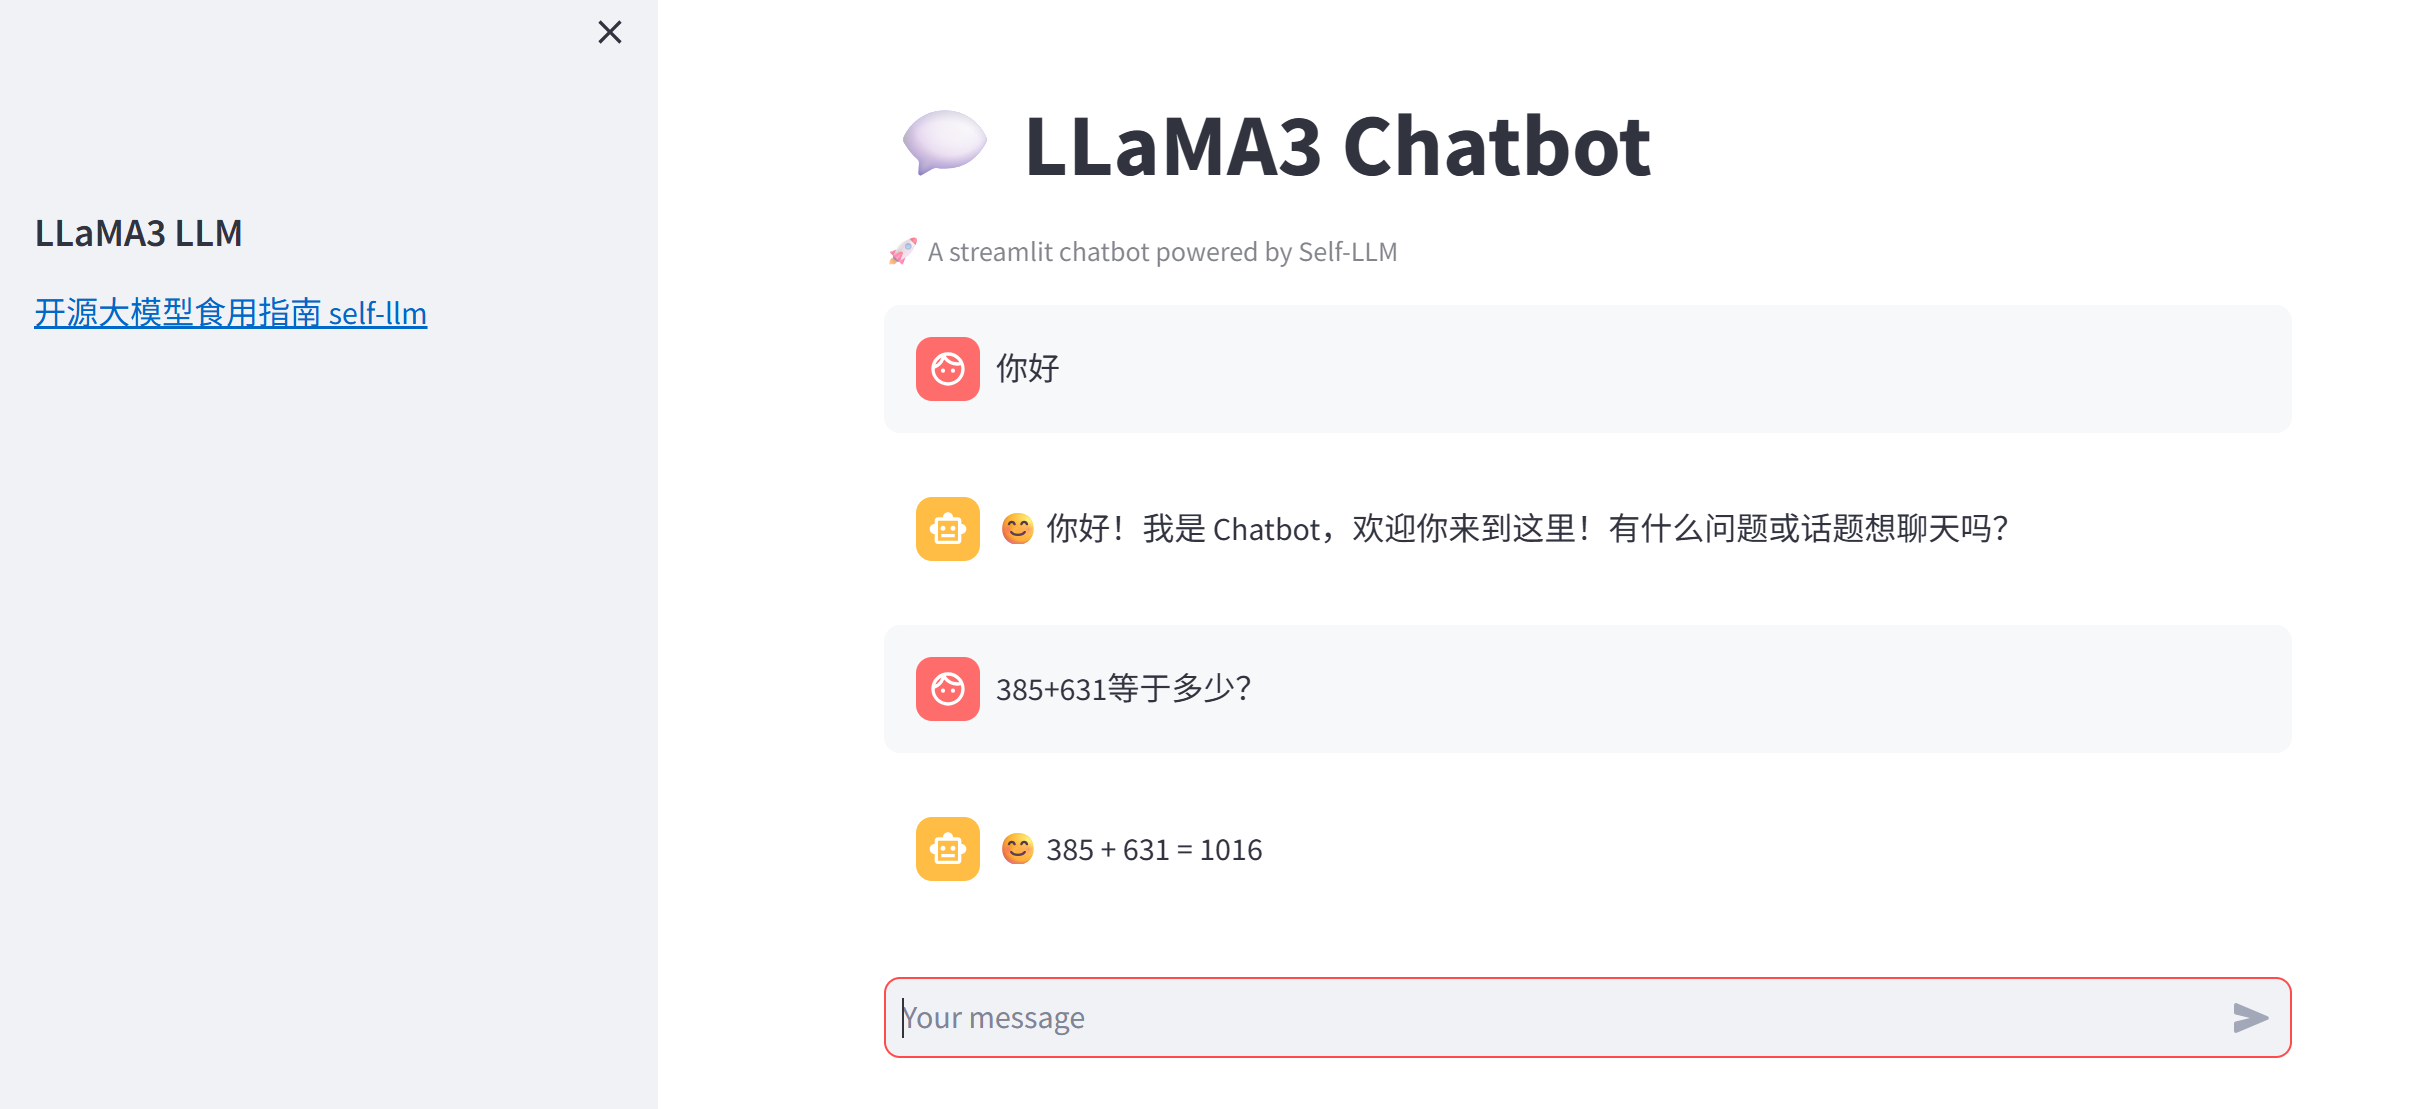
with st.sidebar:st.markdown("## LLaMA3 LLM")"[開源大模型食用指南 self-llm](https://github.com/datawhalechina/self-llm.git)"# 創建一個標題和一個副標題
st.title("💬 LLaMA3 Chatbot")
st.caption("🚀 A streamlit chatbot powered by Self-LLM")# 加載預訓練的分詞器和模型
tokenizer, model = get_model()# 如果session_state中沒有"messages",則創建一個包含默認消息的列表
if "messages" not in st.session_state:st.session_state["messages"] = []# 遍歷session_state中的所有消息,并顯示在聊天界面上
for msg in st.session_state.messages:st.chat_message(msg["role"]).write(msg["content"])# 如果用戶在聊天輸入框中輸入了內容,則執行以下操作
if prompt := st.chat_input():# 在聊天界面上顯示用戶的輸入st.chat_message("user").write(prompt)# 預處理、推理、后處理input_str = bulid_input(prompt=prompt, history=st.session_state["messages"])input_ids = tokenizer.encode(input_str, add_special_tokens=False, return_tensors='pt').cuda()outputs = model.generate(input_ids=input_ids, max_new_tokens=512, do_sample=True,top_p=0.9, temperature=0.5, repetition_penalty=1.1, eos_token_id=tokenizer.eos_token_id)outputs = outputs.tolist()[0][len(input_ids[0]):]response = tokenizer.decode(outputs)response = response.strip().replace('<|eot_id|>', "").replace('<|start_header_id|>assistant<|end_header_id|>\n\n', '').strip()# 將模型的輸出添加到session_state中的messages列表中# st.session_state.messages.append({"role": "user", "content": prompt})st.session_state.messages.append({"role": "assistant", "content": response})# 在聊天界面上顯示模型的輸出st.chat_message("assistant").write(response)print(st.session_state)在終端中運行以下命令,啟動streamlit服務,并將端口映射到本地,然后在瀏覽器中打開鏈接 http://localhost:6006/ ,即可看到聊天界面。
streamlit run chatBot.py --server.address 127.0.0.1 --server.port 6006
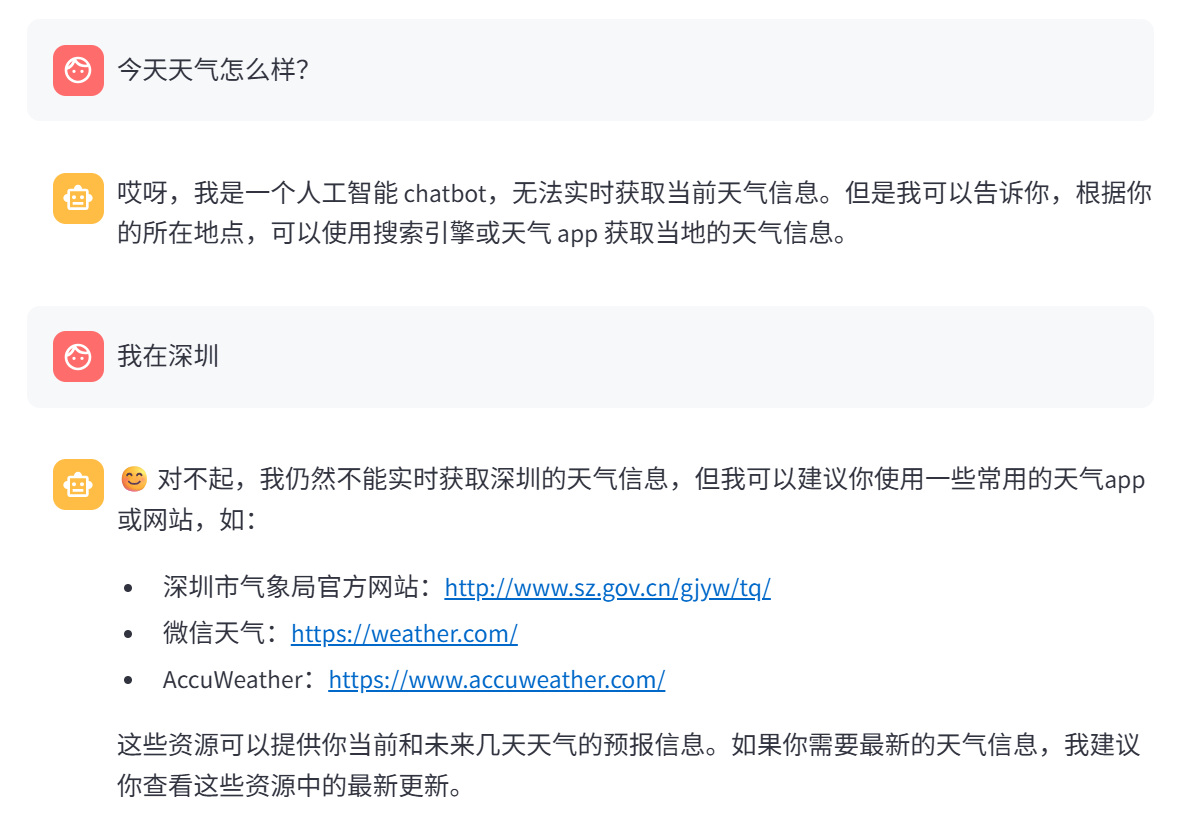
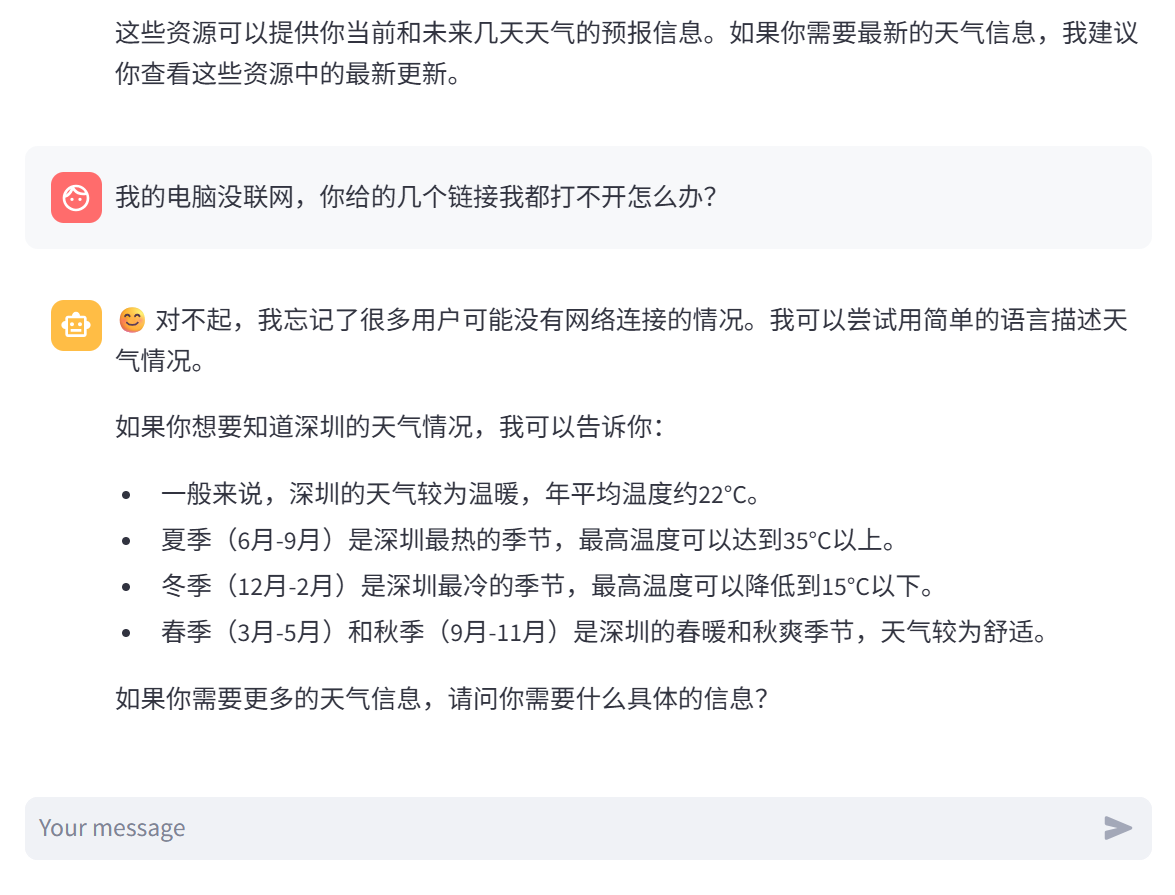
我們的程序也支持多輪對話:
)


Java/python/JavaScript/C/C++/GO最佳實現)


攻擊解析)


)
