馬賽克
face = img[162:428,297:527] # 人臉坐標區域face = face[::10,::10] # 每10個中取出一個像素,馬賽克face = np.repeat(face, 10, axis=0) # 行方向重復10次face = np.repeat(face, 10, axis=1) # 列方向重復10次img[162:428,297:527] = face[:266,:230] # 填充,保持尺寸一致cv2.imshow('bao', img)cv2.waitKey(0)cv2.destroyAllWindows()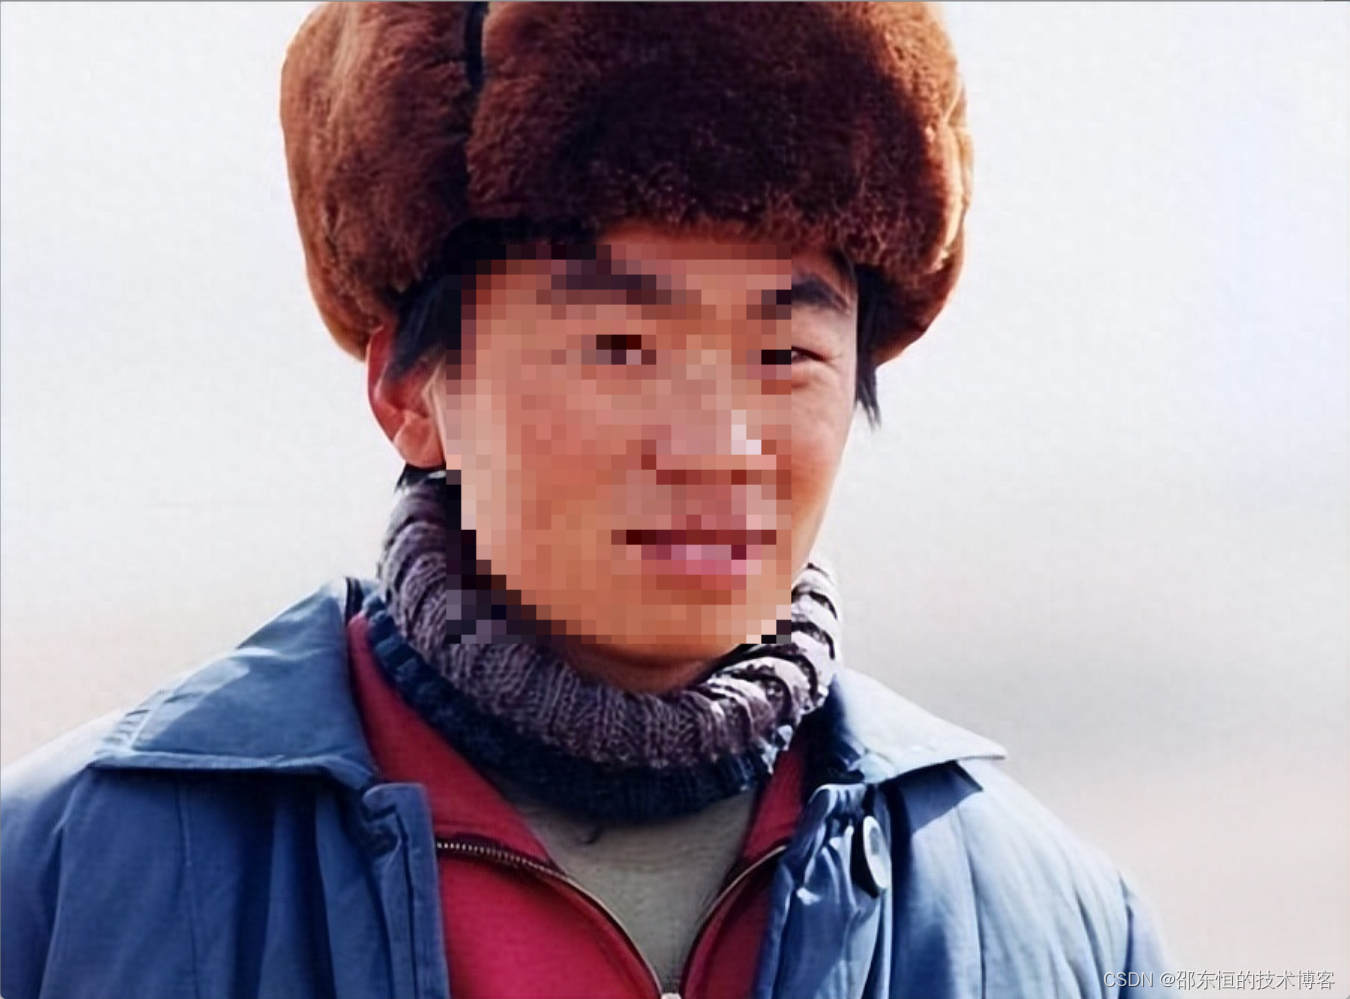
人臉識別
人臉特征參數下載地址
opencv/data/haarcascades at 4.x · opencv/opencv · GitHub
# 人臉特征詳細說明,1萬多行,計算機根據這些特征,進行人臉檢測# 符合其中一部分說明,算作人臉# 級聯分類器、檢測器face_detector = cv2.CascadeClassifier('./haarcascade_frontalface_alt.xml')faces = face_detector.detectMultiScale(img) # 坐標x,y,w,hfor x,y,w,h in faces:cv2.rectangle(img,pt1=(x,y),pt2=(x+w,y+h), color=[0,0,255],thickness=2) # 矩形cv2.imshow('face', img)cv2.waitKey(0)cv2.destroyAllWindows()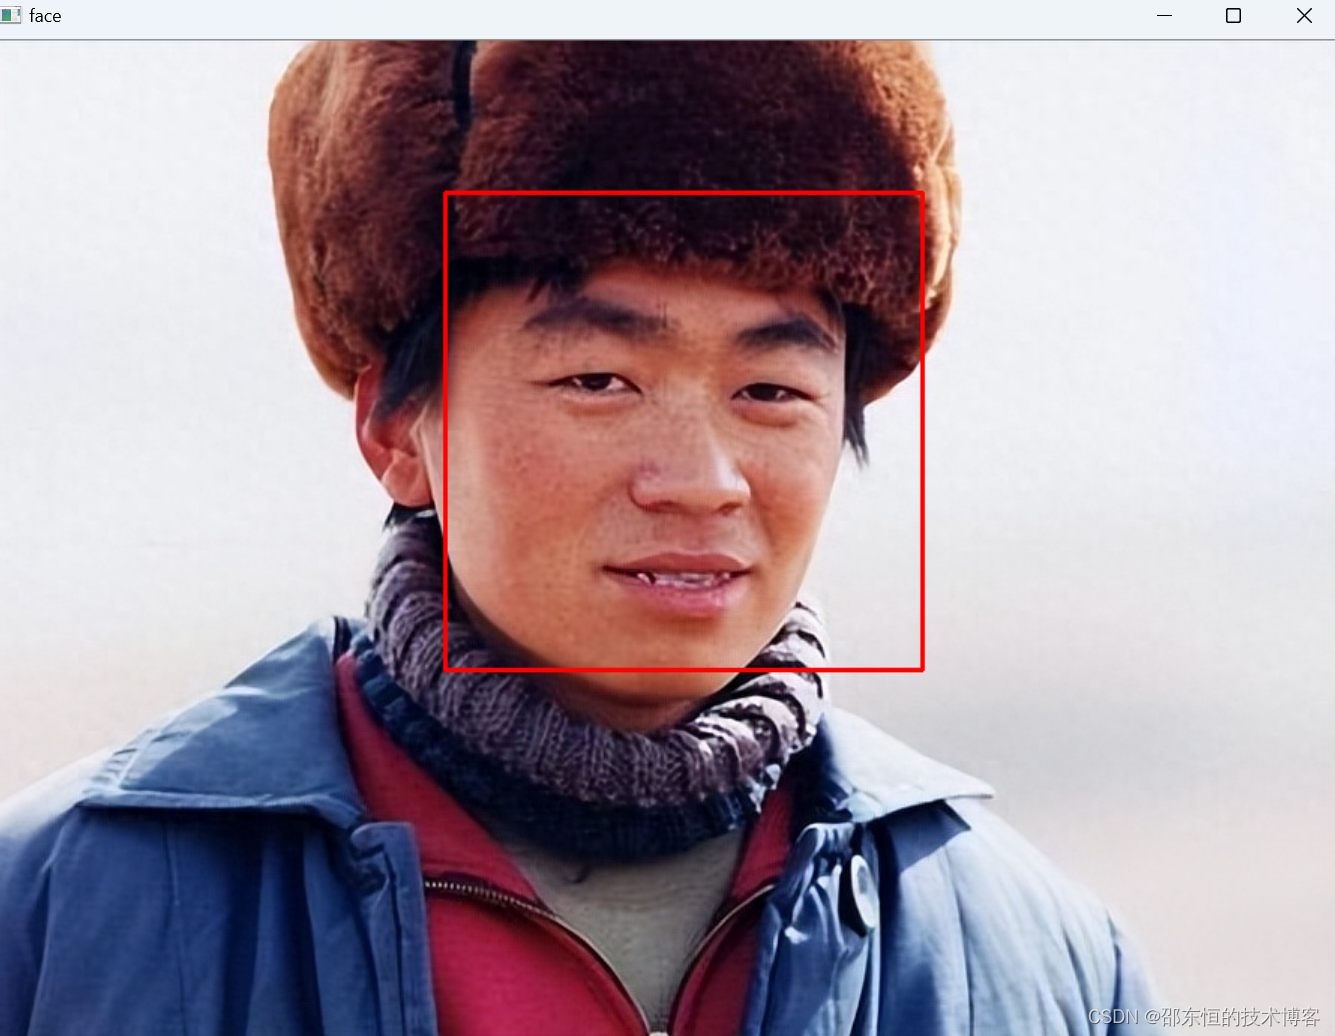
多人臉
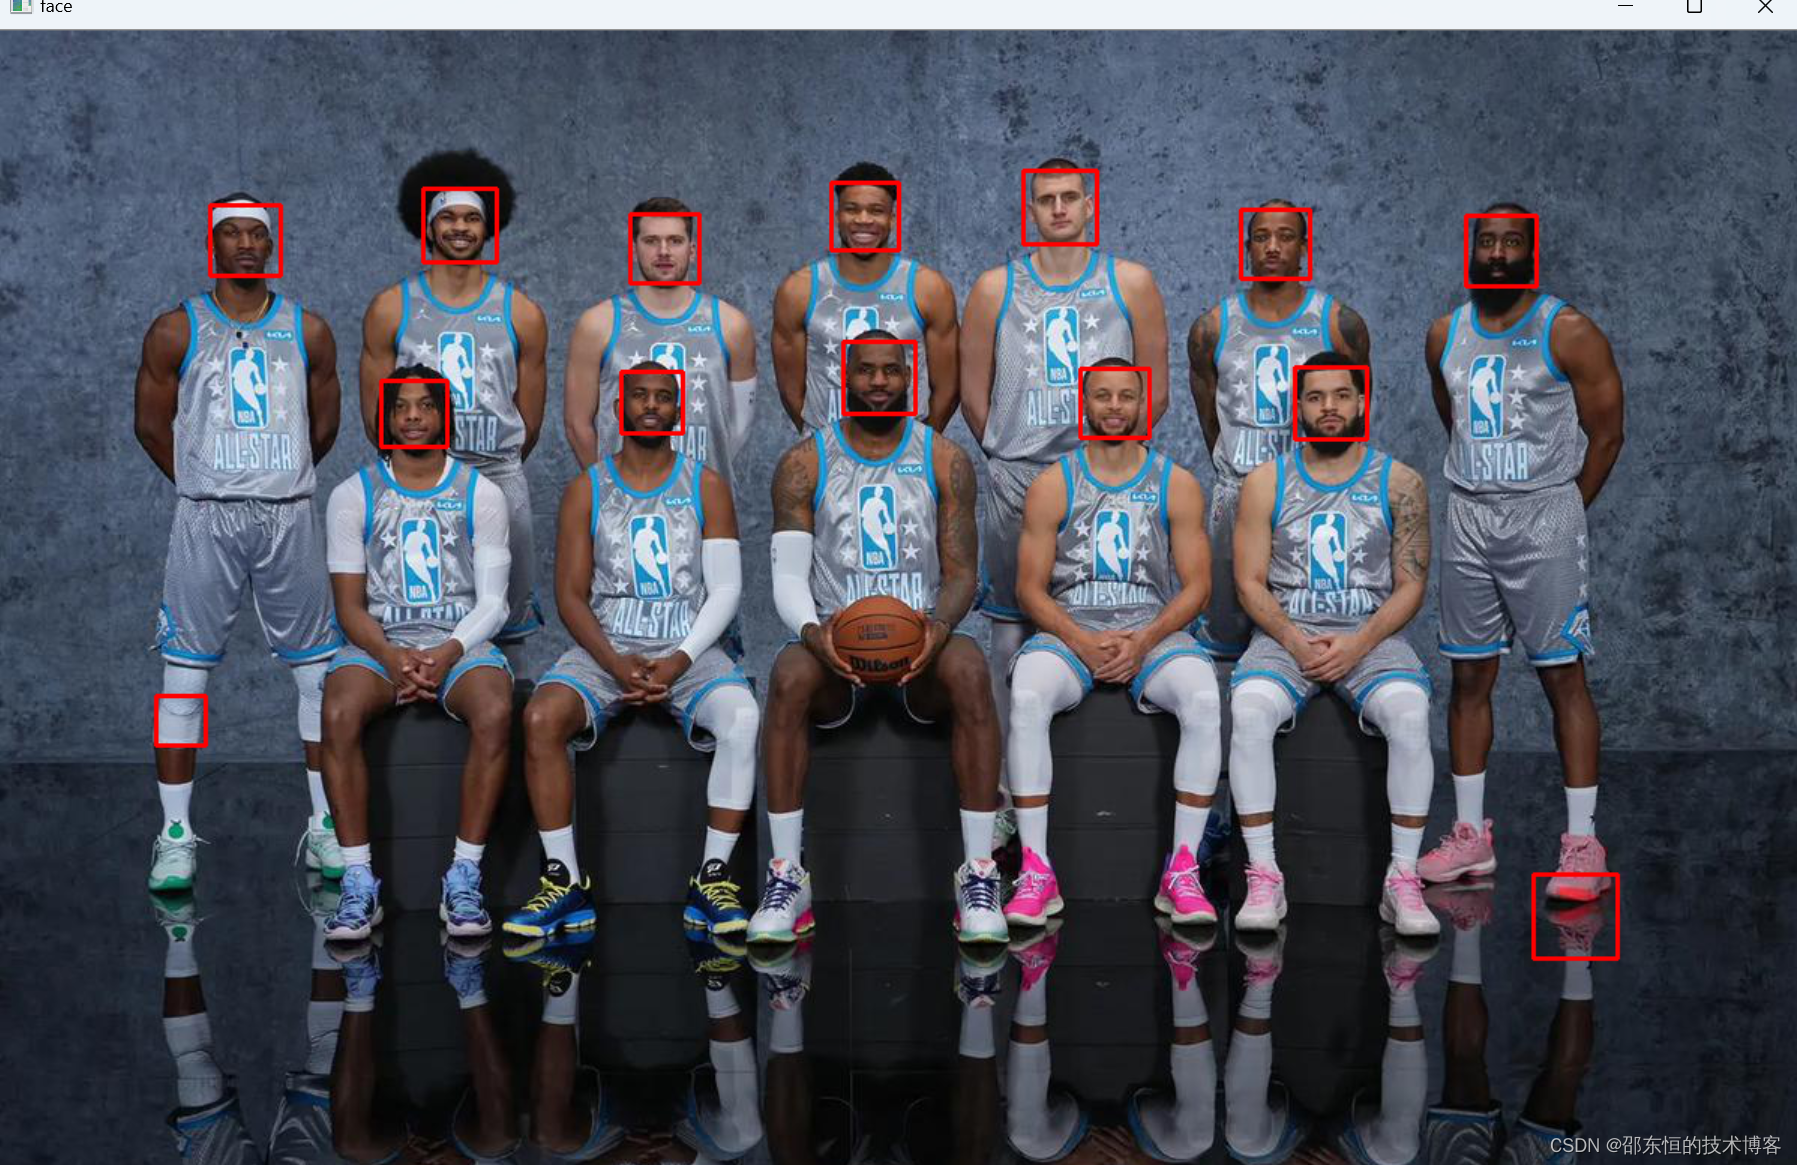 ?調整參數
?調整參數
gray = cv2.cvtColor(img, code=cv2.COLOR_BGR2GRAY)face_detector = cv2.CascadeClassifier('./haarcascade_frontalface_alt.xml')faces = face_detector.detectMultiScale(gray,scaleFactor=1.2, # 縮放minNeighbors=3) # 坐標x,y,w,hfor x,y,w,h in faces:cv2.rectangle(img,pt1=(x,y),pt2=(x+w,y+h), color=[0,0,255],thickness=2) # 矩形cv2.imshow('face', img)cv2.waitKey(0)cv2.destroyAllWindows()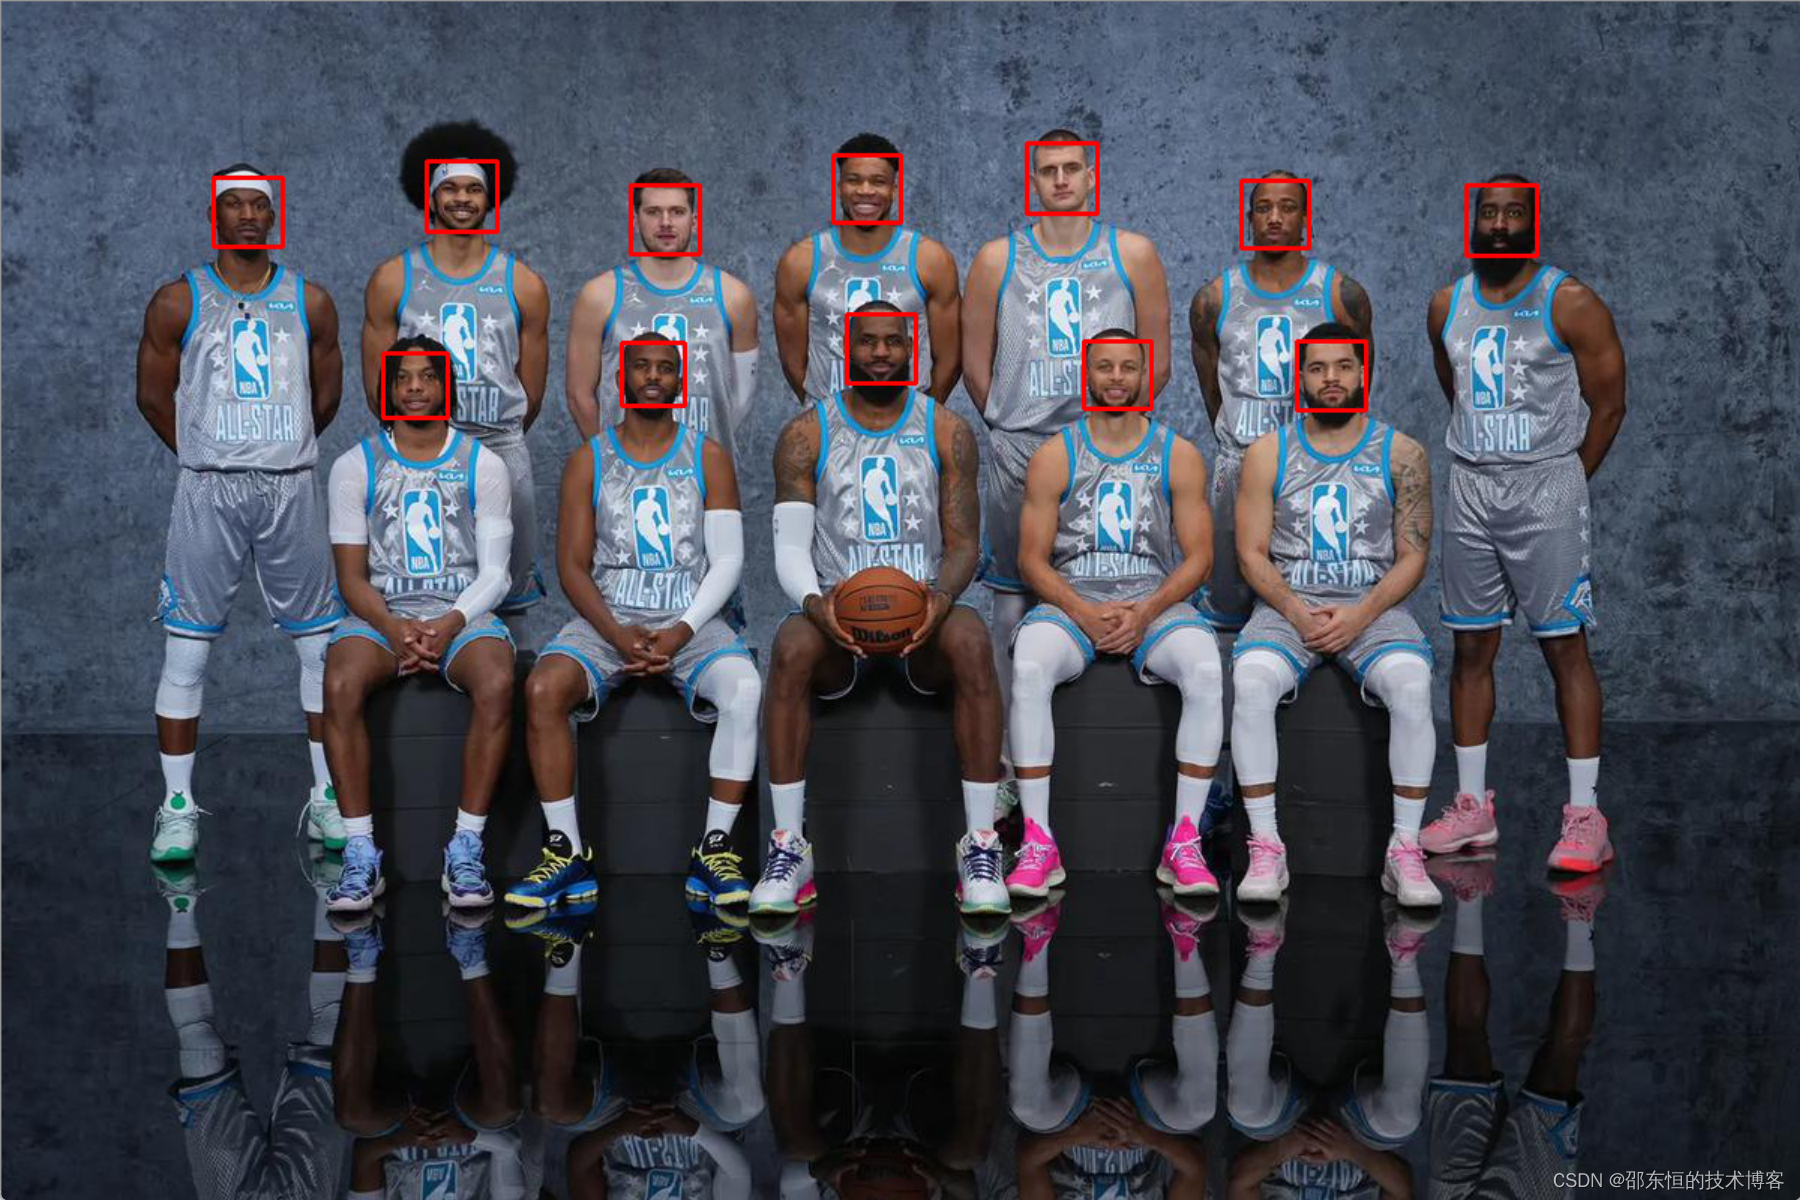
gray = cv2.cvtColor(img, code=cv2.COLOR_BGR2GRAY)face_detector = cv2.CascadeClassifier('./haarcascade_frontalface_alt.xml')faces = face_detector.detectMultiScale(gray,scaleFactor=1.2, # 縮放minNeighbors=3, minSize=(40,40)) # 設置檢測框大小,過濾太小的框for x,y,w,h in faces:# cv2.rectangle(img,pt1=(x,y),pt2=(x+w,y+h), color=[0,0,255],thickness=2) # 矩形cv2.circle(img, center=(x+w//2, y+h//2),radius=w//2,color=[0, 255, 0]) # 圓形cv2.imshow('face', img)cv2.waitKey(0)cv2.destroyAllWindows()
人臉貼紙
gray = cv2.cvtColor(img, code=cv2.COLOR_BGR2GRAY)face_detector = cv2.CascadeClassifier('./haarcascade_frontalface_alt.xml')faces = face_detector.detectMultiScale(gray) # 設置檢測框大小,過濾太小的框star = cv2.imread('./star.png')for x,y,w,h in faces:star_s = cv2.resize(star, (w//4, h//4))w1 = w//4h1 = h//4for i in range(h1):for j in range(w1): # 遍歷圖片數據if not (star_s[i,j] > 200).all(): # 紅色img[i+y,j+x+3*w//8] = star_s[i,j]cv2.imshow('face', img)cv2.waitKey(0)cv2.destroyAllWindows()


)
)


)


