文章目錄
- 1.配置pom.xml(添加以下內容,記住點一下右上方maven下載)
- 2.application.properties添加以下配置信息
- 3.新建swagger的config配置信息,文件位置如下
- 4.添加接口注釋信息
- 訪問swagger文檔
1.配置pom.xml(添加以下內容,記住點一下右上方maven下載)
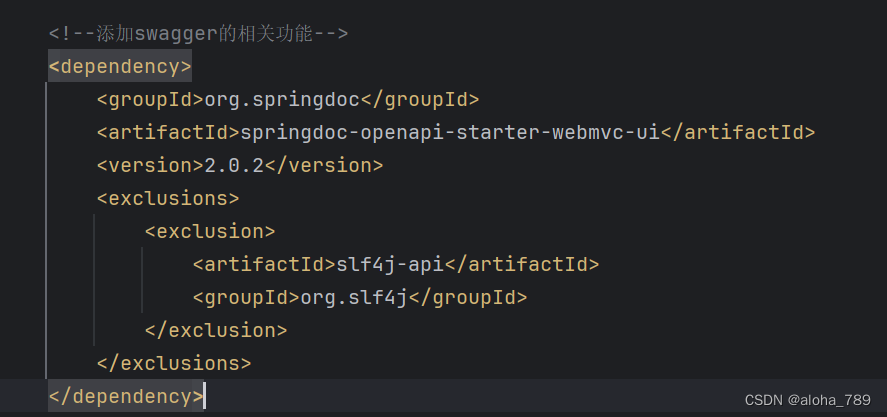
供代碼復制
<dependency><groupId>org.springdoc</groupId><artifactId>springdoc-openapi-starter-webmvc-ui</artifactId><version>2.0.2</version><exclusions><exclusion><artifactId>slf4j-api</artifactId><groupId>org.slf4j</groupId></exclusion></exclusions></dependency>
2.application.properties添加以下配置信息
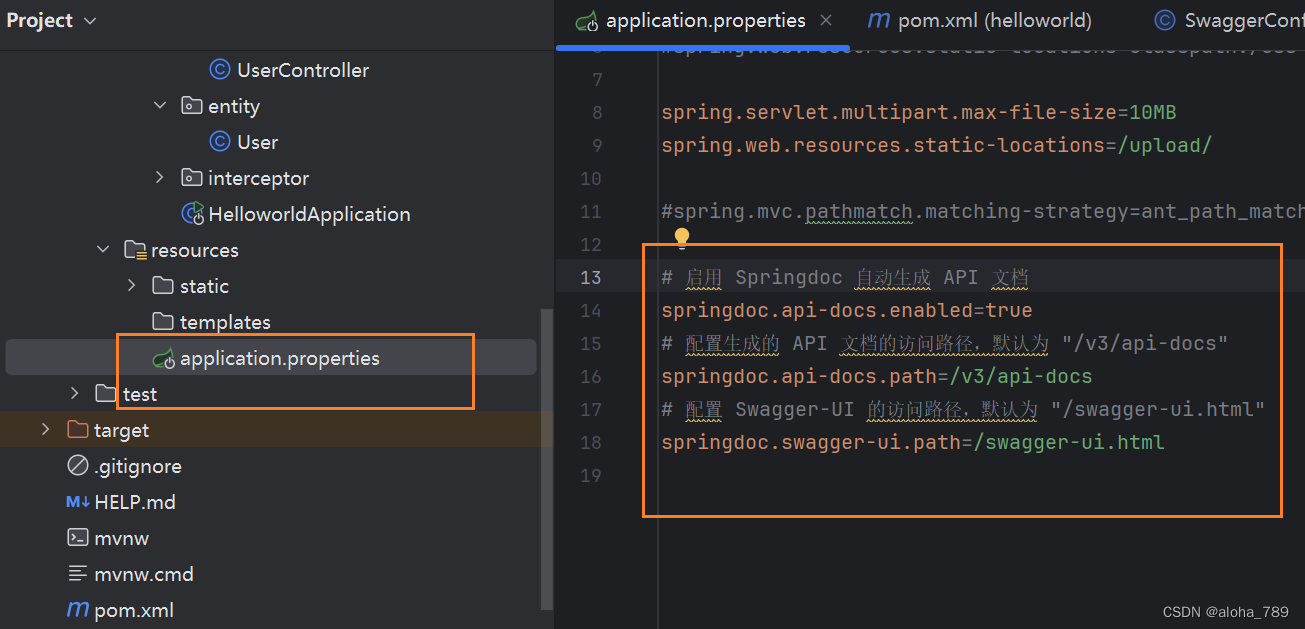
供代碼復制
# 啟用 Springdoc 自動生成 API 文檔
springdoc.api-docs.enabled=true
# 配置生成的 API 文檔的訪問路徑,默認為 "/v3/api-docs"
springdoc.api-docs.path=/v3/api-docs
# 配置 Swagger-UI 的訪問路徑,默認為 "/swagger-ui.html"
springdoc.swagger-ui.path=/swagger-ui.html
3.新建swagger的config配置信息,文件位置如下
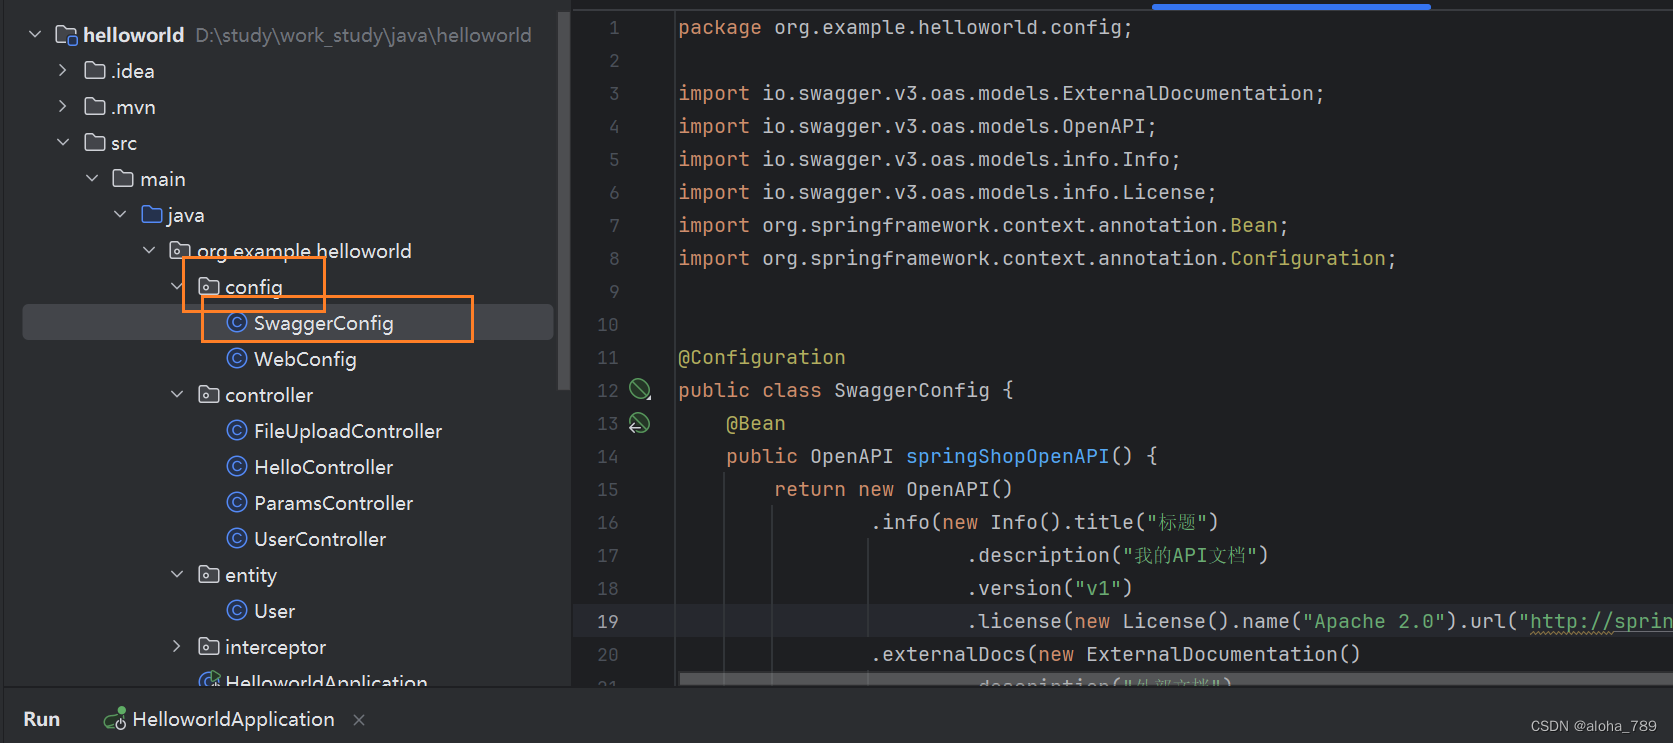
供代碼復制
package org.example.helloworld.config;import io.swagger.v3.oas.models.ExternalDocumentation;
import io.swagger.v3.oas.models.OpenAPI;
import io.swagger.v3.oas.models.info.Info;
import io.swagger.v3.oas.models.info.License;
import org.springframework.context.annotation.Bean;
import org.springframework.context.annotation.Configuration;@Configuration
public class SwaggerConfig {@Beanpublic OpenAPI springShopOpenAPI() {return new OpenAPI().info(new Info().title("標題").description("我的API文檔").version("v1").license(new License().name("Apache 2.0").url("http://springdoc.org"))).externalDocs(new ExternalDocumentation().description("外部文檔").url("https://springshop.wiki.github.org/docs"));}}
4.添加接口注釋信息
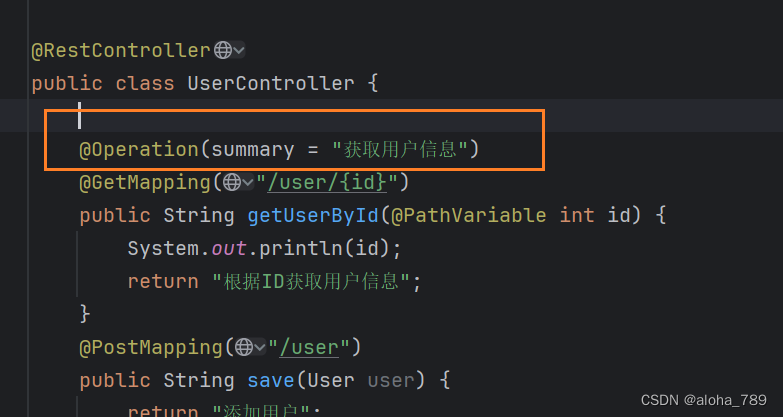
在get,post等注解上添加注釋信息,后面生成的swagger文檔對應接口會帶有注釋
訪問swagger文檔
啟動項目后,瀏覽器輸入地址:http://localhost:8080/swagger-ui/index.html#/

注釋正常顯示,文檔訪問成功

結果不正確問題)

)
)


: 圖像(數據)遠程傳輸)
)


