十五、K8s可觀測能力:日志收集
文章目錄
- 十五、K8s可觀測能力:日志收集
- 1、云原生日志框架-ECK介紹
- 1.1 什么是ECK?
- 1.2 ECK核心資源:
- 1.3 生產級日志收集架構
- 2、日志收集-ECK
- 2.1 集群規劃
- 2.2 ECK 安裝
- 2.3 一鍵部署高可用 ES 集群
- 2.4 一鍵部署 Kibana 集群
- 2.5 一鍵部署 Zookeeper 集群
- 2.6 一鍵部署 Kafka 集群
- 2.7 一鍵部署 Logstash 集群
- 2.8 一鍵部署 Filebeat 收集日志
- 2.9 使用 Kibana 查詢 K8s 日志
- 2.10 Filebeat 配置實戰:收集指定空間下的日志
- 2.11 Filebeat 配置實戰:根據標簽收集日志
- 2.12 Filebeat 配置實戰:收集系統日志及文件日志
- 2.13 Filebeat 配置實戰:收集容器內日志
1、云原生日志框架-ECK介紹
1.1 什么是ECK?
Elastic Cloud on Kubernetes(ECK)是Elastic官方提供的Kubernetes Operator,用于簡化在Kubernetes環境中部署、管理和擴展Elastic Stack的全方位組件。
ECK基于Kubernetes的Custom Resource Definitions(CRDs),可以讓用戶以聲明式的方式定義和管理Elastic Stack組件,比如創建一個Elasticsearch的集群只需要像創建一個Deployment聲明一個Yaml,然后創建即可。
1.2 ECK核心資源:
- Elasticsearch:用于管理和部署Elasticsearch集群
- Kibana:用于管理和部署Kibana服務
- Beat:用于管理和部署Beat服務
- Logstash:用于管理和部署Logstash服務
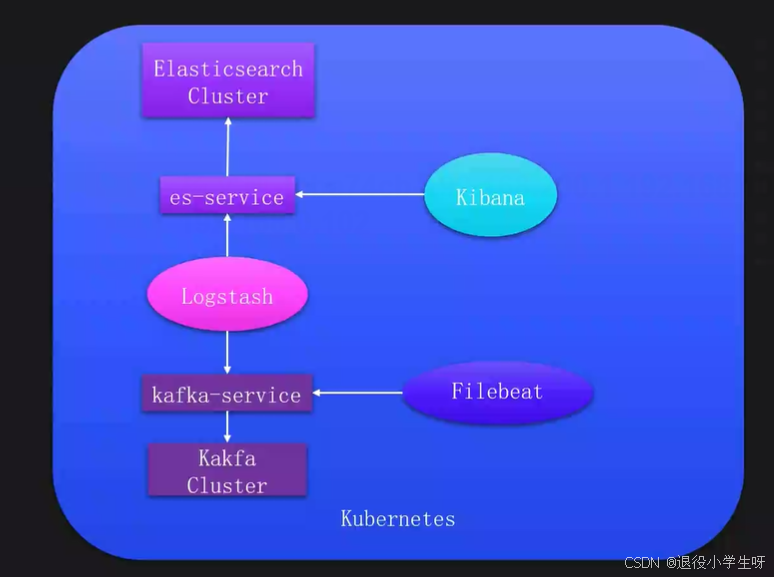
1.3 生產級日志收集架構
2、日志收集-ECK
2.1 集群規劃
| 主機名稱 | 物理IP | 系統 | 資源配置 | 說明 |
|---|---|---|---|---|
| k8s-master01 | 192.168.200.50 | Rocky9.4 | 4核6g | Master節點 |
| k8s-node01 | 192.168.200.51 | Rocky9.4 | 4核6g | Node01節點 |
| k8s-node02 | 192.168.200.52 | Rocky9.4 | 4核6g | Node02節點 |
2.2 ECK 安裝
官方文檔:https://www.elastic.co/guide/en/cloud-on-k8s/master/k8s-deploy-eck.html
# ECK CRD 安裝:
[root@k8s-master01 ~]# kubectl create -f https://download.elastic.co/downloads/eck/2.16.1/crds.yaml# 查看 CRD:
[root@k8s-master01 ~]# kubectl get crd | grep elastic
agents.agent.k8s.elastic.co                            2025-07-05T12:33:58Z
apmservers.apm.k8s.elastic.co                          2025-07-05T12:34:00Z
beats.beat.k8s.elastic.co                              2025-07-05T12:34:00Z
elasticmapsservers.maps.k8s.elastic.co                 2025-07-05T12:34:00Z
elasticsearchautoscalers.autoscaling.k8s.elastic.co    2025-07-05T12:34:00Z
elasticsearches.elasticsearch.k8s.elastic.co           2025-07-05T12:34:03Z
enterprisesearches.enterprisesearch.k8s.elastic.co     2025-07-05T12:34:03Z
kibanas.kibana.k8s.elastic.co                          2025-07-05T12:34:04Z
logstashes.logstash.k8s.elastic.co                     2025-07-05T12:34:06Z
stackconfigpolicies.stackconfigpolicy.k8s.elastic.co   2025-07-05T12:34:08Z
# 下載ECK Operator的yaml包
[root@k8s-master01 ~]# wget https://download.elastic.co/downloads/eck/2.16.1/operator.yaml# 修改成國內的鏡像
[root@k8s-master01 ~]# vim operator.yaml
[root@k8s-master01 ~]# cat -n operator.yaml |grep "image:"457	      - image: "crpi-q1nb2n896zwtcdts.cn-beijing.personal.cr.aliyuncs.com/ywb01/eck-operator:2.16.1"# 安裝ECK Operator
[root@k8s-master01 ~]# kubectl create -f operator.yaml# 查看部署狀態:
[root@k8s-master01 ~]# kubectl get po -n elastic-system
NAME                 READY   STATUS    RESTARTS   AGE
elastic-operator-0   1/1     Running   0          42s
2.3 一鍵部署高可用 ES 集群
接下來即可使用自定義資源 Elasticsearch 一鍵啟動一個 ES 集群
# 創建一個用于放置日志收集工具的 Namespace:
[root@k8s-master01 ~]# kubectl create ns logging創建一個定義 Elasticsearch 集群的 Yaml 文件:
[root@k8s-master01 ~]# vim elasticsearch.yaml
[root@k8s-master01 ~]# cat elasticsearch.yaml
apiVersion: elasticsearch.k8s.elastic.co/v1
kind: Elasticsearch
metadata:name: es-cluster
spec:version: 8.18.3       # ES的版本image: crpi-q1nb2n896zwtcdts.cn-beijing.personal.cr.aliyuncs.com/ywb01/elasticsearch:8.18.3                    # 如果不指定鏡像,只寫版本,默認拉取官方的鏡像nodeSets:             # 節點組配置,可以單獨定義集群中不同角色的節點- name: default       # 節點組名稱,全局唯一count: 3            # 當前節點組的節點數量#config:#node.store.allow_mmap: false#volumeClaimTemplates:      # 動態存儲,本次不演示#- metadata:#name: elasticsearch-data#spec:#accessModes:#- ReadWriteOnce#resources:#requests:#storage: 5Gi#storageClassName: standardpodTemplate:spec:volumes:- name: elasticsearch-dataemptyDir: {}initContainers:- name: sysctlsecurityContext:privileged: truerunAsUser: 0command: ['sh', '-c', 'sysctl -w vm.max_map_count=262144']
# 創建集群:
[root@k8s-master01 ~]# kubectl create -f elasticsearch.yaml -n logging# 查看集群狀態:
[root@k8s-master01 ~]# kubectl get po -n logging
NAME                      READY   STATUS    RESTARTS   AGE
es-cluster-es-default-0   1/1     Running   0          11m
es-cluster-es-default-1   1/1     Running   0          11m
es-cluster-es-default-2   1/1     Running   0          11m
# 設置變量(密碼)
[root@k8s-master01 ~]# PASSWORD=$(kubectl -n logging get secret es-cluster-es-elastic-user -o go-template='{{.data.elastic | base64decode}}')
[root@k8s-master01 ~]# echo $PASSWORD
5dlR77gBrjU03n6LQ5T814CH# 查看service
[root@k8s-master01 ~]# kubectl get svc -n logging
NAME                          TYPE        CLUSTER-IP      EXTERNAL-IP   PORT(S)    AGE
es-cluster-es-default         ClusterIP   None            <none>        9200/TCP   12m
es-cluster-es-http            ClusterIP   10.102.60.248   <none>        9200/TCP   12m
es-cluster-es-internal-http   ClusterIP   10.109.191.98   <none>        9200/TCP   12m
es-cluster-es-transport       ClusterIP   None            <none>        9300/TCP   12m# 測試是否可以訪問
[root@k8s-master01 ~]# curl -u "elastic:$PASSWORD" https://10.102.60.248:9200/_cluster/health?pretty -k
{"cluster_name" : "es-cluster","status" : "green","timed_out" : false,"number_of_nodes" : 3,"number_of_data_nodes" : 3,"active_primary_shards" : 3,"active_shards" : 6,"relocating_shards" : 0,"initializing_shards" : 0,"unassigned_shards" : 0,"unassigned_primary_shards" : 0,"delayed_unassigned_shards" : 0,"number_of_pending_tasks" : 0,"number_of_in_flight_fetch" : 0,"task_max_waiting_in_queue_millis" : 0,"active_shards_percent_as_number" : 100.0
}
2.4 一鍵部署 Kibana 集群
Elasticsearch 集群創建完成后,可以使用 Kibana 資源創建一個 Kibana 實例:
[root@k8s-master01 ~]# vim kibana.yam
[root@k8s-master01 ~]# cat kibana.yaml
apiVersion: kibana.k8s.elastic.co/v1
kind: Kibana
metadata:name: kibana
spec:version: 8.18.3image: crpi-q1nb2n896zwtcdts.cn-beijing.personal.cr.aliyuncs.com/ywb01/kibana:8.18.3count: 3elasticsearchRef:         # ES集群配置name: es-cluster        # ECK部署的ES集群名字http:service:spec:type: NodePorttls:selfSignedCertificate:disabled: true
# 創建 Kibana 集群
[root@k8s-master01 ~]# kubectl create -f kibana.yaml -n logging# 查看pod
[root@k8s-master01 ~]# kubectl get po -n logging | grep kibana
kibana-kb-6bf974f8d7-66gpb   1/1     Running   0          8m39s
kibana-kb-6bf974f8d7-ffgfl   1/1     Running   0          8m39s
kibana-kb-6bf974f8d7-qrm57   1/1     Running   0          8m39s# 查看創建的 Service:
[root@k8s-master01 ~]# kubectl get svc -n logging | grep kibana
kibana-kb-http                NodePort    10.107.247.179   <none>        5601:30802/TCP   9m31s
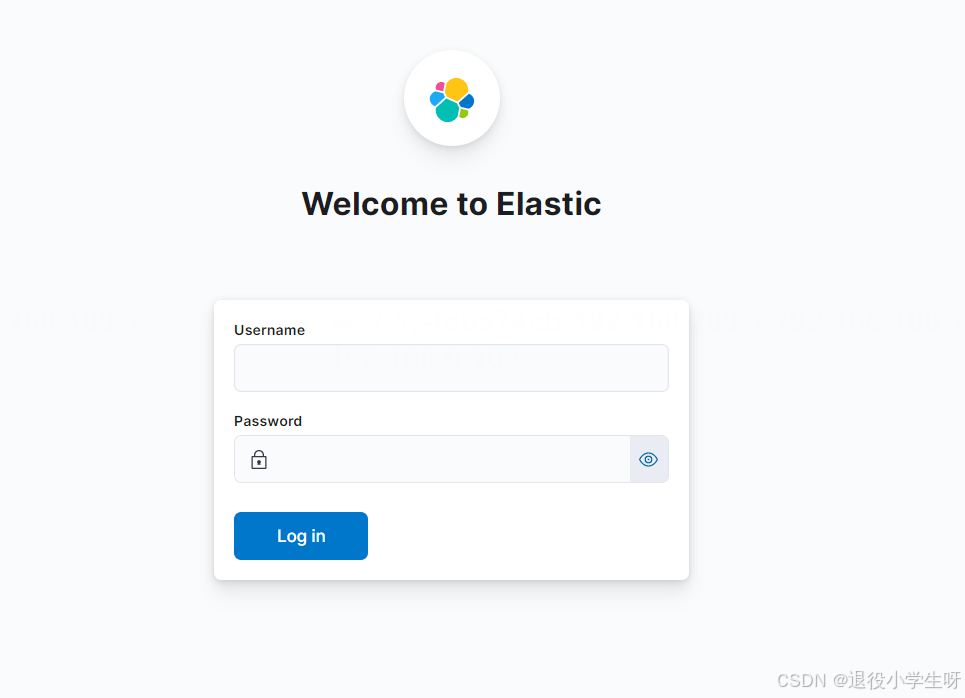
待 Pod 啟動完成后,即可訪問 Kibana,用戶名和密碼和 ES 的一致:
2.5 一鍵部署 Zookeeper 集群
# 下載配置(配置已經修改好直接用就行,helm已經不再維護這個版本了)
[root@k8s-master01 ~]# git clone https://gitee.com/ywb1234/zookeeper.git# 安裝Zookeeper集群
[root@k8s-master01 ~]# cd zookeeper/
[root@k8s-master01 zookeeper]# helm install zookeeper . -n logging# 查看pod狀態:
[root@k8s-master01 zookeeper]# kubectl get po -n logging | grep zookeeper
zookeeper-0                  1/1     Running   0          3m20s
zookeeper-1                  1/1     Running   0          3m20s
zookeeper-2                  1/1     Running   0          3m20s
2.6 一鍵部署 Kafka 集群
# 下載配置(配置已經修改好直接用就行,helm已經不再維護這個版本了)
[root@k8s-master01 ~]# git clone https://gitee.com/ywb1234/kafka.git# 安裝Kafka集群
[root@harbor ~]# cd kafka/
[root@k8s-master01 kafka]# helm install kafka . -n logging# 查看pod狀態:
[root@k8s-master01 kafka]# kubectl get po -n logging | grep kafka
kafka-0           1/1     Running   0               9m27s
kafka-1           1/1     Running   0               9m27s
kafka-2           1/1     Running   0               9m27s
2.7 一鍵部署 Logstash 集群
Logstash 主要用于消費 Kafka 中的數據,之后把數據寫入到 ES 集群,接下來使用 Logstash資源創建 Logstash 集群:
[root@k8s-master01 ~]# vim logstash.yaml
[root@k8s-master01 ~]# cat logstash.yaml
apiVersion: logstash.k8s.elastic.co/v1alpha1
kind: Logstash
metadata:name: logstash
spec:count: 3elasticsearchRefs:                # ES輸出配置- name: es-clusterclusterName: es-cluster       # ES集群名字version: 8.18.3image: crpi-q1nb2n896zwtcdts.cn-beijing.personal.cr.aliyuncs.com/ywb01/logstash:8.18.3podTemplate:spec:volumes:- name: logstash-dataemptyDir: {}pipelines:                        # 數據處理配置- pipeline.id: main             # pipeline名稱config.string: |              # logstash相關配置input {kafka {enable_auto_commit => trueauto_commit_interval_ms => "1000"bootstrap_servers => "kafka:9092"topics => ["k8spodlogs"]codec => json}}output {elasticsearch {hosts => [ "https://es-cluster-es-http:9200" ]index => "k8spodlogs-%{+YYYY.MM.dd}"ssl_enabled => trueuser => "elastic"password => "5dlR77gBrjU03n6LQ5T814CH"ssl_certificate_authorities => "${ES_CLUSTER_ES_SSL_CERTIFICATE_AUTHORITY}"}}# 安裝logstash集群
[root@k8s-master01 ~]# kubectl create -f logstash.yaml -n logging# 查看pod狀態:
[root@k8s-master01 ~]# kubectl get po -n logging | grep logstash
logstash-ls-0                1/1     Running   0             25m
logstash-ls-1                1/1     Running   0             25m
logstash-ls-2                1/1     Running   0             25m
2.8 一鍵部署 Filebeat 收集日志
設置權限
[root@k8s-master01 ~]# vim filebeat-role.yaml
[root@k8s-master01 ~]# cat filebeat-role.yaml
apiVersion: v1
kind: ServiceAccount
metadata:name: filebeatnamespace: logging
---
apiVersion: rbac.authorization.k8s.io/v1
kind: ClusterRole
metadata:name: filebeat
rules:
- apiGroups: [""]resources: ["pods", "nodes", "services", "namespaces"]verbs: ["get", "list", "watch"]
- apiGroups: ["apps"]resources: ["daemonsets"]verbs: ["create", "get", "update"]
---
apiVersion: rbac.authorization.k8s.io/v1
kind: ClusterRoleBinding
metadata:name: filebeat
roleRef:apiGroup: rbac.authorization.k8s.iokind: ClusterRolename: filebeat
subjects:
- kind: ServiceAccountname: filebeatnamespace: logging[root@k8s-master01 ~]# kubectl create -f filebeat-role.yaml -n logging
創建 Filebeat 進行日志的收集
[root@k8s-master01 ~]# vim filebeat.yaml
[root@k8s-master01 ~]# cat filebeat.yaml
apiVersion: beat.k8s.elastic.co/v1beta1
kind: Beat
metadata:name: filebeat
spec:type: filebeatversion: 8.18.3image: crpi-q1nb2n896zwtcdts.cn-beijing.personal.cr.aliyuncs.com/ywb01/filebeat:8.18.3config:                                   # filebeat配置output.kafka:                           # 輸出hosts: ["kafka:9092"]topic: '%{[fields.log_topic]}'#topic: 'k8spodlogs'filebeat.autodiscover.providers:        # 來源配置- node: ${NODE_NAME}        # 自動區分節點的名字type: kubernetes          # 發現類型,支持docker、k8s等templates:                # 配置模版- config:- paths:                # 收集日志的路徑- /var/log/containers/*${data.kubernetes.container.id}.logtail_files: true      # 從文件的末尾開始讀取日志type: container       # 聲明這是一個容器類型的輸入fields:               # 額外的字段log_topic: k8spodlogsprocessors:           # 處理器,用于數據預處理- add_cloud_metadata: {}- add_host_metadata: {}processors:- add_cloud_metadata: {}- add_host_metadata: {}- drop_event:when:or:- equals:kubernetes.container.name: "filebeat"daemonSet:podTemplate:spec:serviceAccountName: filebeatautomountServiceAccountToken: trueterminationGracePeriodSeconds: 30dnsPolicy: ClusterFirstWithHostNethostNetwork: true # Allows to provide richer host metadatacontainers:- name: filebeatsecurityContext:runAsUser: 0# If using Red Hat OpenShift uncomment this:#privileged: truevolumeMounts:- name: varlogcontainersmountPath: /var/log/containers- name: varlogpodsmountPath: /var/log/pods- name: varlibdockercontainersmountPath: /var/lib/docker/containers- name: messagesmountPath: /var/log/messagesenv:- name: NODE_NAMEvalueFrom:fieldRef:fieldPath: spec.nodeNamevolumes:- name: varlogcontainershostPath:path: /var/log/containers- name: varlogpodshostPath:path: /var/log/pods- name: varlibdockercontainershostPath:path: /var/lib/docker/containers- name: messageshostPath:path: /var/log/messages# 安裝Filebeat集群
[root@k8s-master01 ~]# kubectl create -f filebeat.yaml -n logging# 查看pod狀態:
[root@k8s-master01 ~]# kubectl get pod -n logging | grep filebeat
filebeat-beat-filebeat-96grf   1/1     Running   0          2m20s
filebeat-beat-filebeat-kk4l4   1/1     Running   0          2m20s
filebeat-beat-filebeat-kzdvk   1/1     Running   0          2m20s
2.9 使用 Kibana 查詢 K8s 日志
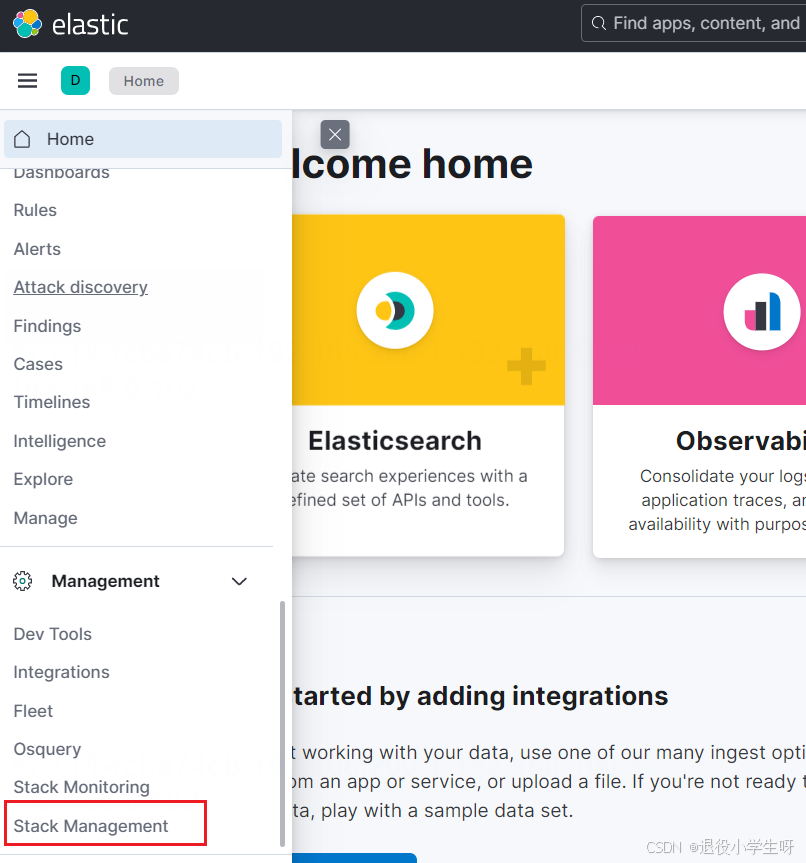
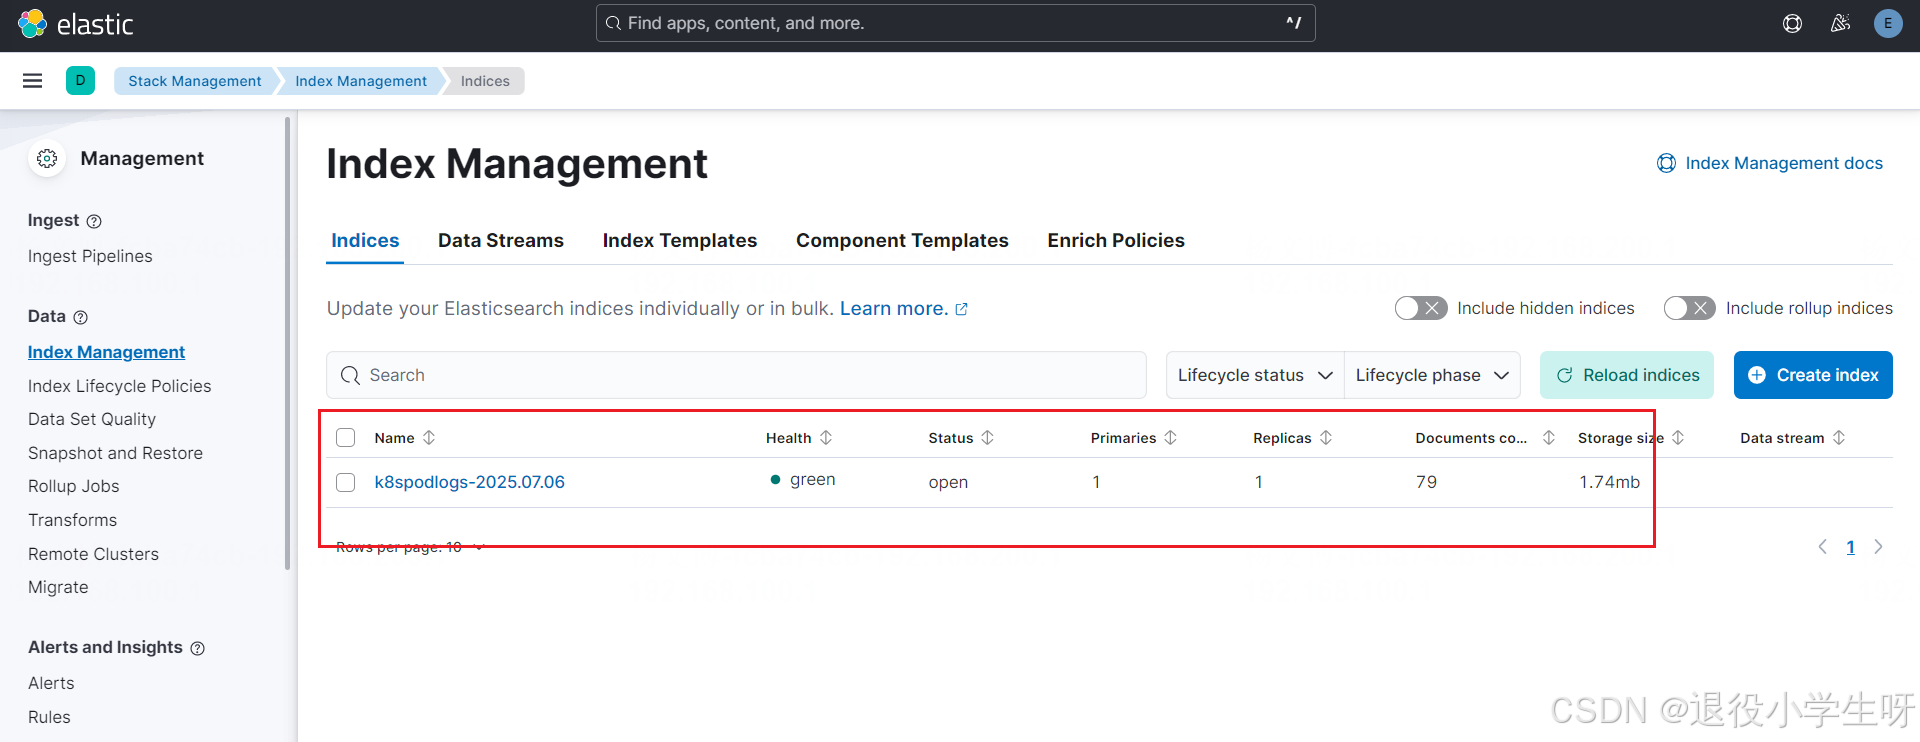
待所有的 Pod 啟動完成后,即可使用 Kibana 查詢日志。登錄 Kibana 后,點擊 Index Management,即可查看索引:
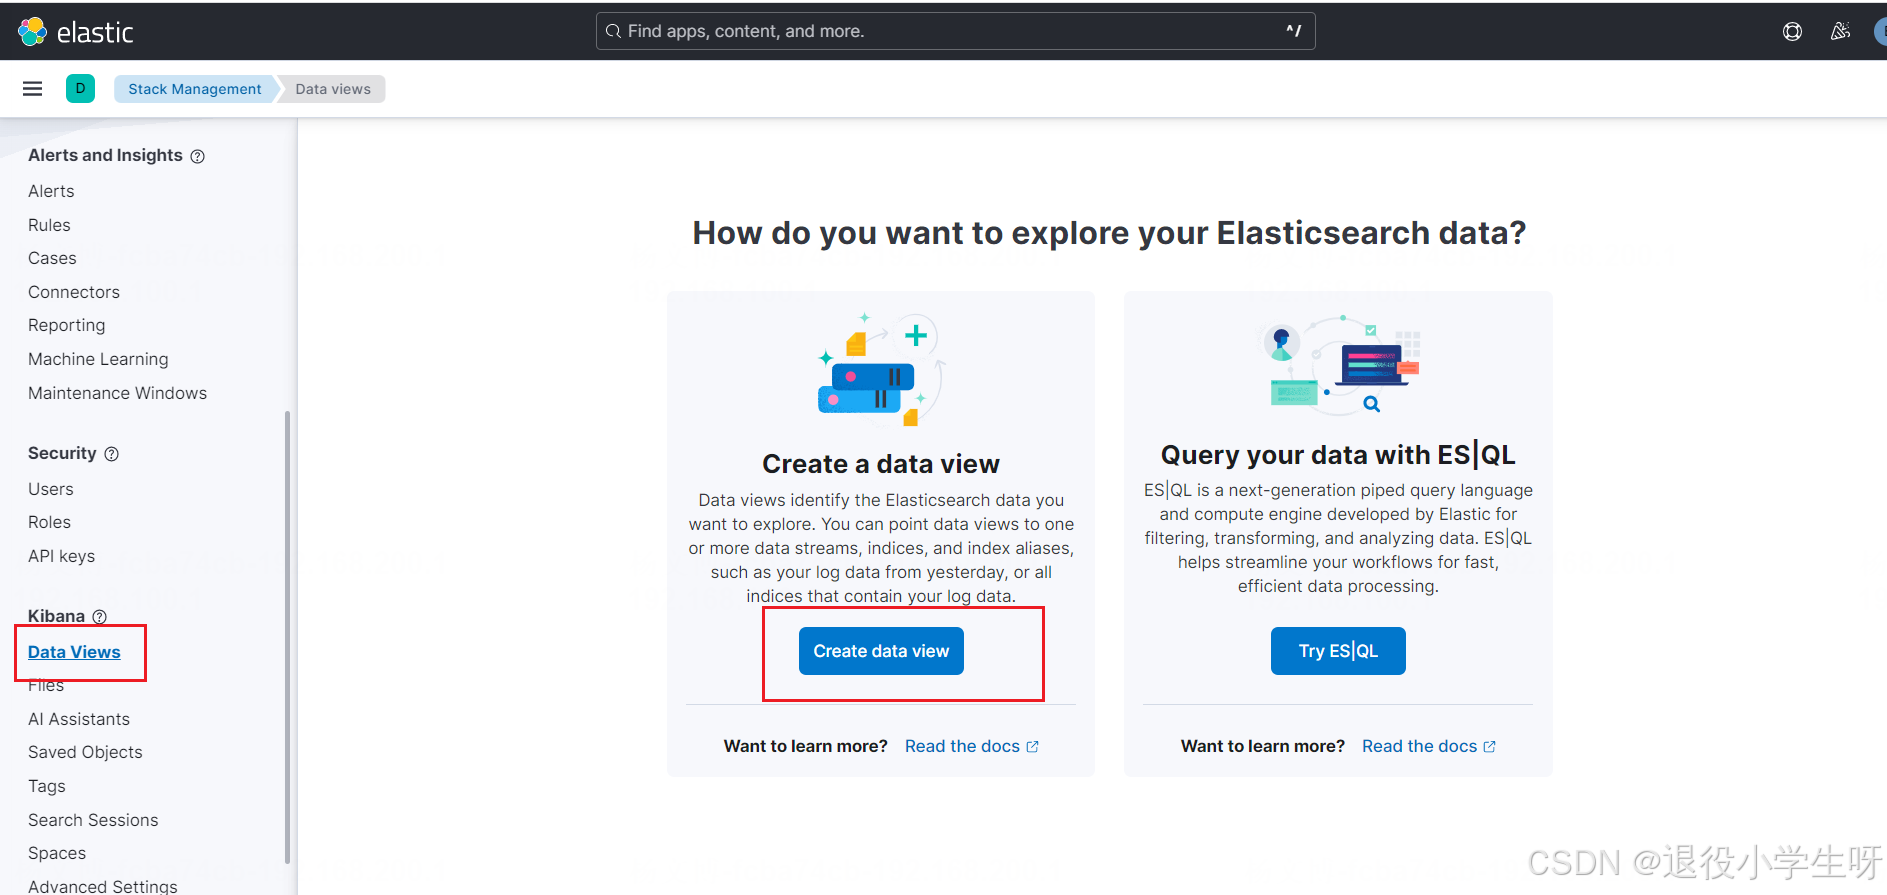
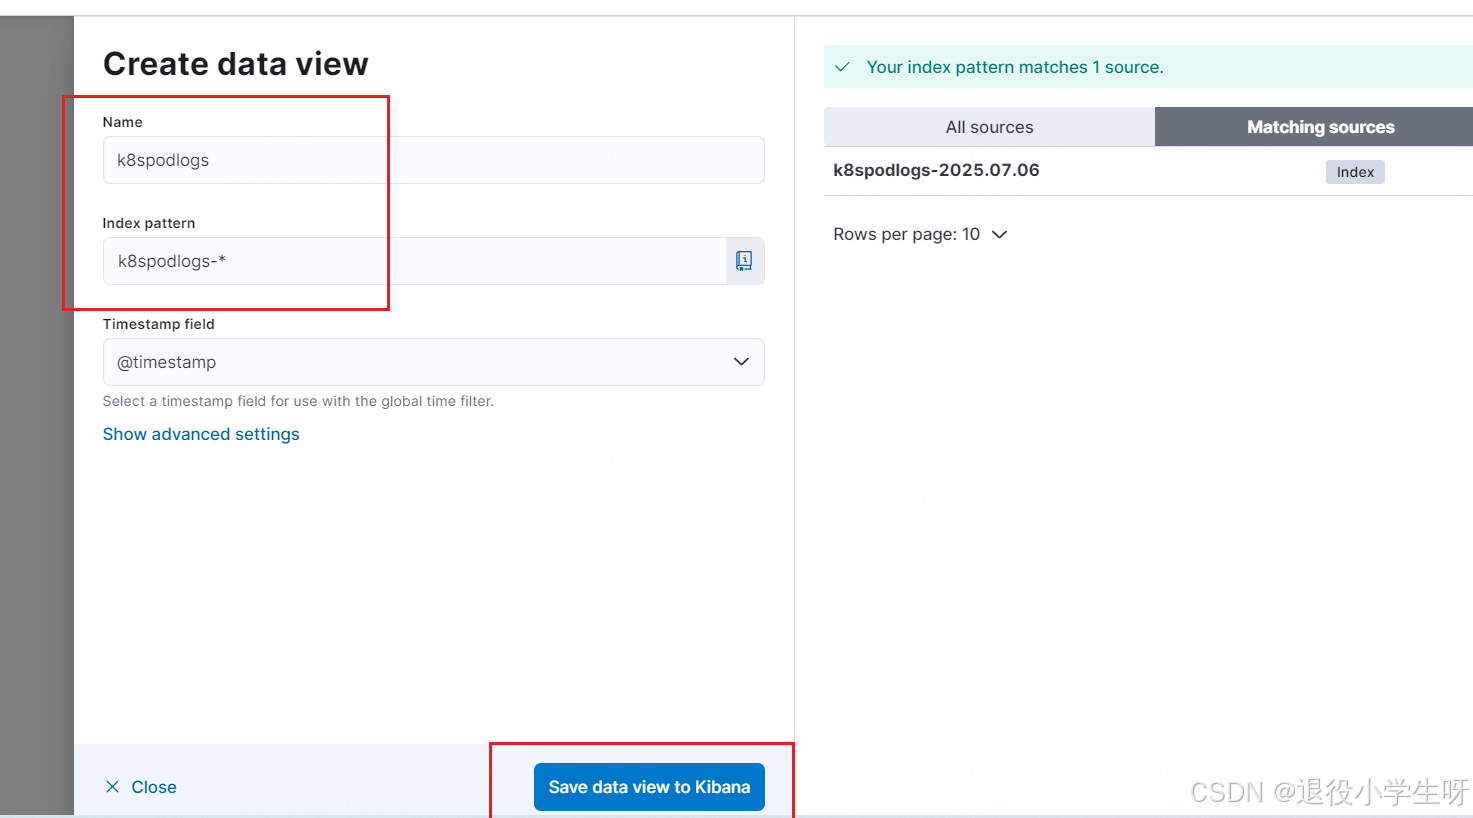
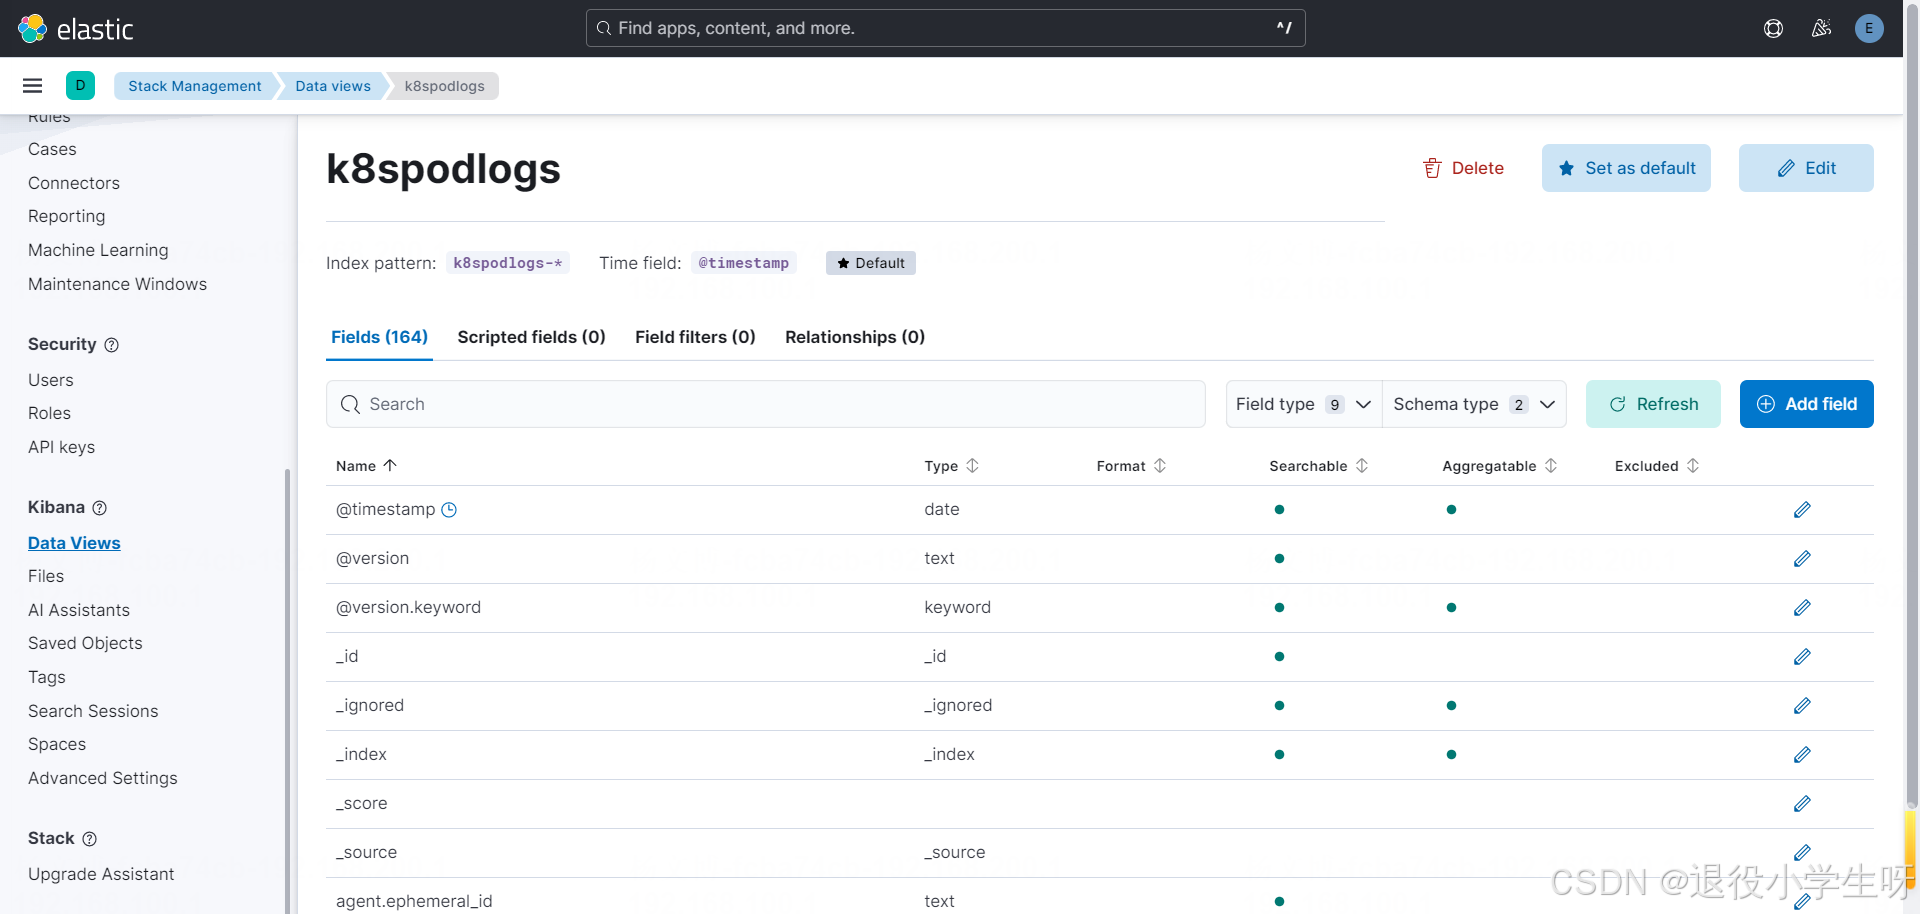
之后點擊 data views 創建一個 data view:
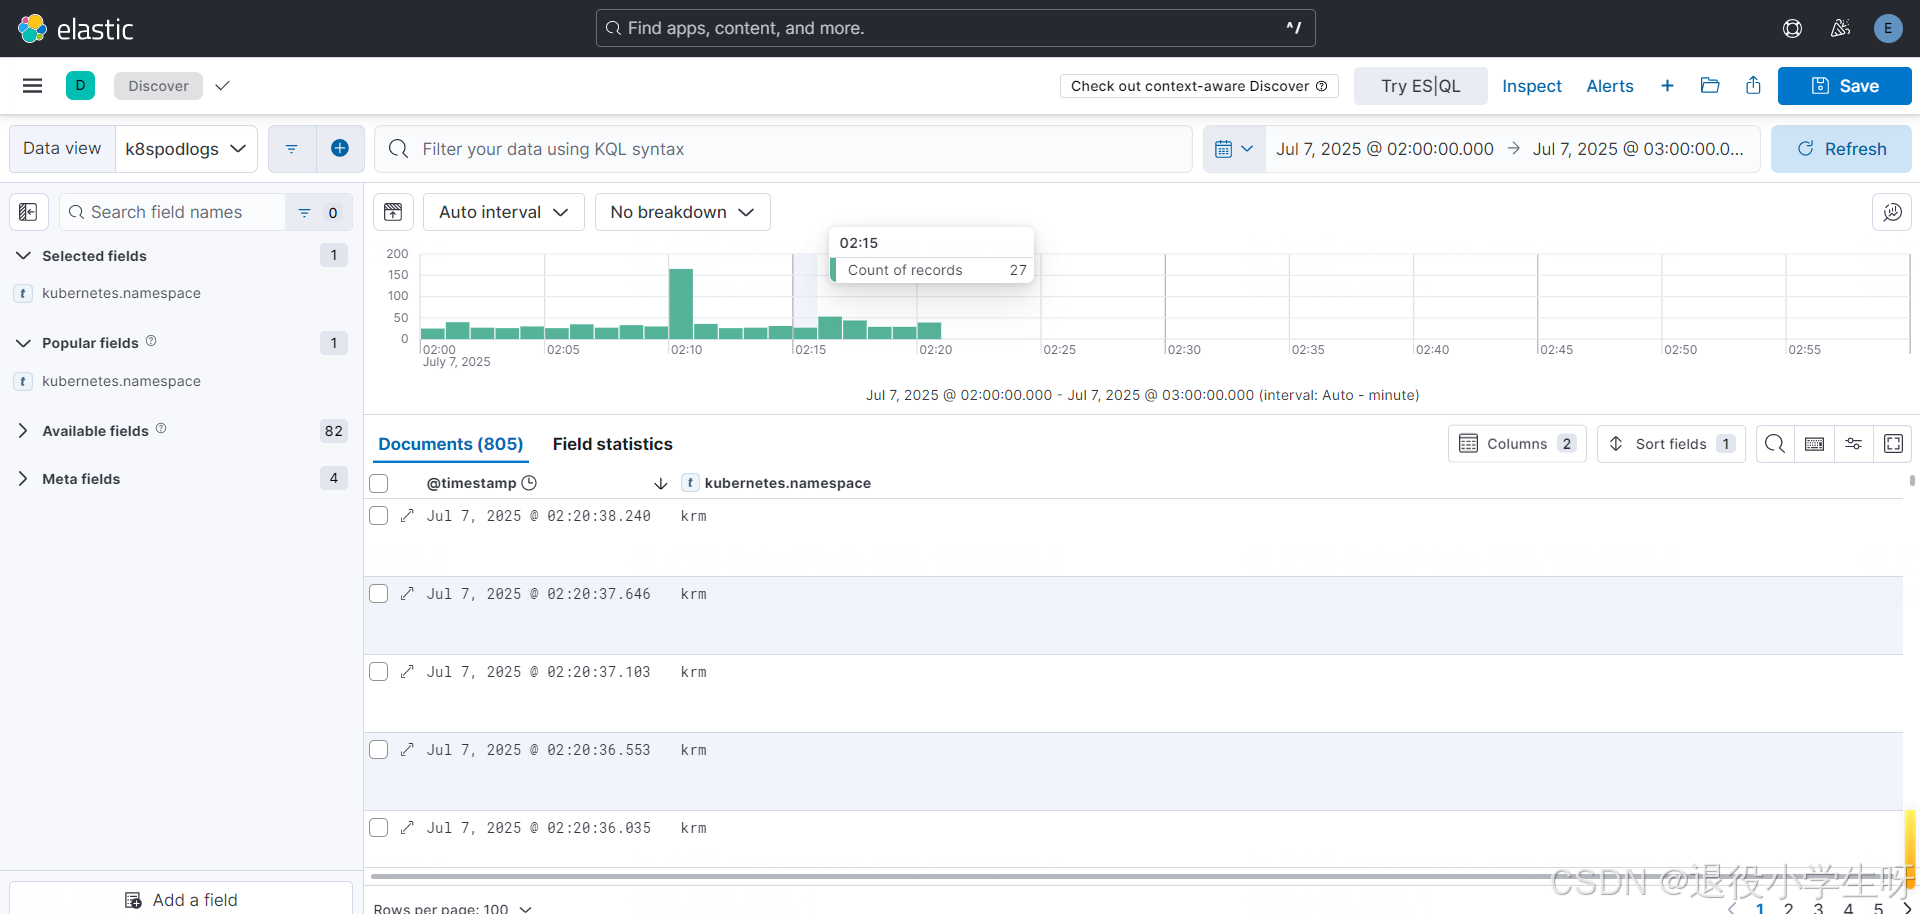
查詢日志:

2.10 Filebeat 配置實戰:收集指定空間下的日志
有時候可能只需要收集部分空間的日志,而并不是收集所有的日志,此時通過修改 Filebeat 的配置,實現只收集部分空間的日志。
[root@k8s-master01 ~]# cat filebeat.yaml
....templates:- config:- paths:- /var/log/containers/*${data.kubernetes.container.id}.logtail_files: truetype: containerfields:log_topic: k8spodlogsprocessors:- add_cloud_metadata: {}- add_host_metadata: {}condition.equals.kubernetes.namespace: krm # 只收集 krm 和 kube-system 空間下的日志
....# 更新配置
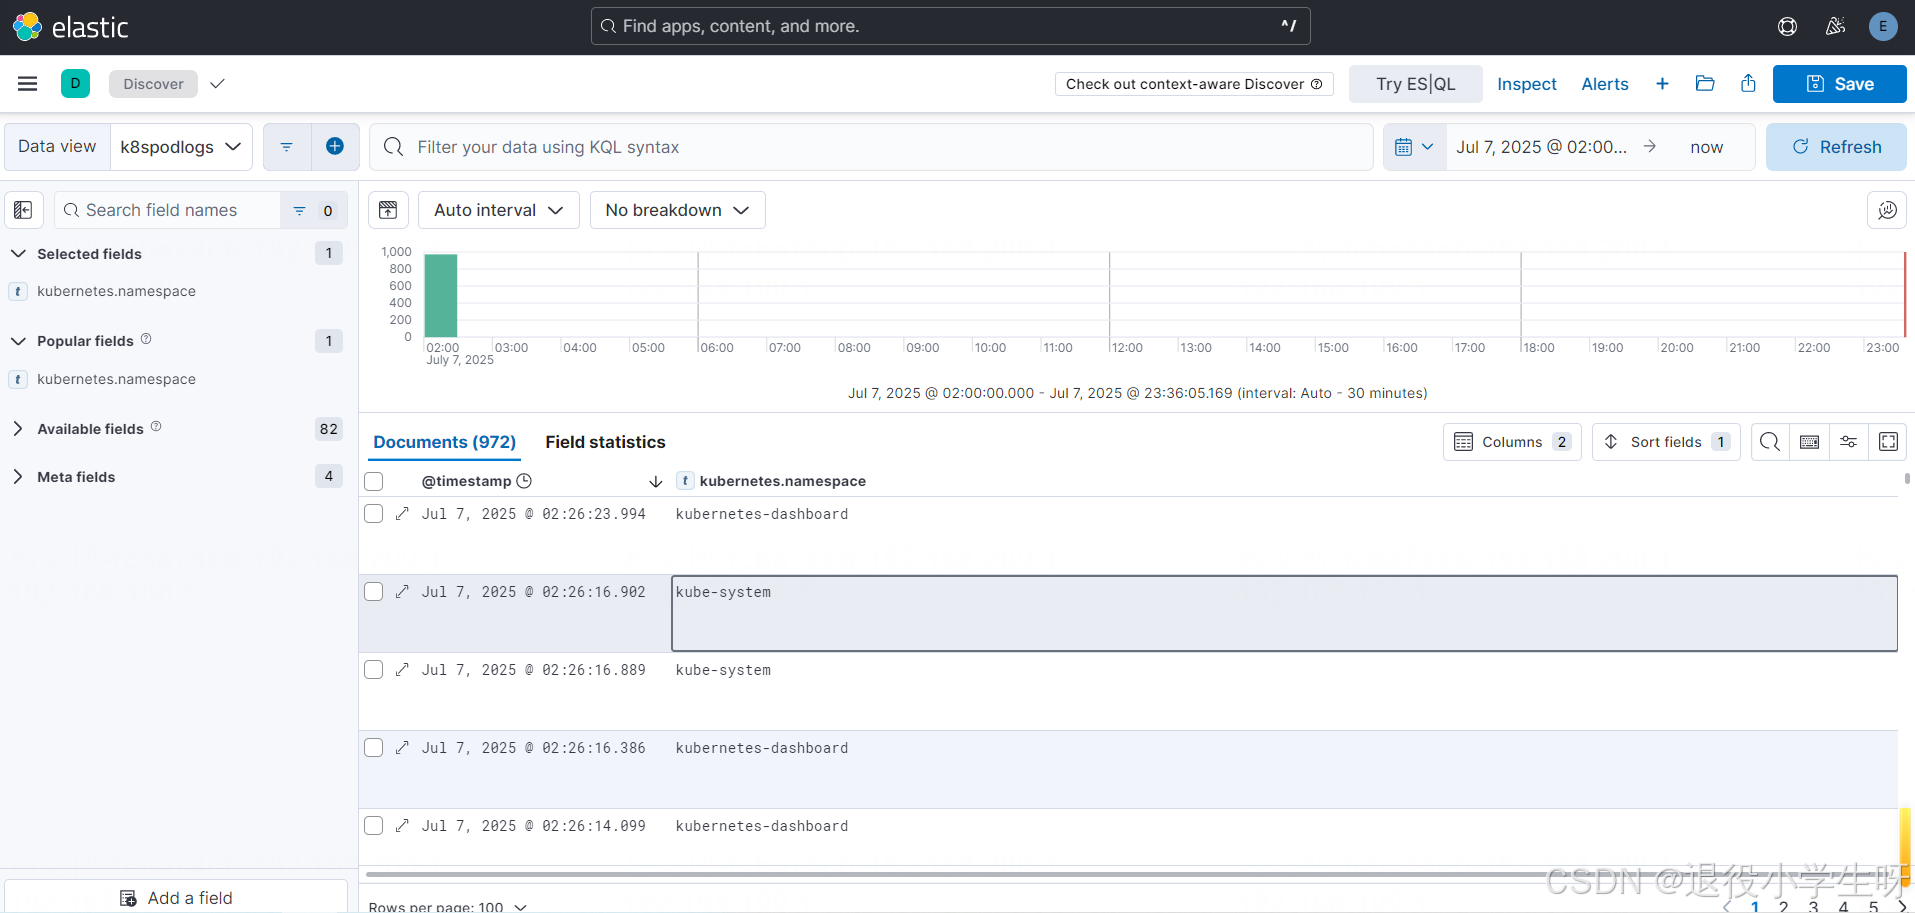
[root@k8s-master01 ~]# kubectl replace -f filebeat.yaml -n logging
替換后,日志將只收集 krm 和 kube-system:
2.11 Filebeat 配置實戰:根據標簽收集日志
除了逐個配置 Namespace,也可以根據 Namespace 的標簽進行過濾,更加方便
[root@k8s-master01 ~]# cat filebeat.yaml
....processors:- add_cloud_metadata: {}- add_host_metadata: {}- drop_event:when:or:- not:equals:     # 只收集 Namespace 具有 filebeat=true 標簽的空間日志kubernetes.namespace_labels.filebeat: "true"
....# 更新配置
[root@k8s-master01 ~]# kubectl replace -f filebeat.yaml -n logging
# 檢查是否有這個標簽
[root@k8s-master01 ~]# kubectl get ns -l filebeat=true
No resources found
已經沒有日志了
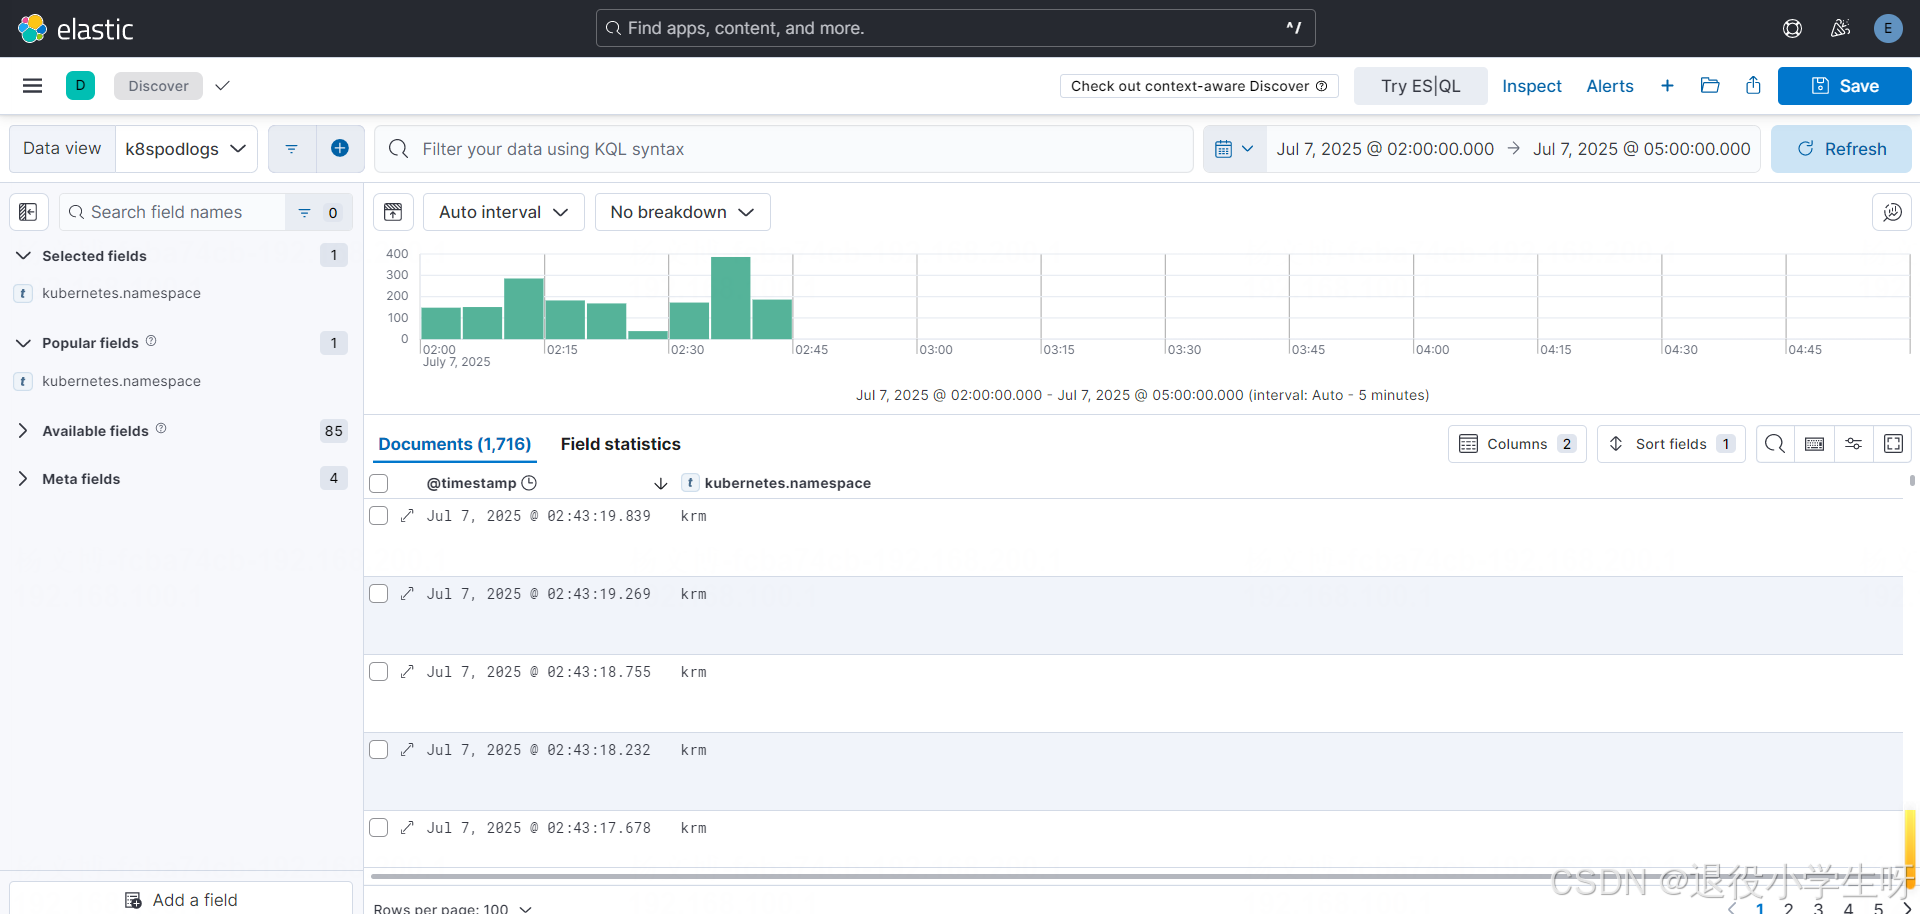
# 添加一個標簽
[root@k8s-master01 ~]# kubectl label ns krm filebeat=true
namespace/krm labeled
已經有krm的日志了
2.12 Filebeat 配置實戰:收集系統日志及文件日志
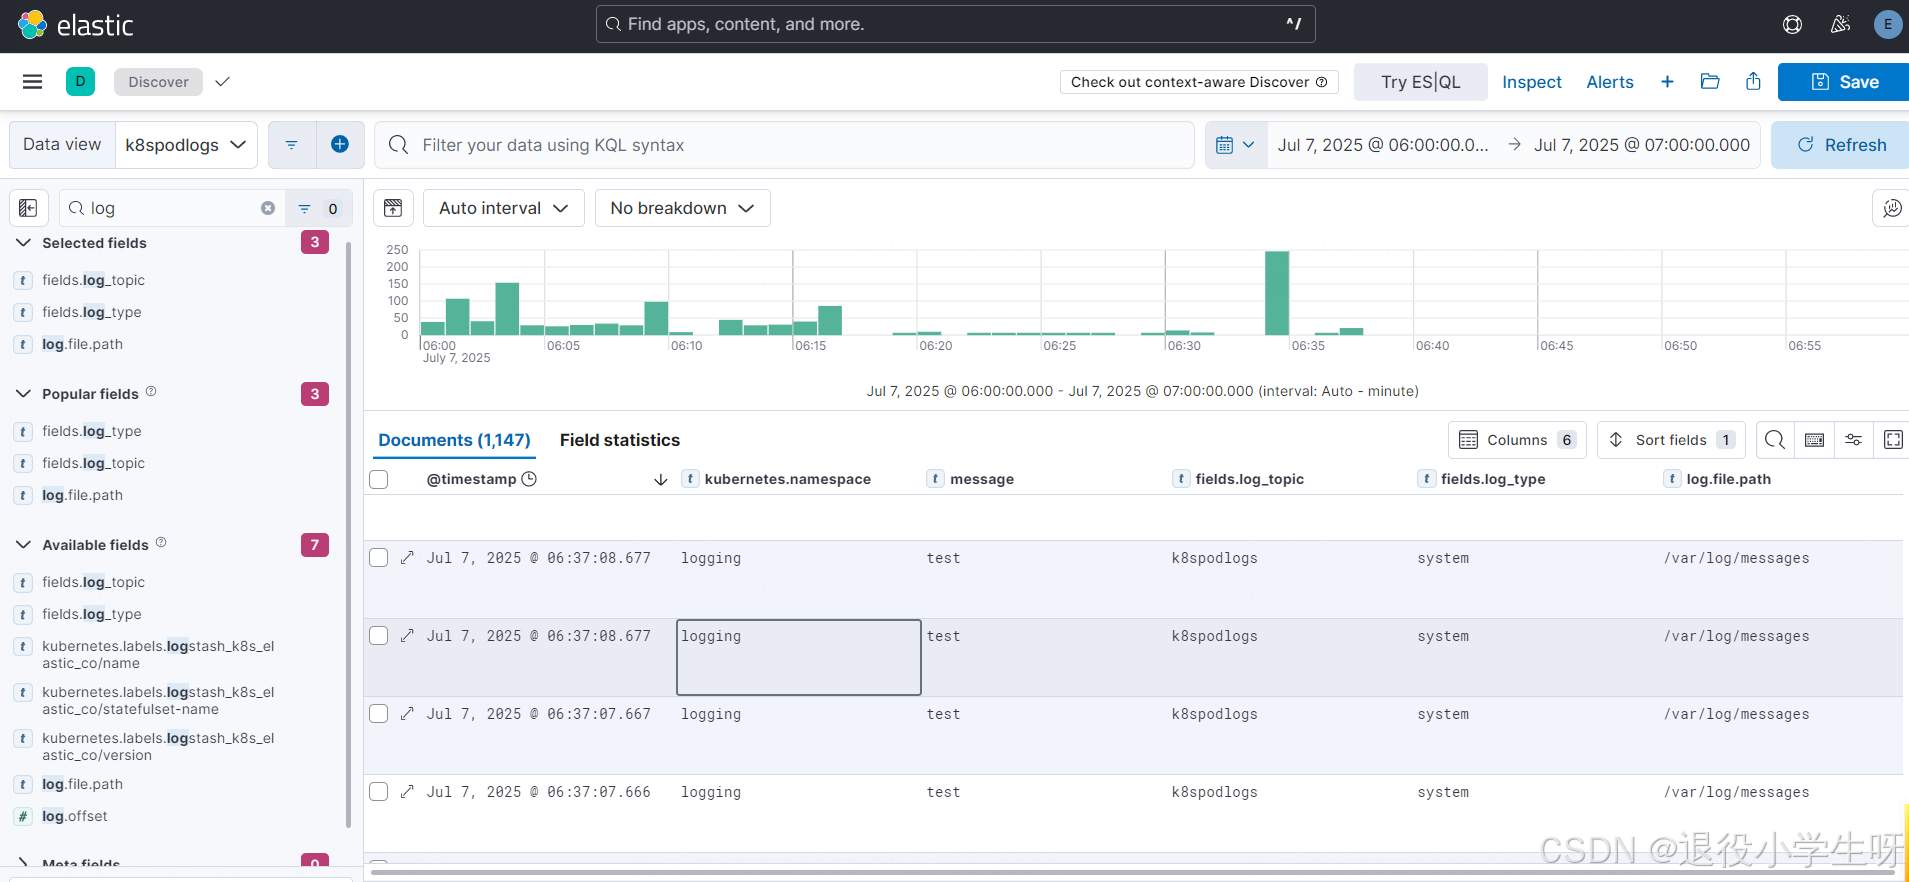
[root@k8s-master01 ~]# cat filebeat.yaml
....templates:- config:- paths: - /var/log/messages       # 采集的路徑tail_files: truetype: log                 # 指定輸入類型fields:log_topic: k8spodlogslog_type: system
....# 更新配置
[root@k8s-master01 ~]# kubectl replace -f filebeat.yaml -n logging
替換配置后,查看日志:
2.13 Filebeat 配置實戰:收集容器內日志
有些程序在設計時,并沒有符合云原生設計,也就是把程序的日志直接輸出到了本地文件,此時如果也需要收集日志,可以在程序的 Pod 內,啟動一個 Filebeat 的容器,用于收集日志。
# 首先創建一個模擬程序,用于輸出日志:
[root@k8s-master01 ~]# vim app.yaml
[root@k8s-master01 ~]# cat app.yaml
apiVersion: apps/v1
kind: Deployment
metadata:name: applabels:app: appenv: release
spec:selector:matchLabels:app: appreplicas: 1strategy:type: RollingUpdaterollingUpdate:maxUnavailable: 0maxSurge: 1# minReadySeconds: 30template:metadata:labels:app: appspec:containers:- name: appimage: crpi-q1nb2n896zwtcdts.cn-beijing.personal.cr.aliyuncs.com/ywb01/alpine:3.6imagePullPolicy: IfNotPresentvolumeMounts:- name: logpathmountPath: /opt/env:- name: TZvalue: "Asia/Shanghai"- name: LANGvalue: C.UTF-8- name: LC_ALLvalue: C.UTF-8command:- sh- -c- while true; do date >> /opt/date.log; sleep 2;  done  volumes:- name: logpathemptyDir: {}[root@k8s-master01 ~]# kubectl create -f app.yaml[root@k8s-master01 ~]# kubectl get po
NAME                   READY   STATUS    RESTARTS   AGE
app-69cb58c6c8-zzhrj   1/1     Running   0          20s# 查看容器內日志:
[root@k8s-master01 ~]# kubectl exec -ti app-69cb58c6c8-zzhrj -- sh
/ # tail -f /opt/date.log
Sun Jul  6 21:41:48 UTC 2025
Sun Jul  6 21:41:50 UTC 2025
Sun Jul  6 21:41:52 UTC 2025
....
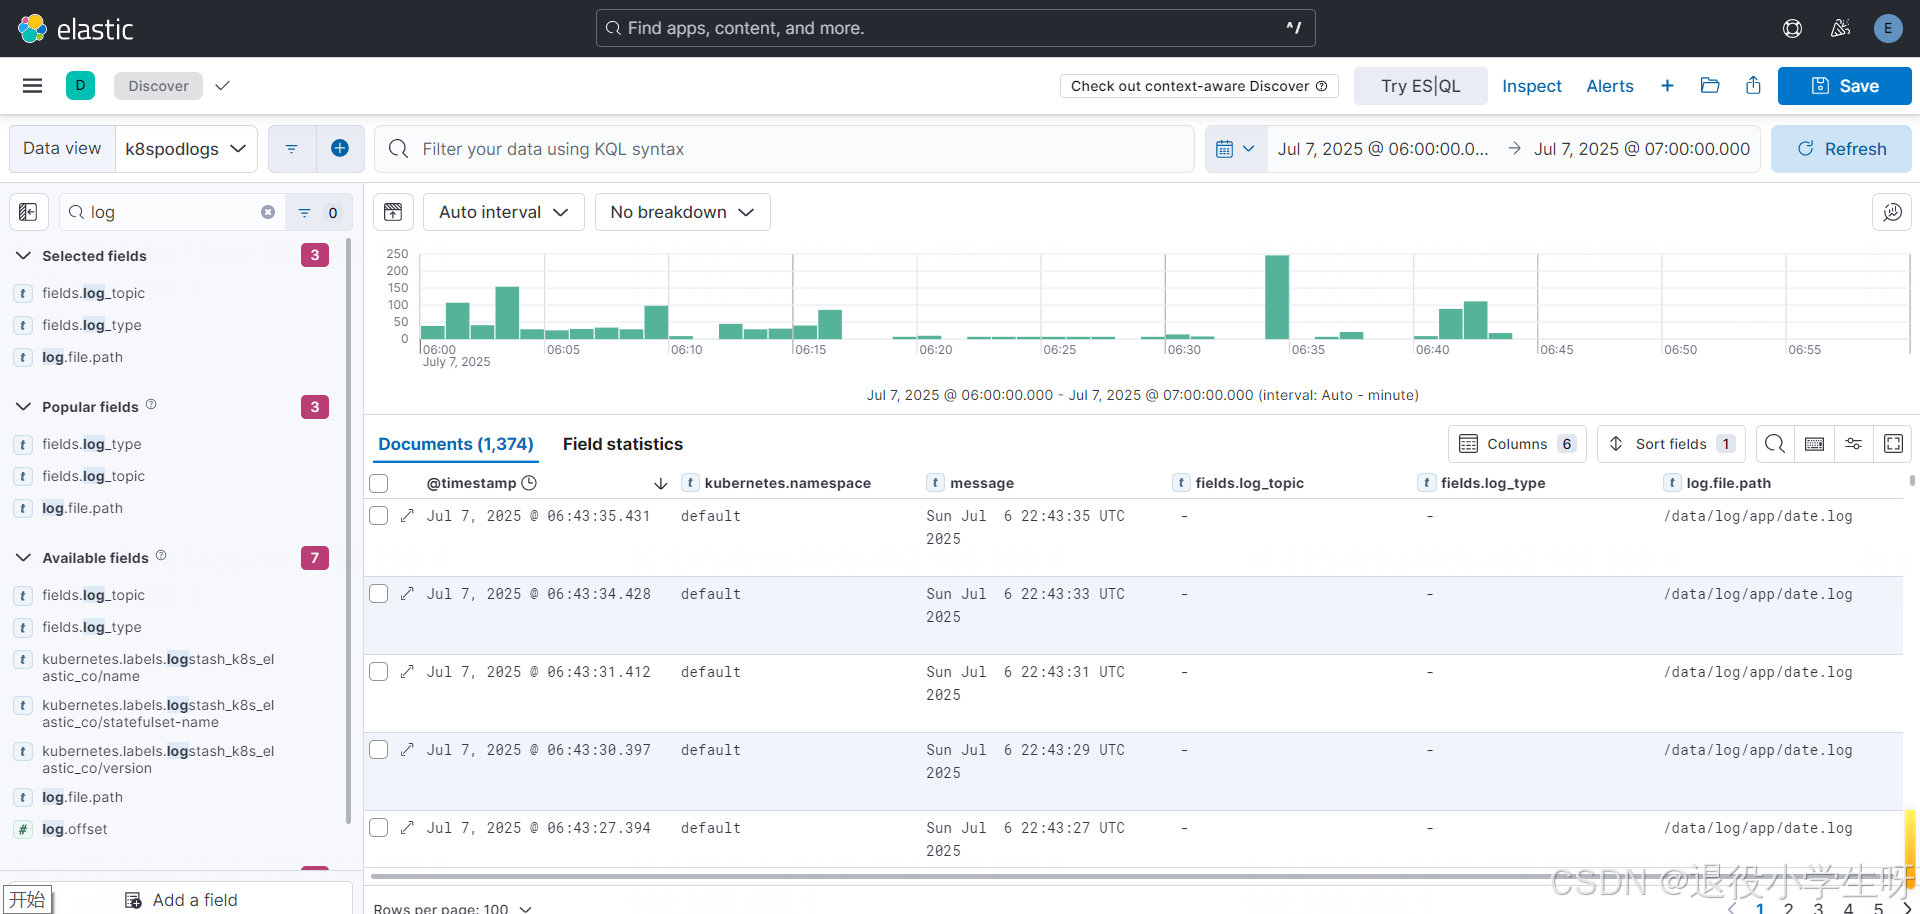
# 此時 Filebeat 是無法收集日志的。接下來在 Pod 內添加 filebeat 的 sidecar:
[root@k8s-master01 ~]# vim filebeat-cm.yaml
[root@k8s-master01 ~]# cat filebeat-cm.yaml
apiVersion: v1
kind: ConfigMap
metadata:name: filebeatconf
data:filebeat.yml: |-filebeat.inputs:- type: logpaths:- /data/log/*/*.logtail_files: truefields:kubernetes.pod.name: '${podName}'kubernetes.pod.ip: '${podIp}'kubernetes.labels.app: '${podDeployName}'kubernetes.namespace: '${podNamespace}'fields_under_root: true output.kafka:hosts: ["kafka.logging:9092"]topic: 'k8spodlogs'keep_alive: 30s
[root@k8s-master01 ~]# vim app-filebeat.yaml
[root@k8s-master01 ~]# cat app-filebeat.yaml
apiVersion: apps/v1
kind: Deployment
metadata:name: applabels:app: appenv: release
spec:selector:matchLabels:app: appreplicas: 1strategy:type: RollingUpdaterollingUpdate:maxUnavailable: 0maxSurge: 1# minReadySeconds: 30template:metadata:labels:app: appspec:containers:- name: filebeat                        image: crpi-q1nb2n896zwtcdts.cn-beijing.personal.cr.aliyuncs.com/ywb01/filebeat:8.18.3args:- -e- -c- /mnt/filebeat.ymlresources:requests:memory: "100Mi"cpu: "10m"limits:cpu: "200m"memory: "300Mi"imagePullPolicy: IfNotPresentenv:- name: podIpvalueFrom:fieldRef:apiVersion: v1fieldPath: status.podIP- name: podNamevalueFrom:fieldRef:apiVersion: v1fieldPath: metadata.name- name: podNamespacevalueFrom:fieldRef:apiVersion: v1fieldPath: metadata.namespace- name: podDeployNamevalue: app- name: NODE_NAMEvalueFrom:fieldRef:apiVersion: v1fieldPath: spec.nodeName- name: TZvalue: "Asia/Shanghai"securityContext:runAsUser: 0volumeMounts:- name: logpathmountPath: /data/log/app/- name: filebeatconfmountPath: /mnt/- name: appimage: crpi-q1nb2n896zwtcdts.cn-beijing.personal.cr.aliyuncs.com/ywb01/alpine:3.6imagePullPolicy: IfNotPresentvolumeMounts:- name: logpathmountPath: /opt/env:- name: TZvalue: "Asia/Shanghai"- name: LANGvalue: C.UTF-8- name: LC_ALLvalue: C.UTF-8command:- sh- -c- while true; do date >> /opt/date.log; sleep 2;  done volumes:- name: logpathemptyDir: {}- name: filebeatconfconfigMap:name: filebeatconf
[root@k8s-master01 ~]# kubectl apply -f filebeat-cm.yaml -f app-filebeat.yaml [root@k8s-master01 ~]# kubectl get po
NAME                   READY   STATUS        RESTARTS   AGE
app-5d567767c-csshd    2/2     Running       0          33s
app-69cb58c6c8-zzhrj   1/1     Terminating   0          2m12s
再次查看日志:
此博客來源于:https://edu.51cto.com/lecturer/11062970.html


)


完整指南)


![[實戰]巴特沃斯濾波器全流程解析:從數學原理到硬件實現](http://pic.xiahunao.cn/[實戰]巴特沃斯濾波器全流程解析:從數學原理到硬件實現)

詳解 + Python實現)

安裝包免費免激活版下載 附圖文詳細安裝教程)