目錄
?一、在Eclipse中構建Maven項目
1.全局配置Maven
2.配置JDK路徑
3.創建Maven項目
4.引入selenium-java依賴
二、Chrome自動化腳本編寫
1.創建一個ChromeTest類
2.測試ChromeDriver
3.下載chromedriver驅動
4.在腳本中通過System.setProperty方法指定chromedriver的地址
5.測試學習通網址登錄功能
三、FireFox自動化腳本編寫
1.新建一個FireFoxTest類
2.指定firefox可執行文件路徑: webdriver.firefox.bin
3.下載geckodriver驅動
4.在腳本中通過System.setProperty方法指定chromedriver的地址
工具:eclipse(2016)、chrome(v.125)
依賴:selenium-java(3.141.59)
驅動:chromedriver(win64 v125)
配置環境:jdk1.8.0、? maven3.5.2
?一、在Eclipse中構建Maven項目
1.全局配置Maven
點擊Windows->Preferences

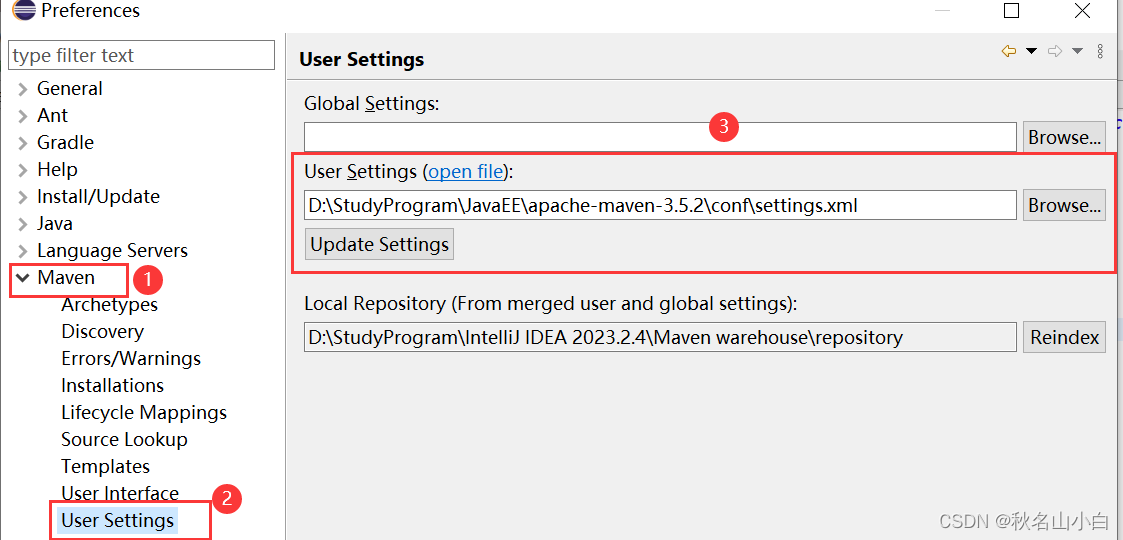
注意:要先在settinfs.xml中配置阿里云鏡像倉庫,可參考該文章1~3步驟IDEA 使用自定義MAVEN(maven安裝及IDEA配置)_idea 用自定義maven-CSDN博客
同時在installations中add maven路徑

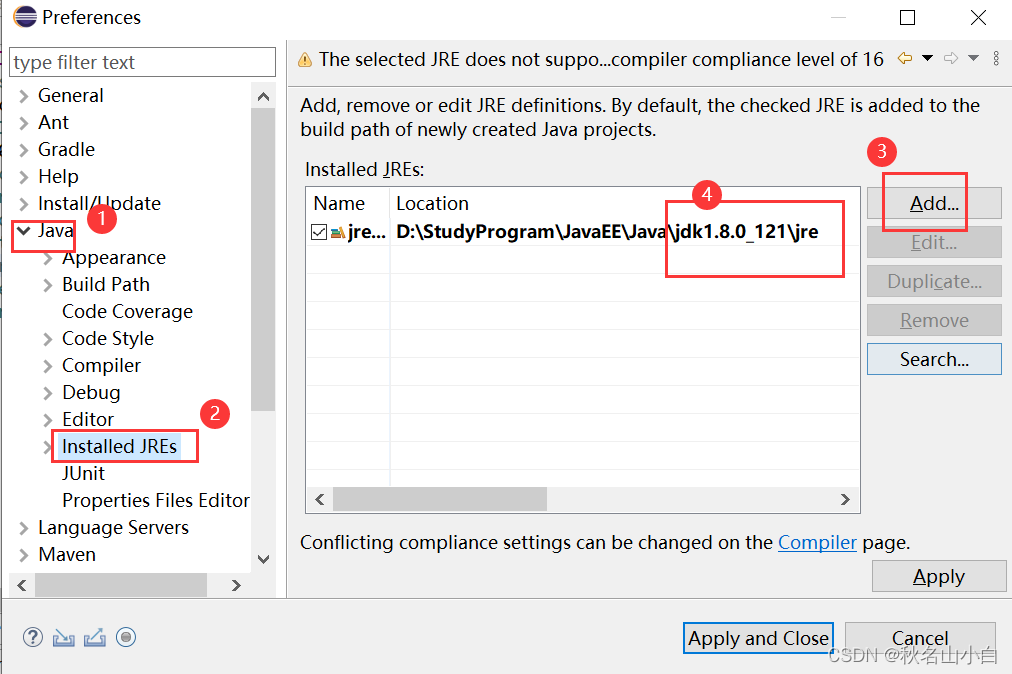
2.配置JDK路徑
同樣是在Preferences中,確認指向的是JDK的路徑而不 是JRE的路徑
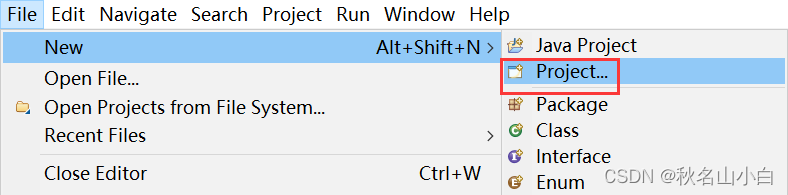
3.創建Maven項目
點擊File->New->Project...
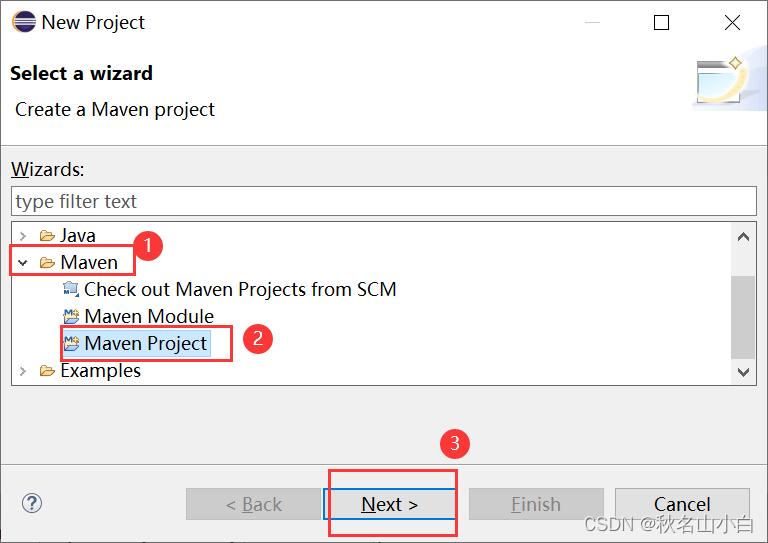
勾選Create a simple...
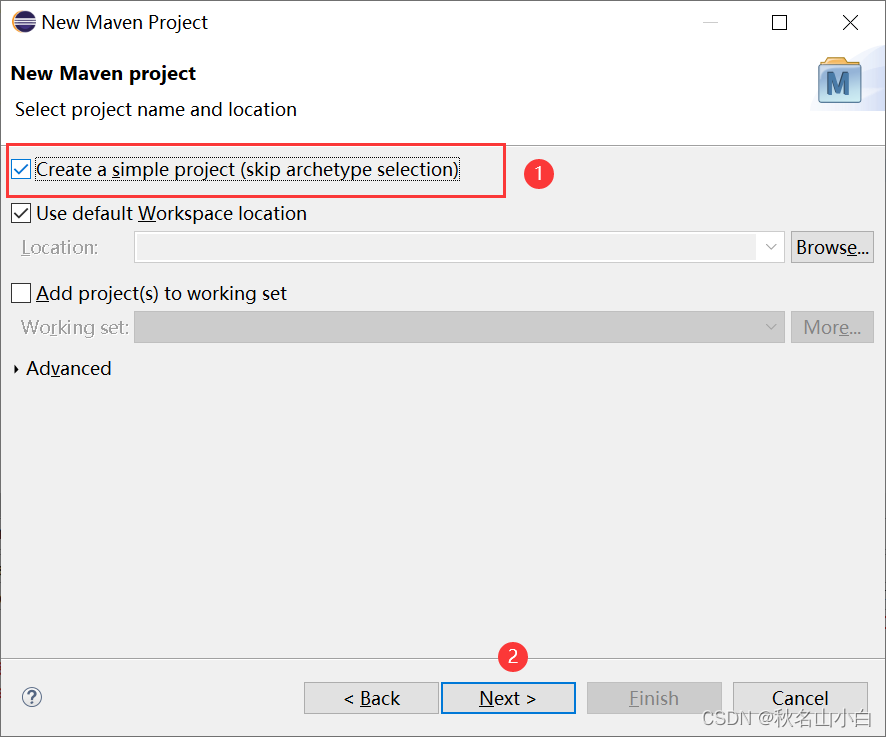
填入組名和項目名,點擊Finish

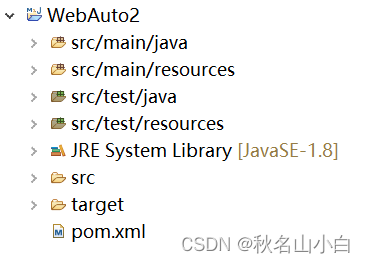
創建完項目列表如下:
4.引入selenium-java依賴
在Maven官網可以下載:Maven Repository: Search/Browse/Explore (mvnrepository.com)
搜索selenium,選擇Selenium Java

選擇使用度較高的版本,這里選擇了4.18.1

拷貝對應的Maven依賴包
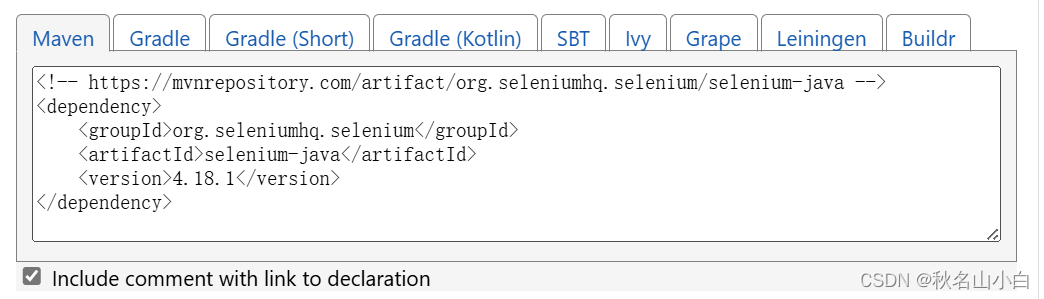
點擊pom.xml粘貼進去,注意要放在<dependencies></dependencies>里面

保存后,后自動生成Maven Dependendies

二、Chrome自動化腳本編寫
1.創建一個ChromeTest類

2.測試ChromeDriver
輸入以下代碼,點擊運行
import org.openqa.selenium.chrome.ChromeDriver;public class ChromeTest {public static void main(String[] args) throws Exception{ChromeDriver driver = new ChromeDriver();}
}
若報以下錯,說明Selenium Java版本過高,需要下載較低版本
Exception in thread "main" java.lang.UnsupportedClassVersionError: org/openqa/selenium/chrome/ChromeDriver has been compiled by a more recent version of the Java Runtime (class file version 55.0), this version of the Java Runtime only recognizes class file versions up to 52.0at java.lang.ClassLoader.defineClass1(Native Method)at java.lang.ClassLoader.defineClass(ClassLoader.java:763)at java.security.SecureClassLoader.defineClass(SecureClassLoader.java:142)at java.net.URLClassLoader.defineClass(URLClassLoader.java:467)at java.net.URLClassLoader.access$100(URLClassLoader.java:73)at java.net.URLClassLoader$1.run(URLClassLoader.java:368)at java.net.URLClassLoader$1.run(URLClassLoader.java:362)at java.security.AccessController.doPrivileged(Native Method)at java.net.URLClassLoader.findClass(URLClassLoader.java:361)at java.lang.ClassLoader.loadClass(ClassLoader.java:424)at sun.misc.Launcher$AppClassLoader.loadClass(Launcher.java:331)at java.lang.ClassLoader.loadClass(ClassLoader.java:357)at com.test.ChromeTest.main(ChromeTest.java:9)
這里我將依賴換成了3.141.59版本
<dependency><groupId>org.seleniumhq.selenium</groupId><artifactId>selenium-java</artifactId><version>3.141.59</version>
</dependency>保存后,再次運行報錯以下信息,這是正常情況,因為我們還沒有設置Chrome瀏覽器的驅動
Exception in thread "main" java.lang.IllegalStateException: The path to the driver executable must be set by the webdriver.chrome.driver system property; for more information, see https://github.com/SeleniumHQ/selenium/wiki/ChromeDriver. The latest version can be downloaded from http://chromedriver.storage.googleapis.com/index.htmlat com.google.common.base.Preconditions.checkState(Preconditions.java:847)at org.openqa.selenium.remote.service.DriverService.findExecutable(DriverService.java:134)at org.openqa.selenium.chrome.ChromeDriverService.access$000(ChromeDriverService.java:35)at org.openqa.selenium.chrome.ChromeDriverService$Builder.findDefaultExecutable(ChromeDriverService.java:159)at org.openqa.selenium.remote.service.DriverService$Builder.build(DriverService.java:355)at org.openqa.selenium.chrome.ChromeDriverService.createDefaultService(ChromeDriverService.java:94)at org.openqa.selenium.chrome.ChromeDriver.<init>(ChromeDriver.java:123)at com.test.WebTest01.main(WebTest01.java:12)3.下載chromedriver驅動
因為我的Chrome瀏覽器的版本是125,在以下鏈接可以下載對應版本
chromedriver瀏覽器驅動各版本下載(...113、114、115、116、117、118、119、120、121、122、123、124、125、126、127)(原創) - Z哎呀 - 博客園 (cnblogs.com)
將下載解壓的chromedriver.exe復制?
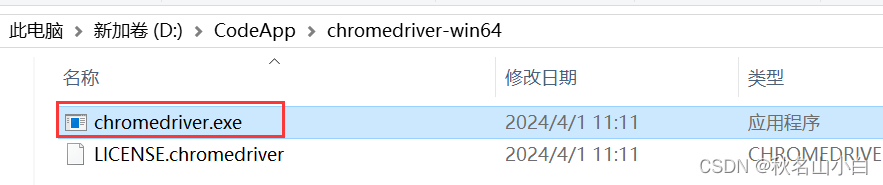
粘貼到項目的resources里面

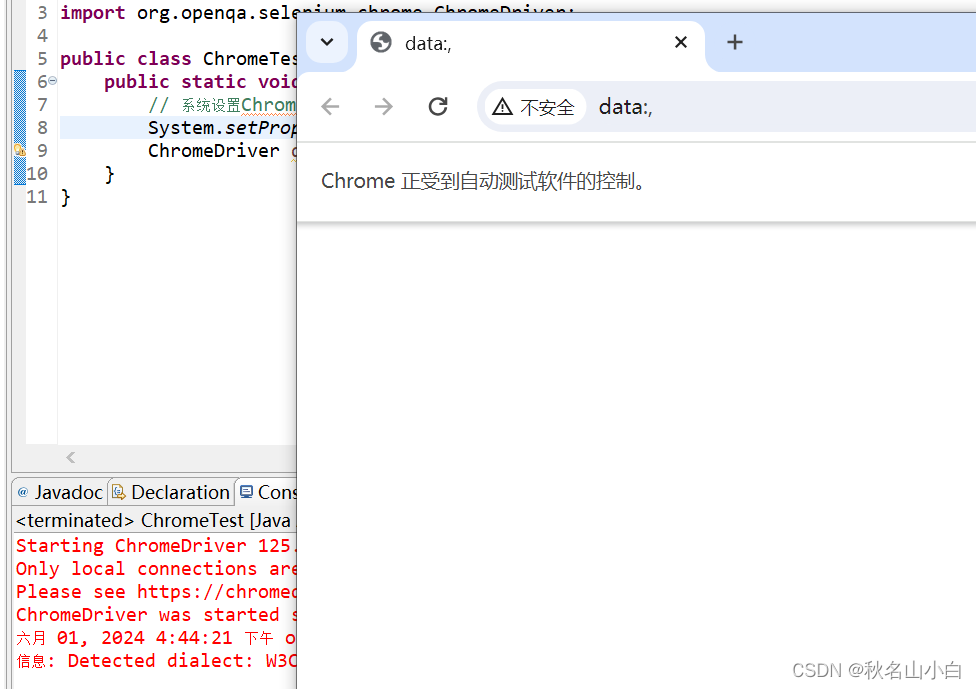
4.在腳本中通過System.setProperty方法指定chromedriver的地址
// 系統設置Chrome驅動文件的路徑
System.setProperty("webdriver.chrome.driver", "src/test/resources/chromedriver.exe");
ChromeDriver driver = new ChromeDriver();
再次運行,此時彈出Chrome窗口,運行成功
5.測試學習通網址登錄功能
public static void main(String[] args) throws Exception{// 系統設置Chrome驅動文件的路徑System.setProperty("webdriver.chrome.driver", "src/test/resources/chromedriver.exe");ChromeDriver driver = new ChromeDriver();//最大化瀏覽器窗口driver.manage().window().maximize();// 測試學習通網站String url = "https://passport2.chaoxing.com";driver.get(url);Thread.sleep(3000);// 通過F12查看對應id// 輸入手機號WebElement phoneElement = driver.findElement(By.id("phone")); //手機號phoneElement.clear(); //清空文本輸入框中的內容phoneElement.sendKeys("xxxxxxxxxx"); //在文本輸入框中輸入內容String phoneValue = phoneElement.getAttribute("value"); //獲取文本框中已經輸入的內容Thread.sleep(1000);// 輸入密碼WebElement passwordElement = driver.findElement(By.id("pwd"));passwordElement.clear();passwordElement.sendKeys("xxxxxxxxxx");String passwordValue = passwordElement.getAttribute("value");Thread.sleep(1000);//輸出對應值System.out.println(phoneValue);System.out.println(passwordValue);//通過className獲取自動勾選框WebElement checkElement = driver.findElement(By.className("check-input"));// 使用isSelected()方法檢查復選框是否被選中 boolean isSelected = checkElement.isSelected(); // 輸出結果 System.out.println("復選框是否被選中: " + isSelected); // 如單復選框沒有被選中if (!isSelected) {checkElement.click(); //點擊選中}Thread.sleep(3000);// 點擊登錄WebElement loginElement = driver.findElement(By.id("loginBtn"));loginElement.click();}點擊運行后,將會彈出網址,自動登錄
三、FireFox自動化腳本編寫
1.新建一個FireFoxTest類
import org.openqa.selenium.By;
import org.openqa.selenium.WebElement;
import org.openqa.selenium.firefox.FirefoxDriver;public class FireFoxTest {public static void main(String[] args) throws Exception{FirefoxDriver driver = new FirefoxDriver();}
}
運行后報錯以下信息,這是正常情況,原因是firefox安裝在其它路徑,不是默認的安裝路徑
Exception in thread "main" org.openqa.selenium.WebDriverException: Cannot find firefox binary in PATH. Make sure firefox is installed. OS appears to be: WIN10
Build info: version: '3.141.59', revision: 'e82be7d358', time: '2018-11-14T08:17:03'
System info: host: 'DESKTOP-VMB9KRO', ip: '10.194.105.24', os.name: 'Windows 10', os.arch: 'amd64', os.version: '10.0', java.version: '1.8.0_121'
Driver info: driver.version: FirefoxDriverat org.openqa.selenium.firefox.FirefoxBinary.<init>(FirefoxBinary.java:100)at java.util.Optional.orElseGet(Optional.java:267)at org.openqa.selenium.firefox.FirefoxOptions.getBinary(FirefoxOptions.java:216)at org.openqa.selenium.firefox.FirefoxDriver.toExecutor(FirefoxDriver.java:187)at org.openqa.selenium.firefox.FirefoxDriver.<init>(FirefoxDriver.java:147)at org.openqa.selenium.firefox.FirefoxDriver.<init>(FirefoxDriver.java:125)at com.test.FireFoxTest.main(FireFoxTest.java:10)
2.指定firefox可執行文件路徑: webdriver.firefox.bin
找到Firefox的exe執行文件,添加路徑對應以下代碼,再次運行
//指定firefox可執行文件路徑
System.setProperty("webdriver.firefox.bin","C:\\Users\\86153\\AppData\\Local\\Mozilla Firefox\\firefox.exe");
FirefoxDriver driver = new FirefoxDriver();
再次報錯以下信息,這也是因為沒有配置FireFox驅動
Exception in thread "main" java.lang.IllegalStateException: The path to the driver executable must be set by the webdriver.gecko.driver system property; for more information, see https://github.com/mozilla/geckodriver. The latest version can be downloaded from https://github.com/mozilla/geckodriver/releasesat com.google.common.base.Preconditions.checkState(Preconditions.java:847)at org.openqa.selenium.remote.service.DriverService.findExecutable(DriverService.java:134)at org.openqa.selenium.firefox.GeckoDriverService.access$100(GeckoDriverService.java:44)at org.openqa.selenium.firefox.GeckoDriverService$Builder.findDefaultExecutable(GeckoDriverService.java:167)at org.openqa.selenium.remote.service.DriverService$Builder.build(DriverService.java:355)at org.openqa.selenium.firefox.FirefoxDriver.toExecutor(FirefoxDriver.java:190)at org.openqa.selenium.firefox.FirefoxDriver.<init>(FirefoxDriver.java:147)at org.openqa.selenium.firefox.FirefoxDriver.<init>(FirefoxDriver.java:125)at com.test.FireFoxTest.main(FireFoxTest.java:11)
3.下載geckodriver驅動
selenium,geckodriver,firefox對應版本官網參考:
Supported platforms — Firefox Source Docs documentation (mozilla.org)

我的FireFox版本是126,下載對應0.34.0版本
進入網址:https://github.com/mozilla/geckodriver?,點擊“Tags”,點擊0.34.0版本的download,然后選擇對應平臺的壓縮包下載

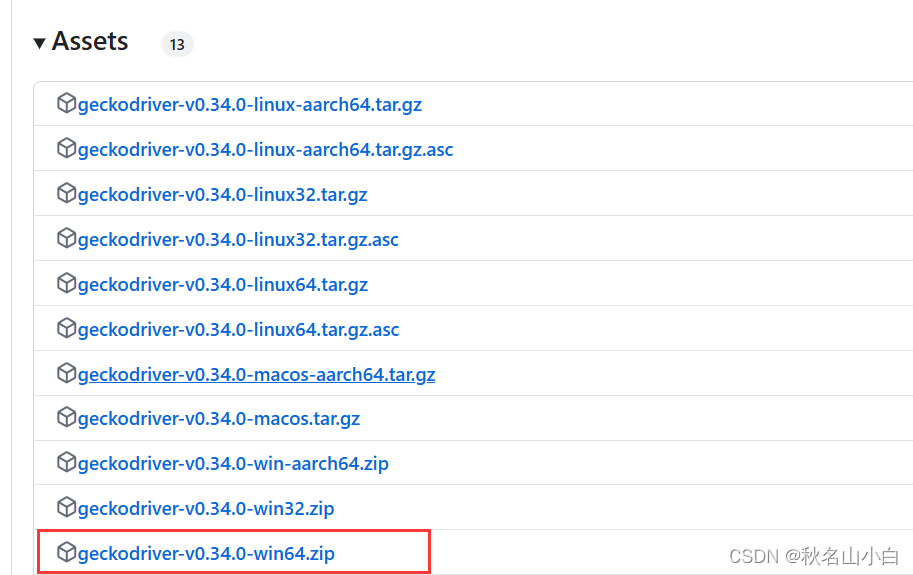
同理,解壓復制到resources文件里

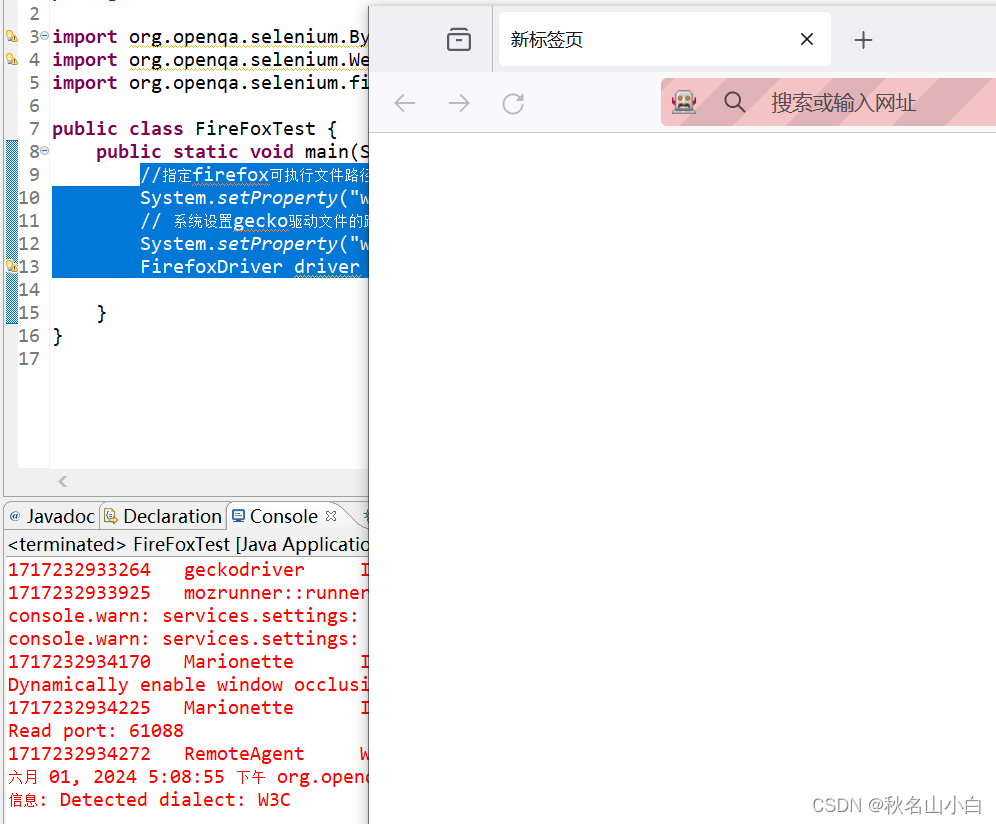
4.在腳本中通過System.setProperty方法指定chromedriver的地址
//指定firefox可執行文件路徑System.setProperty("webdriver.firefox.bin","C:\\Users\\86153\\AppData\\Local\\Mozilla Firefox\\firefox.exe");
// 系統設置gecko驅動文件的路徑
System.setProperty("webdriver.gecko.driver", "src/test/resources/geckodriver.exe");
FirefoxDriver driver = new FirefoxDriver();
再次運行,彈出Firefox窗戶,成功!


)


:跟著鬼谷子學溝通—“飛箝”之術)


問題講解)
